How Much Car Paint Do You Really Need? A Detailer’s Guide to Estimating Paint for Your Project
You are staring at an empty mixing cup, wondering if that quart of paint will be enough to cover your hood or if you are about to waste a lot of money and time.
We will cover how to measure your car’s surface area, the critical variables that change your paint needs like primer and clear coat, choosing between aerosol cans and professional spray systems, and real-world examples from full resprays to touch-up work.
Get the estimate wrong, and you will either run out of paint mid-job, ruining the finish, or spend hundreds on material you will never use.
The Short Answer: A Paint Quantity Cheat Sheet
You need enough paint to do the job right, which means having enough to do it twice. Running out of material is the single biggest reason DIY paint jobs look unfinished. These estimates are for a full, proper respray of the vehicle’s exterior. That means every panel is sanded, primed, and painted with a complete system, not a quick “spray over” of color. Make sure to budget accordingly for paint for your car.
First, some quick terms. Basecoat is the color layer. Clearcoat is the glossy, protective top layer. Reducer thins the paint for spraying, and an Activator (or hardener) is mixed into primer and clearcoat to make it cure. You will need all of these.
| Vehicle Type | Example | Estimated Mixed Basecoat | Estimated Mixed Clearcoat |
|---|---|---|---|
| Compact Car / Coupe | Honda Civic, Mazda Miata | 2 – 3 Quarts | 1.5 – 2 Quarts |
| Mid-Size Sedan / SUV | Toyota Camry, Ford Explorer | 3 – 4 Quarts | 2 – 3 Quarts |
| Full-Size Truck / SUV | Ford F-150, Chevy Suburban | 4 – 6 Quarts | 3 – 4 Quarts |
Treat this table as your absolute starting point, not your final answer. The numbers can swing wildly based on what we discuss next. Buying an extra quart of mixed basecoat is cheap insurance against a nightmare scenario of color mismatch halfway through your hood.
What Really Determines How Much Paint You’ll Use?
The size of your car is just the opening question. The real answers come from your technique, the car’s shape, and the paint itself.
Surface area isn’t just length times width. Think of my black BMW, the “Swirl Magnet.” It’s a mid-size sedan, but its hood has complex contours, the front bumper is a web of grilles and vents, and the fenders have sharp character lines. Every crease and curve is more surface to cover. A simple, flat-paneled van of the same length would use less paint. Trim removal is also key. Masking around door handles and moldings instead of removing them adds risk and can cause you to spray conservatively, often leading to thinner coverage.
Your spraying technique has the biggest impact of all. With an HVLP gun, poor technique can waste 30-40% of your material before it even touches the car. Holding the gun too far away creates dry spray (paint dust). Holding it too close or moving too slowly causes runs. Not maintaining a consistent 50% overlap between passes creates streaks and uneven coverage, forcing you to apply more coats to even it out. Your air pressure, fluid knob setting, and moving at the right speed are everything. Practice on large cardboard or old panels first.
Finally, the paint type dictates your strategy. A solid white or black might need only two or three medium coats for full hide. A metallic silver, like on my F-150, requires even, consistent coats to avoid a blotchy “flop.” You might use more because you’re building it carefully. A tri-coat (a base color, a translucent mid-layer, and clear) is the most material-intensive. You are effectively applying two separate color systems. For tri-coats, you should plan for at least 50% more basecoat material than the table suggests.
Paint Thickness: How Many Mils or Microns Are You Aiming For?
You are not just spraying color. You are building a new, durable skin. We measure that skin in mils (thousandths of an inch) or microns (one mil equals about 25 microns). A factory paint job, like on my Porsche “Garage Queen,” is typically 4 to 6 mils (100-150 microns) thick from the primer to the clearcoat.
For a quality respray, you are adding to that. A good target is an additional 2 to 4 mils (50-100 microns) of new material. Your primer might be 1-2 mils. Your basecoat another 1-2 mils. Your clearcoat should be a robust 2-3 mils minimum. Why so thick on the clear? Because you need a safety net. After the paint cures, you will sand and polish it to remove dust nibs and orange peel. If your clearcoat is only 1 mil thick, you will burn right through it. A thick, level clearcoat is what gives a respray its depth and allows for a flawless final polish.
Think of it like applying a ceramic coating. You put on a thin, even layer. You do not glob it on. Paint is the same. Your goal is to apply enough wet, even layers to reach your thickness target without creating runs. Using a paint thickness gauge after each coat on a test panel is the only way to know for sure what your technique is laying down. This precision separates a durable show car finish from a thin, soon-to-fail repaint.
Your Paint Arsenal: Types, Covers, and Real-World Yields
You are not buying paint by the bucket for a garage door. Modern automotive finishes are complex systems with different coverages. Your first step is understanding what you are spraying.
Single-stage urethane is the old-school workhorse. It has the color and the gloss all in one can. You spray it, it dries, you are done. My 1995 Miata, the “Restoration Project,” wears single-stage red. Restoring that faded pink paint meant wet-sanding and polishing it back to life. When I had to respray a fender, I used a single-stage. It is simpler but less forgiving a mistake shows right in the final color and gloss. A mixed quart of single-stage should cover about 80 to 100 square feet in a solid color.
Basecoat/clearcoat is the modern standard. The basecoat provides the color, whether solid white, metallic, or pearl. The separate clearcoat gives you the deep, wet shine and protection. This is what you will use for most jobs, from a panel repair on your daily to a full respray. It gives you a buffer. A slight imperfection in the basecoat can often be sanded smooth before you spray the clear. For yield, a mixed quart of basecoat should cover 90 to 120 square feet. But the clearcoat is the workhorse you spray it much thicker. A quart of clear might only cover 50 to 70 square feet.
Now, for the keywords. Metallics and pearls change the math. Flake is added by weight per volume of paint. A typical “mid-coarse” metallic might use 1 to 2 ounces of flake per mixed quart. A heavy “show car” flake job can use 4 ounces or more. More flake can reduce coverage slightly. Lacquer is mostly a relic. It sprays thin, covers poorly (maybe 60 sq ft per quart), and offers little durability. It is for show cars only, sprayed in a pristine, dust-free booth.
Product Tier List: Choosing Paint for Your Project and Wallet
Your budget and goals will point you to the right shelf at the paint supplier.
Budget and Restoration Level
This is for getting a solid, durable finish without breaking the bank. A quality single-stage urethane fits here perfectly. It is what I used for the Miata fender. Brands like PPG Omni or Sherwin-Williams Ultra 7000 are common. They are easier to spray for a beginner because you are managing one product. The finish is good, but it will not have the insane depth of a clearcoated job. This tier is about function and classic looks.
Enthusiast and DIY Level
This is the sweet spot. You are buying a reputable basecoat/clearcoat system. Think PPG Deltron, Sherwin-Williams Dimension, or similar. The color match is excellent, the clear is tough, and the system is designed for the weekend warrior in a home garage. You will get professional results if you take your time. This is what I would use on my F-150 or Odyssey if I ever decided to repaint them. The key here is using all the components from the same brand and line reducer, hardener, clear. They are engineered to work together.
Show Car and Pro Level
Here you enter the realm of custom mixes, three-stage pearls (base, pearl midcoat, clear), and candy paints. The materials are expensive and the skill floor is high. Applying a candy evenly over an entire car is a master’s test. The environment must be flawless. This is for the garage queen, like the Porsche, or a full show build. The paint quantity becomes hard to estimate you are building layers of translucency. You buy extra, and then you buy more extra.
The Only Paint Calculator You Need: Your Two Hands and Math
Forget the overly complex charts. Estimating paint is practical math.
The simple formula is: Vehicle Square Footage divided by Paint Coverage per quart equals your estimated quarts needed. You need two numbers.
First, figure out your car’s surface area. An average midsize sedan has about 100 to 120 square feet of paintable surface. A compact car might be 90. A full-size SUV or van, like my “Kid Hauler” Odyssey, can be 140 square feet or more. Do not forget the door jambs and underside of the trunk lid if you are doing a full color change. My rule of thumb is to measure the car’s length and height, multiply them, then double that number. It gets you close.
Second, use the coverage numbers we just discussed. Let us say you are painting a Honda Civic (about 100 sq ft) with a basecoat/clear system. The basecoat at 100 sq ft per quart means about 1 quart of mixed base. The clearcoat at 60 sq ft per quart means you will need roughly 1.7 quarts for two good coats. So you would order 1.5 quarts of base and 2 quarts of clear to be safe.
People search for a “car paint quantity calculator” online. They exist. They are rough estimates at best. They cannot account for your spray technique, the gun you use, or how much paint ends up on the floor versus the car. They are a starting point, not a final answer. To plan a real car repaint, you can calculate the paint needed with careful inputs like panel area and coating type. These calculations bridge rough online estimates and the practical amounts needed for your project.
This leads to the golden rule you must obey. Always, always order extra paint, especially for a custom color. Running out of a color you had mixed two weeks ago is a nightmare. The new batch will never match perfectly. Having a half-pint left over is cheap insurance. You can use it for touch-ups later. I keep the leftover single-stage red for the Miata in a sealed jar. A few years from now, a rock chip will not be a crisis.
Mix only what you plan to use in a day. Store your extra unmixed paint and hardener separately. And wear your respirator. This math means nothing if you are not around to enjoy the finished car.
Tools & Chemicals: What Else You Need Besides Paint
Buying paint is just the start. The real cost and effort are in everything around it. I have learned this the hard way, missing a tool and ruining a panel. Let us talk about what you actually need to get the job done right.
Your Health First: Personal Protective Equipment (PPE)
Do not skip this. Paint fumes are dangerous. They smell strong and can make you dizzy fast. A proper respirator with organic vapor cartridges is the single most important item you will buy, protecting your lungs from harmful vapors. I use one every time, even for small touch ups. Pair it with sealed goggles to keep overspray out of your eyes, heavy duty nitrile gloves, and disposable coveralls. This gear is not optional.
The Foundation: Surface Prep Materials
Good paint starts with a perfectly prepped surface. You will need sandpaper in a range of grits. I keep 400, 600, 800, and 1500 grit on hand. A dual action (DA) sander saves your arms on large roof and hood panels. You must have tack cloths and a dedicated wax and grease remover to eliminate every bit of dust and oil before paint touches the car. Without these, your finish will be peppered with dirt. This is the heart of sand car paint prep. Nail the sanding and dust-control steps, and you’re ready for primer and paint.
Putting Paint to Panel: Application Tools
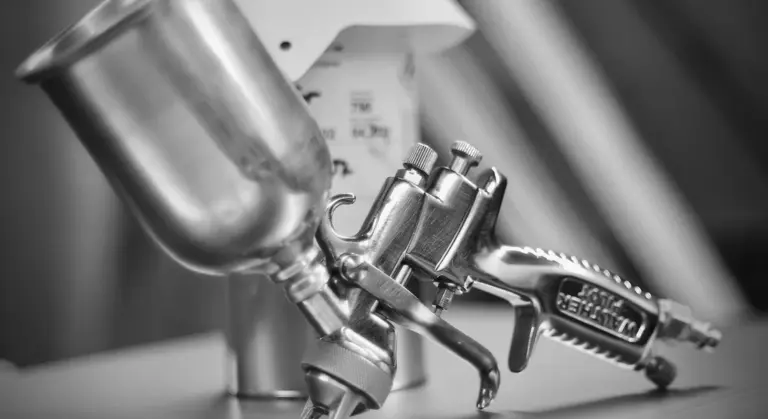
For applying the paint, a high volume low pressure (HVLP) spray gun is the standard. I recommend a 1.3 to 1.4 millimeter tip for most basecoat and clearcoat jobs. An in line air filter and moisture trap are critical to stop water and compressor oil from reaching your gun, which causes ugly pitting in the paint. While you’re choosing a spray gun for car painting, think about nozzle size and pattern control. These choices will influence coverage and finish quality. You will also go through many mixing cups and sticks. Have a big box ready.
The Liquid Mix: Solvents and Reducers
Paint straight from the can is too thick to spray. You thin it with a reducer or activator. The mixing ratio is key, often 1:1 or 4:1:1 (paint to reducer to activator), meaning you frequently need just as much solvent as you do paint. This is essential when you mix car paint spray for a smooth, even finish. If your estimate calls for a gallon of color, plan to buy a gallon of reducer too. Always follow the manufacturer’s tech sheet.
The Crucial First Coat: Surface Prep Dictates Paint Use
How you prepare the car directly controls how much paint you use. Rushed prep wastes material. I see it all the time, especially when sanding the primer is skipped or done poorly.
The goal of sanding is simple. You need a uniform, matte finish over every square inch you plan to paint. This dull, evenly scratched surface gives the new paint a perfect mechanical grip, like roughing up a wall before wallpaper. Start with your DA sander and 400 or 600 grit paper. Work in sections. Then, hand sand all the edges, body lines, and tight spaces. Any area you miss will show.
Poorly feathered edges or spots of leftover gloss are paint thieves. These imperfect areas do not accept paint properly, so they drink up more material as you try to achieve full coverage, leading to runs or an uneven finish. It is frustrating and wasteful. Take the extra time to sand everything dull.
The final step before paint is a meticulous wipe down. Flood a clean, high GSM microfiber towel with wax and grease remover and wipe the entire vehicle down, turning the towel frequently to avoid redepositing dirt. Follow immediately with a dry towel from your stash. This removes the final layer of sanding dust. Any grease left behind will cause the paint to fisheye.
My 2018 Ford F 150, the Workhorse, is a perfect example. Its dark blue paint was scratched and had small rust spots on the bed. Extensive rust and scratch repair requires additional primer and blocking steps, which adds to the total material needed before the color coat even goes on. For a truck like this, your paint estimate must include extra for these repair areas, or you will run out.
Spraying It On: How Technique Changes Your Paint Quantity
Your spraying technique is where the math meets reality. A perfect quart of paint can vanish or leave a mess if your wrist isn’t right. I learned this the hard way on the hood of my “Swirl Magnet” BMW. It’s not just about choosing the right spray gun but also mastering the technique.
Hold the spray gun 6 to 8 inches from the panel. Move your entire arm, not just your wrist, in a smooth, steady motion. You must overlap each pass by 50%. Think of it like mowing a lawn. If you miss a strip, you see it immediately.
Move too fast or hold the gun too far away, and you get “dry spray.” It looks and feels like dusty, rough sandpaper. It doesn’t flow or bond properly. Dry spray is pure waste, forcing you to apply more coats to bury the texture and achieve coverage.
The opposite mistake is “flooding” the panel. You move too slow or hold the gun too close. The paint pools, sags, and runs like a tear. Fixing a run means waiting for it to cure completely, then sanding it flat and repainting the entire area. That wastes more material than any other error.
Before you point that gun at your car, find an old fender or a large piece of cardboard. Practice your distance, your overlap, and your speed. Watch how the paint lays down. Get a feel for the trigger. This step saves paint, time, and your sanity.
How Many Coats of Base and Clear Are Actually Needed?
You do not spray until the can is empty. You spray until the job is done. For basecoat, start with a light “tack coat.” It will look translucent and uneven. Let it flash off for a few minutes. Apply a second full, wet coat. This should get you about 90% there.
Assess the color in good light. If you see any thin spots or the primer peeking through, a third coat is your insurance. Apply just enough medium-wet coats to get uniform, complete color coverage with no shadows or streaks. More is not better, it’s just thicker.
Clearcoat is different. Your first coat can be a light mist to seal the base. Your second and third coats are where you lay it on. You want a full, glossy, “wet look” across the whole panel. This builds enough thickness for the final, critical step: sanding and polishing the clearcoat.
In my shop, we never guess. We use a paint thickness gauge. After clear, we check the mils (or microns). We are looking for a consistent, sufficient film build. It is the only way to know for sure you have enough material to work with later.
After the Paint: The Final 30% of the Job
The paint is dry to the touch, but it is not ready. You must let it cure. Follow your product’s instructions, but think in days or weeks, not hours. Sanding fresh, soft clearcoat will ruin everything. Patience here is non-negotiable.
Once fully cured, look at the surface. You will see “orange peel,” a texture like the skin of an orange. This is normal. We remove it by wet-sanding. Start with 1500 grit sandpaper and a lubricant to gently level the high points. Then follow with 3000 grit to refine the surface. Your goal is a flat, uniformly dull finish with no deep sanding scratches left behind.
That sanded, hazy surface now needs polishing. This is a two-stage process you know from paint correction. Use a cutting compound and a foam pad to remove the 3000-grit marks. Wipe it clean. Then use a finer finishing polish and a soft pad to bring up the deep, liquid gloss. This is how you achieve a factory-flat, reflective finish.
Your new paint is now perfect and completely unprotected. Just like I do on the “Modern EV,” you must seal it. Apply a synthetic sealant or a consumer-grade ceramic coating. This layer will lock in the shine and shield your hard work from water spots, UV rays, and environmental contaminants from the very first drive.
Wrapping Up Your Paint Project
Order more paint than your math says you need. That extra half-gallon or quart is your insurance against running out mid-job and fighting a mismatched blend.
Getting the quantity wrong turns a weekend project into a costly, frustrating mess.
Deep Dive: Further Reading
- How Much Paint Do I Need For A Car? Use Our Paint Calculator
- Automotive Paint Calculator | Estimate Your Paint Needs | DCRYSTA
- Calculating How Much Paint You’ll Need to Paint Your Vehicle
Max Gunther
Max is an automotive enthusiast having worked as a car mechanical and in interior detailing service for over 25 years. He is very experienced in giving your old car, a new fresh vibe. He has detailed many cars and removed very tough smells and stains from all kinds of cars and models, always ensuring that his work and advice helps his customers. He brings his first hand experience to his blog AutoDetailPedia, to help readers breath new life into their car interiors.