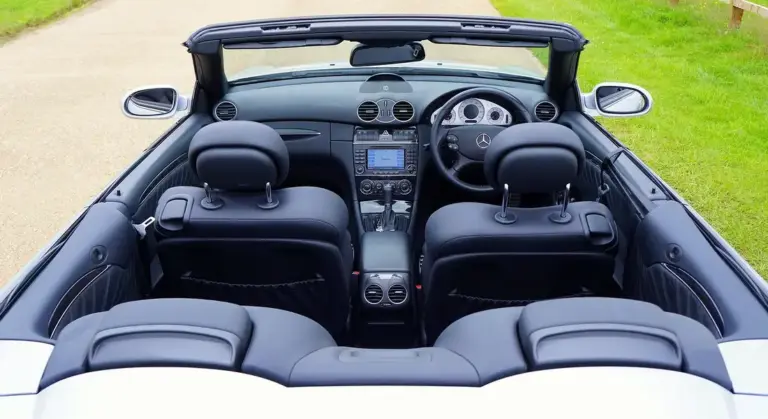
How Do You Remove and Fix Scratches on Car Interior Plastic, Leather, and Vinyl?
You just noticed a fresh scratch on your door panel, and now it’s all you can see every time you drive. I get it, that feeling of your clean interior being marred is downright annoying.
Based on years of fixing interiors from my Honda Odyssey to my BMW, I’ll show you how to make those scratches disappear. We will cover scratch assessment, plastic repair with fillers, leather touch-up dyes, vinyl heat techniques, and final surface protection.
Use the wrong method, and you can etch the surface or cause discoloration that never comes out.
Key Takeaways: Your Scratch Repair Cheat Sheet
Let’s start with the rules I follow in my own shop. They keep things simple and prevent bigger messes.
- Always clean the surface thoroughly first. Dirt acts like sandpaper and will make any scratch worse.
- Test every product in a hidden spot first. A door jamb, under the seat. You need to see how the material reacts.
- Match your repair method to the scratch depth. Polishing a deep gouge is a waste of time. Using a heavy filler on a surface mark makes a mountain from a molehill.
Patience with a series of small, gentle steps will always give you a better finish than one aggressive, rushed move. This is the most important lesson from fixing the crayon art on my Odyssey’s panels.
| Material | Scratch Depth | Best Method | Expected Result |
|---|---|---|---|
| Hard Plastic / Vinyl | Surface Mark | Clean with dedicated interior cleaner. | Scratch disappears completely. |
| Hard Plastic / Vinyl | Light (fingernail doesn’t catch) | Plastic polish & soft microfiber. | Scratch is minimized or removed; surface is rejuvenated. |
| Hard Plastic / Vinyl | Deep Gouge (fingernail catches) | Filler (specialized wax, vinyl repair compound) or dye/touch-up. | Scratch is filled and camouflaged, not erased. |
| Leather / Synthetic (Vegan) | Surface Mark | Leather cleaner & gentle brushing. | Mark is lifted away. |
| Leather / Synthetic (Vegan) | Light (surface scuff) | Leather conditioner or mild rejuvenating balm. | Scuff is masked, color and texture are restored. |
| Leather / Synthetic | Deep (into dye/pigment layer) | Professional leather dye kit or specialist repair. | Color is restored, but texture may differ. |
Look at that Deep Gouge row. A true gouge that removes the color layer often needs a filler or dye, not just polishing. You are replacing missing material or color, not smoothing the surrounding area. This was the case with a deep key scratch on my old Miata’s console. Polish did nothing. A careful dab of a color-matched vinyl filler made it vanish to the casual eye.
The First Step: What Kind of Scratch Are You Dealing With?
Before you touch a product, you need a diagnosis. I do this on every car, from the 911 to the Odyssey.
Run your fingernail gently across the scratch. This is the only test that matters.
- If your nail glides over it smoothly, it’s a surface mark or a very light scratch in the protective top coat. This is great news. It’s likely fixable with cleaning or mild polishing.
- If your nail catches slightly, with a soft bump, it’s a light scratch. It’s etched into the finish but not through the color. This is common on dashboards and hard plastic trim. You can improve this significantly.
- If your nail drops into a trench and clearly catches, it’s a deep gouge. It has cut through the color layer or into the vinyl/plastic itself. The strategy here changes completely.
You also need to know your canvas. Touch the surface. Is it hard and unyielding? That’s rigid plastic or vinyl-coated plastic (like most dashboards and door panels). Is it soft and grainy? That’s often a softer vinyl or a synthetic leather. Is it smooth and porous? That’s genuine leather, like the seats in the BMW or the steering wheel in the Porsche.
How to tell if a scratch can be fixed? The fingernail test gives you the answer. If your nail doesn’t catch, you can likely make it disappear. If it catches lightly, you can make it virtually invisible from a normal viewing distance. If it catches deeply, you can only camouflage it. Knowing this sets realistic expectations.
Tools & Chemicals for the Assessment Phase
You don’t need much to get started, but these items are non-negotiable for a pro-grade assessment.
- A bright LED inspection light. Use it at a low angle to the surface. Scratches you couldn’t see suddenly cast shadows and become obvious.
- A clean, medium-pile microfiber towel (300-350 GSM). This is for gentle cleaning, not buffing yet.
- A mild, pH-neutral interior cleaner. This removes grease, silicones, and dirt without damaging surfaces. I use this on everything from the Tesla’s screen to the F-150’s vinyl floors.
- Isopropyl alcohol diluted with water (50/50 mix) in a spray bottle. This is your final degreaser. It removes all leftover residues so you see the bare, true surface for your test.
The importance of a perfectly clean surface cannot be overstated. What looks like a scratch might just be a white transfer mark from a shopping bag or a hardened spill. I once spent ten minutes trying to “polish” a scratch on a door panel that was just dried toothpaste. A proper clean with interior cleaner took it right off. Always start clean.
How to Fix Scratches on Plastic Interiors (Dash, Trim, Hard Buttons)

You see a scratch on your dashboard and think it’s just plastic. It usually isn’t. Most interior “plastic” is actually a vinyl-coated or textured thermoplastic. That top layer is soft, often painted or dyed, and can melt if you get aggressive. Knowing this changes everything.
Let’s talk about the Vaseline hack. I get it. It makes the scratch seem to vanish by filling it with oil. The problem is it doesn’t fix anything. It’s a temporary, greasy mask that attracts every speck of dust. Over time, petroleum jelly can degrade certain plastics, making them brittle. Skip the kitchen cabinet fixes and use products made for the job.
Fixing these scratches is a progressive process. You start mild and move up only if you need to.
- Deep Clean. A scratch often holds dirt, making it look worse. Use an interior cleaner and a soft detailing brush. Clean the whole panel, not just the scratch. This alone can make shallow marks nearly disappear on my grey Honda Odyssey’s trim.
- Polish. For shallow scuffs, a plastic-specific polishing compound can work wonders. It gently abrades the surrounding area to level the scratch. This is where technique is everything (more on that below).
- Fill. For a deeper gouge that polishing can’t remove, you need a filler. Use a dedicated plastic/vinyl filler or “restorer” product. These are thick creams that settle into the scratch to camouflage it. They are not permanent but can last for years.
- Protect. Once repaired, apply a quality interior protectant. This adds UV inhibitors and creates a sacrificial layer. A matte finish is best to avoid a shiny, greasy dashboard.
So, how do you get scratches out of plastic? You often don’t “remove” them fully. You diminish their appearance through polishing and filling. How long does it take? A simple clean and fill for one scratch might be 20 minutes. Polishing a full dashboard could take an hour. Patience is your best tool.
Technique Tweak: Polishing Interior Plastics
This is not like polishing your car’s paint. The vinyl coating is thin and soft. I use a small, soft hand-applicator pad, never a powered polisher. The risk of burning through the color layer is too high. It’s not recommended for use with any machine polishers.
Apply a pea-sized drop of plastic polish to your pad. Use the lightest pressure you can. Imagine you’re trying not to wake someone up. Make three or four passes, then stop and wipe the area clean with a microfiber towel to check your progress. This frequent checking is how you avoid creating a bigger problem than you started with.
Work in a cross-hatch pattern. Go left-to-right, then up-and-down. This ensures even material removal and prevents you from creating low spots or dull streaks in the soft surface.
Removing Scratches from Leather and Vegan Leather Seats
Not all leather is the same. Aniline leather is porous and uncoated, rare in cars. Coated leather, which is 99% of automotive leather, has a protective color layer on top. Vegan leather (like in my Tesla) is a synthetic polyurethane or vinyl. Your repair approach depends on which you have.
For light scuffs and surface scratches, the fix is simple. Spray a dedicated leather cleaner onto a soft horsehair brush. Gently agitate the scratched area. The brush lifts dirt from the grain and can often buff out the scuff mark itself. If the scratch persists, a leather-safe rubbing compound can be used to help repair scratches. Use it sparingly with a soft cloth, then wipe clean, and apply a leather conditioner immediately. Conditioning plumps the leather fibers, helping to minimize the appearance of the scratch and restore flexibility right where it was damaged.
Deeper scratches that cut into the color layer need more attention and repair techniques. For coated leather, you use a leather filler to build the scratch up level, then a matched dye to restore color. A leather repair kit has both. For synthetic vegan leather, a vinyl/plastic filler works, followed by a matched colorant. The process is the same: clean thoroughly, apply filler, let it cure, sand it flush with a very fine abrasive pad, apply dye with a small brush, and seal it.
This answers “how to fix scratched car interior” for seats. The goal is to make the damage invisible to a casual glance, not necessarily perfect under a microscope—similar to how you might cover or hide car scratches on the exterior.
Tools & Chemicals for Leather Repair
Gather the right tools before you start. Trying to improvise leads to messes.
- Horsehair Detailing Brush: Soft enough for agitation without scratching.
- Soft Microfiber Applicator Pads: For applying conditioners and dressings evenly.
- Dedicated Leather Cleaner: pH-balanced to clean without drying.
- Leather Conditioner: To restore moisture and suppleness post-repair.
- Leather Filler: A flexible compound to fill gouges.
- Leather Dye/Pen: Must be matched to your car’s interior color code. A kit is best for this.
A good leather repair kit will include the filler, colorants, and applicators you need. For a single scratch on my BMW’s black seats, a quality dye pen has saved the day more than once. For larger repairs on the Honda’s kid-worn seats, a full kit is the only way to go. These tools are perfect for repair scratches leather car seats and help keep the look consistent. With a little practice, you can blend repairs so the damage stays nearly invisible.
Repairing Scratches on Vinyl Surfaces (Seats, Door Cards, Consoles)
Vinyl is a different beast from hard plastic trim. It is softer and more flexible by design, which means it can scratch easily but also allows for a unique repair approach. You find it on seat bolsters, door card inserts, and center consoles.
The initial cleaning and light polishing steps are similar to hard plastic. You must use products specifically labeled as safe for vinyl. Using a standard plastic polish or an aggressive cleaner can dry out the material, leading to premature cracking and fading. A dedicated vinyl cleaner and a protectant are your first line of defense.
For shallow scuffs, a good cleaning followed by an application of a quality vinyl protectant can often make them visually disappear by restoring uniform color and shine. The same technique can be applied to car trim, where gentle cleaning and a protective finish can help reduce the appearance of scratches on plastic or rubber trim surfaces. This is the answer to the common question, “How to remove scratches from car vinyl?” Often, you are not removing the scratch but masking it through careful rejuvenation.
For actual cuts or deep scratches that catch your fingernail, cleaning alone won’t fix it. This is where vinyl repair kits enter the picture. These kits use a liquid vinyl filler that you color-match and apply into the damage. The real magic is in the graining tools or texture mats included, which you press into the wet filler to replicate the factory surface texture. This method is especially useful when DIY car scratch repair isn’t sufficient for deeper damage.
Technique Tweak: Working with Vinyl Repair Kits
This is a skill that benefits from patience. My first attempt was on a scuff in the grey vinyl of my Honda Odyssey. The color match was off, and it looked like a grey patch on a slightly different grey seat.
Your entire success hinges on color-matching before you mix any filler. Most quality kits come with primary color pigments. Mix a small drop at a time on a white plate and let it dry completely. Only then can you see the true color against your interior, preferably in natural light.
The process has a rhythm:
- Clean the damaged area thoroughly with isopropyl alcohol to remove all protectants.
- Mix your filler and color pigment thoroughly.
- Apply the filler into the scratch or cut with a spatula, slightly overfilling it.
- Press the provided texture mat or graining paper firmly over the wet filler to transfer the grain pattern.
- Use a heat gun or hair dryer on a low setting to cure and set the repair. The heat makes the filler flexible like the surrounding vinyl.
That graining step is where most DIY repairs fail. The texture mat must be aligned perfectly with the existing grain. Always, always use the practice material in the kit first. Get a feel for how much filler to apply and how much pressure to use with the texture tool. A repair that is the right color but has the wrong texture will still stand out like a sore thumb.
When to Call a Professional: DIY vs. Pro Repair
I love a good DIY fix. But knowing when to hand it off is what separates a smart detailer from a frustrated one. A professional upholstery or interior repair technician is the right call in a few clear situations.
Call a pro if the damaged area is larger than a credit card, or if there are multiple scattered damages. They are essential for a valuable, classic, or collector car where a botched DIY repair could hurt the value. If you’ve tried and failed to color-match, a pro has spectrophotometers that can scan the material and create a perfect paint or dye match. Finally, if there is deep structural damage, like a torn seat bolster, the material needs to be stitched or replaced, not just filled.
A professional vinyl or leather repair for a single seat bolster or panel might cost between $150 and $300, while a comprehensive DIY kit is often under $50. You are paying for their guarantee, their expert color-matching technology, and their practiced hand with complex textures like perforated leather or intricate grains.
They have the experience you cannot get from a single kit. They know how to blend repairs so the eye is never drawn to the spot. For a daily driver with a small scratch, DIY is a fantastic and rewarding project. For the door panel of your Porsche 911 or the vintage vinyl in your Miata, the investment in a professional is usually worth the peace of mind.
Protecting Your Interior to Prevent Future Scratches
Fixing a scratch is satisfying. Never having to fix it is better. A few simple habits and the right products make your interior far more resistant to new marks. This is about building a shield, not just cleaning up the damage. Understanding the causes of interior scratches helps you prevent them before they start. By addressing common culprits and adopting protective habits, you keep your car’s finish looking newer for longer.
The sun is your interior’s worst enemy, not your dog or your kids. Ultraviolet rays bake plastic and vinyl until they become dry and brittle. A brittle surface scratches if you just look at it wrong. I learned this the hard way with an old truck dashboard. It cracked and faded long before the engine gave out.
Use a windshield sunshade every single time you park, even for twenty minutes. A custom-fit shade that folds like an accordion is my go-to. It blocks more light and heat than a cheap, flimsy one. Think of it as sunscreen for your dash and leather seats. This one habit does more for long-term interior preservation than anything else.
Keep Surfaces Fed and Flexible
Protectants and conditioners are not just for shine. They replace the oils that sun and heat steal away.
- For Plastics & Vinyl: Use a water-based protectant. I avoid oily, shiny dressings. They attract dust and create a greasy film. A matte finish protectant soaks in, keeps the surface pliable, and won’t make your steering wheel slippery. Apply it every few weeks for high-touch areas like door panels and the dash.
- For Leather: Use a conditioner made for automotive leather. Modern car leather is almost always coated. You’re conditioning the topcoat, not the hide underneath. Still, it prevents the leather from drying and cracking. For my BMW’s leather or the Tesla’s vegan seats, a light conditioner every other month is perfect. Over-conditioning coated leather just leaves a residue that attracts dirt.
Change a Few Daily Habits
Most interior scratches come from what we bring inside. A little mindfulness stops them.
My keys used to live in my right pocket. I’d get in the car, and the key fob would scrape the bolster as I sat down. Now, my keys go straight into the center console. For work gear, I keep a small canvas bag on the passenger floor of my F-150 for pliers, flashlights, or any hardware. Metal never touches the plastic trim.
If you have a dog, their claws are like little plastic picks. A heavy blanket over the rear seat or a proper hammock-style cover is a must. For my own kids in the Odyssey, the rule is “check your seat.” I make them brush off the obvious sand or cracker crumbs from their pants before they slide across the leather. Grit is sandpaper.
When to Use Seat Covers
For some vehicles, protection needs to be physical. The grey Honda Odyssey, our “Kid Hauler,” has seen things. After extracting spilled juice for the third time, I invested in a set of fitted, durable cloth seat covers. They are not the universal stretchy kind. They look neat and are easy to remove and wash.
This is the move for any high-wear vehicle: work trucks, family vans, or adventure SUVs. A quality cover takes the abuse, and the pristine factory seat underneath is preserved for years down the road. It is the easiest insurance policy you can buy for your interior.
Final Thoughts on Interior Scratch Repair
Always start by identifying the material under your fingertips—glossy plastic, grained vinyl, or coated leather—because the right filler and pad make the scratch disappear. Treat them all the same, and you will only make the damage more obvious. Do not attempt DIY fixes for minor scratches without knowing the material first.
Get this wrong, and you trade a faint line for a deep gouge or a shiny patch that forever catches the light.
Expert Resources and Citations
- r/Detailing on Reddit: Anything I can do about scratches on this interior?
- Amazon.com: Car Plastic Interior Scratch Remover
- Repair & Renew Scratch Remover for Cars | Repair & Restore |
- Car Interior Scratches Plastic Restorer
- How to Remove Scratches from a Car’s Interior – iFixit Repair Guide
- Interior plastic scratches – R Detailing – VWROC – VW R Owners Club
- Interior plastic scratch repair DIY how-to. | Honda Odyssey Forum
Max Gunther
Max is an automotive enthusiast having worked as a car mechanical and in interior detailing service for over 25 years. He is very experienced in giving your old car, a new fresh vibe. He has detailed many cars and removed very tough smells and stains from all kinds of cars and models, always ensuring that his work and advice helps his customers. He brings his first hand experience to his blog AutoDetailPedia, to help readers breath new life into their car interiors.