How Much Does Automotive Clear Coat Cost and How Many Layers Should You Apply?
You are looking at your car’s paint, worried about spending too much or not applying enough clear coat to keep it safe. I have asked myself the same thing while working on my jet black BMW, the car that shows every single flaw.
We will cover what really drives the cost of a clear coat job, how to choose the right number of layers for your vehicle, and the hands on method for applying it correctly.
Guess wrong on the layers or cost, and you will get a finish that fails to protect your paint or wastes your hard earned money.
Key Takeaways: The Clear Coat Cheat Sheet
Before we get into the weeds, here are the numbers and rules I live by.
- Professional clear coat jobs range from $300 to $800 for a single panel like a bumper, and from $2,000 to $10,000 for a full car respray. The final price hinges on your car’s size, the shop’s skill, and your location.
- For DIY, your material cost starts around $50 for a couple of aerosol cans and can exceed $300 for a professional-grade spray gun setup with quarts of 2K clear. This does not include the cost of mistakes, which is real.
- Apply two to three coats of clear coat for most jobs. More than three risks runs and slow curing; fewer than two may not build enough depth or protection.
- The golden rule is “not too thick, not too thin.” Aim for a wet, glossy layer that lays down smoothly but doesn’t sag or drip. It should look like fresh syrup on a pancake.
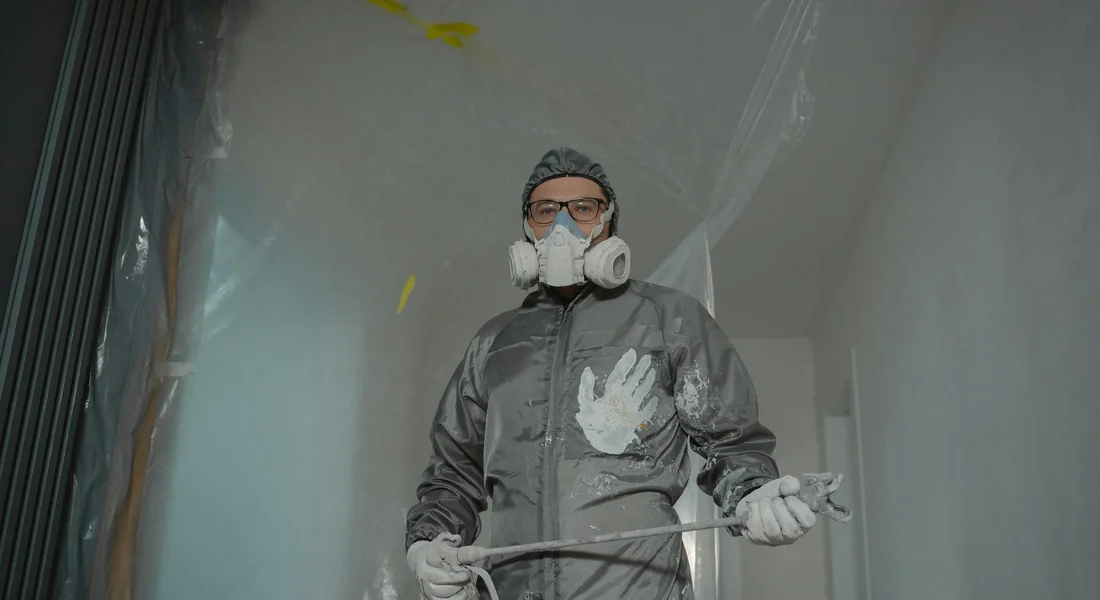
- 2K (two-component) clear coats contain isocyanates. These are dangerous chemicals. You must use a fresh, organic vapor cartridge respirator, gloves, and have serious ventilation. I won’t spray it without my full-face mask.
What You’re Really Paying For: Clear Coat Cost Breakdown
So, how much does automotive clear coat cost? The answer splits cleanly into two paths: paying a professional or buying the materials yourself. One buys you expertise and a warranty. The other buys you a learning experience and full control, for better or worse.
The Professional Service Price Tag
When a shop gives you a quote, you’re paying for much more than just the liquid in the can. You’re buying their time, their booth, and their guarantee that the job won’t fail. Labor is the biggest chunk. A good painter might charge $50 to $100 per hour, and a full respray can take 40 to 60 hours of work when you factor in disassembly, prep, paint, and reassembly.
Think of it like dental work. A small scratch repair is a filling: relatively quick and affordable. A clear coat respray on a hood or a door is like a crown: it requires precise shaping and blending. A full car respray is a full mouth reconstruction. It’s a major project that demands perfection across every surface.
Here are the realistic price ranges I’ve seen and been quoted for, based on typical shop rates:
- A Front Bumper: $300 – $800. This includes removal, prep, color match, and clear. Plastic parts can be tricky to adhere to.
- A Hood: $500 – $1,200. Large, flat panels show every imperfection, so the prep work has to be flawless.
- A Full Car Respray: $2,000 – $10,000+. The low end is for a basic job on a compact car. The high end is for luxury vehicles, custom colors, or show-quality finishes on something like my Porsche. A full respray on my F-150 would land in the middle.
The DIY Materials Shopping List
Going the DIY route means you become the painter, the prep technician, and the quality control manager. Your costs are purely for materials and tools, but your risk is higher.
You have three main choices for application:
- Aerosol Cans: The entry point. A 12-ounce can of 2K clear costs $20-$30. It’s convenient for tiny spots but exhausting for large areas. The propellant can cause a slightly orange-peel texture.
- Quart Kits: These are mixed yourself. A quart of 2K clear with hardener costs $60-$100. You need a spray gun and compressor. This is how you get near-professional results in a garage.
- Spray Gun Systems: The gun itself can cost $50 to $500. Add a capable air compressor for $200+. This is an investment for the serious hobbyist.
Now, how many cans of 2k clear coat for a car? Aerosol yield is poor. For a full vehicle:
- Compact Car (like a Miata): 3 to 4 cans.
- Midsize Sedan (like the BMW 3 Series): 4 to 6 cans.
- Full-Size Truck (like the F-150): 6 to 8 cans or more.
With a spray gun, a full car typically uses 1.5 to 2 quarts of mixed clear coat. This directly answers how many coats of clear coat a car needs in practical terms. Two to three coats over the entire car will consume that volume if applied correctly.
The choice between 1K and 2K clear is the most important decision you’ll make. 1K clears are air-dry. They’re easier but less durable. 2K clears use a chemical hardener. They’re tougher and glossier but require strict safety measures.
| Feature | 1K Clear Coat | 2K Clear Coat |
|---|---|---|
| Durability | Moderate. Resists water and sun for a year or two. Fine for interior trim or small touch-ups. | High. Chemical cross-linking creates a hard, long-lasting shield that can last for years. |
| Cost | Lower. Aerosol cans are cheap and readily available. | Higher. The hardener and the need for safety gear add cost. |
| Required Safety Gear | Basic dust mask and ventilation. The fumes are strong but less toxic. | Full-face organic vapor respirator, gloves, coveralls, and forced ventilation. Isocyanates are no joke. |
I keep 1K aerosol for quick fixes on trim. For any real paintwork, like restoring the single-stage on my Miata, I only use 2K. The difference in hardness and gloss is night and day.
The Product Tier List: From Driver to Show Car
Forget brand names for a second. The right clear coat depends on what you need it to do. I sort them into three groups based on your project, not marketing. This comes from fixing chips on my daily drivers and doing full panels on my project cars. I also factor in safe chemicals in car paint clear coats, because safer formulas can still yield durable, high-quality finishes.
Budget or Driver Tier is for the small stuff, like a rock chip on your door. These are aerosol 1K clears, the kind you find at any auto parts store. They are single-component and air-dry. I have used them on my F-150’s bumper for quick touch-ups. They are cheap and easy. But they stay soft. You cannot sand and polish them to a high gloss like factory paint. They yellow faster in the sun. Use them only for tiny, out-of-sight repairs where perfect looks do not matter.
Enthusiast or Project Tier is where most garage work happens. This includes 2K aerosol kits, where you pop a catalyst button inside the can. Brands like SprayMax are famous here. I used one on a fender for my Miata. The catalyst creates a chemical cure, making it much harder and more durable than 1K. You can sand and polish it. This tier also includes entry-level 2K clear coat sold in quart cans you mix yourself. You need a spray gun for these, but they offer better control. This is the sweet spot for repainting a hood or fixing a large scratch.
Show Car or Pro Tier is for the final, flawless finish. These are high-solids, high-gloss 2K clears meant for professional spray gun application. They flow out like glass and sand to a deep, wet look. My Porsche’s PPF was applied over paint with this grade of clear. You need serious equipment: a quality HVLP spray gun, a dedicated air compressor with a dryer, and a proper spray booth or a very clean, ventilated space. The cost is higher, but the result is a durable, show-ready surface.
The Golden Rules: How Many Coats to Spray and Why
Everyone asks for a number. The real answer is about total thickness, measured in mils (thousandths of an inch), not just coat counts. A perfect finish needs enough material to protect the color and to be leveled smooth.
The industry standard for total clear coat thickness is between 1.5 and 2.5 mils after it has cured. Factory paint usually lands in this range. Your goal is to hit that target. Two perfect medium coats might get you there. Three thin coats might be needed. It depends on your spray technique and the product. Different applications may require different thickness targets. Knowing the thickness ranges for applications helps you tailor your process for each job.
So, how many layers should you apply? For most jobs, the magic number is two to three. Always spray multiple thin layers instead of one thick one. Let me break it down by project type.
For Touch-Ups and Scratch Repair
This is delicate work. Your goal is to build the clear up just to the level of the surrounding factory paint, no higher. You want a slight mound of material to sand flat. On my black BMW, I fix scratches often. Wet sanding car paint helps blend the repair with the factory finish. Details on how to approach this will follow in the next steps.
I spray two or three very thin coats, waiting a few minutes between each. The challenge is not the number of coats, but blending the repair into the old clear coat so it disappears. When you’re repairing clear coat damage, the goal is to make the patch vanish into the surrounding finish. After it cures, you carefully level it with fine sandpaper and polish. If you spray too much, you create a obvious bump that is hard to hide.
For a Full Panel or Complete Respray
Here, you are starting fresh. The standard practice is two to three medium-wet coats. A medium-wet coat means you spray enough for the surface to look glossy and wet, but not so much that it starts to sag or run.
I apply a first coat as a light “tack coat” to help adhesion. Then I follow with two full medium-wet coats. Spraying more than three coats often causes runs, sags, and dramatically longer cure times because the solvents cannot escape properly. The paint can stay gummy for weeks.
People ask how many coats of clear coat for a show car. It is not five or six. A show car finish comes from applying two or three coats perfectly and then spending hours wet-sanding and polishing that clear to an insane level of flatness and gloss. The depth is from perfect leveling, not from piling on layers.
What Happens If You Spray Too Little or Too Much?
I have seen both mistakes in my shop.
Too thin, and you are in trouble. If your clear coat is under 1 mil thick, it will lack durability and cannot be sanded and polished without burning through. It will fail quickly, peeling or fading when exposed to sun and weather. It is a wasted effort.
Too thick is just as bad. If you lay it on heavy or add too many coats, the weight can cause runs and sags. Worse, trapped solvents can create tiny pinholes called solvent pop. A clear coat that is too thick may never cure hard, remaining soft and gummy forever, attracting dirt and marring easily. You would have to sand it all off and start over. Always measure your mil thickness with a gauge if you can. When in doubt, spray thin.
The Detailer’s Technique Tweak: Watching the “Flash”
Spraying clear coat is about rhythm, not just a timer. I ruined a panel on my Jet Black BMW once by spraying the second coat too early. It sagged and ran. Now, I watch the paint, not the clock.
Right after you spray, the surface looks wet and glossy. Wait. Do not touch it. The gloss will start to disappear. It turns into a dull, even haze across the entire area. This is the flash-off time.
You apply the next coat the instant you see that uniform haze, not when it’s shiny and not after it looks dry.
To see this change, you need the right light. Shine a lamp or work light across the panel at a very low angle. This raking light makes the shift from gloss to haze obvious. I set a light on the garage floor when working on the Porsche’s flat surfaces.
This rhythm-spray, watch for the haze, spray again-is your guard against runs. It lets each coat become just tacky enough for the next to bond chemically without flowing. It builds a solid, unified layer.
The Application Playbook: From Prep to Final Sand

Your clear coat will only look good and last if the surface underneath is perfect. Prep is everything. When painting over a clear coat, proper prep is essential for adhesion and a smooth finish. Here is the sequence I follow on every car, from the kid-hauler Odyssey to the garage-queen 911.
- Clean and degrease the entire area. Use a dedicated wax and grease remover. Wipe it on with a clean microfiber, then immediately wipe it dry with a second, fresh cloth. Any residue will cause fisheyes or poor adhesion.
- Tack the surface immediately before spraying. Use a fresh tack cloth. Drag it lightly over the paint to lift every speck of dust. Do this after your final wipe-down.
- Mix your product if it’s a 2K clear. Follow the manufacturer’s ratio exactly. Stir it gently to avoid bubbles. Once mixed, you have a limited window to use it.
- Set up your spraying environment. Control dust, temperature, and airflow before you start.
- Apply the clear using the flash technique and proper spray pattern. Build the coats slowly and evenly.
- Let it cure completely before any sanding or polishing. Impatience here will undo all your work.
If you are using a 2K clear coat with a hardener, a supplied-air respirator is not optional, it is mandatory. The isocyanates in the hardener can cause permanent lung damage. A paper mask or standard respirator does not protect you. I will not spray 2K, even on my truck’s bumper, without my supplied-air system hooked up.
Environment is Everything: Temp, Humidity, and Dust
Clear coat needs a friendly room to dry. The sweet spot is between 70°F and 85°F, with relative humidity below 50%.
Spray when it’s too cold, and the clear won’t flow out. It dries with a rough, orange peel texture. Too hot, and it flashes off before it can level, leaving a dry, bumpy finish. High humidity traps moisture in the film, leaving a cloudy, milky haze called blush.
In a home garage, you can create a decent space. Lightly mist the concrete floor with water to settle dust. Turn off the furnace, air conditioner, and any fans. Hang plastic painter’s sheets from the ceiling to create a makeshift booth around the car. Tape the seams.
Plan your work for when the air is still and the temperature is stable, like early morning or after sunset. I always spray my project Miata in the cool, still hours of the morning.
The Spray Pattern: Building Your Coats
Your arm movement builds the film. Start with a tack coat. Hold the spray can or gun about 10 inches from the surface. Make a light, quick pass with a 50% overlap. This sticky first layer gives the next coats something to grab.
For the full wet coats, slow your pace. Make steady, horizontal passes with a 70% overlap. Keep the sprayer perpendicular to the panel. Move your entire arm at a consistent speed, like you’re painting a fence. This builds an even, glossy film.
You want to see a wet, shiny surface right after your pass, but not so wet that it looks like it could drip. On the big hood of my F-150, I practice the motion on a piece of cardboard first. Consistency is key.
With a rattle can, shake it vigorously for two full minutes after the mixing ball starts rattling. Test the pattern on cardboard. With a spray gun, adjust for a fine, fan-shaped mist.
Drying vs. Curing: The Patience Game
Drying and curing are not the same. Drying is when the solvents evaporate and the surface feels dry to the touch. Curing is the slow chemical process where the film reaches its full hardness.
A 1K clear coat from a can is usually dry to the touch in an hour. You can sand it after about 24 hours. But it keeps hardening for weeks. It never gets as hard as a 2K clear.
A 2K clear coat with hardener is dry to touch in 2-4 hours. It is often sandable in 24-48 hours. Full, through-and-through cure can take 30 days or more. Warmth speeds curing; cold extends it dramatically.
Do not wax, seal, or expose a newly cleared car to the elements until it is fully cured. For a 2K clear, wait at least 30 days. For a 1K clear, wait 60 days to be safe. Cure times can vary, so I write the cure date on a piece of tape on my garage wall.
What happens if you don’t let clear coat dry? You trap solvents. The finish can wrinkle, stay soft forever, or develop sags you didn’t see at first. If you touch it, your fingerprint becomes a permanent defect.
Can you put new clear coat on old clear coat? Yes, but only if the old coat is sound, clean, and properly prepared. You must sand it thoroughly with 800-1000 grit sandpaper to create a matte, scratched surface for the new clear to mechanically bond to. Then clean and tack it again. I did this successfully over the original single-stage on my Miata before the new clear went on.
Troubleshooting Common Clear Coat Problems
Even with perfect prep, things can go wrong. The good news is most clear coat flaws happen for specific reasons. You can diagnose them by looking at what you did just before they appeared.
Orange Peel
This looks like the dimpled skin of an orange. The surface feels rough and looks wavy under light. On my black BMW, orange peel scatters light and makes the deep shine impossible to achieve.
This is almost always a spray application error. It means the clear coat did not flow out smoothly before it dried.
- Too little material: The coat is too thin to level itself.
- Wrong gun settings: Air pressure too high or fluid flow too low atomizes the clear into tiny, dry droplets that hit the panel and stick as texture.
- Improper flash time: Rushing coats traps solvents underneath. The top skin sets before the bottom layer can flow.
The fix is wet sanding and polishing, which is labor intensive. It is better to adjust your technique and get it right from the gun.
Runs and Sags
These are thick, wet drips that look like tears. They happen when too much liquid clear collects in one spot.
A run means you applied too much material too quickly.
- Too much material: Overlapping your spray passes too heavily.
- Too slow arm speed: Lingering on a section.
- Spraying too close: Putting the gun nozzle nearer than recommended (usually 6-8 inches) concentrates the material.
You must let a run cure completely, then carefully sand it level and polish the area. Do not try to wipe it while wet, you will make a much bigger mess.
Dust or Bugs in the Finish
These look like tiny specks or hairs stuck under the glossy surface. I once had a fly land on the hood of my Miata mid-coat. I still see it.
Contamination is the enemy of a perfect finish. This flaw points directly to your environment and prep.
- Contaminated environment: Spraying in a dusty garage, with floor fans kicking up debris, or without an air filtration system.
- Contaminated surface: Not wiping the panel with a tack cloth immediately before spraying. Even a tiny fiber from your shirt can cause this.
Prevention is your only real defense. Seal the space, wear lint-free clothing, and always use a tack cloth.
Cloudiness (Blush or Bloom)
The clear coat dries with a milky, hazy whiteness within it. This is common when humidity is high.
Blush is caused by moisture trapped in the curing film. It happens when water vapor condenses into the clear coat as it dries.
- High humidity: Spraying when relative humidity is above 70% is very risky.
- Cool surface temperature: If the panel is cooler than the air, moisture can condense on it as you spray.
- Improper thinner: Not using a slower evaporating “retarder” thinner in humid conditions to let the clear flow out before moisture gets in.
Sometimes blush will fade as the clear fully cures. Often, it requires sanding and re-clearing. Watch the weather and control your booth climate.
Aftercare: Protecting Your New Clear Coat Investment
Fresh clear coat is soft. It needs time to fully harden, or cure. This process can take up to 90 days as solvents fully evaporate. How you treat it in this period decides its long term durability.
The Curing Timeline and What to Do
For the first 30 days, treat the paint like a newborn. Keep it out of direct sun for long periods if you can. Do not get it rained on. Most importantly, do not wash it. Water spots will etch into the soft surface. If you must clean it, use a detail spray and a very soft, clean microfiber with zero pressure.
After 30 days, you can give it a gentle hand wash. Use a pH-neutral car shampoo and the two-bucket method. Do not use a pressure washer nozzle closer than 12 inches. Dry with a clean microfiber drying towel, blotting instead of dragging.
Do not wax, seal, or use any spray coatings for at least 60 days, and 90 days is safer. These products can trap escaping solvents and prevent proper curing, leading to long term softness or adhesion issues.
The First Layer of Protection
Once the 90-day mark passes, it is time for protection. Your goal is to add a sacrificial layer without disturbing the fresh clear.
I recommend a pure, soft carnauba paste wax or a gentle synthetic spray sealant for this first application. For a brand-new car with fresh paint, this step helps seal and protect the delicate finish. Keep the product non-abrasive to avoid any risk to the new paint. Avoid any product labeled “cleaner wax” or with abrasives. You do not need to clean or polish the brand new clear.
On my Porsche, I used a simple spray sealant. It was easy to apply, gave a deep gloss, and created a barrier against contaminants. A traditional carnauba on the Miata gave a warm, rich glow. Both are perfect choices. This layer will last a few months, giving your clear even more time to fully harden underneath.
Clear Coat is Not a Ceramic Coating
People often confuse these. Your new clear coat is the paint itself, the final layer of colored paint protection. A ceramic coating is a separate, liquid chemical product applied on top of fully cured clear coat.
A ceramic coating is an advanced form of protection you can consider much later, after 6-12 months. It requires intensive paint correction first to remove any imperfections. Applying ceramic to fresh, uncured clear coat is a guaranteed failure. For now, focus on letting your clear cure and using a simple wax or sealant. When you’re ready to apply ceramic coating paint, take time for meticulous correction and a clean, dust-free surface. It will make the coating easier to apply and help it perform as intended.
Getting Clear Coat Right: A Last Word
Invest in a quality product and apply thin, even layers for lasting protection. I learned on my jet black BMW that perfect technique matters far more than the number of coats you stack on, especially when you apply clear coat or protective coatings.
Cut corners here, and you will be staring down a chalky, peeling surface that requires a full correction.
Deep Dive: Further Reading
- r/Detailing on Reddit: Let’s get technical. How much is mostly clear coat?
- 5 Thin Automotive Paint Layers Explained For Detailing
- How Much Does It Cost to Clear Coat a Car?
- How much will it cost me to fix my car’s peeling clear coat?
- What happens when you apply 35 layers of clear coat? – YouTube
- r/cars on Reddit: How many coats in a good respray?
- r/diynz on Reddit: How much would it cost roughly to recoat the clear coat?
Max Gunther
Max is an automotive enthusiast having worked as a car mechanical and in interior detailing service for over 25 years. He is very experienced in giving your old car, a new fresh vibe. He has detailed many cars and removed very tough smells and stains from all kinds of cars and models, always ensuring that his work and advice helps his customers. He brings his first hand experience to his blog AutoDetailPedia, to help readers breath new life into their car interiors.