How Do You Fix, Remove, and Prevent Oxidized Car Paint?
That chalky, faded haze on your hood isn’t just ugly-it’s your paint crying for help. I see it every year on my dark blue F-150 after a brutal summer.
I’ll show you exactly how I bring that gloss back, covering how to identify true oxidation, the safe removal process with compounds and polishes, restoring depth and color, and the simple habits that lock in protection.
Ignore it, and that chalky film will degrade into permanent, sandpaper-rough damage that no wax can fix.
Key Takeaways: Your Quick Roadmap to Restoration
Seeing your car’s paint go chalky and dull can feel like a loss. I get it. My dark blue F-150 looked faded and tired after a few harsh summers. But here is the truth. Oxidation is just a surface problem you can fix, not a death sentence for your paint—it’s just one aspect of environmental damage to car paint. The process is straightforward if you follow a plan.
- The core message is simple: oxidation is a fixable surface problem, not a death sentence for your paint. It is the clear coat breaking down. You are not repainting the car. You are reviving what is already there.
- Your action plan has three phases: Assess, Correct, Protect. You figure out the damage, you remove the dead layer, and you lock in the new finish. Jumping straight to correction is a mistake.
- Realistic difficulty rating: Moderate DIY. If you can use a polisher, you can do this. For a full car correction, plan for 4 to 6 hours of focused work. My 1995 Miata restoration took a full Saturday.
- The single most important tip is to never skip the protection step after correction. Freshly corrected paint is soft and exposed. Leaving it bare will have it oxidizing again faster than you think.
The Oxidation Protocol: Your Non-Negotiable Order of Operations
Think of this as a recipe. If you skip an ingredient, the cake fails. I learned this on my black BMW. I rushed and created more swirls. Have all your tools and products laid out before you make a single pass with the polisher. Get your microfiber towels, your polisher, pads, compounds, and sealants ready. Now, follow these steps in order.
- Wash & Decontaminate. You must start with an impeccably clean surface. Use the two-bucket wash method with grit guards. Dry it completely. Then, run a plastic bag over the paint. If it feels gritty, you need to clay it. Use a detailing clay bar or synthetic clay mitt with plenty of lubricant. On my Tesla’s flat front bumper, this step removes bonded contaminants that would scratch during correction.
- Assess Oxidation Level. In direct sunlight or under a bright LED light, look at the paint. Light oxidation looks hazy and dull. Severe oxidation looks chalky and faded, often with a whitish tint. On my classic red Miata, the single stage paint had turned pink. Touch it. Does it feel rough or dry? Test a small, inconspicuous area with a mild polish to see how the paint responds before you commit to the whole panel.
- Correct with Compound/Polish. This is the work phase. For heavy chalkiness, use a cutting compound on a foam cutting pad. For light haze, start with a polishing compound on a polishing pad. I use a dual action polisher. Work on one two foot by two foot section at a time. Apply product to the pad, spread it on low speed, then increase speed and make slow, overlapping passes. Keep the polisher moving. Correcting paint is about letting the abrasives do the work, not using muscle. Wipe off the residue with a clean microfiber towel before moving on.
- Protect with Sealant/Wax. After you finish correcting the entire car and have wiped all panels clean, apply your protectant immediately. A synthetic sealant typically offers longer lasting protection than a traditional carnauba wax. I use a sealant on my Honda Odyssey for its durability against kid spills and sun. Apply a thin, even layer to one panel at a time, then buff it off with a fresh microfiber before it fully dries. This step is non negotiable.
- Maintain. Your new finish needs care. Wash the car every two weeks with a pH neutral shampoo. Use a dedicated wheel cleaner for brake dust. After each wash, consider using a spray sealant or a spray wax as a drying aid to boost protection. For my garage queen Porsche, I use a ceramic spray coating for easy cleaning. Avoid automatic brush car washes at all costs.
Skipping any step here will compromise your results and can cause damage. I have seen people compound over leftover dirt. It creates deep scratches. If you’re wondering how to repair deep scratches car paint, following a proper method will prevent further damage down the line. This is why the protocol matters. Follow the protocol. Your paint will thank you.
What Is Oxidized Car Paint? The Science of That Chalky, Faded Look
Think of oxidation like a sunburn for your car’s paint. The clear coat is a thin, transparent layer of paint on top of your car’s color. Its job is to take the beating from the sun so the color underneath stays bright. Over years, ultraviolet rays and plain old oxygen in the air break down the chemical bonds in that clear coat.
It gets brittle. It gets weak. Eventually, it starts to fail.
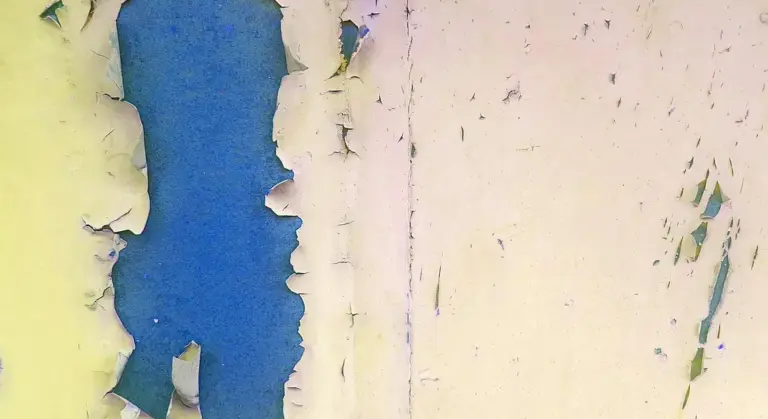
You see this failure in three ways. First, the color looks faded or milky, like someone put a layer of gray chalk dust over it. Second, the surface loses its glossy, reflective shine. It looks flat and dull. Third, if you run your hand over it, it feels rough and chalky, not slick and smooth. That rough, chalky feeling is the dead giveaway your paint is actively oxidizing and needs help.
How you fix it depends on what type of paint you have. Most modern cars use a base coat/clear coat system. The color is one layer, and a separate, clear resin layer goes on top for protection and shine. When this clear coat oxidizes, it turns cloudy and fails, but the color layer underneath is often still intact. You are working to restore that top clear layer, which is crucial for restoring faded paint on your vehicle.
Older cars, like my 1995 Mazda Miata, often used single-stage paint. There is no separate clear coat. The color pigment and the protective resin are all mixed together in one layer. When single-stage paint oxidizes, the actual color fades. That classic red turns pink. The surface feels dry and chalky because the resin itself is breaking down at the surface.
A Case Study: The 1995 Mazda Miata
When I bought my Miata, it was not red. It was pink. The single-stage paint had been baking in the sun for decades with little more than an occasional wash. The hood and trunk lid were the worst. The surface had no reflection. It sucked up light instead of bouncing it back.
Running my fingertips across it felt like dragging them across a blackboard. That was the oxidized resin. I knew the true color was still there, buried under that dead, chalky surface. Fixing single-stage oxidation is a process of carefully removing that dead, chalky top layer to reveal the fresh, vibrant color preserved underneath.
What Causes Car Paint Oxidation?
Sunlight is the main culprit. Ultraviolet radiation is the primary force that breaks down the paint’s chemical structure. But other factors speed up the process.
- UV Exposure: Constant, direct sunlight without any protective barrier (like wax or a sealant) is a death sentence for clear coat.
- Environmental Pollutants: Industrial fallout, acid rain, and bird droppings eat away at the paint’s surface, creating weak spots where oxidation can start.
- Neglect: Simply never waxing or sealing the paint. A good coat of wax acts like sunscreen. Without it, the paint is bare and vulnerable to the elements.
- Harsh Cleaning: Using aggressive brushes, cheap towels, or strong degreasers can microscopically damage the clear coat, making it fail faster.
My Miata suffered from the first three. It lived outside, was rarely protected, and collected every bit of environmental grime. The result was that pink, chalky finish. Understanding the cause is the first step to both fixing it and, more importantly, preventing it from coming back.
How Do You Fix Oxidized Car Paint? A Step-by-Step Correction Guide
Fixing oxidized paint is about removing the dead, chalky layer to reveal the healthy paint underneath. You do this by abrading the surface, but in a controlled way. This is the exact process I use on my own cars, like bringing my old Miata’s single-stage paint back from pink to red.
Step 1: The Perfect Wash and Decontamination
You cannot polish a dirty car. Any grit left on the paint will get ground into the surface by your polisher, creating deep scratches. You start clean.
Use the two-bucket method. One bucket has your soapy wash solution. The other is filled with clean water for rinsing your mitt. This traps dirt in the rinse bucket so you don’t drag it back across the paint. Work from the top down, rinsing the panel as you go.
After the wash, spray an iron remover over the entire car. It will turn purple as it reacts with embedded brake dust and rail dust. This stuff is invisible but acts like tiny metal splinters stuck in your clear coat. Rinse it off thoroughly.
Now, use a detailing clay bar or synthetic clay mitt. Lubricate a small section with a quick detailer spray and glide the clay over it. You will feel it grabbing. This step physically pulls out contaminants that washing misses, leaving the paint as smooth as glass, which is the only safe surface for polishing.
Step 2: Assessing Your Paint’s True Condition
Is the damage just on the surface? You need to know before you start machine polishing. Find an inconspicuous spot, like on a roof pillar or near the bottom of a door.
Put a small amount of a light cleaner polish on a clean microfiber pad. Rub it firmly into the oxidized paint by hand for about 60 seconds. Wipe it off with a separate clean towel.
Look at the spot. If the haze is gone and a deep gloss appears, you have moderate surface oxidation. This is great news. The clear coat is still intact and can be fully restored.
If the area remains chalky, dull, or you see a color change on your towel (common on older single-stage paints), the damage is severe. Severe oxidation means the clear coat has failed entirely, and you are seeing the degraded base coat or primer; this requires a professional repaint, as there is no protective layer left to polish.
Step 3: Machine Polishing for Moderate Oxidation
This is the hands-on answer for how to deoxidize car paint. You use a machine polisher to carefully remove the thin, damaged top layer of clear coat. A dual-action polisher is the safest tool for beginners. It oscillates and spins, making it very difficult to burn through the paint.
Match your compound and pad to your paint’s hardness. My BMW’s jet black paint is notoriously hard. It requires a more aggressive cutting compound and a firmer foam pad to make an impact. My Ford’s truck paint is much softer. I can use a milder compound and a less aggressive pad to achieve a perfect finish.
Apply a few dots of compound to your pad, spread it on the paint at low speed, then increase speed and work an area about 2 feet by 2 feet. Keep the polisher flat. Use slow, overlapping passes until the compound begins to clear. Wipe the residue and inspect under good light. The chalkiness should be gone, replaced by a sharp, wet reflection.
Step 4: Protecting the Newly Revealed Paint
The polishing process removes the oxidation, but it also strips away any existing wax or sealant. The paint is completely bare and exposed. If you leave it unprotected, new oxidation and water spots will form incredibly fast.
You must apply protection immediately after polishing and wiping down the car with an alcohol-based panel wipe to remove any final oils.
For longevity and durability, choose a synthetic sealant or ceramic coating. These products can last 6 months to several years, forming a hard, chemical-resistant shell. For that classic, warm depth of shine on darker colors, a natural carnauba wax is beautiful. It won’t last as long as a sealant, but the visual payoff on a deep red or black car is often worth the extra maintenance for an enthusiast. On my daily drivers, I always choose a sealant. On my garage-kept Porsche, I use a premium wax.
How Do You Remove Heavy, Chalky Oxidation?
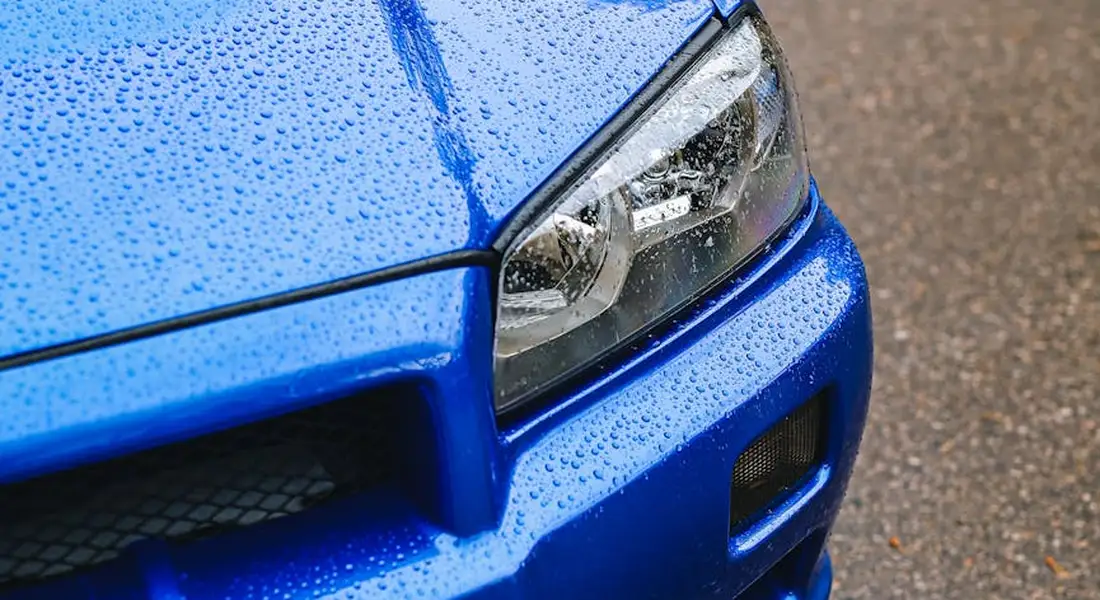
Heavy oxidation is a different beast. The surface feels sandy or chalky. The color looks faded and milky. This means the clear coat has failed, and you are now working on the base coat or single stage paint itself. My 1995 Miata looked pink, not red, when I started. This is the stage where you move from cleaning to cutting.
When Hand Application is Your Only Safe Choice
There are places where a machine should never go. I use my hands here. The paint is dangerously thin.
- On sharp edges and body lines. The paint on a hood’s edge or a fender’s ridge is often microns thick. A machine can burn through in a second.
- Around complex curves and tight spaces. Think of the grooves around door handles, the tight contours of a mirror housing, or the intricate badges on a grille.
- On old single stage paint. Like on my Miata. There is no clear coat to burn through, but you can cut right down to primer if you are not careful. Hand work gives you ultimate control.
For hand work, you need a dedicated rubbing compound, not just a polish. I keep Meguiar’s Ultimate Compound or Griot’s Garage Fast Correcting Cream in my kit. They are aggressive enough to cut but formulated to finish down nicely by hand.
My technique is simple. I apply a small amount to a clean, soft foam applicator pad. I work it in using straight line or small circular motions with firm, even pressure. I focus on a two foot by two foot area. I keep working until the compound turns almost clear and the chalkiness is gone, checking my progress with a clean microfiber towel. It is slow, it is tiring, but it is the safest way to reclaim paint in high risk zones.
Machine Correction for Widespread Severe Oxidation
For large, flat panels like a hood or roof, a machine is the only practical tool. This is where you answer the common question: how do you remove oxidation from car paint? You cut it away, carefully.
For my Ford F-150’s oxidized hood, I used a dual action polisher. I paired it with a microfiber cutting pad, which is more aggressive than foam but safer than wool for a beginner. I loaded the pad with a heavy cut compound, something like 3D One or Menzerna Heavy Cut 400.
- I spread the compound on the pad at speed 1.
- I worked at speed 4 or 5, moving the machine slowly across the panel.
- I used moderate pressure, keeping the pad flat.
- I polished until the compound became translucent and the oxidation disappeared, leaving a hazy but uniform surface.
The single biggest risk is burning through the clear coat, which is a point of no return. You avoid this by never staying in one spot, especially on edges. Keep the machine moving. Let the pad and compound do the work, do not lean on the polisher. Always test your method on a small, inconspicuous area first, like inside a door jamb.
Removing oxidation always follows the same principle, by hand or machine: you use an abrasive product to level the damaged, porous surface and reveal fresh, intact paint underneath. The method just changes with the scale of the job and the risk to the paint.
Is It Too Late? Recognizing Unrestorable Paint
Sometimes, the paint is too far gone. You need to know when to stop. Can oxidized car paint be restored? Usually, yes. But not always. Especially if it’s been left untreated for a long time.
Look for these signs that mean stop cutting:
- You see a different color underneath, like grey primer or white sealer. You have cut through the color layer.
- The paint has deep, spiderweb like cracks (crazing). This is in the paint itself, not on the surface.
- The surface feels like brittle eggshell and flakes away when you touch it.
- You have worked an area repeatedly and the chalky white color will not disappear. The pigment is dead.
On my Miata’s rear bumper, the red was just gone. I hit primer. That was my signal. My options were a professional repaint for a perfect, lasting fix, or a quality vehicle wrap to change the color and protect what was left. I chose paint. Knowing when to walk away saves you hours of wasted effort and prevents you from causing irreversible damage.
Detailer’s Pro-Tip: The Technique Tweaks for Flawless Results
You can have the best polish and pad in the world, but if your technique is poor, the results will be poor. This is where most DIY projects hit a wall. The difference between a hazy mess and a deep, clear reflection is in your hands, not just the bottle.
Your physical technique is more important than the specific product you choose. A master with a basic compound can out-perform a novice with the most expensive polish. Focus on your movement, your pressure, and your patience.
Master the Crosshatch Pattern
Never polish in circles or just back-and-forth. This creates uneven correction and can leave behind swirls or buffer trails. The goal is uniform paint removal.
Think of it like mowing a lawn. You don’t mow in random circles. You go in straight, overlapping passes.
- Start your polisher and place it on the paint.
- Move the polisher slowly up and down in a straight line, overlapping each pass by 50%.
- Then, move the polisher slowly side-to-side over the same area, again overlapping by 50%.
This “crosshatch” or “criss-cross” pattern ensures every single millimeter of that section gets touched by the pad evenly. It’s the single biggest upgrade you can make to your polishing game.
Your Eyes Are the Best Tool: Use an Inspection Light
You cannot fix what you cannot see. Sunlight lies. Garage lighting lies. Your eyes need help.
A dedicated LED inspection light, held at a low angle to the paint, is non-negotiable. This shallow light reveals every defect, every micro-scratch, every bit of leftover haze.
As you polish a section, stop your machine and wipe the area clean with a microfiber. Then, hit it with your inspection light. You should see the oxidation and scratches vanish, replaced by a uniform, clear finish. If you see fine holograms or haze, you need a finer polish or a softer pad. The light tells the truth.
Arm Speed, Pressure, and Knowing When to Stop
These three factors control your result. Get them wrong, and you can burn through your clear coat.
- Arm Speed: Move slowly. I use a speed of about one inch per second. Rushing means the polish doesn’t have time to break down and do its job.
- Pad Pressure: Let the weight of the machine do 90% of the work. You only need to apply enough pressure to keep the pad flat. Pressing too hard creates excessive heat and increases the risk of damaging the paint.
- The Stop Signal: Watch the polish on the paint. When you start, it will be wet and opaque. As you work the section, it will begin to clear up and turn almost transparent. When the polishing compound turns clear and spreads thinly, that’s your signal to stop. You’ve achieved the full correction for that step. Working it longer just creates heat and dust.
A Lesson from the Swirl Magnet: Managing Heat on Soft Paint
My 2016 BMW 3 Series in Jet Black has some of the softest, most finicky clear coat I’ve ever worked on. It’s a swirl magnet for a reason. It’s also incredibly sensitive to heat.
When you polish soft paint, heat builds up fast. Too much heat can actually soften the clear coat further, making it gummy and prone to new scratches from the pad.
My pro-tip is to work in smaller sections than usual and constantly check the paint surface temperature with the back of your hand. If it feels more than slightly warm to the touch, stop. Move to a completely different panel and let the first one cool down. A cool surface polishes better and is safer for your car’s finish. This patience is the secret to a flawless result on dark colors.
How Do You Prevent Oxidized Car Paint from Coming Back?
Think of fixing oxidation like surgery. It works, but you would rather avoid it. Prevention is the check-up. It is easier on your back, your wallet, and your car’s paint. Once you bring that shine back, a few simple habits will keep it that way for a long time.
The Golden Rule: Consistent and Proper Washing
Washing is not just about looks. It is about removing the enemies of your clear coat before they dig in. Dirt, pollen, bird droppings, and industrial fallout are acidic. They eat at the protective layer every day. A consistent wash schedule stops this.
Use a pH-neutral car shampoo. Dish soap or household cleaners strip away your wax or sealant, leaving the paint naked. A proper shampoo lifts dirt gently.
Always dry the car with a clean, soft drying towel. Letting water air-dry is a guarantee of water spots. Those mineral deposits etch into the surface, creating tiny spots of damage that turn into bigger problems. Drying the car is the final, critical step of every wash, not an optional chore.
On my Jet Black BMW, the ‘Swirl Magnet,’ I never skip the two-bucket wash method and a final wipe with a plush drying towel. It is the only way to keep black paint looking deep and clear.
Creating a Barrier: Sealants, Waxes, and Coatings
After a clean surface, you need a shield. This barrier blocks UV rays and contaminants from touching your paint directly. The choice depends on how long you want protection to last and how much effort you want to put in.
- Spray Sealants: These are my go-to for daily drivers. They apply easily after a wash, bead water beautifully, and last about 6 months. They offer more chemical resistance than traditional wax.
- Traditional Paste or Liquid Wax: Often made from carnauba, these give a warm, deep glow. They feel fantastic to apply. But they typically only last 1 to 3 months and melt away in strong sun or heat.
- Ceramic Coatings: These are liquid glass in a bottle. Professionally applied, they can last for years, offering incredible scratch resistance and chemical protection. They are a serious investment for a garage-kept show car, like my Porsche.
For a truck like my Ford F-150 that sees real work, I keep it simple. After every wash, I use a spray wax or sealant as I dry. It takes two extra minutes and adds a fresh layer of protection every single time. This ‘topping up’ approach is foolproof for a vehicle that lives outdoors.
Smart Parking and Storage Habits
Where you park is half the battle. The sun is your paint’s greatest enemy. UV radiation is what breaks down the chemical bonds in your clear coat, causing it to fail and oxidize.
Park in the shade whenever possible. If you must park outside long-term, a high-quality, breathable car cover is a worthy investment. It keeps off sun, bird droppings, and tree sap. A cheap, non-breathable cover will trap moisture and scratch the paint.
Nothing slows oxidation like garage storage. It removes the constant UV assault and protects from the elements. My 1995 Miata, the ‘Restoration Project,’ lives in the garage. That is the single biggest reason I was able to bring its single-stage red paint back from chalky pink to a deep gloss. If you have a garage, use it. It is the ultimate paint preservation tool.
How do you prevent oxidized car paint?
You build a routine. Wash the car frequently with the right soap and dry it completely. Keep a protective layer of wax or sealant on the paint at all times. Park it out of the sun whenever you can. It is not about one heroic effort. It is about small, consistent actions that add up to a permanently shiny car.
Your Oxidation Questions, Answered
After years of reviving paint, you hear the same things from folks in my shop or at car shows. They look at a faded hood and ask the real questions, like how long car paint lasts before it fades. Here are the straight answers.
Can You Fix Oxidized Car Paint by Hand Without a Machine?
Yes, you can. For a small, mildly hazy area, your hands are a tool. I want to be honest with you, though. It is hard work. Your arm will get tired. It will take much longer than you think.
I only do this for spot fixes. Think of a single roof pillar or a mirror cap that’s looking dull. For a whole panel or car, a machine polisher is the only sane choice. The goal with hand work is not perfection. It is improvement.
For a hand application, a liquid cleaner wax is your best friend. It combines a gentle abrasive to scrub off the dead top layer with protective wax in one step. Use a soft, foam applicator pad. Work in small, overlapping circles with firm, even pressure. Keep your area small-no bigger than two feet by two feet at a time. You will feel the paint’s texture change under your pad as you work, going from rough and dry to smooth.
On my old Miata’s rear bumper, I once did this by hand. It took me forty-five minutes for a section that would take five with a machine. It brought back a deep, wet red shine. It was worth the effort for that one piece.
What’s the Best Product to Clean Oxidation Off Car Paint?
“Best” is a tricky word. The right product depends on what your paint looks like and what you’re holding in your hand. Let’s break it down simply.
If the paint just looks hazy, dull, or cloudy but still has some color underneath, you need a light polishing compound. This is a fine abrasive that cleans the surface without removing much clear coat. It’s for rejuvenation.
If the paint is chalky, white, or powdery to the touch, you need a heavy cutting compound. This is a more aggressive abrasive designed to strip away the fully dead, oxidized layer to reveal the good paint below. This is for restoration.
Your tool decides the formula you need. Compounds and polishes made for machine use are usually thicker. They are designed to be spread and worked by a spinning or oscillating pad. Products meant for hand use are often milder and more liquid, so you can spread them without immediately drying up.
Start with the least aggressive option. Try a polish on a test spot. If the chalkiness remains, step up to a compound. This is the exact process I use on my blue F-150’s hood every spring to remove winter’s damage.
How Long Will the Shine Last After I Remove Oxidation?
Removing the oxidation is only half the job. The fresh paint you reveal is naked and vulnerable. How long it stays shiny is 100% about the shield you put over it.
If you apply a quality synthetic sealant, you can expect a strong, glossy barrier for about three to six months. This is my go-to for daily drivers like the Odyssey. It beads water beautifully and resists dirt.
If you apply a ceramic coating or a high-end liquid wax with carnuba, you can extend that protection to a year or more. This is what I use on the Porsche and the corrected black BMW. These products create a thicker, more sacrificial layer.
The longevity is a promise you make with your maintenance. If you wash the car with harsh soaps or automatic brushes, that protection will fade fast. If you use a gentle wash and a spray wax detailer every few weeks, you will keep that shine alive for its full potential. The shine lasts exactly as long as you decide to care for it.
Is Rubbing Compound the Same as an Oxidation Remover?
Most of the time, yes. “Oxidation remover” is a term you’ll see on a bottle in an auto parts store. It sounds like a magic potion. What’s usually inside is a cutting or polishing compound.
A rubbing compound is a specific type of cutting compound. It is traditionally more abrasive, meant for serious defect removal. Modern compounds are often better labeled as “cutting,” “polishing,” or “finishing.”
Do not get hung up on the marketing name on the front label. Look at the description on the back. If it says it removes oxidation, hazing, or heavy defects, it is a compound. That is the correct tool for the job. A true “oxidizer” in a chemical sense would damage your paint. What you want is a physical abrasive that safely scrubs the bad layer away. A quality compound does exactly that.
Keeping Your Paint’s Gloss Alive
Whether you’ve just corrected the chalky blue on my F-150 or any oxidized finish, remember that the work isn’t done until you protect it. Your single most important job is to lock in that renewed clarity with a durable ceramic coating or synthetic sealant, creating a permanent shield against the sun and rain.
Skip that final step, and UV rays will break down the clear coat, returning your paint to a dull, chalky state by next season.
Citations and Authoritative Sources
- How to Remove Oxidation from Car Paint | Chemical Guys
- How to Remove Oxidation from Paint
- Amazon.com: Oxide Reducing Emulsion to Restore Faded, Oxidized or Sun Damaged Car Paint, Peeling Clear Coat and Dull Headlights in a Simple DIY Operation. Easier to apply than wax, needs no polishing : Automotive
- r/Detailing on Reddit: How to treat this serious oxidation?
- How to make an oxidized car look great – without a lot of money | Alfa Romeo Forums
- Easiest way to stop and fix oxidation on car top? – Bogleheads.org
- A Simple DIY Operation to Repair Car Paint Oxidation and Faded Paint
Max Gunther
Max is an automotive enthusiast having worked as a car mechanical and in interior detailing service for over 25 years. He is very experienced in giving your old car, a new fresh vibe. He has detailed many cars and removed very tough smells and stains from all kinds of cars and models, always ensuring that his work and advice helps his customers. He brings his first hand experience to his blog AutoDetailPedia, to help readers breath new life into their car interiors.