What Common Substances and Methods Can Damage Your Car’s Paint?
You see those fine scratches and water spots, and you wonder where they came from. I’ve seen it on my own black BMW, the swirl magnet, and the culprits are often everyday habits.
I will walk you through the hidden dangers. We will cover acidic contaminants like bird droppings, the abrasion from automatic car washes, chemical burns from household cleaners, and the physical damage caused by improper tools.
Overlook these, and you will be left with permanent defects that require costly paint correction.
Key Takeaways: The Paint Damage Shortlist
I have seen a lot of paint ruined over the years. The causes are usually the same few things. If you know what they are, you can stop them before they start.
Here are the five most aggressive substances you will encounter.
- Bird and Bug Droppings: These are acidic. They bake onto your clear coat in the sun and actually eat into it, leaving a permanent dull spot called an etch.
- Tree Sap and Pollen: Sap is a sticky resin that bonds to paint. It traps dirt and, as it hardens, can stain or even pull the paint’s protection off when you remove it. Pine sap is especially nasty.
- Road Salt and De-Icers: This is a slow killer. My F-150 sees it every winter. Salt is corrosive. It holds moisture against metal and paint, promoting rust and eating away at coatings from the edges of chips.
- Harsh Household Chemicals: Glass cleaner, all-purpose sprays, and dish soap are not for cars. They strip the protective wax or sealant, leaving your paint bare and dry, which accelerates fading.
- Brake Fluid and Gasoline: These are paint solvents. A spill will strip paint down to the primer or bare metal almost instantly. Wipe any spill immediately with a wet cloth.
The three most common damaging methods are things people do trying to help.
- Automatic Car Washes (with brushes): Those spinning brushes are full of grit from every car before yours. They grind that dirt into your paint, creating a spider web of fine scratches. I never use them.
- Using the Wrong Cleaners and Tools: Old t-shirts, dish sponges, and household cleaners introduce swirls and strip protection. It is a double attack on your paint’s finish.
- Washing or Waxing in Direct Sunlight: The sun heats the panel. Soap and water dry too fast, leaving spots. Wax or sealant can bake on, making it gummy and impossible to buff off evenly.
A reader once asked me, “Does fake blood damage car paint?” Most Halloween-style fake blood is water-based and washes off easily with a quick detailer if you get to it fast. The real risk comes from formulas with strong dyes or corn syrup, which can stain or turn into a sticky, abrasive paste that scratches the paint when you wipe it. Treat it like tree sap and remove it carefully.
All of this leads to one simple idea. Putting a good sealant or wax on your car is a Sunday afternoon job. Fixing etched paint is a weekend-long correction project. Protection is always easier, and cheaper, than repair.
How to Spot the Different Types of Paint Damage
You need to know what you are looking for, and feeling for. Your eyes can see a lot. But your fingertips find the truth.
Try this. Put your hand inside a thin, clean plastic sandwich bag. Now, gently run your fingertips over a clean, dry section of your hood or door. The bag reduces friction and lets you feel every tiny bump of bonded contaminant, like tree sap or industrial fallout, that your eyes might miss. If it feels rough like sandpaper, your paint needs a clay bar treatment before you do anything else.
Swirls and Scratches
These are the marks of a bad wash. In direct sunlight, your paint will look like a web of fine, circular lines. On my black BMW, they look like a haze over the deep gloss. You can feel them as a slight roughness when you run the baggie over them. They are not deep cuts into the color, but millions of fine scars in the clear coat.
Etching
This is a stain in the paint itself. A bird dropping sits, bakes, and its acid burns a shallow crater. You will see a dull, matte patch, often with a slight outline. It feels flat and smooth to the touch, unlike the roughness of contamination, because the surface material is gone. Etching requires professional polishing to level the clear coat again, you cannot just wipe it away.
Fading and Oxidation
This is paint that has lost its fight with the sun. The clear coat breaks down, turning chalky and flat. My 1995 Miata was pink when I got it. The single-stage red paint had lost all its oils and protection. It felt chalky and dry, not slick. The color was bleached out. This requires heavy compounding to remove the dead layer and reveal the true color beneath.
Water Spots
There are two kinds. Fresh water spots from rain are usually just mineral rings you can wipe away with a detail spray. Hard water spots are the problem. They are mineral deposits that have fused to the surface. They feel like tiny bumps of concrete. If left for months, they can etch the paint just like acid. You need a specific hard water spot remover or light polish to get them off. Following a proven method to remove water spots from car paint helps restore clarity and safely return the shine without risking damage to the clear coat.
Paint Chips
This is the most direct damage. A rock hits, and you see a small speck of primer (often light grey or black) or bare metal (silver). There is no feeling for this. You see it. Left alone, especially on a hood or fender, salt and moisture will get in and start to rust the bare metal from the inside out.
A common question is about damage on different materials. The process for fixing car paint damage on a plastic panel, like a bumper, is the same as metal, but you must be more cautious. Plastic flexes. It can get hotter faster with friction from a polisher. You use less pressure. The bigger issue is that many bumpers are painted off the car with a slightly different paint blend, which can sometimes react differently to compounds. Always test in an inconspicuous spot first.
The Usual Suspects: Common Substances That Attack Your Paint
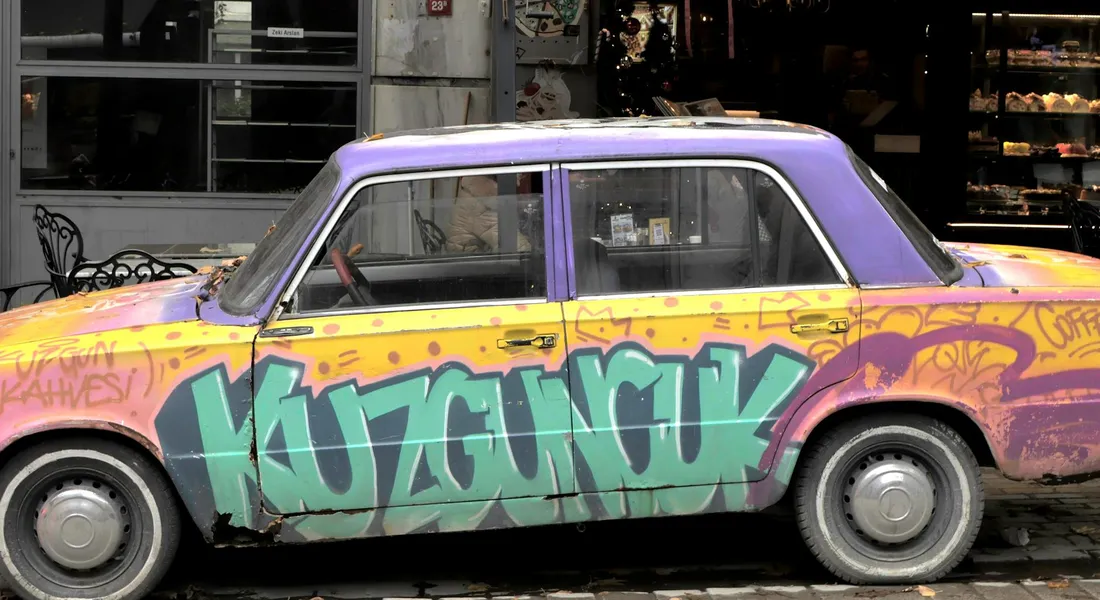
Your car’s clear coat is tough, but it is not invincible. Daily driving puts it against enemies that eat away at its shine and integrity. I group them into a few simple categories.
Biological Bombs
This is nature’s attack on your finish. Bird droppings are not just unsightly. They contain uric acid that starts etching into your clear coat the moment they land and bake in the sun. The white, chalky stain you see later is often permanent damage.
Tree sap is a sticky, sugary glue that bonds to your paint. As it hardens, it traps dirt underneath and can pull the protective layers right off if you try to peel it. Bug splatter is acidic too. On my white Tesla, after a long highway drive, the front bumper is a bug graveyard. If left for days, those splats dry into a concrete-like shell that can stain the paint beneath. Both tree sap and bug residue require careful removal.
Rule of thumb: treat bird droppings, sap, and bug guts as a “clean it now” emergency. Soak them with a dedicated bug remover or detail spray and gently wipe them away.
Road Grime & Chemicals
The road throws everything at you. Road salt is a double threat. It is highly corrosive, accelerating rust on any bare metal, and when it dries into a fine, gritty powder, it acts like sandpaper against your paint. You feel it when you run your hand over a dusty panel, especially in areas suffering road salt damage to car paint.
Brake dust is a silent killer, especially for alloy wheels. It is not just dirt. It is a mix of hot metal fragments, carbon, and adhesive resins from your brake pads. On my Porsche’s wheels, if I let it sit for a few weeks, it bonds to the surface and can become permanently embedded, requiring a heavy-duty wheel cleaner to lift it. Gasoline and oil drips will break down waxes and sealants, leaving a dull spot if not wiped up quickly.
Household & Harsh Chemicals
People reach for what is under the sink. This is a mistake. Dish soap like Dawn is a degreaser. It is fantastic for your pans because it strips away oil. On your car, it strips away the wax or sealant you worked so hard to apply, leaving the paint bare and unprotected.
Glass cleaners with ammonia can damage tint films and dry out vinyl and rubber trim, causing it to crack and fade. Abrasive cleaners, like powdered bathroom cleaners, will scratch glass and paint instantly. Even dedicated wheel acid must be used with extreme care. Spray it on a cool wheel, let it dwell for only a minute, and rinse it completely. Misuse will permanently stain or etch the finish.
Your car is not a countertop. Use products formulated for automotive surfaces. They are pH-balanced to clean without destroying your protection.
Intentional Damage
I see the searches. Let’s talk about prevention. The worst common attack is car paint damage from egging. An egg thrown at your car is not just messy. The yolk contains sulfur compounds that are highly acidic. It etches paint almost instantly upon contact, especially in the sun. The shell can cause micro-scratches as it impacts. If this happens, do not rub it. Rinse it off with copious amounts of water immediately to dilute the acid, then follow with a proper wash. Other substances like silly string, permanent marker, and even some types of paint can have similar devastating effects if not removed promptly and correctly.
You Might Be The Problem: Damaging Cleaning Methods
Good intentions can still lead to bad results. I have made every one of these mistakes myself, especially on my black BMW, which shows every single error.
Automatic Car Washes
Those spinning brushes are convenient. They are also paint killers. They are never perfectly clean. They trap sand, grit, and metal fragments from thousands of previous cars. They then drag that abrasive mix across your paint in a circular motion, creating a web of fine scratches called “swirl marks.” You usually can’t remove those even with polishing. Touchless washes are safer for your paint but often use very harsh, alkaline soaps that can degrade trim and protection over time.
The Wrong Wash Technique
Using one bucket and a single rag is the fastest way to install scratches. You dip a dirty mitt into your soapy water, grind the dirt from the previous panel into the bucket, and then reload the mitt with that now-gritty soup. You are painting with sand. Dropping your wash mitt on the ground means it is done for that day. Pick it up, toss it in the laundry, and get a fresh one.
The two-bucket method with grit guards is not a suggestion for enthusiasts; it is the absolute baseline for anyone who cares about their paint.
Drying Wrong
A terry cloth bath towel or an old chamois is too aggressive for clean paint. Their loops and texture can trap tiny, leftover specks of dust. As you drag it across the panel, you are effectively polishing your car with that grit. Use a clean, plush microfiber drying towel. Lay it flat and pull it across the surface to absorb water, minimizing friction. This is especially important if you’re trying to dry your car paint quickly without causing damage.
Improper Product Use
Aggressive products in the wrong hands cause more harm than good. Using a car paint damage rubbing compound with a powerful polisher to tackle a light scratch is like using a chainsaw for detailed wood carving. You will remove too much clear coat, leaving a hazy, dull spot. Compounds and polishes are tools for specific levels of defect. You must start with the least aggressive method first. Test in a small area.
Washing in Direct Sunlight or on a Hot Panel
Washing a hot car in the sun is a battle you will lose. The heat causes soap and water to dry almost as soon as you apply them. This leaves behind soap stains and mineral deposits from the water, which bond to the paint and are very difficult to remove. Always wash in the shade on a cool surface. Early morning or evening is best.
What Can You Actually Fix Yourself? A Repair Reality Check
Let’s be honest. Seeing a new scratch on your car feels terrible. Your first instinct might be to grab whatever is in the garage and start rubbing. I have been there. The real skill is knowing what you can handle and what will make it worse. Setting realistic expectations saves your paint and your wallet, especially when attempting DIY car scratch repairs.
The golden rule is to start with the least aggressive method and work up only if you need to.
DIY-Friendly Fixes
These are the tasks any car owner can and should learn. They are about maintenance, not major correction.
- Removing Fresh Contamination: This means things sitting on top of your clear coat. Bird droppings, tree sap, fresh tar, and industrial fallout (those tiny orange specks). For this, you need a dedicated “decontamination” step. Use a specific tar remover or iron fallout spray. I keep a bottle of isopropyl alcohol mix (diluted 1:1 with water) for sap. Spray it on, let it dwell, and gently wipe it away with a clean microfiber. The key is to not scrub abrasive grit into the paint.
- Light Polishing to Remove Water Spots or Mild Swirls: This is for defects in the very top layer. Use a mild “finishing” polish and a soft foam applicator pad by hand. Work a small 2×2 foot section. Apply gentle, consistent pressure. This can often haze out light scratches and restore gloss. It is what I do on my Ford F-150’s hood every spring to clean up winter’s fine marks.
- Applying Spray Wax or Sealant: This is the easiest win. After a good wash, a spray-on protectant adds a layer of shine and defense. Products today are incredible. Some hybrid ceramic sprays bead water for months. Mist it on, spread it thin with one microfiber, and buff it to a shine with a second, dry one. It is that simple.
Proceed with Caution
This is the next level. You need the right tools, patience, and a willingness to practice on an old panel or inconspicuous area first.
- Using a Machine Polisher (DA Polisher): A dual-action polisher is much safer than a rotary, but you can still burn through paint if you are careless. The biggest mistake is using too aggressive a pad or compound. Always start with the least cutting combination. Keep the machine moving. Let the polish and the pad do the work. My first time, I practiced on the trunk lid of a junkyard car. It was the best $50 I ever spent.
- Touch-Up Paint for Chips: The repair is often worse than the chip. The goal is to fill the chip, not paint over it. Clean the chip with alcohol. Use the brush in the bottle to apply a tiny drop of paint, just filling the void. Let it cure for days. Then, very carefully, use 3000 grit sandpaper (with lots of water) to level the blob, followed by a heavy polish to restore clarity. It takes a steady hand. Most people apply too much paint.
Leave to a Professional
Some damage goes too deep. Trying to fix these yourself often leads to a more expensive professional repair later.
- Deep Scratches to Primer or Metal: If you can catch your fingernail in the scratch, it is through the clear coat. This needs paint, not polish.
- Severe Etching: Bird droppings or acid rain that sat for weeks can eat into the clear coat. Removing this requires removing clear coat, which is a job for a polisher with experience.
- Car Paint Damage Sideswipe Repairs: Long, deep scuffs across multiple panels almost always need bodywork and respraying to match. Blending paint is an art.
- Full Paint Correction on Soft Black Paint: I own the textbook example: my 2016 BMW 3 Series. Black paint shows every flaw. Correcting it means removing swirls without adding new ones. The paint is so soft it marks if you look at it wrong. A pro has the experience and lighting to do this safely. A car paint damage appraisal from a qualified detailer or body shop is your best first step for any significant damage. They can tell you what is possible and what it might cost. Car paint damage repair cost varies wildly based on depth, location, and paint color.
Paint Damage Prevention: Your Best Defense
Chasing scratches is tiring. Preventing them is peaceful. Good habits are free armor for your paint.
Your washing technique is more important than any magic product you buy. Most scratches are inflicted during cleaning.
Washing 101: The Non-Negotiable Basics
- The Two-Bucket Method: One bucket with your soapy wash water. One bucket with clean rinse water. After you wash a section of the car with your mitt, rinse it in the clean water bucket before going back to the soap. This traps dirt and keeps it out of your wash mitt.
- Use a Grit Guard: Put these plastic gridded discs at the bottom of both buckets. They act as a trap, letting dirt settle away from your mitt.
- Proper Microfiber Mitts: Use a plush, chenille microfiber wash mitt. It holds soap and lifts dirt away from the surface. Never use a sponge or a towel that has been on the ground. I have dedicated mitts for my cars. They never touch wheels or door jambs.
The Power of Protection
Think of protection as a force field. A stronger, longer-lasting shield means contaminants have a harder time bonding to your paint.
| Protection | Duration | Best For | My Analogy |
|---|---|---|---|
| Wax (Carnauba or Synthetic) | 4-8 Weeks | Warm, deep gloss. Classic feel. | A good coat of sunscreen. It works great but needs frequent reapplication. |
| Sealant (Synthetic Polymer) | 3-6 Months | Durable beading, chemical resistance. Easy application. | A tough raincoat. Less about shine, more about long-term shedding of water and contaminants. |
| Ceramic Coating | 2-5 Years | Extreme hydrophobics, UV resistance, stain protection. Professional application recommended. | A permanent non-stick pan coating. It makes cleaning effortless and provides serious chemical resistance. |
| Paint Protection Film (PPF) | 5-10 Years | Physical scratch and chip resistance. Self-healing properties. | Clear armor. My Porsche’s front end has it. It takes the rock chips so the paint does not. |
Parking Smarts
Where you leave your car matters as much as how you wash it.
- Seek Shade: UV radiation is a slow, constant attack that fades paint and dries out trim. Park in a garage or under a cover when you can.
- Avoid Under Trees: Sap, bird droppings, and falling seeds or nuts are a triple threat. Sap is sticky and acidic. It bakes on fast.
- Use a Cover for Long-Term Storage: But only if the car is perfectly clean first. A cover over a dirty car is like sandpaper blowing in the wind.
Immediate Action Plan
Life happens. A bird will use your roof as a target. You will park under a pine tree. Have a plan.
Keep a small kit in your trunk: a spray bottle of quick detailer and a few clean, soft microfiber towels folded in a sealable bag. These items are part of essential car cleaning supplies you keep handy for quick touch-ups on the go. They help you stay on top of dirt between full washes.
- Bird Droppings/Bug Splatter: Spray the detailer generously over the spot to lubricate it and start loosening it. Let it soak for a minute. Gently blot and lift the mess away with the microfiber. Do not scrub. If it is baked on, you may need to wait until you can properly wash the car.
- Tree Sap: Use your isopropyl alcohol mix (or a dedicated sap remover). Spray it on, let it dwell for 30 seconds, and gently wipe. Repeat if needed. Follow with quick detailer to re-lubricate the area.
The faster you address a contaminant, the less chance it has to bond with and damage your clear coat. This simple habit saves countless hours of correction later.
Product Tier List: Your Arsenal for Paint Defense
Think of your paint care like building a house. You need a solid foundation before you add the fancy finishes. This tier list builds from the ground up. I built mine over years, starting with a bucket and a dream for my black BMW. Every product here serves a purpose. None of it is just for show.
Your goal is to build layers of defense that make cleaning easier and damage less likely. Choose your tier based on your time, budget, and how perfect you need your paint to be.
Budget / Essential: The Non-Negotiable Foundation
This is your survival kit. If you do nothing else, do this. My Honda Odyssey lives here most of the year. It keeps the kid-hauler presentable and protected from juice box explosions and playground dust.
- pH-Neutral Car Shampoo: This is your first line of defense. Dish soap or household cleaners strip wax and can dry out plastics and trim. A proper shampoo lifts dirt safely. I use a gallon jug that lasts me all season.
- Soft Microfiber Wash Mitts (at least two): One for the upper panels, one for the lower rockers and wheels. This prevents grinding brake dust into your paint. The chenille-style mitts are great for trapping dirt away from the surface.
- A Dedicated Drying Towel: A large, plush drying towel is not a bath towel. It soaks up water with zero dragging. Dragging a damp towel over a dusty surface is how you paint my black BMW. Pat and glide, don’t scrub.
- A Quality Spray Wax: Your quick shield. After every wash, while the car is still slightly damp, mist this on and wipe it off with a clean microfiber. It adds a layer of hydrophobic protection that beads water and makes the next wash simpler. It takes three minutes and makes a huge difference.
Safety Note: Even at this tier, wash your car on grass or gravel, not directly into a storm drain. The dirt, oils, and soaps are bad for waterways. Dump your buckets on landscaping, not the driveway.
Enthusiast / Next Level: The Correction & Enhancement Kit
You’ve mastered the wash. Now you want to remove defects and get longer-lasting protection. This is where my F-150 and Model 3 spend most of their time. You tackle problems, not just dirt.
- Iron Remover Spray: Brake dust embeds itself in your paint and melts into the clear coat. It looks like tiny orange or purple specks. This spray dissolves it. Spray it on dry, cool paint, watch it turn purple as it works, then rinse. It’s a game-changer for white and silver cars.
- Clay Bar/Lubricant Kit: Paint feels rough even after washing? That’s bonded contaminants. Claying is like giving your paint a deep shave. You gently glide the clay bar with ample lubricant. You’ll feel and hear the difference. This is mandatory prep before any polish or sealant.
- A Dual-Action Polisher & A Fine Polish: This is for removing light swirls, water spots, and oxidation. The DA polisher is safe for beginners. Pair it with a fine polish and a soft foam pad. It brought the deep blue back to my F-150’s hood. Start in an inconspicuous area. Go slow.
- A Synthetic Sealant: This is spray wax’s bigger, tougher brother. It bonds to the paint and lasts 3-6 months. It provides superior UV protection and a deeper gloss. Apply it to a perfectly clean, clayed surface. One application in the spring and fall can cover you.
Safety Note: Iron remover and polishes are chemicals. Wear nitrile gloves. Work in a shaded, well-ventilated area. Dispose of used clay bars and polish-smeared towels in a sealed bag with your regular trash. Do not rinse polish residue directly down a drain.
Show Car / Maximum Protection: The Long-Term Investment
This is for garage queens, weekend toys, or anyone who wants the ultimate shield with minimal maintenance. My 911 and the restored Miata get this treatment. The upfront work is significant, but the payoff is a surface that repels almost everything.
- Consumer-Grade Ceramic Coating Kits: This is a liquid polymer that cures onto your paint, creating a semi-permanent, ultra-hard layer. It makes washing trivial and offers incredible chemical resistance. The prep is everything: the car must be fully decontaminated, clayed, and polished to perfection first. Any defect left on the paint is locked under the coating for 2+ years.
- Paint Prep Cleansers (Panel Wipe): This is your final, critical step before coating. After polishing, you must wipe the entire car down with this to remove any leftover polishing oils or wax. It ensures a perfectly clean surface for the coating to bond. Miss this, and the coating will fail.
- Dedicated Wheel Cleaner: At this level, you protect everything. A pH-balanced wheel cleaner is gentle on coatings and clear coats but strong on brake dust. It keeps your expensive wheels pristine without etching the finishes.
- A Cordless Detailing Blower for Drying: This is the ultimate touchless dry. After a rinse, use the blower to push 90% of the water off the car. What’s left can be dabbed with your drying towel. It eliminates the chance of dragging any lingering dirt across your expensive ceramic coating.
Safety Note: Ceramic coatings require serious care during application. Wear gloves, safety glasses, and a respirator mask rated for organic vapors. Application must be done indoors, away from sun and dust. Used applicator cloths are hazardous waste; let them fully dry in a safe, outdoor area before sealing them in a bag for disposal. Proper safety practices are crucial for effective and safe ceramic coating application.
Maintaining That Showroom Shine
After correcting everything from acid rain etching on my F-150 to swirls on the black BMW, I know the best defense is a gentle, consistent wash routine with pH-neutral soap and clean microfiber. Your paint stays healthy when you remove contaminants without adding new scratches.
Ignore this, and you will pay for it later in costly paint correction to remove the scratches and stains you could have prevented.
Industry References
- What Damages Car Paint: A Definitive Breakdown | UTI
- What Substances Can Damage Car Paint
- What are the best substances that easily ruin car paint? – Quora
Max Gunther
Max is an automotive enthusiast having worked as a car mechanical and in interior detailing service for over 25 years. He is very experienced in giving your old car, a new fresh vibe. He has detailed many cars and removed very tough smells and stains from all kinds of cars and models, always ensuring that his work and advice helps his customers. He brings his first hand experience to his blog AutoDetailPedia, to help readers breath new life into their car interiors.