Do Car Scratch Removers Actually Work? A Detailer’s Guide to Products and Methods
That new scratch on your paint feels like a personal insult. You need to know if a quick fix from a bottle is a smart solution or a waste of effort.
Drawing from years of correcting everything from my swirled black BMW to my oxidized Ford truck, I will walk you through how scratch removers work, what kind of scratches they can truly fix, my top product picks for different paints, and the safe, effective method I rely on.
Get it wrong, and you can easily turn a minor flaw into a permanent, cloudy eyesore.
Key Takeaways: The Scratch Remover Cheat Sheet
Before you buy a single product, understand these five truths.
- Scratch removers only work on clear coat scratches, not deep paint cuts. If your fingernail catches in the scratch, the paint is gone and cannot be rubbed back.
- The primary goal is to level the clear coat around the scratch, not fill it. These products are mild abrasives. They shave down the high edges of the scratch trench to make it disappear.
- For light swirls and scuffs, they are very effective. This is their perfect use case. The cobweb scratches on my black BMW vanish with a good polish.
- For deep scratches, they are a cosmetic band-aid. They can polish the rough edges to reduce light scatter, making the scratch less glaring, but the groove and missing color remain.
- Proper technique is more important than the product. Using the wrong pad or too much pressure can create more damage than you started with.
Hand application is for a single, isolated scuff. Machine polishing is for an entire panel covered in swirls. Choose your tool based on the size of the problem.
Understanding Your Enemy: The Different Types of Car Scratches
Not all scratches are created equal. Your repair plan changes completely based on what layer of your paint is damaged. Think of your car’s finish like a layered cake: clear coat on top, color in the middle, primer and metal below. That awareness helps you pinpoint the right method to remove scratches and correct paint defects. Mastering this lets you target the exact defect and keep the finish pristine.
The Fingernail Test: Your Instant Diagnostic Tool
This is the single most useful trick I know. You do not need special tools.
- Wash and dry the scratched area. You need a clean surface.
- Gently run the tip of your fingernail across the scratch, not along it.
- Pay close attention. Does your nail catch, or does it glide smoothly over?
It is like running your hand over a polished wooden table versus one with a deep knife mark. Your fingernail is the probe telling you the depth.
Clear Coat Scratches (The “Good” Kind)
These look like hazy lines. In the sun, they appear as cobwebs or spiderwebs of fine marks. You often get them from automatic car washes, dirty towels, or brushing against a dusty bush. On my black BMW, they make the paint look dull and gray.
Your fingernail will not catch in a pure clear coat scratch. It glides right over. This is fantastic news.
These scratches are 100% removable with the right product and method. The scratch remover abrades the clear coat just enough to flatten the surface back to perfect smoothness. This is where scratch removers genuinely work miracles.
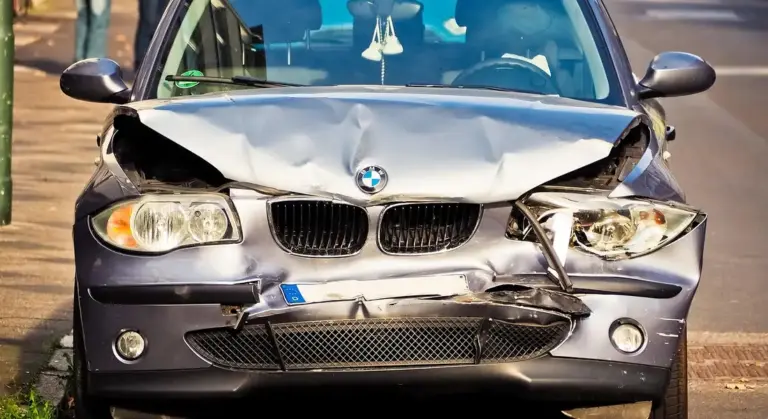
Paint and Primer Scratches (The “Bad” Kind)
These look like a distinct, colored line (you see your car’s base color) or a stark white or gray gouge (you see the primer or plastic). A shopping cart scrape, a key mark, or a deep rock chip causes this.
Your fingernail will catch, even if just slightly. That catch means the scratch is a valley, and paint is missing.
This answers the common question. Do car paint scratch removers work on deep scratches? They cannot replace missing paint. They are not magic goo. At best, you can use them to carefully polish the rough, raised edges of the scratch. This smooths the transition and can make the scratch reflect light more evenly, making it less obvious from a few feet away. It is a cosmetic improvement, not a repair. For these, you need touch-up paint to fill the void after proper cleaning.
How Scratch Removers Work: The Simple Science Behind the Bottle

Let me tell you how scratch removers really work. It is simple. The good ones use fine abrasives. These are tiny, hard particles suspended in a liquid or paste. When you rub them on the paint, they physically level the clear coat around the scratch. Imagine sanding a shallow scratch on a piece of wood. You smooth the high edges down to meet the low point. That is exactly what happens here, but on a microscopic scale.
I do this often on my Jet Black BMW 3 Series, my “Swirl Magnet.” Its dark paint shows every flaw. When I use a true polish, I am not adding magic. I am carefully removing a minuscule amount of clear coat to make the surface even again. Effective scratch removal is a permanent correction, not a cover-up, and it requires physically altering the surface.
This leads to a critical point. You must differentiate between “filling” products and true abrasive polishes. A filler is like spackle for your paint. It contains oils or soft polymers that flow into the scratch and make it less visible to the eye. It does not remove anything. A true polish uses abrasives to cut the material away. The fix is permanent until a new scratch happens.
Now, let’s address the “magic pen” myth. Do car scratch pens work? I have tested many. Most are just clear coat fillers in a convenient tube. They can mask a very shallow scratch for a week or two. Then, after a rain or a car wash, the filler washes out and the scratch reappears. If a solution seems to work with zero effort, it is almost certainly a temporary filler, not a fix. For a real repair, you need a product that abrades.
Abrasives vs. Fillers: The Permanent Fix vs. The Temporary Illusion
Contrast a true polishing compound with a “glaze” or “pre-wax cleaner.” A compound like Meguiar’s Ultimate Compound contains engineered abrasives. It actually removes clear coat. A glaze is loaded with oils. It hides defects by filling them. The compound fixes. The glaze disguises.
Fillers wash away. Proper abrasion is a lasting repair. On my Ford F-150, the “Workhorse,” I use a compound on scratches from tree branches. Those scratches are gone for good. If I used a filler, the next trip through the mud would reveal them again. A permanent repair means the scratch is gone, not just hidden from view for a few days.
You must be careful. Some products sold as “scratch removers” in stores are primarily fillers. They give you a false sense of success. You apply it, the scratch disappears, and you feel great. Then, after a few washes, your heart sinks. Always read the label. Look for words like “cutting compound,” “polish,” or “abrasive technology.” If it says “glaze,” “cleaner wax,” or “paint sealant,” it is likely a filler. Real repair often involves a rubbing compound to actually remove or reduce the scratch rather than just masking it. In the next steps, we’ll show how rubbing compound repair scratches works and when to use it.
The Role of the Clear Coat: Your Paint’s Safety Buffer
Modern car paint is a layered system. There is a colored base coat that gives the car its color. On top of that is a clear coat, a transparent layer of tough resin. This clear coat is your paint’s safety buffer. It provides the gloss and protects the color from the sun and elements. There are several automotive paint types—solid, metallic, and pearlescent finishes. Each type uses different base and clear coats to achieve its look and protection.
All safe scratch removal happens within this clear layer. You are only working on the top part. You never want to reach the colored base coat. On my Tesla Model 3, with its relatively soft clear coat, I am very mindful of this. I only polish until the scratch is gone, not a stroke more. Your goal is to remove the defect while preserving as much of the protective clear coat as possible.
The danger is cutting through the clear coat. Using overly aggressive products, like heavy-duty rubbing compound on a random orbital polisher, or using too much pressure, can burn through. Once the clear coat is gone, the base coat is exposed and will fade quickly. Repair requires a professional repaint. Always start with the least aggressive method, and test on a small, inconspicuous area first to gauge the paint’s response. My Porsche 911 taught me that gentle, controlled work preserves perfection.
The Scratch Remover Product Tier List
Not all scratches are created equal. Neither are the products that fix them. Throwing any bottle labeled “scratch remover” at your problem is a great way to waste time and money, or worse, make the damage more obvious. I sort scratch remover products into three tiers based on what they actually do and the skill needed to use them.
Think of this tier list as a map to set realistic expectations and match the right tool to your specific scratch.
Tier 1: Budget/Drive-Through Solutions
You find these on the bottom shelf at the auto parts store. They promise a lot. They are designed for one thing, speed. They are for the person who wants a five minute fix before a car show or to make a scratch less obvious from ten feet away.
This tier includes pre-mixed liquid “rubbing compounds” in a bottle, all-in-one wipe-on creams, scratch remover pens, and abrasive pads that look like magic erasers.
So, do car scratch repair kits work? The typical kit with a pen and a buffing cloth has one job. It fills and masks. The pen is often a clear coat filler or a pigmented wax that sits in the scratch to reduce its visual contrast. It does not remove paint. The included “polisher” is usually a coarse foam pad that can leave its own fine scratches, or holograms, in soft paint. On my black BMW, these kits made faint scratches look like faint, cloudy scratches. Real repair goes beyond masking. There are methods and services that can restore a pristine finish.
Do car scratch remover pens work? For a hairline scratch on a door edge, yes, they can make it nearly disappear for a short time. For anything your fingernail catches on, they are useless.
- Pros: Very cheap. Incredibly easy and fast to use. No tools needed. Good for a psychological boost.
- Cons: Provides minimal to zero actual paint correction. Most are filler-based and wash away. The abrasive ones can mar soft clear coat, creating a dull halo around the scratch. Results are temporary.
Use these for a quick touch-up on a daily driver like my Honda Odyssey, or to mask a shopping cart scuff right before you sell a car. Do not expect a permanent fix.
Tier 2: Enthusiast-Grade Polishes and Compounds
This is where real paint correction begins. We are no longer hiding defects. We are carefully removing a microscopic layer of clear coat to level the surface and eliminate the scratch. This tier is built around the dual-action polisher, the essential tool for any serious DIY detailer.
These are dedicated liquid polishes and compounds. A “compound” is more abrasive, designed to cut deeper and remove heavier defects. A “polish” is finer, used to refine the surface after compounding and remove any haze. The magic is in the system. A specific compound is paired with a specific pad. A microfiber cutting pad adds aggression. A soft foam polishing pad finishes down glossy.
I used a medium-cut compound with an orange foam pad on my Ford F-150 to remove heavy oxidation from the hood. I followed it with a fine polish on a white pad to restore the deep gloss. The scratch was gone because the surrounding paint was leveled down to its bottom.
- Pros: Offers significant and permanent correction. Delivers professional-level results. The corrected finish lasts for years. It is the foundational skill for maintaining perfect paint.
- Cons: Requires more skill and knowledge. Needs an investment in a machine polisher, pads, and products. There is a learning curve to avoid burning the paint or leaving swirls. It is a physical process.
This tier is for the dedicated DIYer ready to correct swirl marks on an entire car, or for an owner like me who maintains a garage-kept car like my Tesla. It turns a scratch into a story, not a flaw.
Tier 3: Show-Car/Pro-Level Corrective Systems
This is the pinnacle of abrasive technology. We are talking about multi-step systems with compounds and polishes of varying abrasion levels, often with dedicated “finishing” polishes that leave a flawless, high-gloss surface ready for a ceramic coating. The goal is not just to remove a scratch, but to create absolute optical clarity.
These systems often involve three or more steps. A heavy cutting compound with a wool pad for severe defects. A medium compound to refine. A fine finishing polish to remove any haze and produce a jewel-like finish. The ceramic coating prep polishes are a subset here. They are non-abrasive or minimally abrasive cleaners that strip every last bit of contaminant and old wax without leaving any oils behind, just perfectly clean paint.
Before applying ceramic coating to my Porsche, I used a two-step system. A fine compound removed any hidden swirls. A dedicated coating prep polish ensured the surface was surgically clean for maximum bond. The depth of the red was shocking.
- Pros: Delivers the ultimate in gloss and defect removal. It is the necessary preparation for top-tier paint protection like professional ceramic coatings. Can correct severe issues like sanding marks or holograms from improper buffing.
- Cons: Expensive. Very time-consuming. Requires expert technique to navigate different paint hardnesses and avoid instilling new holograms. Often overkill for a single scratch on a daily driver.
Reserve this tier for show car preparation, complete paint correction before a ceramic coating, or rescuing a finish with severe oxidation or buffer trails. This is how you make paint look wetter than water.
Machine vs. Hand Application: Choosing Your Battle Tactics
Think of your scratch removal method like choosing a tool for a job. You wouldn’t use a sledgehammer to hang a picture. You wouldn’t use a toothbrush to paint a wall. The method you pick depends entirely on the size of the problem and your goal.
Hand application is for precision. Machine application is for correction.
I learned this on my own cars. Last summer, a tree branch left a single, angry white line down the side of my blue F-150. It was deep enough to catch a fingernail, but isolated. I reached for a microfiber pad and some polish. Twenty minutes of focused work by hand made it nearly vanish.
My black BMW was a different story. The entire hood looked like a spiderweb party under the sun. Hundreds of fine swirls from improper washes. Hand correction would have taken a week and my arms would have fallen off. I broke out my dual-action polisher. In about an hour, the hood was a flawless, deep mirror. The machine conquered an area I could never fix effectively by hand.
For risk, hand polishing seems safer, but it’s tricky. Your uneven pressure can create new, shallow swirls right next to the scratch you’re fixing. A dual-action polisher, when used correctly, applies even, consistent force. It’s faster, more effective for larger areas, and when you follow the rules, it’s remarkably safe for your clear coat.
Removing Scratches by Hand: The Spot Repair Approach
This is your surgical strike toolkit. You only need a few things, but quality matters.
- A soft, foam or microfiber hand applicator pad.
- A bottle of a fine finishing polish or a dedicated “scratch remover” liquid.
- Clean, plush microfiber towels for removal.
- A good light source and your patience.
Hand work is best for what I call “offense” scratches. A shopping cart ding on a door. A key scrape near the handle. A single scratch from a bush on a fender. It’s also your only option for tight spaces a polisher can’t reach, like the narrow pillars between windows or the grooves around a door handle.
The big limitation is your own energy and consistency. Trying to polish an entire door panel by hand will lead to fatigue. Your pressure will waver. You’ll likely create a patchy, uneven finish with new micro-scratches. Reserve the hand method for spots smaller than a dollar bill.
Here is a quick preview of the hand method. First, wash and dry the area completely. Put three small dots of your product on the applicator pad. Work the product into the scratch using tight, overlapping circles with firm pressure. Keep the area small. After 30-45 seconds, wipe the residue away with a clean microfiber towel. Inspect under your light. You may need 2-3 rounds for a deeper mark.
Using a Dual-Action Polisher: The Path to Perfect Finish
This is where you graduate from spot fixes to true paint correction. The toolset is more involved, but the process becomes simpler.
- A dual-action (DA) orbital polisher. Brands like Griot’s or Porter-Cable make great beginner models.
- A selection of foam pads. Start with a cutting pad (usually orange) for compounding and a polishing pad (usually white) for finishing.
- Paint compound (more abrasive) and a finishing polish (less abrasive).
- Many clean, folded microfiber towels.
- Masking tape for protecting trim.
The DA polisher is your weapon of choice for widespread defects. The entire hood of my BMW was covered in swirls. The rear quarter panel of the Odyssey had a network of scuffs from backpacks. A machine is the only sensible way to restore a large panel to a like-new state. It’s also far more efficient for removing deeper scratches that are still within the clear coat, as the machine’s motion generates the consistent heat and friction needed to level the paint.
I always recommend a DA polisher over a rotary for beginners. A rotary spins in one constant direction and can burn through paint in a heartbeat if you’re not skilled. A DA polisher has a random orbital movement that spins and oscillates. This makes it much more forgiving. It’s very hard to burn your paint with a modern DA if you keep it moving.
Your success hinges on technique, not strength. Always prime your pad by rubbing a few drops of product into the foam. On the paint, spread your polish at low speed first. Then, use slow, overlapping passes. Let the weight of the machine do most of the work. Pushing down too hard will stall the tool and ruin the finish. Move your arm slowly across the panel. You should hear a consistent, light buffing sound. When the polish looks nearly clear, stop and wipe it off. You are not wrestling the polisher. You are guiding it.
The Step-by-Step Guide to Using Scratch Removers Correctly
Forget magic in a bottle. The real magic is in your process. Whether you’re using a compound by hand or a dual-action polisher, the core principles are the same. A good result is 90% preparation and 10% polish. I learned this the hard way on my black BMW. Rushing the prep created new scratches I then had to fix. Working in direct sun is your enemy, as heat causes products to dry too fast and can damage paint. Always work in a cool, shaded area. Have a collection of clean microfiber towels and pads ready. If you’re using a machine on older paint, a bit of dust might come up, so a simple disposable mask is a smart precaution.
Step 1: The Critical Wash and Decontamination
You cannot polish dirt. You will grind it into your paint. Start by washing the entire panel, not just the scratch, using a lubricating car shampoo and the two-bucket method. This gets rid of loose grit. Next, you must decontaminate. Run your clean hand inside a plastic baggie over the wet surface. If it feels gritty, you need to clay.
Clay bars glide over the paint, pulling out embedded particles like brake dust, industrial fallout, and tree sap that washing misses. Skipping the clay bar step means you will drag those bonded contaminants across your paint like sandpaper during polishing. What begins as a shallow surface scratch can easily become a deep, permanent gouge. Use a dedicated clay lubricant and knead the clay frequently to expose a clean surface.
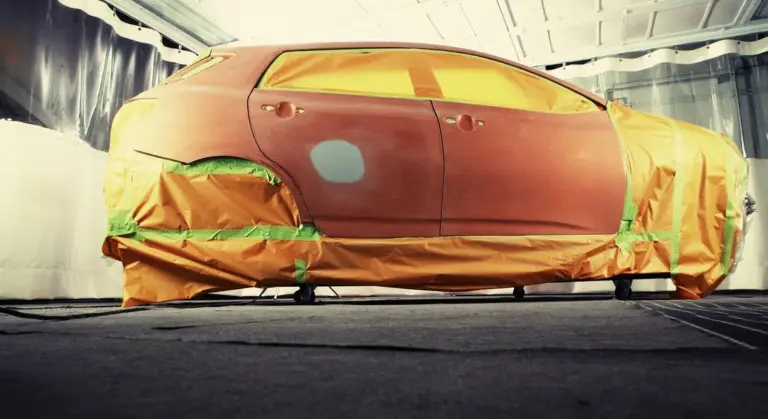
Step 2: Tape and Isolate the Work Area
Reach for the blue painter’s tape. It’s a detailer’s best friend for isolation work. Carefully tape off any trim, rubber seals, plastic moldings, or badges adjacent to your scratch. On my Porsche, I tape the black trim around the windows and the edges of the PPF.
This serves two vital purposes. First, it prevents polish or compound from staining porous trim, which is very difficult to clean. Second, it creates a physical barrier so your polishing pad doesn’t catch the edge of a sharp body line or trim piece. On sharp edges and ridges, the clear coat is thinnest, and it’s terrifyingly easy to burn right through it with a machine. The tape acts as a bumper, protecting those vulnerable spots.
Step 3: Apply Product and Work the Surface
The approach here splits based on your tool, but the goal is identical: use the abrasive product to slowly level the clear coat down to the bottom of the scratch.
For Hand Application:
Fold a clean, soft microfiber towel into a small pad or use a hand-applicator foam pad. Put a few dots of product directly onto the scratch line. Using moderate pressure, rub the product in a straight line along the length of the scratch. Use short, controlled back-and-forth strokes.
Your arm will get tired. That’s normal. The key is to stop every 15-20 seconds, wipe the area clean with a different towel, and check your progress under good light. Hand correction requires immense patience; you are removing a microscopic amount of clear coat with each pass. If you press too hard or go too fast, you’ll just make the area hazy without fixing the scratch.
For Machine Application:
I use a dual-action polisher for 95% of my correction work. Start with a clean polishing pad. Prime it by putting a few dots of product on the pad and smearing it onto the paint in a cross pattern with the machine off. Then, turn the speed to the lowest setting (usually 1 or 2) and spread the product over a section no larger than two feet by two feet.
Increase the speed to between 4 and 5. Use slow, overlapping passes, moving the machine about one inch per second. Let the weight of the machine and the oscillation of the pad do the cutting. The most common mistake is moving the machine too fast; you need to give the abrasives time to work. Keep the pad flat to avoid creating holograms, especially on dark paint like my BMW’s.
Step 4: Wipe and Inspect Your Progress
Take a fresh, plush microfiber towel. Lightly mist it with a quick detailer or distilled water for lubrication. Wipe the polished area using a flicking motion to lift the residue, rather than grinding it in. Now, inspect.
This is where a bright LED work light is worth its weight in gold. Angle the light across the paint. Can you still see the scratch? Has it faded? Is it gone but left a hazy footprint? Proper inspection under angled light tells you everything; ambient garage light lies. If the scratch is gone but the spot looks dull, you need to follow your compound with a finer finishing polish on a softer pad to restore perfect clarity.
Step 5: The Non-Negotiable Final Step: Protection
Polishing, by its very nature, strips away every layer of protection on your paint. You are left with bare, clean clear coat that is exposed to the elements. Leaving it unprotected is like taking a shower and then putting on dirty clothes.
You must apply protection immediately after your final wipe-down. For a small, hand-corrected spot, a quality spray wax is perfect. For a larger machine-polished panel, I reach for a sealant or a ceramic spray. On my daily drivers like the F-150, I use a robust synthetic sealant. For the Porsche’s pristine paint, I prefer the slickness and durability of a ceramic spray coating.
This final layer is what locks in your hard work, shields the fresh surface from UV rays and contaminants, and makes future cleaning easier. Apply it according to the product directions, and your corrected paint will stay looking sharp for months to come.
Common Pitfalls and What Scratch Removers Can’t Fix
Scratch removers are not magic. Their effectiveness stops the moment a scratch penetrates through the clear coat and into the color layer or primer. You must set realistic expectations, or you will waste time and make the damage look worse.
These products fail on several common issues. They cannot fix a scratch where you see a different color underneath, like the gray of primer or the silver flash of bare metal on my F-150’s bumper. They are useless on scratches that catch your fingernail. They will not repair chips, cracks, or scratches on plastic trim. User error is a big factor, too. Using too much product, pressing too hard, or working on a dirty surface just grinds contaminants into the paint, creating more scratches.
The “Magic Pen” Mirage and Other Gimmicks
I have bought those pens from the auto parts store. You know the ones. They promise to match any color. In reality, most are just a bottle of clear coat resin with a little tint. They do not repair. They fill.
So, do magic pens for car scratches work? For a few days, maybe. They can mask a shallow scratch from ten feet away by filling the gap with that resin. Then you wash the car. The pressure washer blasts it out. Or the sun heats it, and it shrinks, becoming a visible, glossy trench in your paint. It looks terrible up close. This is a temporary, cosmetic trick, not a correction. Similar to using a magic eraser for car paint, it can even cause more harm than good.
When the Scratch is Too Deep: The Touch-Up Paint Reality
The point of no return is visual. If the scratch shows a distinct, different color layer, it is too deep for any polish or remover. On my black BMW, a deep scratch shows white (primer). On the red Miata’s single-stage paint, a deep scratch might look lighter red or pink where the pigment is gone.
A scratch remover cannot add material. Touch-up paint does. The correct process is meticulous. First, clean the area with isopropyl alcohol to remove wax and grease. Apply the factory-matched touch-up paint in two or three whisper-thin layers, letting each dry for an hour. Let it cure fully for a week. Then, you can carefully level the raised paint blob with a very fine polish, like a finishing compound on a soft pad. This is a repair, not a cover-up.
Avoiding “Holograms” and “Buffer Trails”
Sometimes, the “fix” looks worse. Holograms, also called buffer trails, are a web of ultra-fine, circular scratches. They are new damage, inflicted by improper polishing with a cheap product, a dirty pad, or incorrect technique.
They are the curse of dark paint. My Jet Black BMW shows every single one. They look like oily swirls under fluorescent lights or direct sun. They happen when the abrasive in the product is too harsh or broken down, or when a pad caked with old polish acts like sandpaper.
To remove holograms, you must polish again, but correctly. Use a dedicated finishing polish with super-fine abrasives and a perfectly clean, soft foam pad. Work a small section, apply almost no pressure, and buff the area until the polish is nearly clear. Wipe it off and inspect in sunlight. This refines the finish to a true, deep gloss.
Keeping Scratches at Bay: Maintenance After the Repair
You just worked hard to get those scratches out. Your paint feels like glass again. Now, the real job begins. A freshly corrected finish is clean and soft, and it will show new defects faster than ever. This is not a reason to worry. It is a reason to build better habits. I keep my Swirl Magnet BMW looking sharp with a few simple routines. You can do this too, especially if you know how to cut and polish paint properly.
Wash Technique is Everything
How you wash your car is the single biggest factor in keeping it scratch free. One bad wash can undo hours of careful polishing. The goal is to get the car clean without letting any dirt grind against the paint. That starts with your tools and your method.
I still use the two bucket method on every single car I own, even the daily drivers. You need one bucket with your soapy wash water, and a second bucket filled with clean rinse water. Put grit guards in the bottom of both buckets. Every time you finish wiping a section of the car, you dunk your wash mitt into the rinse bucket first. You swish it against the grit guard to trap the dirt you just picked up in the bottom of the bucket. Then, you go back to your soap bucket for more clean suds. This keeps your washing tool clean.
For the tool itself, use a soft microfiber wash mitt. I never use a sponge or a brush from the hardware store on my paint. A good mitt has long, soft fibers that lift and hold dirt away from the surface. It is gentle. After washing, drying is critical. Hard water leaves spots. I dry my cars with a large, plush microfiber drying towel. I lay it flat on a panel and gently pull it across to soak up the water. I never scrub or wipe hard. I keep a second, smaller towel just for the wheels and door jambs so I never cross contaminate my clean paint.
Choosing the Right Protection for Your Lifestyle
A layer of protection is like a thin, sacrificial shield for your clear coat. It makes it harder for light scratches to dig in and it makes washing safer. The best product depends on how you use your car.
For my F 150 workhorse or the family Odyssey, I use a durable spray sealant. These are incredibly easy. You spray them onto a cool, dry panel after a wash, wipe them in with one microfiber towel, and buff off any haze with a second, dry towel. A good one will last three to six months, shed water beautifully, and add a nice shine. They are perfect for a car that lives outside and sees regular use.
For my garage kept Porsche, I invested in a professional grade ceramic coating. This is a liquid polymer that bonds to the paint and cures into an extremely hard, slick layer. It can last for years. It offers the ultimate protection against contaminants and makes washing a breeze. If you’re considering long-term paint protection, ceramic coatings are a popular choice. They’re designed to preserve color, gloss, and ease of maintenance. A coating does not make your car scratch proof, but it gives the clear coat a much harder first line of defense.
No matter what you choose, maintenance is non negotiable. Even on a ceramic coated car, I use a spray detailer or a quick ceramic topper every few months. This refreshes the slickness and fills any microscopic gaps. Think of it like putting a fresh coat of wax on top of a sealed floor. It keeps everything working as it should and makes your initial repair work last for years, not just months.
Final Thoughts on Scratch Removal
From detailing my Jet Black BMW, the ‘Swirl Magnet,’ I learned the most important rule: always match the product to the scratch depth. Start with a light polish for surface marks, and only use compound if your fingernail catches on the defect.
Ignore this, and you will likely burn through your clear coat, leaving a cloudy patch that requires professional correction.
References & External Links
- Not All Scratch Removers Work-These Are the Ones That Smoothed Out the Scrapes on Our Car
- The Best Car Scratch Removers of 2024 | GearJunkie Tested
- Car Scratch Remover
- 4 Best Car Scratch Removers of 2025, Tested by Experts
Max is an automotive enthusiast having worked as a car mechanical and in interior detailing service for over 25 years. He is very experienced in giving your old car, a new fresh vibe. He has detailed many cars and removed very tough smells and stains from all kinds of cars and models, always ensuring that his work and advice helps his customers. He brings his first hand experience to his blog AutoDetailPedia, to help readers breath new life into their car interiors.