How Do You Remove Paint Spots, Marks, and Stains from Car Paintwork?
You just found a weird blotch on your fender. It feels rough, looks out of place, and a simple wash did nothing to remove it.
I will teach you how to diagnose and eliminate these eyesores using techniques proven on my own vehicles. We will cover identifying the type of stain, selecting the correct chemical remover, using a detailing clay bar, polishing out residual marks, and protecting the paint afterward.
If you scrub or use the wrong product, you will scratch your clear coat and make the problem much worse.
Key Takeaways: Your Quick Start Guide
Think of this as your roadside checklist before you start.
The core method is to always wash the area first, identify the stain correctly, use a targeted remover, then clay the paint, polish if the stain etched in, and finally protect the surface.
This is not a race. The difficulty is moderate, but rushing will cause scratches or make the problem worse. Some stains, like deep etching from bird droppings baked in the sun, may require a professional with a polisher to fix.
The single most important rule is to test any chemical or method in a hidden area first, like inside a door jam or under the trunk lid. This tells you if the product is safe for your car’s specific finish.
What Exactly Are You Dealing With? Identifying Paint Contaminants
You need to know your enemy. A spot is usually something sitting on top, like a water spot or fresh sap. A mark is often a transfer, like a rubber scuff from a shopping cart. A stain means it has changed the paint’s color or texture, like an etched shadow.
Your eyes and fingers are your best tools. After a good wash, try the plastic baggie test. Put your hand inside a thin, clean plastic bag and glide your fingertips over the clean, wet paint. You will feel every tiny piece of grit. That roughness means contaminants are embedded.
I group common problems into three categories. Organic includes tree sap, bird droppings, and berry stains. Industrial covers things like road tar, paint overspray, and gasoline drips. Environmental is hard water spots, iron fallout from brake dust, and road salt residue.
People often ask what a paint stain looks like. It often looks like a shadow or a permanent watermark you cannot wipe away. To identify a car paint stain, look for a color change and a change in texture, from smooth to cloudy or rough.
The “Feel” Test: Is It On the Paint or In It?
This test changes everything. Run your fingernail gently over the spot. If it catches, it’s sitting on the surface. This is good news. Raised, sticky spots like sap or tar are on top. Dull, rough spots that feel like sandpaper, often from rail dust, are embedded in the pores of the clear coat. Cloudy, etched spots that look milky, like from water or old bird poop, are actually damage in the clear coat itself.
Tree sap feels like a hard drop of glue. Iron fallout feels like fine grit or sandpaper stuck to the door. My black BMW, the Swirl Magnet, shows this perfectly. Its hood felt like 80-grit sandpaper from brake dust before I decontaminated it.
Organic Stains: Sap, Berries, and Bird Bombs
These are the sticky, acidic enemies. They start as a gooey mess and harden into a cement-like blob. The sun heats them up, and their acids start eating into your clear coat very quickly. A fresh dropping can etch paint in under an hour on a hot day.
Knowing how to get berry stains off car paint is a perfect example. The sugary juice dries and bonds. You need a solvent that breaks down sugar, not just soap. I learned this the hard way on my Miata parked under a mulberry tree.
Industrial and Chemical Stains: Tar, Overspray, and Gas
This is the dirty, gritty stuff. Tar is petroleum-based and melts onto hot paint. Overspray is tiny droplets of foreign paint that land on your car. Gasoline is a harsh solvent that can strip wax and dull paint if left on.
If you need to know how to clean gasoline off car paint, speed is your friend. Do not let it evaporate on the surface. Flush it immediately with detailer spray or a quick wash. My F-150’s filler neck gets drips, and I never let them sit.
Gathering Your Arsenal: Tools and Chemicals for the Job
You cannot fight paint stains with whatever is under the sink. You need the right tools, like a surgeon needs a scalpel. I keep a specific kit ready, a lesson learned from fixing swirls on my black BMW after using a rough towel. Having the correct items turns a frustrating job into a straightforward clean up.
Microfiber and Machine Specs
Your towels matter more than you think. Use microfiber towels with a density of 350 to 500 GSM for wiping off stains and buffing products; this weight safely absorbs and lifts without scratching the finish. I reserve my 500 GSM towels for final buffing on my Porsche, and use lighter 200 GSM ones for applying removers to my Ford truck.
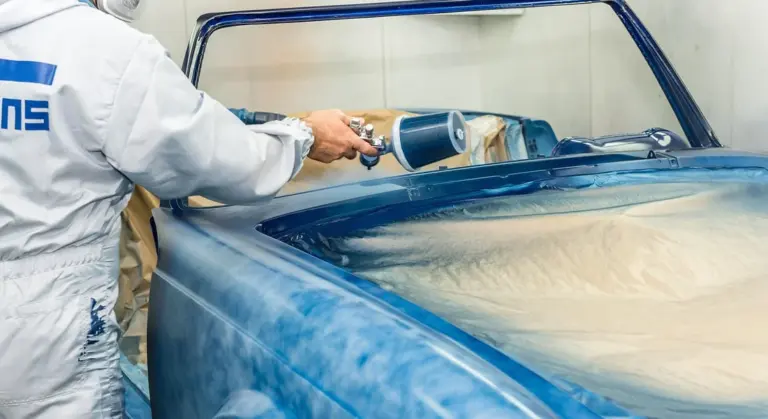
A good polisher is for the corrective work after a stain is lifted. A dual-action polisher with a 15mm throw is ideal because it safely breaks down minor defects without the heat risk of a rotary tool. I used mine to restore the single-stage paint on my Miata after removing years of oxidized stains.
Never skip the wash bucket setup. You must use two buckets, both with Grit Guards sitting at the bottom, to trap dirt and prevent it from scratching your paint during the initial clean. This simple step saved the hood on my Honda Odyssey when removing a dried juice stain.
Chemical Shelf: pH and Purpose
Begin every job with a pH-neutral car shampoo. It cleans thoroughly without damaging existing sealants or the paint itself. I use it on my Tesla’s flat front bumper to safely clear bug residue before tackling any stains.
For specific stains, you need targeted chemicals. Think of these as your car paint stain remover sprays. A solvent-based tar remover will dissolve sticky, black road tar, while an acidic iron fallout remover will react with and dissolve tiny metallic particles embedded in the paint. On my BMW’s wheels, the iron remover turns brake dust stains purple as it works.
Water spot removers are mild acids that dissolve hard water minerals. You also need a dedicated clay lubricant or diluted shampoo to safely glide a clay bar over the surface. After using any chemical, I do a final wipe with a 10% to 20% isopropyl alcohol solution. This IPA wipe eliminates chemical residues and reveals a truly clean surface. Always finish by applying a paint sealant or wax. On my daily drivers, I use a spray wax for quick protection after stain removal.
A Note on “Miracle” Sprays
Online, you will see questions like “can Caro White remove dark spots” or “does Magnilife Dark Spot Care really work” on car paint. You should be very skeptical of any product not formulated for automotive clear coats, as they can contain abrasives or solvents that cause permanent haze or damage. I tested a household “magic” spray on an old panel, and it dulled the finish instantly. Always choose chemicals made for cars.
The Safe Removal Process: A Step by Step Method
Rushing at a spot with a rag and whatever cleaner is under the sink is a recipe for swirls. I follow a universal sequence every time. This method isolates the problem, removes it safely, and leaves the paint smoother than before you started. On my jet black BMW, the ultimate swirl magnet, this discipline is the only thing that keeps it looking deep and reflective.
Step 1: The Gentle Wash
You must always start with a clean surface. Grit trapped under your towel or applicator will scratch a long line instead of removing a small spot. I wash the entire car, or at least the full panel, using a pH neutral shampoo in a two bucket system. This lifts away loose dirt without stripping existing wax. On my F 150 after a muddy job, this step is non negotiable. Dry the area thoroughly with a clean, high GSM plush towel. You need a perfectly clean, dry canvas to work on.
Step 2: Isolate and Identify
Now, get close. Use a bright LED work light or pull the car into direct sunlight. Look at the spot from different angles. Is it sitting on top? Is it etched in? Does it have a texture? Correct identification from the previous section dictates your next move and prevents you from using the wrong, potentially damaging, chemical. What looks like a water spot might be a chip. What feels like sap might be paint overspray. Take thirty seconds to figure it out.
Step 3: Apply a Targeted Remover
This is where you fight the specific stain. For a tar blob on my truck’s rocker panel, I use a dedicated tar remover. For a bug splatter stain on my Tesla’s bumper, I use a citrus based bug remover. Here is a critical technique: spray the product onto a small microfiber applicator pad, not directly onto the paint. This controls the spread and prevents the chemical from running onto unaffected areas or trim. Press the soaked pad onto the spot and let it dwell for the time listed on the bottle. The product needs time to soften and dissolve the contaminant. Gently wipe the area. You may need to repeat this process two or three times for stubborn deposits. Never scrub aggressively.
Step 4: Clay the Surface
After the stain is gone, you are not finished. The chemical remover often leaves behind a slight residue or loosens other bonded contaminants you could not see. This is where a clay bar or synthetic clay mitt comes in. Using ample clay lubricant, gently glide the clay over the entire panel. You will feel it grabbing microscopic particles. Claying is the final decontamination step that makes the paint feel perfectly smooth like glass. It is also the definitive answer to a common question: will clay bar remove paint overspray? Yes, absolutely. It is the primary and safest method for lifting those fine paint dots off your clear coat. On my Porsche with its expensive paint protection film, I use a very gentle synthetic clay to avoid any marring.
Step 5: Polish to Restore Clarity
Some marks, like hard water etching or light sap stains, leave a ghosted shadow or haze even after removal. The contaminant is gone, but it has dulled the clear coat. To restore perfect clarity, you need to polish. I use a dual action polisher with a soft foam pad and a fine finishing compound. This gently abrades the very top layer of clear coat, leveling out the microscopic etching. On my Tesla with its notoriously soft clear coat, I use an ultra mild polish and keep the polisher moving quickly to avoid generating too much heat. For my older Miata’s single stage paint, I use an even gentler hand. If no etching remains after claying, you can skip this step.
Step 6: Protect the Clean Surface
You have just washed, chemically treated, clayed, and possibly polished the paint. That area is now completely bare and vulnerable. You must apply protection immediately. I keep a bottle of spray wax or sealant in my detailing cart for this exact moment. A quick spritz and wipe over the panel locks in that clean, smooth surface. On my daily driver Honda Odyssey, this step is what keeps the next juice box spill or bird dropping from bonding directly to the paint. It is the final, essential seal on your work.
Tackling Specific Stains: From Tree Sap to Gasoline
Every stain tells a story. I have found tree sap on my F-150, road tar on the Odyssey, and bird bombs on the BMW more times than I can count. The key is knowing your enemy. You match the solvent to the stain. Rushing or using the wrong tool can turn a simple cleanup into a paint correction job.
Tree Sap and Berry Stains
Parking under a pine tree for shade seems smart. Until you see the damage. Tree sap on my F-150’s dark blue hood looked like amber droplets and felt like sticky rock candy the next morning. If it hardens, it bonds to the clear coat.
You must soften sap before you try to remove it. Never pick or scrape with a fingernail or razor blade. You will scratch the paint. This same approach helps with tree sap and bug residue on the exterior. We’ll cover the best methods to remove tree sap and bug residue in the next steps.
- Spray a high-percentage isopropyl alcohol (70% or higher) or a dedicated automotive sap remover onto a clean microfiber pad.
- Dab and hold the soaked pad over the sap spot for 30 seconds to dissolve it.
- Gently wipe the area. It may take a few passes. Follow up with car wash soap and water.
Prevention is simple. Park away from trees if you can. Keep a bottle of quick detailer in your trunk. If you see fresh sap, spray the quick detailer on it and glide it off with a plush microfiber towel. The lubricants in the spray prevent scratching.
Tar, Asphalt, and Road Grime
Fresh road tar is a black, gummy nightmare. It smears if you rub it dry. A dedicated tar remover is a gentle solvent designed for car paint. It breaks down the tar so you can wipe it away.
- Apply the tar remover to a microfiber applicator or the stained area itself.
- Let it dwell for a minute to break the tar down. Watch it start to dissolve.
- Wipe gently with a fresh, clean side of the towel. You will often need two or three applications for thick spots.
People often ask if tar remover works on tree sap. Usually, yes, because both are solvent-based cleaners. But for sap that has baked on for weeks, a sap-specific remover is formulated to be more effective. I keep both in my kit.
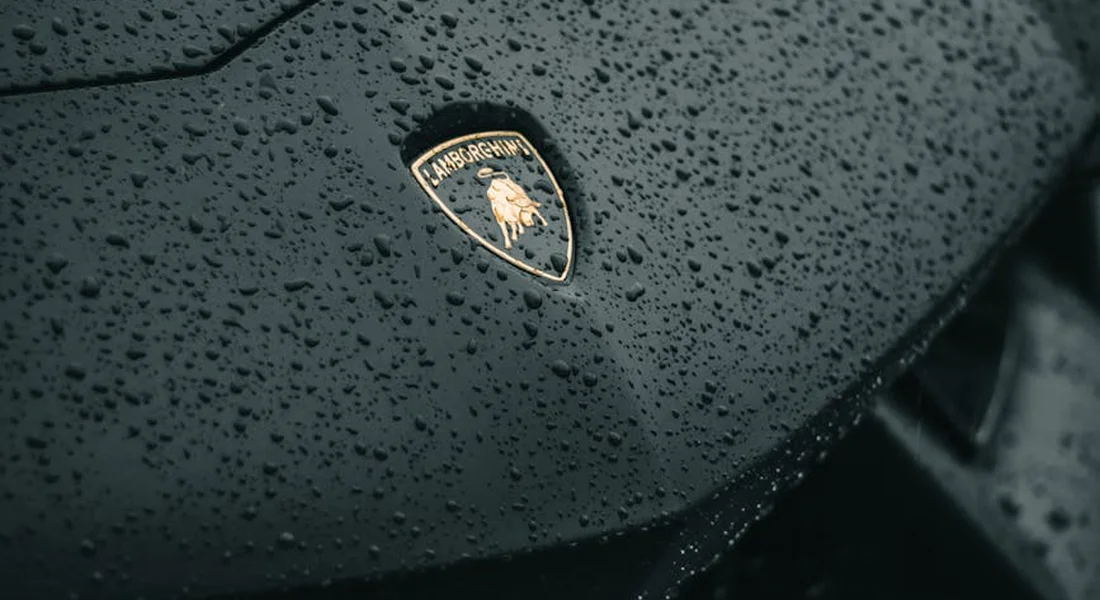
Bird Droppings and Insect Remains
This is an emergency clean-up. The acidity in bird droppings is severe. On a hot, sunny day, it can etch into your clear coat in a few hours. My black BMW is proof. A white, cloudy stain was left behind after a lazy weekend.
Will bird poop ruin car paint? Yes, absolutely, and faster than you think.
- As soon as you can, soak the dropping with a wet microfiber towel. Let the water soften it for a few minutes.
- Gently lift the mess away. Do not scrub. Rinse the area well.
- If a dull, etched stain remains, the clear coat is damaged. You will need a light polish to level the surface and restore clarity.
For bug splatter on the Tesla’s flat front bumper, I use the same soak-and-lift method during a wash. A dedicated bug remover spray can help dissolve the remains before washing.
Paint Overspray and Industrial Fallout
Overspray happens when someone paints a fence or a building nearby. Industrial fallout is microscopic particles from trains and factories that land on your car. They embed in the paint. Run your hand over a clean panel. If it feels like fine grit or sandpaper, you have contaminants.
A clay bar is your first and best tool for this job. It physically pulls the embedded particles from the paint.
- Wash and dry the car thoroughly. Use a dedicated clay lubricant or a diluted quick detailer spray.
- Flatten a piece of detailing clay in your hand and glide it back and forth over a small section. You will hear a light scraping sound.
- For heavy overspray, claying might not get it all. A mild polishing compound with a machine polisher will be needed to remove the final film.
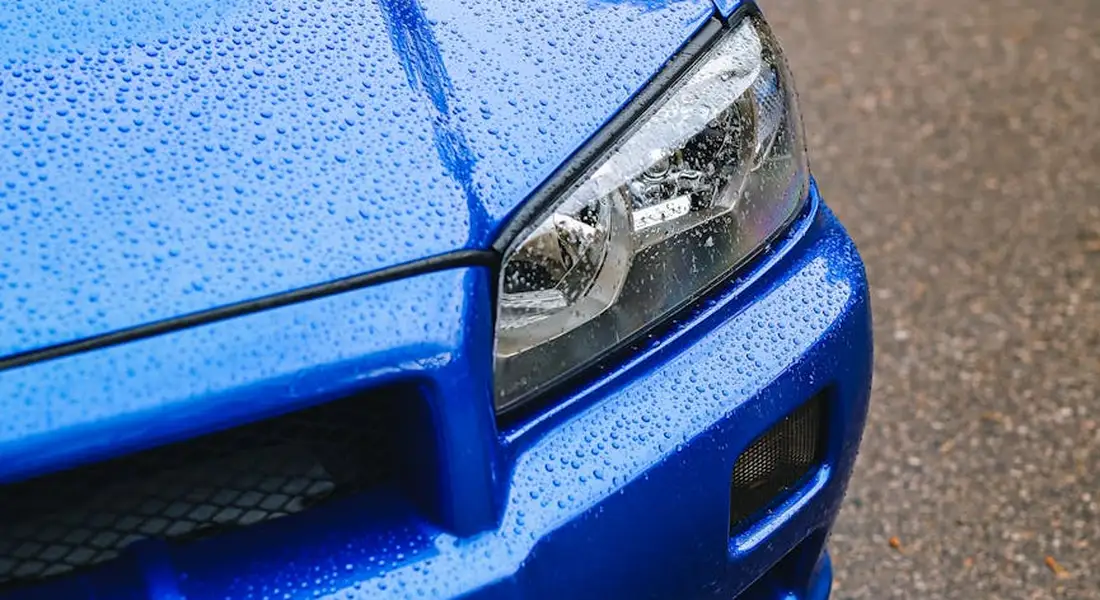
Water Spots and Hard Water Stains
There are two kinds. Fresh water spots are mineral deposits sitting on top. Old, baked-on stains are minerals that have etched into the clear coat. The white Tesla shows every single one.
- For fresh spots, use a dedicated water spot remover. Spray it on, let it work for the time listed on the bottle, then rinse or wipe away.
- For etched spots that remain after a remover, you must polish them out. The stain is now physical damage to the clear coat.
Prevention changes the game. Dry your car completely after every wash with clean, absorbent drying towels. For the ultimate defense, use a deionized water filter for your final rinse. The water sheets off with zero spots. I use one on my final rinse for the Porsche and it is worth every penny.
Gasoline, Oil, and Fluid Stains
Drips happen at the gas pump. Brake fluid or oil can leak from another car. These fluids can soften or stain clear coat if left alone.
Clean gasoline spills immediately in a well-ventilated area away from any ignition source.
- Wipe the spill instantly with a quick detailer spray on a microfiber. The lubricants help lift the fluid without rubbing it in.
- If a slight stain or oily film remains, use a grease-cutting automotive cleaner (an all-purpose cleaner diluted for paint). Spray, agitate gently with a soft brush, and rinse.
Rubber Marks and Scuffs
These are common on bumper corners and rocker panels. They come from tire rubs in a tight parking spot or a shopping cart scrape. The black marks are often just transferred material, not removed paint.
- Spray an all-purpose cleaner or isopropyl alcohol on a microfiber towel.
- Firmly wipe the mark. It should transfer to your towel.
- If the paint underneath looks scratched or marred, the mark may have cut through. A light polish can often remove these shallow defects.
Metal Contaminants and Rail Dust
This is a sneaky one. Tiny iron particles from train brakes or industrial areas land on your car and rust. They look like tiny orange or brown specks, often concentrated on horizontal surfaces and wheels. My F-150’s wheels get covered in this.
An iron fallout remover is a chemical that dissolves these particles. You spray it on cool, clean paint, watch it turn purple as it reacts with the iron, then rinse it away. Always follow the iron remover with a clay bar treatment and a full wash to get any leftover bits.
What About Stains on Other Materials?
People search for ways to get paint stains out of clothes. Automotive paint is a hard, cured surface, completely different from fabric. A stain on your car’s paint is something that has landed on it and bonded to it. When removing stains from car paint, use products formulated for automotive finishes. This protects the clear coat while effectively removing residue. A stain on fabric is something that has soaked into the fibers. The methods are not interchangeable. Automotive solvents can ruin cloth seats or your jeans. Always use products designed for the specific material you are cleaning.
Avoiding Disaster: Common Mistakes and Paint Damage Prevention
You have the right product. You have the will to clean. But one wrong move can turn a simple spot removal into a full day of paint correction on my black BMW. These are the top errors I see, even from enthusiastic detailers. Preventing these mistakes is more important than knowing how to fix the stain itself. A final safety note: always follow your local regulations for chemical waste disposal. For example, a search for “car paint stain disposal Minnesota” shows specific state guidelines for rinsate and used towels.
Mistake 1: Using the Wrong Tool as a Scraper
Panic sets in when you see a blob of tree sap or a paint overspray dot. Your brain says “scrape it.” Your hand reaches for a razor blade, a credit card, or even your fingernail. This is how clear coat gets a deep, permanent scratch. The clear coat on your car is softer than you think. Your only scraping tool for paint should be a dedicated detailing clay bar or synthetic clay towel, used with ample lubricant. For thick deposits, soften them first with the appropriate solvent, then gently wipe. If it won’t budge, it’s time for a professional, not a hardware store tool.
Mistake 2: Letting Stains Bake In the Sun
I made this mistake early on with my Ford F-150. A bird dropping sat in the summer sun for an afternoon. By the time I got to it, it had etched a permanent mark into the clear coat. Heat is your enemy. It cooks organic stains into the paint and causes chemical removers to flash off too fast, leaving them to dry and potentially damage the finish. Always work in the shade, a garage, or in the early morning. If you find a fresh stain under the sun, gently rinse it with water to neutralize it until you can perform the full removal process in a cool spot.
Mistake 3: Scrubbing a Dry Surface
This is the quickest way to add swirl marks. You see a watermark, a light sap spot, or some road tar. You take a dry microfiber towel and rub. That tiny bit of grit on the surface, or even the hardened contaminant itself, now acts like sandpaper under your pressure. Lubrication is non-negotiable, whether it’s a dedicated detail spray, car shampoo suds, or the remover product itself. The lubricant suspends the contaminant and allows your towel or clay to glide, lifting the mark away without grinding it into the paint. A dry surface is a scratch waiting to happen.
Mistake 4: Using Household Cleaners
Dish soap is for plates. Laundry detergent is for clothes. A magic eraser is a fine-grade sanding block. Using these on your car’s paint is a slow-motion disaster. They strip every bit of protective wax and sealant. Many are far too alkaline or abrasive for automotive clear coat. They create a dull, lifeless finish and make the paint more vulnerable to every environmental attack. Stick to pH-balanced car wash soap and dedicated automotive chemical cleaners. Your paint’s gloss and longevity depend on it.
Mistake 5: Neglecting to Protect Afterwards
You successfully removed the tree sap or the industrial overspray. You even clayed the area. You are done, right? Wrong. That spot of paint is now completely bare. The cleaning process, especially claying or using a solvent-based remover, has stripped all protection. Leaving that area unprotected is an invitation for new stains, water spots, and UV damage to take hold immediately. Always follow a successful decontamination with an application of your preferred protectant. A spray wax, paint sealant, or ceramic coating will reseal the surface. This final step locks in your hard work—not to mention it’s especially important after you remove tree sap from your car paint.
When DIY Isn’t Enough: Considering Professional Help
I love fixing things myself. But with car paint, there comes a point where calling a professional is the smartest move. I’ve learned this the hard way on my own vehicles. Here are the clear signs it’s time to pick up the phone.
- Deep chemical etching into the clear coat is a major red flag. If a stain feels rough or looks dull and cloudy even after you’ve clayed and polished the area, the contaminant has likely eaten into the paint. On my jet black BMW, I’ve seen bird droppings etch permanent rings after just a few hours in the sun.
- Large areas of overspray demand professional attention. If your entire car is dusted with fine paint particles from construction or a nearby painting job, correcting it yourself is a massive undertaking.
- Stains on delicate wraps or Paint Protection Film (PPF) need a specialist’s touch. Aggressive cleaners can ruin these surfaces. The matte wrap on my Tesla or the PPF on my Porsche requires specific, gentle products and techniques.
- If you’re simply uncomfortable with polishing, stop. Using a machine polisher incorrectly can burn your paint or create swirls. There’s no shame in hiring out a job that makes you nervous.
Let’s tackle two questions I hear all the time.
Where do I go if my car has paint stains? Your best bet is a reputable detailing shop, not a body shop. Detailers specialize in paint correction and surface care. Body shops focus on collision repair and repainting, which is often unnecessary and more expensive for stain removal.
Is paint on car repairs covered by insurance? Typically, no. Insurance usually covers damage from specific incidents like vandalism or accidents. Environmental staining from tree sap, hard water, or industrial fallout is considered maintenance and isn’t covered by your policy. To protect your car paint from environmental damage, consider protective coatings and mindful cleaning. These steps help guard against sap, hard water spots, and fallout.
Scenario: The Etched Water Spot
You see a white, chalky ring on your hood. You’ve used a water spot remover, clay barred it, and even tried polishing by hand. The spot remains. This means the mineral deposits have dissolved into the clear coat itself.
When hand polishing fails, a professional with a rotary or forced rotation polisher is the best solution. They use more aggressive compounds and pads to safely level the clear coat and remove the etching. This is especially true for hard clear coats, like the one on my red Porsche. Its paint is notoriously tough and requires professional-grade machines and skill to correct without causing holograms or burns.
Scenario: Full Car Overspray
Your car feels like it’s covered in fine sandpaper. This is overspray. It sticks to every panel, window, and trim piece.
A professional clay bar and multi-step polish is often more time and cost-effective than doing it yourself. Removing overspray means claying the entire vehicle, then compounding and polishing to restore the gloss. For a job this big, a pro shop has the team, the lights, and the high-speed tools to do it efficiently. When my blue F-150 got coated in dust from a road project, I called for help. The cost saved me an entire weekend of backbreaking work.
Keeping It Clean: How to Prevent Future Stains
Fixing a stain is one thing. Stopping the next one is where real satisfaction lives. This is about long term care. It turns a frantic cleanup into a simple wipe down.
I think of my Honda Odyssey, the kid hauler. Juice boxes explode against the sliding door. Ketchup packets find the fender. A good barrier on the paint means those messes wipe off with a damp microfiber before they ever become a stain. For my old Mazda Miata, with its delicate single stage paint, prevention is everything. A consistent layer of wax keeps that classic red glowing and resistant to environmental stains that would otherwise sink in fast.
The best defense against paint stains is a consistent, proactive routine that creates a resilient surface.
Create a Barrier: Sealants and Coatings
Your car’s clear coat is porous. Think of it like the skin on an apple. A sealant or coating puts a slick, non porous shell over that skin. Stains and contaminants sit on top of this shell, unable to bond deeply. This makes removal trivial.
A quality synthetic paint sealant will give you months of protection. A true ceramic coating can last for years. Both make water bead up and roll off, taking dirt with it. Sap and bird droppings might still land on the paint, but they won’t etch into it if you remove them in a reasonable time.
I keep a spray sealant on hand for my daily drivers. After a wash, a quick spritz and wipe on the F 150 or the Odyssey adds a fantastic protective layer in minutes. For my Porsche and the Miata, I use a dedicated ceramic coating for long term, hard shell protection.
Remember, terms like “car paint satin steel” only describe the color and finish, not any inherent protection. Every paint type, from gloss to matte, needs a protective barrier.
Smart Parking Habits
Where you park is a choice. That choice directly impacts what lands on your paint. It is the easiest form of prevention.
Avoid parking directly under trees. You are inviting a shower of sap, bird droppings, and pollen. Tree sap is especially brutal. It acts like a slow acting glue that bakes onto your paint in the sun.
Be mindful of sprinkler systems. The water often contains high levels of minerals that will spot and stain paint if left to dry. Parking near construction sites coats your car in fine, abrasive dust and potential overspray.
For long term outdoor parking, a quality, breathable car cover is a wise investment. It shields the paint from everything. Just make sure the paint is perfectly clean before you put the cover on, or you will grind dirt into the finish. Even the best covers won’t help if the paint isn’t properly protected and maintained.
Scan your parking spot for overhead and ground level hazards. A thirty second assessment can save you an hour of stain removal later.
The Maintenance Wash Rhythm
Protection is not a one time application. It is maintained through a regular washing rhythm. This removes contaminants before they have a chance to break through your sealant or coating.
Wash your car every two weeks as a general rule. If you drive through road salt, heavy bug splatter like on a summer highway, or a rainstorm followed by sun, wash it immediately. Road salt is corrosive. Bug guts are acidic. Both will stain and damage the paint if left sitting.
Between washes, keep a bottle of quick detailer and a clean microfiber towel in your garage or trunk. The moment you see a fresh bird dropping or a sprinkle of sap, spray it, let it soak for a moment, and gently wipe it away.
This quick action prevents etching. It is the single most effective habit for preserving a flawless finish. I do this on my Tesla’s front bumper after every long drive. The bugs wipe right off because the coating is there, and I did not let them bake on.
Do not let contaminants become tenants on your paint. A regular wash schedule and instant spot cleaning keep your protective barrier strong and your paint stain free.
Keeping Your Paint Pristine After Treatment
Removing paint stains is about patience and progression. Your most important tool is the discipline to start with the gentlest, least invasive method and work up only when necessary, especially when trying to remove paint stains from car interior. Protecting that flawless finish afterward with a quality sealant or wax is your final, non-negotiable step.
Skipping this careful approach risks etching the clear coat or leaving behind holograms and scratches that require professional correction to fix.
References & External Links
- How to get stain off car paint : r/Detailing
- Common Car Paint Stains and How to Get Rid of Them
- Car Paint Stain Removal: Types, Methods, and Prevention – AutoManiacs
- Remove Paint Stains From Car: Easy Tips – Auto Detailing Pro
- How to remove stains and embedded dirt out of paint | Auto Geek Online Auto Detailing Forum
- Amazon.com: Car Paint Stain Remover
Max is an automotive enthusiast having worked as a car mechanical and in interior detailing service for over 25 years. He is very experienced in giving your old car, a new fresh vibe. He has detailed many cars and removed very tough smells and stains from all kinds of cars and models, always ensuring that his work and advice helps his customers. He brings his first hand experience to his blog AutoDetailPedia, to help readers breath new life into their car interiors.