How Do You Wash a Car Without Leaving Water Spots?
You dry your car only to find a mess of chalky rings on the paint and glass. That dull film turns a clean finish into a disappointment.
I will show you my proven routine for why water spots happen, how to stop them during washing and drying, and the correct removal methods for painted surfaces, windows, and exterior trim.
Let water spots sit, and they will bake into permanent, cloudy etchings.
Key Takeaways: Your Water Spot Cheat Sheet
I get it. You just washed your car, and now it’s covered in those little white rings. It feels like you went backwards. I see it all the time on my Tesla’s flat front bumper after bug splatter dries, or on my black BMW’s hood where every flaw screams for attention.
Fighting water spots comes down to a simple philosophy.
- Dry it fast. Never let water air-dry on the paint, glass, or trim.
- Use clean water. The purer your final rinse, the fewer minerals you leave behind.
- Maintain your protection. A good wax or sealant makes water bead and roll off, giving it less time to dry.
- Act fast on fresh spots. If you see them, remove them immediately. Tomorrow is too late.
This guide will show you how to build these ideas into your wash routine to prevent spots. It will also give you the steps to remove spots that are already there, whether they’re on paint, glass, or black plastic trim.
What Are Water Spots and Are They Bad for Your Car’s Paint?
Water spots are just what’s left behind after a water droplet evaporates. Think of a coffee ring on a wooden table. The water disappears, but the dirt and minerals it carried stay right there in a perfect circle. On your car, that “dirt” is usually calcium, magnesium, or other hard minerals from your tap water or from contaminants already on the paint.
The real question is whether those rings are bad for your paint. The answer depends entirely on time. Fresh water spots are a cosmetic issue. They look terrible, especially on dark paint like my BMW, but they haven’t hurt the clear coat yet. Etched water spots are a different story. They are permanent damage.
Are water spots permanent? Only if you ignore them. Fresh spots can be wiped away. Etched spots cannot be washed off; they must be polished out. This is why speed matters.
People often ask if rain causes water spots. It absolutely can. Rainwater is fairly pure when it falls, but it picks up pollution, pollen, and dirt from the air and off your car’s surface. If your car is dirty or lacks a protective layer, that dirty rainwater will sit and dry in beads, leaving behind spots. A well-protected, clean car will shed water much faster, greatly reducing the risk.
The Two Faces of Water Spots: Fresh vs. Etched
You need to know which type you’re dealing with. The fix is completely different.
Fresh water spots are less than a day old. They look hazy or chalky. You can’t feel them with your fingernail. On glass, they just look like a foggy film. These spots will often vanish with a spritz of detail spray and a gentle wipe with a clean microfiber towel. They are just mineral deposits sitting on top of your wax or sealant.
Etched water spots are the enemy. They are rough to the touch. Run your fingernail over one lightly and you’ll feel a slight catch or crater. These form when mineral-rich water sits for days, or when the water is acidic (like from sprinklers with reclaimed water). The minerals or acids actually eat microscopic holes into your clear coat. I found a cluster of these on the hood of my Ford F-150 last summer after a bird dropping I missed was washed over by the sprinklers for a week. The damage was done.
Can Water Spots Damage Car Paint?
Let’s be perfectly clear. Fresh water spots do not damage paint. They dirty it. They obscure the gloss. They are a sign that your drying technique or paint protection needs work, but they wipe away without harm. A ceramic coating creates a hydrophobic layer that makes water bead and roll off, reducing water spots. It also simplifies drying and helps keep that gloss intact.
Etched water spots are real damage. They are micro-etchings in the clear coat, the same as a very light scratch. Each etched spot is a tiny, permanent dull spot that no longer reflects light correctly. If you let them cover a panel, the entire area will look faded and lack depth. This etching also complicates future paint correction, as you must now level the clear coat even deeper to remove these tiny craters. On single-stage paint like my old Miata, etching can happen even faster, going right into the colored paint layer.
Your Wash-Day Defense: How to Prevent Water Spots
Listen, I spend most of my time removing water spots from my own cars, especially the black BMW and the white Tesla. It is tedious work. The single best piece of advice I can give you is to focus here, on prevention. Stopping water spots from forming in the first place is far easier, cheaper, and safer for your paint than removing them later. A good defense also means being smart about your environment. Always work in the shade, and try to use only the water you need. It’s better for your car and the driveway. When you do wash, pay attention to car scratches and spots—regular gentle washing makes it easier to remove flaws before they become stubborn stains. A quick, careful wash routine also helps prevent water spots from settling into tiny scratches, keeping your paint looking newer longer.
The Right Water and the Right Time
Think of your water as an ingredient. If your tap water is “hard,” full of minerals like calcium and magnesium, those minerals are what get left behind to create spots. For folks in hard water areas, a water filter like a CR Spotless system is a legitimate game-changer. It strips those minerals out, so even if a drop dries, it’s just pure water with no spot left behind.
Timing is everything. Never, ever wash your car in direct sunlight. I learned this the hard way on my F-150’s dark blue hood. The sun heats the paint and makes water evaporate almost instantly, baking in those mineral deposits before you can dry it. Wash in the cool shade, early in the morning or later in the evening.
Here is the most critical rule to remember. If you get caught in the rain or finish a wash and notice fresh water spots, you have less than 24 hours to safely wipe them away with a quick detailer. After that, they begin to etch into the clear coat, turning from a surface stain into permanent damage that needs polish to remove.
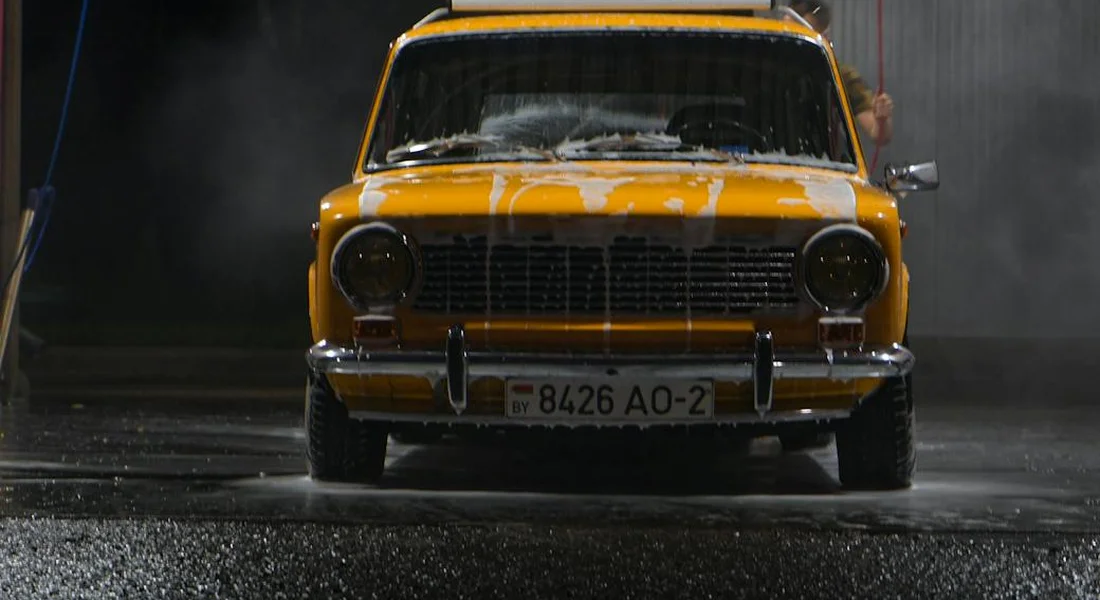
Drying is Not an Afterthought: It’s the Main Event
Perfect drying prevents 90 percent of water spots. Letting your car air dry is a guarantee you’ll get spots. You must physically remove the water. I use a large, plush microfiber drying towel, like The Rag Company’s Gauntlet. It’s huge and absorbs an unbelievable amount of water, which helps dry the paint fast.
Do not drag the towel. Gently lay it flat on the panel and pat or pull it across, lifting it to re-fold and find a dry side. Dragging a towel over microscopic dirt is how you add swirls to your paint. A damp towel will just smear water, so use a second dry one if needed.
For the final pass, I use a drying aid. As I go panel by panel with my drying towel, I first mist the surface with a spray wax or a detail spray. This lubricates the towel’s path, adds a layer of protection, and helps the water sheet away cleanly. It takes an extra 30 seconds and makes a huge difference.
Soap and Protection: Your Chemical Shields
Start with a proper car wash soap. Dish detergent is too harsh. It strips away the wax or sealant that is your first line of defense, leaving the paint naked and vulnerable. A good car soap cleans while being gentle on your existing protection.
That protection layer is key. This is the idea behind car wax protection water beading: water beads up and rolls off. It keeps the finish clean and helps prevent spots. On my red Porsche, the wax causes water to bead up into tight little balls. When I dry the car, or when I drive it after a wash, those beads simply roll right off the surface. They don’t sit there long enough to dry and leave a spot. A well-maintained sealant or wax acts like a non-stick coating for water.
For a long-term solution, a ceramic coating is the ultimate hydrophobic barrier. It’s not a magic force field, but it makes water behavior so dramatic that drying becomes incredibly easy and spot formation is drastically reduced. It turns your weekly wash from a chore into a quick maintenance task.
Removing Existing Water Spots: A Step-By-Step Guide
The fight to remove spots is a fight you can win. You just need the right strategy. Start by figuring out what you are dealing with.
The first step is always to diagnose the spot type using the simple sight and touch test. Feel the spot with your fingertip. If it feels smooth like the surrounding paint, it is likely a fresh mineral deposit sitting on top. If it feels rough, like a tiny crater or a grain of sand under your nail, the water has etched into the clear coat. Your approach changes completely based on this test.
Always start with the least aggressive method and work up only if you need to. Going straight to heavy polish for a fresh spot is like using a sledgehammer to hang a picture. It creates more work. Follow this order.
Stage 1: Removing Fresh Water Spots (The Easy Fix)
Fresh spots are just mineral deposits. They have not yet bitten into the paint. You see this often on my white Tesla after a drive in the rain, where spots dry on the flat front bumper.
A quick detailer or a diluted rinseless wash solution is your best tool here, acting as a lubricant to safely wipe the contamination away. Spray the product directly onto the spot and the surrounding area. Let it soak for a moment to soften the minerals.
Take a clean, plush microfiber towel-I prefer a 500 GSM towel for this-and gently wipe the area. The spot should dissolve and wipe away cleanly. Flip the towel to a fresh side and buff the area dry.
You must use a clean, high-quality microfiber towel to avoid inflicting scratches while you clean. A dirty or coarse towel will grind the minerals into the paint, turning a simple clean-up into a scratch removal job.
Can a proper car wash remove fresh water spots? Yes, absolutely. A thorough wash with a pH-neutral shampoo and a wash mitt will lift and rinse away most fresh deposits. This is why a regular wash routine is your first defense.
Stage 2: Tackling Light Etching (The Decontamination Approach)
When the spot feels rough, the minerals have started to etch. This is common on horizontal surfaces like the hood and roof. You need a dedicated product to break the mineral bond.
A dedicated water spot remover uses acidic chemistry to dissolve the mineral deposits embedded in the paint’s pores. Think of it like vinegar dissolving scale in a coffee maker. It targets the calcium and magnesium.
These products are potent. Always test the product on a small, inconspicuous area of trim or in a door jam first to check for any adverse reaction. Follow the product’s instructions exactly. Wear nitrile gloves and eye protection. Work in a shaded, cool area.
The process is straightforward but requires attention. Here is how I do it on my Ford F-150’s hood after a spotty rain shower.
- Spray the remover directly onto the affected panel.
- Let it dwell for the time specified on the bottle, usually 30 to 60 seconds. Do not let it dry.
- Gently agitate the area with a damp microfiber towel. You should see the spots begin to fade.
- Rinse the entire panel thoroughly with clean water. A final wash with your regular shampoo is a good idea to remove any residue.
Stage 3: Correcting Etched Spots (Paint Correction Territory)
Sometimes, the etching wins. The spots are deep, permanent stains in the clear coat. This is what I faced with my jet black BMW, the ultimate swirl magnet. The only fix is to remove a tiny layer of clear coat to level the surface.
Deep etching requires mechanical polishing to physically level the clear coat around the spot. You are not dissolving minerals anymore. You are removing clear coat until the surface is flat and smooth again.
This is an advanced technique. You need a dual-action polisher, a light to medium correcting polish, and a foam polishing pad. The goal is to use the abrasive polish to slowly erase the defect. You follow with a finer polish and a soft finishing pad to restore clarity, just like I do on the BMW’s hood every spring.
For severe, widespread etching, seeking a professional detailer is a wise and often cost-effective choice. They have the experience and tools to assess the paint depth and correct it safely without risking damage. Trying to fix this yourself without practice can lead to holograms, burnt edges, or thinning the paint too much.
Glass and Trim: Special Tactics for Tough Surfaces
Water spots do not play fair. They often cling to glass and black plastic trim with more tenacity than your car’s paint. On these surfaces, minerals and soap residue bake into a stubborn, cloudy film. It takes a different approach to get them clean, especially when trying to remove hard water spots from windows.
Getting Windows Crystal Clear
Your windshield and side windows are your view of the road. Spots here are more than ugly, they’re a safety issue when the sun hits them just right. For routine cleaning, you need two things: a dedicated glass cleaner and a separate, lint-free microfiber towel. I keep a bottle and a blue glass towel in every vehicle, including my Tesla.
Use a cleaner made for auto glass, not your kitchen counter, as it won’t leave distracting streaks or residue. Spray the cleaner directly onto your clean microfiber towel, not the glass. This prevents overspray from dripping onto paint or trim. Wipe in straight, overlapping strokes, then immediately flip the towel to a dry side and buff the surface to a perfect, streak-free finish.
For those stubborn, etched-in hard water spots that regular cleaner can’t touch, you need a mild acid. Distilled white vinegar, diluted 1:1 with distilled water, works. This method also helps remove hard water stains from car windows. It’s a practical step you can use on any glass surface on a vehicle. This method requires care: apply the vinegar solution only to the glass, avoid getting it on paint or rubber seals, and rinse the area thoroughly with plain water after a minute or two. Dry it completely with a microfiber. For my cars, I test this on a lower corner of a window first.
How you dry your windows after a wash is critical. After drying the whole car, I go back over the glass with a fresh, dry microfiber. Any leftover water droplets on the glass will dry into new spots. Make that final, dedicated pass over every window.
Reviving Plastic and Rubber Trim
On trim, water spots show up as ugly white, chalky stains. This is mineral deposit sitting on top of, and sometimes etched into, the plastic. You see it a lot on mirrors, bumper trim, and around windows. It makes a car look old and poorly kept.
To remove them, use a mild all-purpose cleaner or a dedicated trim cleaner. Spray it onto a soft microfiber towel or, for heavily textured plastics, a soft detailing brush. Gently agitate the surface. The cleaner will break the bond of the minerals. Wipe it away with a separate, damp towel. You are lifting the stain, not scrubbing the plastic raw.
Cleaning alone leaves the trim exposed and often looking faded. You must follow up with a trim protectant. This product restores the deep black color and adds a protective layer that helps bead water, making future spots easier to wipe off. I do this on my Honda Odyssey’s exterior plastics every few washes, especially after restoring faded black plastic trim. A little protectant goes a long way toward keeping that family hauler looking fresh.
Paint Damage Prevention: Common Washing Mistakes That Cause Spots
We all want a clean car. Sometimes, in our rush to get it done, we skip a step or pick the wrong time. That is how water spots happen. Do not worry. I have made every single one of these mistakes on my own cars, especially the black BMW. Spot free finishes are more about avoiding errors than using magic potions.
Washing in Direct Sunlight
This is the biggest, most common error. You see a nice day and think it is perfect for a wash. If the sun is directly on your paint, you are already fighting a losing battle. Water, especially tap water loaded with minerals, will evaporate in seconds on a hot panel. What is left behind is everything that was dissolved in that water, baked onto your clear coat.
I learned this the hard way on my Tesla. The flat white paint shows every shadow of a mineral deposit. I started washing a door in full sun and by the time I rinsed it, the water had already vanished and left a faint, dusty film. You must wash in the shade, in the early morning, or in the evening when the surface is cool to the touch. If you must wash in the sun, work on one small section at a time and dry it immediately.
Using Dirty Water or a Dirty Drying Towel
Think about what is in your wash bucket. After you wash a wheel, or a lower rocker panel, that water is full of grit. Dunking your wash mitt back in is like adding fine sand to your lubrication. You will swirl the paint, and those tiny particles can get trapped in water droplets, leaving behind concentrated spots of grime when they dry.
This is not just about the wash water. Your drying towel is critical. If you use a towel that has been sitting around, or one you used last week and did not wash, it is a museum of old minerals and contaminants. You will smear them across your clean paint, creating new streaks and spots.
The two bucket method is not a fancy trick, it is basic contamination control to keep your wash water clean. One bucket for your soapy wash solution, one bucket with clear water to rinse your mitt. You keep the dirt in the rinse bucket, not on the car. For your drying towel, use a clean, premium microfiber drying towel every single time. I have dedicated towels for my Porsche and Miata that never touch anything else.
Letting the Car “Air Dry”
It seems logical. You rinse the car, walk away, and let nature do the work. This is the most guaranteed method to cover your car in water spots on paint. As each droplet evaporates, it leaves its contents behind. On glass, this makes hazy, difficult to remove spots. On paint, it etches a faint outline. On black trim, it leaves white, chalky rings.
My F-150 used to air dry all the time. I thought I was saving effort. I was actually creating more work for myself, having to use a detail spray to wipe off the spots I had just created. Air drying does not save you time, it creates a new correction step for later. The proper final step of any wash is a thorough, gentle dry with a clean towel. It takes five minutes and saves you an hour of spot removal down the road.
Your Water Spot Defense Protocol: The Order of Operations
I treat water spots like a ticking clock. The moment water dries on a surface, the timer starts. My defense is a strict routine, a sequence I follow on every vehicle I touch. From washing road salt off my Ford F-150 to gently cleaning the delicate clear coat on my Tesla, this order is non-negotiable. It is the barrier between a perfect finish and a cloudy, spotted one. Think of this protocol as your detailing playbook, designed to stop spots before they ever form.
The Prevention-Focused Wash Checklist
This is your frontline defense. Skip a step, and you invite spots back onto the paint. I run through this exact list every single wash, whether it is for the kid-mess in the Odyssey or the prized paint on the 911.
-
Work in the shade, in cool temperatures. Sun is your enemy here. It heats the panels and makes water evaporate too fast, baking in minerals before you can dry. I wash my black BMW only in the early morning or under my garage door’s shadow. The difference in drying time is dramatic.
-
Pre-rinse with the cleanest water available to loosen debris. Use a hose or pressure washer to flood the paint from top to bottom. This step is about lubrication. You are floating away loose grit and salt so your wash mitt glides safely. On my truck after a storm, I spend extra time here, blasting mud from the wheel wells.
-
Wash using the two-bucket method with grit guards. One bucket holds your soapy shampoo. The other is for rinsing your mitt clean. The grit guards at the bottom trap dirt. This method is the single best way to prevent fine scratches that make water spots more noticeable. My swirl-prone BMW 3 Series demands this. Without it, I am just rubbing dirt into the paint.
-
Final rinse thoroughly, sheeting water off panels if possible. Do not just spray randomly. Remove the nozzle from your hose and let the water flow from the top of a panel down. This creates a “sheet” that pulls most of the water off, leaving fewer droplets to dry. On the Tesla’s flat front bumper, this technique is a lifesaver.
-
Immediately dry with a large, clean microfiber towel, using a drying aid. Do not let the car air dry. I grab a clean, plush drying towel while the car is still wet. I mist a spray wax or a dedicated drying aid onto the panel first. This adds lubrication and protection, making the towel glide and absorbing water in one pass. The difference on my Miata’s single-stage paint is a deep, spot-free shine.
-
Apply protectant (spray wax, sealant) to maintain the hydrophobic layer. A protected surface sheds water. After drying, I go over the paint with a light spray wax. This refreshes the barrier that causes water to bead and roll off, making the next wash easier. On my daily drivers, this is my go-to for efficient upkeep.
The Removal-Focused Action Checklist
Sometimes, spots happen. A sudden sunbeam, a distracted moment. When you find them, stay calm and follow this plan. The wrong move can make light etching worse.
-
Identify the spot type (fresh or etched). Gently run your fingernail over a spot. If it feels smooth and comes off easily, it is likely fresh mineral deposits sitting on top. If you feel a rough, chalky ring or a slight dip in the paint, the minerals have etched into the clear coat. The severe ones on my F-150’s hood felt like tiny craters.
-
For fresh spots: use quick detailer and microfiber. Spray a quality quick detailer directly onto a soft microfiber towel, not the paint. Gently wipe the spot. The lubricants in the spray should dissolve the minerals without scratching. I keep a bottle in my garage for wiping down my Porsche’s glass after a dew-covered morning.
-
For light etching: use a dedicated water spot remover. These are acidic cleaners designed to dissolve mineral deposits. Read the label. Always test on a small, hidden area of trim first. Apply with a microfiber applicator, let it dwell for the recommended time (often just 30-60 seconds), then wipe and rinse thoroughly. I used this on the Honda’s windows after a season of sprinkler water.
-
For severe etching: assess if polishing is needed (consider professional help). If the remover does not work, the spot is etched deep. Removing it requires polishing, which means removing a tiny amount of clear coat. This is where I stop on my black BMW and consider my tools. If you are not experienced with a polisher, this is the time to call a pro. The risk of burning through the paint or creating holograms is real.
-
Always follow removal with protection (wax/sealant) on paint, and conditioner on trim. Any removal process, especially with chemicals, strips protection. After cleaning spots from paint, apply a wax or sealant. For textured black trim or rubber seals, use a UV protectant. This reseals the surface, making it resistant to the next water attack.
Final Thoughts on Managing Water Spots
The best way to handle water spots is to never let them form in the first place. Using deionized water for your final rinse and drying the car in a shaded, cool spot is the single most effective change you can make. This simple shift in your routine stops the problem at its source.
Ignore this, and the minerals in that water will bake onto your paint and glass, turning from a spot you can wipe away into an etched stain you have to polish out.
Research and Related Sources
- r/AutoDetailing on Reddit: Water Spots after Car Wash
- A Guide to Removing Water Spots from a Vehicle | Turtle Wax® Pro
- How to Avoid Water Spots After Washing Car | How to Prevent Water Marks – BLO Car Dryer
- How to Remove Water Spots on a Car – AutoZone
- Guide to Preventing Car Water Spots | Washlab
Max is an automotive enthusiast having worked as a car mechanical and in interior detailing service for over 25 years. He is very experienced in giving your old car, a new fresh vibe. He has detailed many cars and removed very tough smells and stains from all kinds of cars and models, always ensuring that his work and advice helps his customers. He brings his first hand experience to his blog AutoDetailPedia, to help readers breath new life into their car interiors.