Is That Cloudy Haze on Your Windows Permanent?
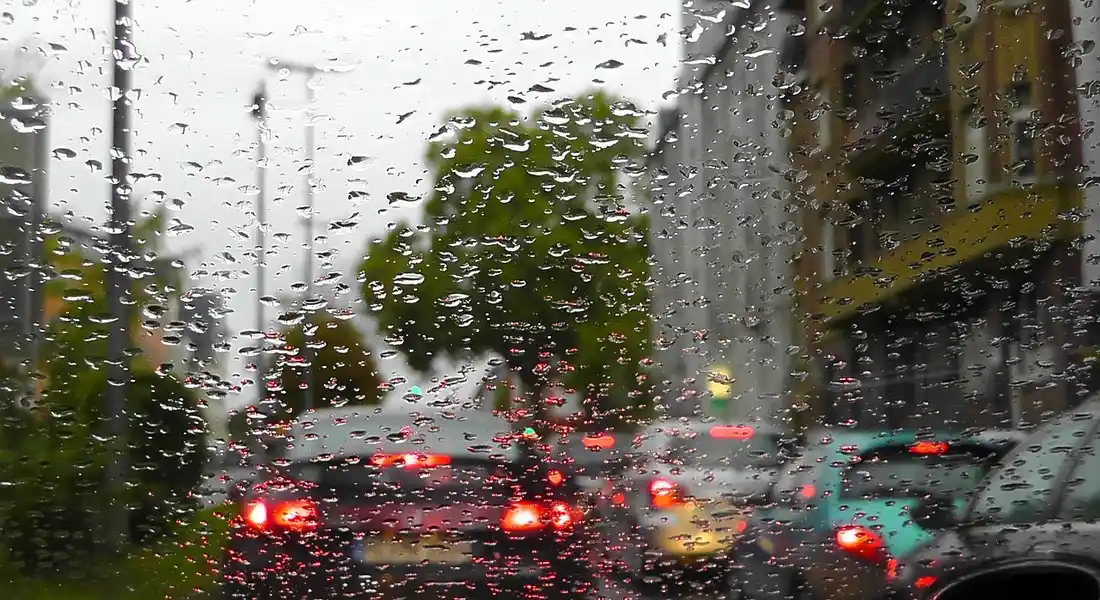
You wash your car, and a few hours later, those cloudy, chalky rings appear on the glass, ruining your view and your hard work. They seem stuck there for good.
I have fought this battle on every car I own, from my sun-baked Miata to my daily-driven F-150, and this guide will show you exactly how to win. We will cover why water spots form, the simple test to tell hard water spots from etched ones, the correct removal methods that won’t scratch your glass, and how to stop them from ever coming back.
Ignore them or use the wrong cleaner, and you risk etching the glass surface permanently.
What Are Hard Water Spots, Anyway?
Think of your car’s glass like a coffee pot. When you let water with minerals in it dry on the surface, it doesn’t just disappear. The water evaporates, but the calcium, magnesium, and other minerals get left behind. That chalky, crusty ring in your coffee carafe is the same basic science happening on your windshield.
Fresh water spots might just look like cloudy, white rings. You can often wipe them away with a damp towel. The real trouble starts when those mineral deposits are baked on by the sun or left for weeks, etching themselves into the glass. That’s when they go from a stain to actual damage. Etched spots feel gritty and rough to the touch, like fine sandpaper, even after you wash the car.
Glass is a common victim because it’s so hard and non-porous. The minerals bond to its slick surface. Windshields and side windows get hit the worst. They face direct sun and catch every drop of sprinkler water or rain that dries in place. On my white Tesla, the flat front bumper gets bad spots too, but the windshield always shows them first.
Your Water Spot Removal Arsenal: Tools & Chemicals
You need the right tools for the job. Starting gentle and moving to more aggressive methods saves you time and prevents damage. Here’s what I keep on my shelf.
For the chemicals, you have two main paths: a dedicated remover or a common household item.
- 70%+ Isopropyl Alcohol: This is a great first try. It’s a mild solvent. Mix it 1:1 with distilled water in a spray bottle. It can break down fresh mineral deposits without much fuss.
- Dedicated Water Spot Remover: These are acidic (low pH). They work by dissolving the alkaline mineral bonds. Brands like CarPro Spotless are excellent. You must wear nitrile gloves and eye protection with these products. They work fast but can harm paint and trim if you’re not careful.
For the physical removal tools, your choice depends on how etched the glass is.
- Fine Detailing Clay: This is your step two after a chemical spray. If the glass still feels rough after cleaning, a clay bar will literally pull the bonded contaminants off. Lubricate the glass well with a quick detailer spray.
- Dual-Action Polisher with a 3-Inch Backing Plate: For etched-in spots that chemicals and clay won’t touch, you must polish. A small 3-inch plate lets you work on curved glass around mirrors. You never want to use a rotary polisher on glass if you can avoid it.
- Glass Polishing Compound: This is a must for polishing. Don’t use regular paint compound. Glass polishes have special abrasives like cerium oxide that are hard enough to cut glass safely. It’s a messy job, but it works.
Your towels matter as much as your chemicals.
- Soft, Clean Microfiber Glass Towels: You need two types. Use a thick, plush towel (300+ GSM) for drying after washing. For applying polish or final buffing, use a softer, shorter-pile towel. I keep a set reserved only for glass to avoid contaminating them with wax.
Always test your method in a small, bottom corner of the window first. This tells you how aggressive you need to be without risking the whole windshield.
First, Diagnose the Spot: Is It On Top or Etched In?
Before you grab a product, you need to know what you’re fighting. This single step saves you time and frustration. Here’s how I do it on every car, from my kid-hauler Odyssey to my black BMW.
Run the pad of your finger over the spot. Does it feel perfectly smooth? Now, gently drag the edge of your fingernail across the same spot.
- If your nail glides right over it, you’re in luck. The mineral deposits are sitting on top of the glass. They haven’t started eating into the surface yet. This is a surface deposit.
- If your nail catches, scratches, or clicks, the minerals have already done damage. The water spot is etched into the glass. It feels rough because the glass itself is now microscopically pitted.
Surface deposits are a cleaning job. Etched spots are a correction job that needs polishing. This distinction changes everything.
Let me be direct. If you’ve tried a regular glass cleaner and a lot of elbow grease, and those white rings are still there staring back at you, they are almost certainly etched. Don’t waste more energy. Normal cleaner won’t touch it. You need to move to the next step.
Method 1: Removing Surface Mineral Deposits
For spots your nail glides over, you can use simple chemistry. The goal is to dissolve the mineral crust without hurting the glass or your car’s trim.
My go-to is a 50/50 mix of distilled white vinegar and distilled water in a spray bottle. The acetic acid breaks down calcium and lime. Always test any solution on a small, inconspicuous area first, like the bottom corner of a window. Vinegar is safe for glass but can stain unprotected trim if left to dry.
- Park in the shade. Hot glass makes the solution evaporate too fast.
- Spray the vinegar solution liberally onto the affected window. Let it dwell for 60-90 seconds. Don’t let it dry.
- Take a clean, soft microfiber towel dedicated to glass. Fold it into quarters to use a fresh side often. Wipe the window with firm, straight strokes.
- For stubborn crusts, you may need to reapply and use a very soft detailing brush (like a boar’s hair brush) to gently agitate the surface.
- Immediately dry the window with a second, clean, dry microfiber towel. This prevents the diluted minerals from just redepositing as the water dries.
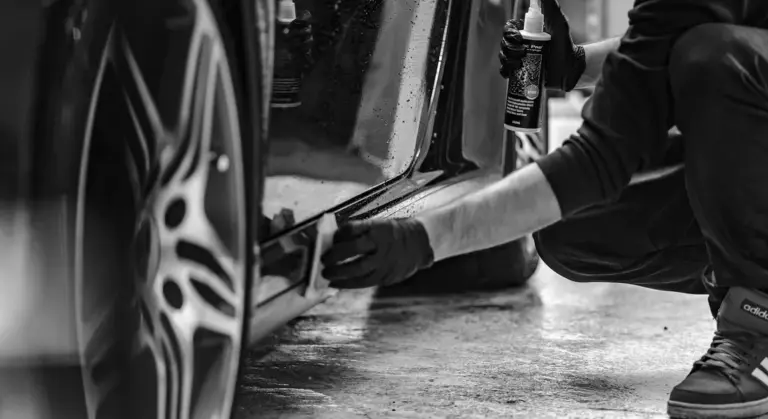
For tougher surface films, a dedicated water spot remover can be more effective. These are formulated acidic cleaners. Wear gloves and eye protection. They work fast, so follow the bottle’s instructions precisely and rinse thoroughly. To safely use car cleaning chemicals, always read the label and follow the safety instructions. Keep cleaners away from children and pets, and never mix different cleaners.
Method 2: Polishing Out Etched-In Water Spots
When your nail catches, you need an abrasive. Think of it like sanding a rough spot on a piece of wood, but on a microscopic level. We use a fine polishing compound to level the glass surface back to smooth.
You will need a machine polisher for this. Hand polishing etched glass is incredibly difficult and often ineffective. A dual-action polisher is safest for beginners.
Glass is harder than paint, so we use a more aggressive compound. A dedicated cerium oxide glass polish is the professional choice. It’s a powdered abrasive you mix into a paste. For many DIY situations, a heavy-cut automotive polishing compound designed for clear coat defects will also work.
- Clean the window thoroughly with your regular car wash soap. Any grit left on the surface will scratch the glass during polishing.
- Tape off the surrounding trim, rubber, and paint with painter’s tape. The polish will stain and is very difficult to remove from these materials.
- Apply a small amount of your chosen compound to a clean foam polishing pad on your machine.
- Work on a small section, about 2ft x 2ft. Use slow, overlapping passes with moderate pressure. Keep the pad flat. You will see the compound turn clear as it breaks down.
- Wipe off the residue with a clean microfiber towel and inspect. The rough, white spot should be gone, leaving clear, smooth glass behind. Repeat if necessary.
- Clean the window with isopropyl alcohol after polishing to remove any leftover oils from the compound.
Polishing glass generates heat and fine dust. Wear a mask, safety glasses, and work in a well-ventilated area. Go slow and check your progress often. It’s better to make two light passes than one overly aggressive one.
The Gentle Approach: Removing Fresh Surface Deposits
-
Step-by-Step: The Clay Bar Treatment for Glass
Run your fingernail across the glass. If you feel a slight grit or bump, those are surface minerals a clay bar can grab. This is for spots that have not eaten into the glass. I do this on my black BMW every spring after the pollen settles.
Clay works by physically shearing off contaminants bonded to the surface, leaving the glass perfectly smooth. Do not use this method if the glass looks frosted or etched; that is damage, not a deposit.
- Wash the window thoroughly. Use car shampoo and water to remove loose dirt. A clean surface prevents you from rubbing grit into the glass.
- Spray a generous amount of clay lubricant onto a small section. I use a quick detailer spray. The window should look wet.
- Knead your clay bar until it is soft and pliable. Flatten it into a pancake shape that fits comfortably in your palm.
- Glide the clay bar over the lubricated area using very light pressure. Move it in straight, back-and-forth strokes. You will hear a light scraping sound as it picks up the minerals.
- Frequently fold the clay bar over on itself to expose a fresh, clean surface. Knead it when it looks dirty.
- Wipe the area clean with a dry, soft microfiber towel. The glass should feel slick and smooth, like new.
-
Using a Dedicated Water Spot Remover
These products are formulated mild acids, like citric or phosphoric acid. They work by dissolving the chemical bond between the mineral deposit and the glass. It is a chemical reaction, not abrasion.
A dedicated remover is often the fastest way to tackle widespread, fresh spotting on windows and paint. I keep a bottle handy for my white Tesla after hard water sprinkler encounters.
- Put on nitrile gloves and work in a well ventilated area. The fumes can be strong.
- Shake the bottle well. Spray the product directly onto the glass, coating the spotted areas. Do not let it dry.
- Let the product dwell for the time listed on the label, usually 30 to 60 seconds. You will see the spots start to fade.
- Agitate the area gently with a damp microfiber towel. This helps lift the dissolved minerals.
- Rinse the window thoroughly with clean water. Any leftover acid can stain trim or cloud the glass.
- Dry the glass completely with a separate, clean microfiber towel.
-
The Household Hack Check: Does WD-40 or Vinegar Work?
People search for this all the time. Let us be clear. WD-40 is a water displacer and lubricant, not a cleaner.
While WD-40 might seem to make spots disappear by coating them in oil, it leaves a film that attracts dust and dirt, creating a bigger mess to clean later. I do not recommend it for any part of your car’s exterior, especially for painted surfaces (WD-40 can damage car paint).
White distilled vinegar is a mild acetic acid. It can work on very fresh water spots. The smell is pungent and it can linger in your garage. For old, baked on spots from a hot summer, vinegar usually is not strong enough. If you try it, mix it 50/50 with water, apply with a cloth, rinse well, and dry immediately.
When Spots Fight Back: Polishing Out Etched Glass

Sometimes, hard water spots don’t just sit on the surface. They etch into the glass. You can feel it with your fingernail, a slight catch or roughness where the mineral deposits have literally eaten into the top layer. When vinegar or a dedicated water spot remover does nothing, you have entered the correction phase. Polishing glass is a physical removal process, similar to fixing scratches on paint, but it demands more patience and a lighter touch. I learned this the hard way on my Tesla Model 3’s massive front windshield after a summer of sprinkler water baked on in the sun. That same careful approach also applies when addressing scratches on car window glass. A light polish can often restore clarity without risking further damage.
Detailer’s Pro-Tip: Technique for Machine Polishing Glass
Using a machine polisher on glass feels different than on paint. Glass is much harder. Your goal is not to generate heat or cut aggressively, but to gently abrade the etched layer away. I use a random orbital polisher with a dedicated, firm foam glass polishing pad.
The technique is all about control. Move the polisher across the glass with a slow, deliberate arm speed. I pretend I’m spreading cold butter on toast. Apply moderate, consistent pressure to keep the pad perfectly flat against the surface. If you tilt it, you risk creating swirls or an uneven finish. The key is to let the abrasive compound do the work at a slow, steady pace without rushing.
You check your progress by wiping a small section clean with isopropyl alcohol and shining a sidelight, like a flashlight or the sun at an angle. The etched spots will scatter the light, looking cloudy or white. As you polish, that cloudiness will fade to a clear, uniform reflection. This visual check is your only real guide.
Consider this method a last resort for truly etched mineral deposits, as it does remove a microscopic layer of glass. With care, it is perfectly safe, but rushing or using too aggressive a product can permanently haze the surface.
The Step-by-Step Polish Process
Follow this sequence to remove etched water spots safely and completely. You will need a machine polisher, a glass polishing compound, a firm foam polishing pad, painter’s tape, isopropyl alcohol, and clean microfiber towels.
- Protect surrounding trim. Use painter’s tape to mask off any rubber seals, moldings, or painted surfaces around the window. Glass polish can stain trim and is difficult to remove.
- Prime and load the pad. Apply a few small dots of your glass polishing compound directly onto the foam pad. Do not put it on the glass itself, as the spinning pad will sling it everywhere.
- Work in small, manageable sections. Tackle an area about two feet by two feet. This keeps the compound from drying out and lets you maintain control. Use the slow, flat-pad technique described above, making several slow passes over the same spot.
- Wipe away residue for inspection. After polishing a section, immediately wipe it clean with a microfiber towel lightly sprayed with isopropyl alcohol. The alcohol cuts the oily residues from the compound so you can see the bare glass.
- Inspect under light. Look at the cleaned section with a sidelight. If the etching is gone, move on. If faint marks remain, repeat the polish cycle in that section once more. Do not over-polish.
Always finish by thoroughly cleaning the entire window with alcohol to remove all polishing oils, ensuring perfect clarity for your sealant or wax.
Special Cases: PPF, Trim, and Exterior Plastics
Glass and paint get most of the attention. But water spots love to settle on everything else too. These materials need a gentler touch. A mistake here can mean a permanent stain or a ruined finish. Sometimes those marks need to be removed. Knowing how to remove paint spots and stains without damaging the surface can protect the finish.
How to Remove Water Spots from PPF (Paint Protection Film)
My Porsche 911 has full PPF. It’s a self-healing urethane film with a sensitive top coat. Using the wrong cleaner on it is like using steel wool on a pair of glasses. You will haze it.
You must avoid acidic water spot removers and any abrasive polish or compound on PPF, as they can permanently damage the film’s top coat. That top coat is what gives it its gloss and self-healing properties. Once it’s gone, the film looks dull and attracts more dirt.
Here is what I do on the Porsche and any other car with PPF I work on:
- Start with a dedicated PPF cleaner. Brands like Gyeon and CarPro make them. They are formulated to be safe.
- If the spots are stubborn, I use a very mild, pH-neutral water spot remover. I always check the label to ensure it says it’s safe for PPF or vinyl wraps.
- The golden rule: Test in a hidden area first. Spray a little on the film in a door jam or under the bumper. Wait a minute, wipe it off. Does it look the same? Good. Proceed.
- Apply the product to a soft microfiber towel first, not directly onto the film. Gently wipe the area. You should not need to scrub.
After cleaning, I always apply a spray sealant made for PPF. This adds a sacrificial layer that makes the next cleanup easier.
Dealing with Spots on Chrome, Polished Aluminum, and Stainless Trim
The chrome window trim on my black BMW is a water spot magnet. These metals are much softer than your paint’s clear coat. You can scratch them just by looking at them wrong.
For polished metals, a dedicated metal polish and the softest applicator you own is the only safe way to remove embedded mineral deposits. Do not use a glass cleaner or an all-purpose cleaner here. They will not work on hard spots and you will just rub the minerals around, causing fine scratches.
My go-to is Mother’s Mag & Aluminum Polish. It’s a classic for a reason. Here’s the method:
- Make sure the surface is cool and clean. Wash it first.
- Put a small amount of polish on a soft foam applicator or a clean, cotton diaper.
- Rub gently, following the grain of the metal. On trim, this is usually front to back. Use very little pressure.
- Let it haze, then buff it off with a clean, soft microfiber towel until it shines.
Remember, this polish is for bare metal only. Do not use it on any painted surface or clear-coated wheels. It will remove the clear coat instantly.
Cleaning Spots from Black Plastic Window Trim
That black trim around your windows is often a matte, porous plastic. My Honda Odyssey has miles of it. Harsh cleaners get absorbed and can cause permanent fading or a whitish, stained appearance.
A strong degreaser or acidic cleaner will often stain matte black trim, leaving it looking faded and patchy. Once that happens, it’s very difficult to fix. Prevention is everything.
For light spots, a diluted all-purpose cleaner (like Optimum No Rinse diluted for cleaning) on a microfiber towel works well. For heavier buildup, I use a dedicated trim cleaner like Solution Finish Trim Cleaner. It’s pH-balanced to clean without damaging the plastic.
- Spray the cleaner onto your towel, not directly onto the trim.
- Wipe gently. There’s no need to soak it.
- Rinse the area with a separate damp towel to remove any cleaner residue.
- Dry thoroughly.
Once clean and dry, protect it. A product like 303 Aerospace Protectant will add UV inhibitors and help repel water, making the next cleanup much simpler.
How Do I Prevent Hard Water Stains from Coming Back?

The Golden Rule: Dry Your Windows After Every Wash
This is not a suggestion. It is the rule. Hard water spots form when mineral-heavy water evaporates and leaves its chalky residue behind. The only way to stop that is to remove the water before it can dry. I keep a dedicated, clean waffle-weave drying towel in my wash bucket for this exact job. That approach also helps when you’re dealing with water spots or wash car scratches on the finish. I’ll outline a simple method to tackle those issues in the next steps.
As soon as you finish rinsing, go straight to the glass. Do not pass go. Do not dry the paint first. Your windows are the priority because they show every single spot with glaring clarity. I learned this on my Jet Black BMW, where any haze on the windshield ruins the whole look. A good waffle-weave towel grabs and holds water like nothing else. You will hear a squeak when the glass is truly dry.
Make it the last step of your wash routine. Dry every window, every time. It takes two minutes and saves you hours of correction later.
Applying a Glass Sealant or Ceramic Coating
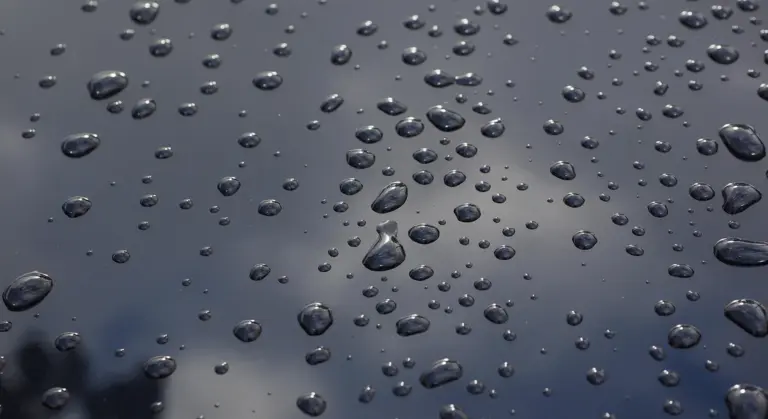
Think of this as putting rain boots on your windows. A quality glass sealant creates a hydrophobic, or water-hating, layer on the surface. Instead of water sheeting and clinging, it pulls into tight, round beads. These beads roll off the vertical glass with gravity, taking the minerals with them before evaporation can happen.
I use a spray-on ceramic sealant on my Tesla Model 3 and Porsche 911. The flat windshield on the Tesla used to be a water spot magnet. Not anymore. Here is how you apply one.
- First, the glass must be perfectly clean. Use your water spot removal method or a dedicated glass cleaner. Any dirt or old sealant left on the surface will be trapped under the new coating.
- In a shaded, cool spot, spray a light mist of the sealant directly onto one window panel. Do not spray the whole car at once.
- Immediately spread the product evenly with a clean, soft microfiber towel. Use light pressure in straight lines or small circles.
- Wait about 30 to 60 seconds for it to haze. Then, take a fresh, dry microfiber towel and buff the window to a clear, streak-free shine.
That hydrophobic layer makes your next wash easier, as water literally flees the surface, and it is your best defense against random rain showers or sprinkler overspray. A good application lasts for months.
Fixing the Source: Water Filtration for Your Hose
If your tap water is very hard, you are fighting an uphill battle. The minerals are in the water before it even touches your car. For a permanent solution, you attack the source. An inline water deionizer or softener attaches to your hose and filters out the dissolved minerals that cause spotting.
It is the professional’s choice. The water that comes out is pure, so it dries spot-free even if you walk away and let it air dry. I considered one for my house after seeing the chalky buildup on my Honda Odyssey from the sprinklers. They are an investment, but for someone who washes weekly, they pay for themselves in time saved not drying or correcting spots.
For a budget fix, use someone else’s filtered water. Many self-serve car wash bays have a “spot-free rinse” option that uses deionized water. Here is my trick. Wash your car at home with your regular hose and soap. Then, drive to the self-serve bay (make sure the car is still wet). Use only the spot-free rinse function to give the entire vehicle a final soak. The pure water will sheet off and dry without a trace. I do this with my Ford F-150 in the summer when the sun is brutal and drying is a race against time.
Your Go-To Action Plan for Stubborn Spots
Think of this like a ladder. You start on the lowest, safest rung. You only climb higher if the spot refuses to budge. The goal is to clear the glass without ever risking damage to it or the surrounding trim.
First, do a test spot. Pick one small, bad area on a side window. Work through the steps there. If it works, you have your solution for the whole car. This saves you time and product.
Here is your decision flowchart. Follow it in order.
- If the spots are new, light, or hazy: Start with a dedicated water spot remover. Spray it on a cool, shaded panel. Let it dwell for 60 seconds, then wipe with a clean, damp microfiber towel. Rinse the area thoroughly. This often works on my Tesla after a sprinkler incident.
- If the dedicated remover fails: Move to a diluted white vinegar solution (1:1 with distilled water). Spray, dwell for 30-45 seconds, and gently agitate with a soft glass cleaning pad or microfiber. Rinse immediately. Vinegar is acidic and can attack the minerals. Never use vinegar on hot glass, as thermal shock can cause it to crack.
- If vinegar does nothing: The spots are likely etched. It is time for a mild abrasive. Use a cerium oxide-based glass polish and a dedicated foam polishing pad on a dual-action polisher. This is the step for my BMW’s windows after a season of bad washes. Work a 2×2 foot area, applying light pressure. The polish will turn clear as it breaks down. Wipe off the residue with a clean microfiber and inspect.
- If polishing by machine is not an option: A non-abrasive chemical clay bar designed for glass can sometimes grab embedded minerals that chemicals miss. Lubricate the glass well with a quick detailer, knead the clay, and glide it gently over the surface. You will feel it grab. This is a good intermediate, hands-on step.
- If the spots remain after polishing: The etching is severe. You can attempt a second, more aggressive pass with the polish. For professionals, this is where a jeweler’s rouge or a more aggressive compound might be considered, but for most, this is the limit. Deep etching into the glass itself may be permanent.
The rule is simple. Start with chemistry. Finish with very controlled, fine abrasives if you must. Jumping straight to polishing is overkill for fresh water and risks creating new problems.
Once the glass is finally clean, protection is key. Apply a high-quality glass sealant or a ceramic coating formulated for glass. On my cars, I use a spray sealant. It beads water so effectively that droplets never get a chance to dry and deposit minerals. It makes your next cleanup a simple wipe.
I have brought windows back from looking permanently foggy to perfectly clear. It takes patience and the right steps in the right order. You can get your glass clear again.
Final Thoughts on Clear Windows
The single best thing you can do is attack water spots early with a dedicated remover, not a generic cleaner. For best results to remove water spots from car paint, choose a remover formulated for automotive finishes. Following that up with a thorough drying routine and a quality sealant is what keeps them from coming back.
Ignore them, and those harmless-looking spots will etch into the glass, turning a simple wipe into a job for professional-grade polishers and pads.
Deep Dive: Further Reading
- Clearing the Haze: How to Clean Cloudy Glass Windows Like a Pro
- 6 Ways to Get Rid of Moisture Between Window Panes
- Why Are My Windows Cloudy? | WindowPRO
- Removing haze on the outside of the windows | Hometalk
- r/WindowCleaning on Reddit: How can I remove this with hazy layer?
- How to Unfog a Double Pane Window? | Apex Window Werks
- How to Polish a Cloudy Window
Max is an automotive enthusiast having worked as a car mechanical and in interior detailing service for over 25 years. He is very experienced in giving your old car, a new fresh vibe. He has detailed many cars and removed very tough smells and stains from all kinds of cars and models, always ensuring that his work and advice helps his customers. He brings his first hand experience to his blog AutoDetailPedia, to help readers breath new life into their car interiors.