How Do You Repair Clear Coat Damage and Fix Scratches, Peeling, and Fading?
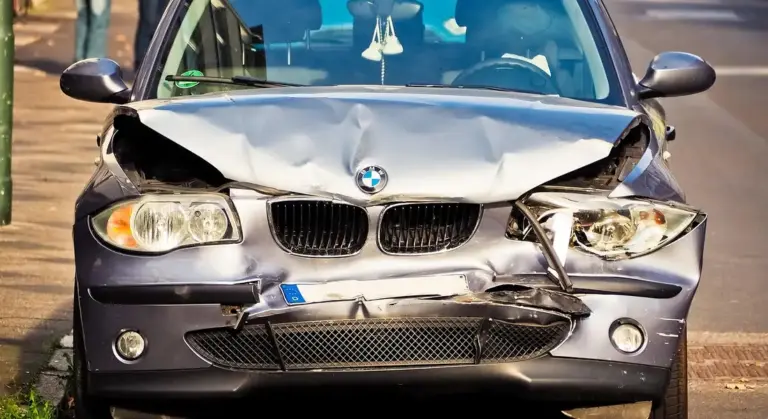
That hazy, scratched paint on your car isn’t just a cosmetic eyesore. It’s a sign your clear coat is failing, leaving the color underneath exposed to sun and weather.
I’ll show you the safe, detailing-focused methods to restore your finish. We will cover assessing clear coat integrity, removing scratches with correction, managing minor peeling, and sealing the paint to prevent further fading.
Leave it untreated, and UV rays will burn through to your car’s color coat, requiring a full repaint.
Clear Coat 101: What Exactly Are You Trying to Fix?
Your car’s clear coat is that transparent, protective top layer of paint. It is the final shield applied over the colored base coat. Think of it like the screen protector on your phone, a sacrificial layer meant to take the hits so the valuable surface underneath stays safe. It is one of the multiple layers in automotive paint that ensure durability and finish.
I see its purpose in three key jobs. First, it blocks ultraviolet rays from the sun to prevent the base coat color from fading. Second, it provides the deep, reflective gloss that makes a clean car look wet. Third, it acts as a physical barrier against contaminants like bird droppings, tree sap, and road film.
The Diagnosis: What Kind of Clear Coat Damage Do You Have?
You must identify the problem correctly. The wrong fix can waste your time or harm the paint. Start with your senses. Look at the damage under a bright light, like the sun or a detailing lamp. Then, use your touch.
Run your fingernail gently over a scratch. Does it catch? If your nail dips into a groove and gets stuck, the scratch has likely cut through the clear coat into the colored base coat. If your nail slides over smoothly, the damage is probably only in the clear coat. This simple fingernail test is the most reliable way to gauge scratch depth before you touch a polisher.
The Fingernail Test and Scratch Types
Perform the test on a perfectly clean, dry surface. Dirt can mislead you. Use the flat part of your fingernail. Glide it across the scratch, don’t dig in. Listen for a click and feel for a catch.
Clear coat damage falls into common categories. Light swirls are fine, circular web-like marks from improper washing or drying. They haze the reflection but rarely catch a nail. RIDS, or Random Isolated Deep Scratches, are solitary lines from keys, branches, or gravel. They may catch slightly if severe, but many are still within the clear coat. Etching is a chemical stain left by bird droppings, bug splatter, or acid rain. It looks like a dull, shadowy imprint in the finish. Polishing can remove swirls and some etching, but a deep RID that catches your nail might need more advanced correction.
My Jet Black BMW shows all of this. The swirls appear after every wash if I’m not careful. A RID from a stray shopping cart will stand out like a scar. Etching happens if I let a bug stain bake on the hood in the sun.
Peeling, Fading, and Oxidation
Peeling means the clear coat is physically separating from the base coat. It often starts on horizontal panels like the hood, roof, and trunk lid where sun exposure is constant. You will see edges curling up, with a cloudy or bubbled look underneath. It feels rough and flaky to the touch.
Fading and oxidation describe the clear coat losing its transparency and gloss. Ultraviolet radiation breaks down the coating over years. A chalky, dull, whitish haze forms on the surface. The paint loses its shine and feels rough, like very fine sandpaper. This haze is the clear coat deteriorating, and it requires specific restoration steps to bring back the gloss.
For comparison, my 1995 Mazda Miata had severe oxidation on its single stage paint. The red had turned a flat, pinkish chalk. On a modern clear coat car, that same chalky, dead look happens in the transparent top layer, not the color underneath. The visual result is identical, a lifeless finish.
The Detailer’s Protocol for Clear Coat Repair
Think of your clear coat as the thin, hard shell on an egg. Once it’s cracked or worn through, the color underneath is exposed and vulnerable. My Jet Black BMW taught me this lesson daily. Fixing it is not about guesswork. It is about a disciplined, repeatable process. Skipping any step in this protocol will guarantee a subpar finish, or worse, permanent damage. Learning how to apply clear coat protective coatings correctly is essential to maintain that discipline. A proper coat protects the color and keeps the finish lasting.
This is my workshop checklist. It is the same for a small scratch on my Miata’s fender or a faded section on my F-150’s roof. Follow it in order, every single time.
- Perform a complete two bucket wash on the entire vehicle, even if the damage is isolated to one panel. Any dirt or sand on an adjacent area can migrate and scratch the paint during repair.
- Decontaminate the paint with a chemical iron remover and a mechanical clay bar treatment. Polishing will not remove bonded contaminants like brake dust or industrial fallout, it will only grind them in.
- Dry the surface completely with a clean, plush microfiber towel. Water beads hide defects and dilute your polishing compounds, making your work inconsistent.
- Use automotive painter’s tape to isolate the repair area on the panel. This creates a safe zone and protects trim, edges, and adjacent panels from accidental abrasion or product staining.
- Inspect the damage under a bright, raking light source before you touch it with a polisher. Your garage ceiling light lies. A handheld LED or direct sunlight reveals the true depth and extent of every scratch.
- Always begin your correction attempt with the least abrasive combination of polish and pad. The goal is to remove the minimum amount of clear coat necessary to erase the defect.
Order of Operations
The checklist sets the stage. This sequence is the performance. Each step builds on the last, ensuring you never have to backtrack or fix a new mistake you created.
-
Wash and decontaminate until the paint is surgically clean. After washing, spray an iron remover over the dry panel and let it dwell. On my white Tesla, I watch it turn purple as it dissolves invisible metallic particles. Rinse thoroughly. Then, using a dedicated clay lubricant, glide a clay bar over the surface. You will feel it. The paint transitions from a subtle grit to a smooth, glassy feel. Any remaining roughness will ruin your next steps.
-
Isolate and tape with precision. Use high quality blue painter’s tape. Follow the body lines of the panel. On my Porsche’s bumper, I carefully tape the border where the paint protection film meets the paint. This discipline forces you to focus your work and prevents compound from slinging onto trim, which can leave a white, ghostly residue that is very difficult to remove.
-
Assess the damage under honest, harsh light. Angle a bright LED work light across the taped off section. On the BMW’s hood, this light shows me the difference between a superficial swirl and a deep scratch that has reached the color layer. Sunlight works, but it moves. A fixed light lets you mark defects with a washable pen and track your progress as you work.
-
Start with the least aggressive method possible. Fit your dual action polisher with a soft, foam polishing pad. Apply a dime sized amount of a fine finishing polish. Work a small, 2×2 foot area within your taped zone. I test on my Honda’s door all the time. Often, oxidation and light scratches disappear with just polish. If the defect remains, then and only then do you step up to a more aggressive cutting compound. You can always increase aggression, but you cannot put material back once you have burned through the clear coat.
DIY Repair: Fixing Scratches and Restoring a Dull Finish
Let’s get right to a common question I hear. Can you add clear coat to a car? The honest answer is, not the way you might think. You don’t just spray a new clear coat over the old, failing one like a fresh coat of wax. That will fail quickly and look terrible.
In detailing, we fix clear coat by working with what’s left. We restore the existing clear through abrasion and polishing. We remove the damaged, oxidized top layer to reveal the still-good clear coat underneath. The only time we “add” clear is during a targeted spot repair for a deep scratch, which is a delicate art.
This section is about paint correction, the process of removing defects from your car’s clear coat without repainting the entire panel. We’ll walk through the car paint correction process step by step, from inspection to finishing polish, to restore a showroom shine. You’ll learn how each step affects the depth, clarity, and durability of the finish.
Polishing Out Light Scratches and Haze
This is the most satisfying repair you can do. That cloudy, dull haze and those fine spiderweb scratches are just in the top few microns of your clear coat. My black BMW 3 Series, the “Swirl Magnet,” is the perfect teacher for this. It shows every single defect.
You need a dual-action (DA) polisher. It’s safe for beginners because it oscillates and rotates, making it very hard to burn through the paint. You’ll also need a polishing compound and a soft foam finishing pad.
Here is how you do it.
- Wash and dry the car thoroughly. Any grit left on the paint will get ground in by the polisher and make new, deeper scratches.
- Apply two pea-sized drops of polish to your clean pad. Less is more. Too much product will sling everywhere and dry out before it does its job.
- Spread the polish on a 2×2 foot section at low speed. Then, increase the polisher to a medium setting.
- Move the polisher slowly across the paint. Your arm speed should be about one inch per second. Make overlapping passes, like mowing a lawn. Do three or four passes in one direction, then three or four passes in the opposite direction.
- Check your work. Wipe the area clean with a microfiber towel. Look at it in direct sunlight or under a bright LED work light. Are the swirls gone? Is the haze removed? If not, make another set of passes.
- Repeat section by section across the entire panel.
The key is patience and checking your progress often; you are removing a microscopic layer of clear coat, and you want to stop as soon as the defect is gone. After polishing, you must always apply a protective sealant or wax. You have just exposed fresh, unprotected clear coat.
Using a Clear Coat Scratch Repair Kit
For a single, isolated scratch that catches your fingernail, a repair kit from the auto parts store can be a good option. These kits usually have a primer, a small bottle of color-matched paint, and a bottle of clear coat. They are made for shallow scratches, not deep gouges down to the metal. They are ideal for DIY scratch repairs on car paint.
Think of it as a cosmetic band-aid. It will make the scratch far less noticeable from a few feet away, but it will rarely be completely invisible up close. Manage your expectations before you start.
The process is all about cleanliness and thin layers.
- Clean the scratch and the area around it with isopropyl alcohol to remove all wax and oil.
- Use the included abrasive tip or a very fine sanding pen to lightly smooth the edges of the scratch. Be gentle.
- Apply the primer in a tiny, thin layer only inside the scratch. Let it dry completely.
- Apply the color paint. Use the brush or applicator to dab a minuscule amount into the scratch. You are filling the trench, not painting the panel. Let it dry. You may need two or three layers, letting each dry fully.
- Apply the clear coat. Again, just in the scratch. Build it up slowly in thin layers until it is just slightly higher than the surrounding paint.
- Wait at least 24 hours for everything to cure hard.
- Now you must level it. Use a very fine rubbing compound, like the one often included, by hand with a soft cloth. Gently sand the now-raised repair down until it is flush with the original clear coat.
- Finally, polish the entire area with a fine polish to blend the repair and restore gloss.
This repair takes a steady hand and a lot of time for drying; rushing the layers is the most common reason these fixes fail or look obvious. It is a skill that improves with practice, so try it on an inconspicuous area first if you can.
When Damage is Too Deep: Peeling, Heavy Fading, and Spot Clear Coat Reapplication
Let’s be honest. Some damage has gone too far for a buffer and a bottle. When your clear coat is actively peeling or has faded to a chalky, dull mess, you’re in a different league. This is where the real decision happens: try a risky DIY save, or call a professional.
My black BMW’s roof had a small spot where the clear coat gave up. It started as a tiny bubble, then peeled back like a bad sunburn. I knew right away I was out of my depth for a perfect repair.
The Hard Truth: When DIY Reaches Its Limit
Widespread peeling is a system failure. It means the bond between the clear coat and the color layer underneath is broken. You cannot glue it back down. You cannot polish it away.
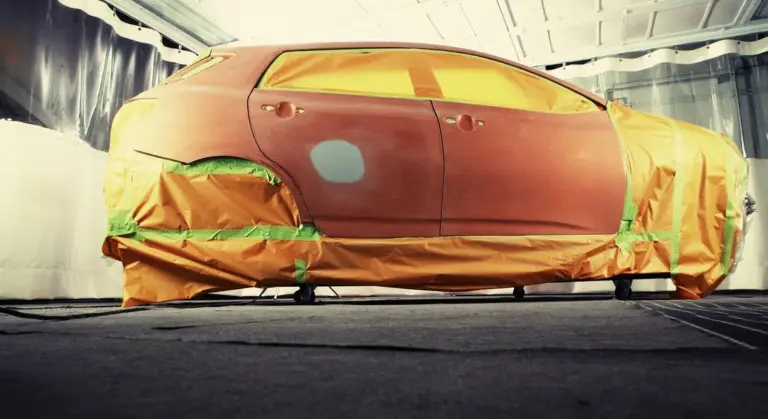
The only reliable fix for a panel with active peeling is to sand it completely smooth and apply a new, continuous layer of clear coat across the entire panel.
Why the whole panel? Blending new clear coat into old, damaged clear coat is incredibly difficult. The edge will always be visible, like a ridge under a sticker. A full respray ensures a uniform finish with no weak boundaries. For this, a professional paint booth, proper spray equipment, and experience are non-negotiable. It’s the right call for your daily driver’s hood or your classic car’s trunk lid.
The Advanced DIY Path: Feathering and Spot Clearing
For a very small, isolated spot of damage-like a rock chip that took the clear coat off down to the color, or a dime-sized peel-an advanced DIYer can attempt a spot repair. The core concept is called “feathering” the edge.
You don’t want a sharp cliff where good clear coat meets bare base coat. You need a smooth, gradual slope. Here’s how it’s done:
- Clean and Isolate: Wash the area thoroughly. Use painter’s tape to create a small work zone around the damage.
- Feather Sand: Using a very fine grit sandpaper (like 1500 or 2000 grit) on a soft block, gently sand the damaged area. Your goal is to sand the undamaged clear coat around the spot, tapering it down smoothly to the level of the base coat. You are creating a shallow, wide bowl shape, not a pothole.
- Clean and Prep: Wipe with a prep spray or isopropyl alcohol to remove all sanding residue and oils. Any contaminant left will be trapped forever.
- Apply Base Coat (If Needed): If you sanded into the color layer, you must carefully apply matching base coat paint in thin layers, only within the deepest part of your feathered area. Let it dry completely.
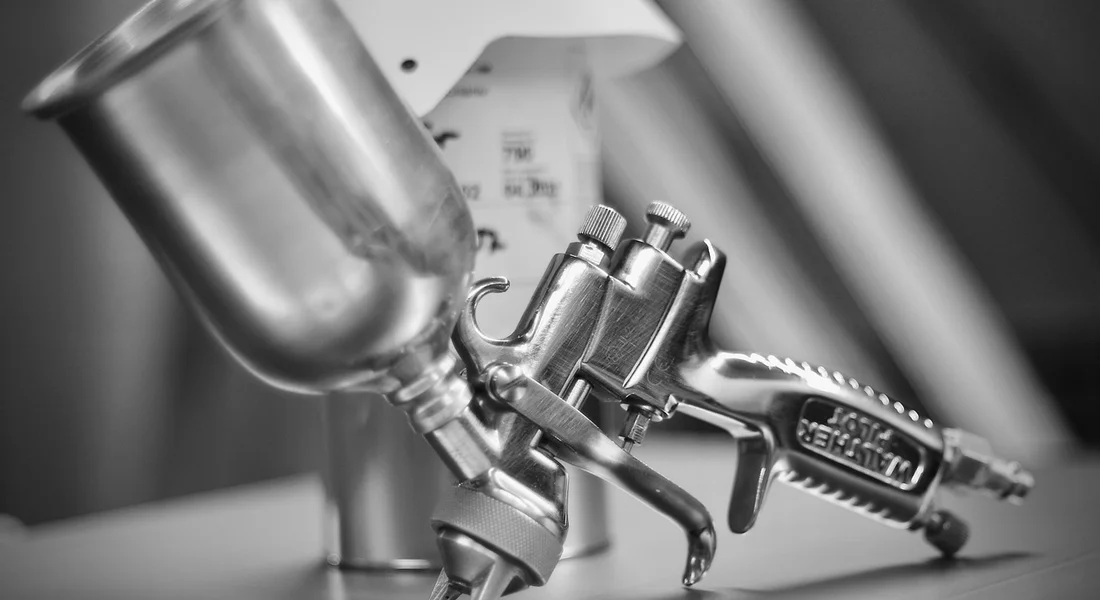
- Apply Clear Coat: Using a professional-grade aerosol clear coat or a small touch-up gun, apply the new clear. Start with a light “tack coat,” then apply 2-3 wet coats, going slightly beyond your feathered edges to help it blend.
- The Long Cure: Let it cure for at least 24-48 hours. Then, wet sand the entire repaired area with 2000 then 3000 grit to level any texture or “orange peel.” Finally, polish it back to a high gloss.
The biggest risk here is creating a “halo” or a visible ring around the repair where the new clear meets the old. This happens from poor feathering, insufficient blending, or a mismatch in the clarity or hardness of the clear coats. Dust, humidity, or cold temperatures during application will also ruin it. My Tesla’s front bumper had a chip I tried this on. In certain light, I can still see a faint ring. It’s a constant reminder of the challenge.
Answering: “Can I Spray Clear Coat on My Car?”
Yes, you can. Aerosol clear coat cans are readily available. But the can is not the hard part. The preparation and the finish work are everything.
Think of it as a three-part job: one part spraying, two parts sanding and polishing. The spray just deposits the material. Your skill with sandpaper and a polisher determines if it looks professional or like a botched touch-up.
If you go the aerosol route, your prep must be flawless, and you must commit to the extensive wet sanding and polishing afterward.
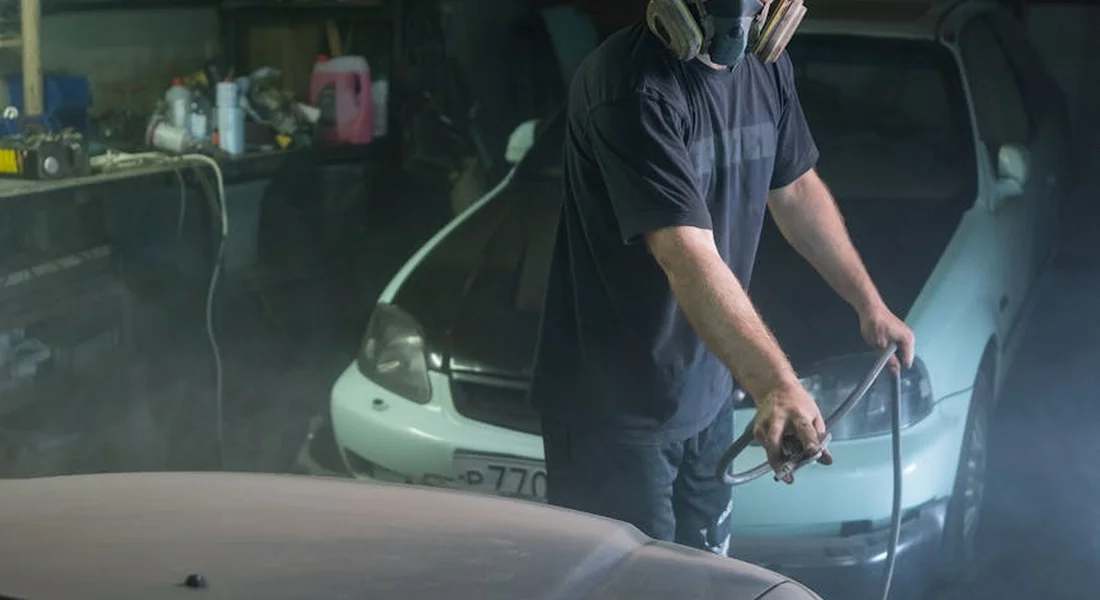
Choose a 2K (two-component) aerosol clear coat if possible. It has a separate hardener you mix, and it cures harder and more durable than a simple 1K clear. Work in a clean, warm, well-ventilated space-a garage with the door open, never outdoors where wind and dust will wreck it. Apply in multiple thin, even passes. Do not try to lay it on thick in one coat; it will run (“sag”) and look terrible.
And remember, you are working with isocyanates and particulates. Wear a proper respirator mask rated for organic vapors and particulates, not a dust mask. Your lungs will thank you. This isn’t just detailing anymore. It’s painting. It requires a painter’s respect for the materials and the process.
Calling in the Pros: What Professional Clear Coat Repair Really Costs
Sometimes, the damage is just too deep, too widespread, or the car is too valuable to risk a DIY mistake. When you start searching for clear coat repair near me, you need to know what you’re really paying for. It’s not just slapping on new paint. A quality repair is an art that blends chemistry, physics, and a steady hand. For deep scratches, repair deep scratches car paint often requires a precise assessment of depth and a multi-step process. A skilled technician can map the damage and choose the right materials to restore the finish.
The final clear coat repair cost hinges on three main things: the size of the damaged area, the complexity of your paint, and the shop’s labor rate. A small clear coat peel spot on a roof pillar is a quick fix. A whole hood that’s faded and peeling is a major project.
Paint color matters a ton. A solid white or black is more straightforward. Metallics, tri-coats (like many modern reds and whites), and especially custom colors cost more. The painter has to blend the new paint seamlessly into the old, which is incredibly difficult with complex pigments. Trying to match the flake in my Ford F-150’s dark blue metallic is a headache I’m happy to pay a pro to solve.
Realistic Price Ranges: From Respray to Restoration
Let’s talk numbers so you aren’t shocked. For a professional respray of a single panel, like a hood or a door:
- **Basic Respray:** $500 – $1,200. This gets the panel sanded, primed, painted, and cleared. It might not include removing parts like emblems or handles for a perfect edge.
- **Quality Blended Respray:** $800 – $2,000+. Here, the painter will sand and featheredge the damage, then blend the new color into adjacent panels (like fenders) so the repair is invisible. This is what you want for a seamless finish.
Now, compare that to multi-step paint correction and ceramic coating. This is for clear coat that is scratched and dull but intact. You’re not spraying anything; you’re meticulously removing microscopic layers of clear to restore clarity.
- **Single-Stage Correction:** $300 – $600. A good one-step polish to remove light swirls and bring back gloss. Perfect for maintaining a garage queen.
- **Multi-Stage Correction & Coating:** $800 – $2,500+. This is the full restoration. Multiple steps of compounding and polishing to erase deep scratches, followed by a professional-grade ceramic coating. This is what I’d do for my black BMW or the Porsche to make it look better than new.
A Tale of Two Repairs: Porsche 911 vs. Honda Odyssey
This is where your car’s role changes everything. Let’s use my garage as an example.
For the red Porsche 911, a paint correction isn’t just a wash. It’s a preservation project. The soft clear coat on many performance cars is a swirl magnet. A full multi-step correction to remove holograms from a bad detail and light scratches might run $1,500 – $2,500. Why so high? The labor is intense, the materials are premium, and the margin for error is zero. One wrong move with the polisher and you burn through the clear.
For the grey Honda Odyssey, the goal is different. It’s about rehab, not perfection. A customer might come in with a scratched-up sliding door from grocery carts and faded clear on the roof. A shop would likely recommend a blended respray of that door and a heavy polish on the roof. Total cost? Maybe $1,000 – $1,800. The paint is simpler, the expectations are about looking great from five feet away, and the labor focuses on durability for a family hauler.
The right repair always depends on the car’s value, your long-term plans for it, and your expectation for the final result. A pro will look at the damage, feel the paint thickness, and give you these options. Get a few estimates. The cheapest quote often means cutting corners on materials or prep work, which will show up in a year. Remember, with clear coat, you almost always get what you pay for.
Technique Tweak: The Secret to a Flawless Finish
My black BMW shows every single flaw. In direct sun, it tells the truth about my work. The final polishing pass is where you seal that truth.
On your last pass, use a crosshatch pattern with painfully slow arm speed. Move the polisher up and down, then side to side. Overlap each stroke by half. This gentle, overlapping grid removes the micro-marring or holograms that faster passes can leave behind.
This slow crosshatch is the buffing equivalent of a whisper, blending the finish into silence.
Never judge your work under one light. Garage bulbs lie. I keep a Brinkmann xenon light or a basic LED swirl finder in my kit. After polishing, walk around the car. Hold the light at a shallow angle, almost touching the paint. Tilt it. Move it.
Inspect from the hood, the side, and even squat down to look along the door. Holograms are ghosts. They only appear from certain angles. Find them now with your light, not later in a driveway.
Your inspection light is your most honest critic. Use it from every possible angle.
Before any polish touches the paint, you need a perfectly clean canvas. After claying, do the baggy test. Slide your hand into a cheap, thin plastic sandwich bag. Lightly drag your bag-covered fingertips across the panel.
The plastic amplifies every speck. What feels smooth to your bare hand will feel like sandpaper through the bag. If you feel grit, clay that section again. It takes five seconds.
The baggy test is the final gatekeeper. It ensures no hidden grit ruins your polished finish.
Long-Term Protection: Keeping Your Clear Coat Safe After Repair
Fixing the clear coat is only half the job. I learned this the hard way on my black BMW. I spent a weekend correcting the swirls, only to see fine scratches return after one careless wash. If you do not protect the fresh surface, your repair work is completely wasted. Think of it like healing a cut and then not putting a bandage on it. The environment wants to attack your paint again immediately.
Your choice of protection depends on your car and your life. I use different products on my different vehicles.
For cars like my Tesla or the Porsche, where I want maximum durability and a brilliant, slick finish, I apply a ceramic sealant. These are not waxes. They form a hard, semi-permanent layer of protection that can last over a year. On my white Model 3, a good ceramic sealant makes bug splatter rinse right off the flat bumper. It makes the paint feel like glass.
For daily drivers that see more abuse, like my F-150 or the Odyssey, a high quality spray wax is my go to. It is fast. I can apply it right after a wash while the car is still wet. It gives me three to four months of solid protection against rain and dirt. The key is choosing a spray wax designed for durability, not just a quick shine. The spray wax on my truck’s dark blue paint keeps water beading beautifully between deeper cleans.
How do you seal the clear coat? The process is simple if the paint is perfectly clean. After your final polish, use a prep spray or isopropyl alcohol wipe down to remove any oils. Then, in a shaded, cool spot, apply your sealant or wax in thin, even sections. Follow the product’s instructions for cure time. For a ceramic sealant, you might need to let it sit for a minute before gently wiping it off. The surface should feel incredibly slick when done.
Let us compare clear coat versus wax, as this confuses many people. The clear coat is the hard, transparent layer of paint on top of your color. Its job is to protect the color coat from the sun and elements. Wax or sealant is a product you add on top of the clear coat. Wax is a sacrificial layer that takes the damage so your clear coat does not have to. It is like a shield you renew every few months. A ceramic sealant is a more advanced, longer lasting version of that shield. Wax does not replace the clear coat, but rather supplements it.
The Right Wash Keeps Your Work Intact
You can have the best sealant in the world, but a bad wash will scratch right through it. This is non negotiable. To avoid re scratching everything you just fixed, you must wash properly.
I use the two bucket method on every single car, every single time. It is the only way I wash my swirl magnet BMW. Here is how it works.
- Fill one bucket with your soap and water. This is your wash bucket.
- Fill a second bucket with plain water. This is your rinse bucket.
- Use a clean, soft microfiber wash mitt. Dip it in the soapy bucket and wash one section of the car.
- Before dipping the mitt back into the soap, rinse it thoroughly in the plain water bucket. This traps the dirt you just picked up in the rinse water, not in your soap.
- Only then do you go back to the soap bucket for more clean suds.
This method prevents dirt from being ground into your paint, which is how most scratches and swirls are created. It feels like an extra step, but it becomes habit. After correcting the paint on my Miata, this wash technique is what keeps that classic red looking new.
Beyond the wash, your tools matter. Use plush, clean microfiber towels for drying. Never use a brush or an old rag. Store your towels and mitts in a sealed bin so they do not collect dust. A clean car starts with clean tools.
Maintaining That Showroom Shine
After fixing everything from peeling clear on my F-150 to faded single-stage on the Miata, I stand by one rule: flawless repair starts with stripping the area back to a perfectly clean, bare surface. Do that, and your new clear coat will bond properly, protecting the paint beneath it for the long haul.
Ignore this foundation, and the damage will return, often worse than before.
Sources and Additional Information
- r/projectcar on Reddit: Does anyone know the best way to “fix” the clear coat peeling without repainting?
- How to Repair Clearcoat – TouchUpDirect
- Can You Restore Damaged Clear Coat on Your Car? Here’s What You Need to Know
Max is an automotive enthusiast having worked as a car mechanical and in interior detailing service for over 25 years. He is very experienced in giving your old car, a new fresh vibe. He has detailed many cars and removed very tough smells and stains from all kinds of cars and models, always ensuring that his work and advice helps his customers. He brings his first hand experience to his blog AutoDetailPedia, to help readers breath new life into their car interiors.