How Do I Detail My Car’s Interior and Exterior to Maximize Its Value Before a Sale or Trade-In?
You’re thinking about selling your car, and you know a dirty interior or dull paint will knock money off the price. I get it, I’ve been there with every car I’ve ever sold.
Let me walk you through the exact process I use, from my kid-hauled Honda Odyssey to my black BMW that shows every flaw. We will cover extracting ground-in stains from seats, eliminating any trace of smoke or food odors, safely restoring oxidized paint to a deep shine, claying and sealing the exterior for that wet look, and dressing tires and trim to complete the picture.
Skip this work, and you are giving the buyer a reason to lowball you.
Key Takeaways: The Detailer’s Bottom Line on Value
Is getting your car detailed worth it before selling? The answer is yes, every single time. Think about the last time you shopped for a used car. You opened the door and got a whiff of old fries and wet dog. You saw stained seats and grimy steering wheels. You walked away fast, didn’t you? First impressions are everything. A buyer forms their opinion in the first ten seconds.
View detailing not as an expense, but as one of the highest-return investments you can make before a sale. A weekend of your time and maybe a hundred dollars in supplies can directly add hundreds, even thousands, to the final offer. A dealer sees a clean car and thinks “easy to prep for the lot.” A private buyer sees a clean car and thinks “this owner cared for it mechanically, too.”
Your goal isn’t just to sell a used car. You are selling the feeling of a “like new” vehicle that has been cherished. That feeling commands a premium.
The biggest value killers are what buyers notice instantly. Odors from pets or smoke make them question if the smell will ever come out. Stained fabric seats look permanent. Filthy footwells and crumbs in crevices scream neglect. On the outside, swirled, dull paint under the lot lights looks tired and expensive to fix. Tackle these, and you tackle the buyer’s biggest fears.
The Pre-Sale Detail Protocol: Your Non-Negotiable Order of Operations
This is your master checklist. Order matters. You work top to bottom, inside to out, dirty to clean. Follow this sequence to avoid splashing dirt on a clean interior or grinding brake dust into your corrected paint.
The 6-Step Pre-Sale Sequence
- Interior (Deep Clean)
Start here because it’s the messiest. Remove all personal items and floor mats. Vacuum every surface first, starting with the headliner, then seats, then floors. Use a soft brush attachment. For plastics, vinyl, and leather, use a diluted all-purpose cleaner and microfiber towels. For cloth seats, a fabric cleaner and a stiff brush work wonders, especially on cloth fabric seats. My Honda Odyssey taught me that a portable extractor is the ultimate weapon against kid stains, pulling up deep grime and odors. Let the interior air out completely.
- Wheels & Tires
Wheels are often the dirtiest part. Clean them now, before you wash the paint, so any splatter gets rinsed off later. Use a dedicated wheel cleaner that’s safe for your wheel type (check for labels saying “safe for all finishes”). Agitate with a soft wheel brush. Dress tires with a water-based tire shine for a deep black, non-greasy look. This step alone makes a car look well-maintained.
- Wash & Decontaminate Paint
Use the two-bucket wash method. One bucket with soapy water, one with clean rinse water. This prevents scratching. After washing, feel the paint. If it feels gritty, use a clay bar or synthetic clay mitt with lubricant. This removes embedded contaminants that washing misses. It makes the paint feel glass-smooth, a huge signal of care to a savvy buyer.
- Paint Correction (If Needed)
This is for higher-value cars or ones with obvious swirls. Look at the paint under a direct light, like the sun or a bright LED. See spiderweb scratches? That’s what we fix. Using a dual-action polisher, a light cutting pad, and a one-step corrective polish can remove 80-90% of defects. My black BMW 3 Series was a swirl magnet. A single polishing session transformed it from looking tired to looking liquid deep. For most sales, this one-step polish is the sweet spot for effort versus visual impact.
- Protect & Shine
Never leave corrected paint bare. Apply a protective layer. A synthetic spray sealant is perfect for sellers. It’s easy to apply, offers good protection for months, and gives a brilliant, wet shine. Apply it to all painted surfaces, clean glass, and even plastic trim. This makes the car pop in photos and in person.
- Final Touch-Ups
Wipe down door jambs and the gas filler door. Clean the interior glass with a glass-specific cleaner. Vacuum the floor mats and place them back neatly. Do a final walk-around to remove any fingerprints or water spots.
Product Tier List for Sellers
| Budget / Quick Flip | Pro-Sumer / High Impact | Show Car / Concours |
|---|---|---|
|
Best for: A 10+ year old commuter car where the goal is simple cleanliness.
|
Best for: The sweet spot. Most 3-8 year old vehicles for private sale or trade-in.
|
Best for: High-end, late-model, or collector cars where maximum presentation equals maximum dollars.
|
Understanding the Price: DIY vs. Pro
People often ask about interior and exterior detailing price. The math is simple. A professional pre-sale detail can range from $200 to $600 or more, depending on the car’s condition and size. The DIY cost is just your products. A Pro-Sumer tier kit of concentrates might cost you $150 initially, but it will detail that car and your next five. You are trading your sweat equity for pure profit.
Hiring a pro makes sense if you lack time, physical ability, or the confidence to tackle paint correction. A good detailer brings expertise and efficiency. But doing it yourself brings knowledge and saves you money you can keep in your pocket. For my cars, I always do it myself. I know every inch is done right.
Interior Deep Dive: Making It Smell and Feel Like New
Here is the one rule you must remember. Buyers smell and touch everything first. A shiny exterior pulls them in, but a dirty or strange smelling cabin sends them running. Your job is to make the interior feel like nobody ever lived in it.
The Systematic Tear-Down
You cannot clean what you cannot see. Start by removing every single item from the car. I mean all of it. Floor mats, car seats, old napkins in the door pockets, coins, and that forgotten french fry under the center console.
My Honda Odyssey, the ‘Kid Hauler’, taught me this. Once I pulled out the second and third row seats, I found a layer of sand, crushed goldfish crackers, and a petrified juice box straw. You need that blank canvas.
Your first step is to take everything out and vacuum the empty, bare interior. This is the only way to get a truly deep clean and shows a buyer you cared for the space.
Fabric & Carpet Rescue
Stains tell a story, usually one you don’t want a buyer to hear. For common spills like milk or soda, an extractor is your best friend. It sprays a cleaning solution and sucks the dirty water back out.
To know if a stain will come out, do a spot test. Apply a little cleaner to a hidden area, like under the seat. If the color doesn’t change or fade, you are likely safe. For set-in stains, you may need several passes.
For floor mats, a deep extraction can often restore them, but badly worn or torn mats should be replaced. New, inexpensive mats signal that the car is well-maintained and are a smart investment.
Hard Surface Warfare
This is where you fight grease, skin oils, and spilled syrup. Use different tools for different surfaces. A soft bristle brush works for air vents and textured plastic. A microfiber wrapped around a plastic card cleans tight seams.
For touchscreens and glossy black plastic, use a product labeled safe for those surfaces. A regular glass cleaner can strip anti-glare coatings. Always spray your cleaner onto the cloth, not the surface, to avoid drips.
Remember that “Vegan Leather” or synthetic leather, like in my Tesla Model 3, is not real leather. Use a mild, pH-balanced interior cleaner. Harsh chemicals or leather conditioners can damage the coating, making it sticky or discolored.
The Nuclear Option for Odors
Air fresheners are a red flag. They scream “I’m hiding something.” For organic smells like food or spilled milk, use an enzymatic cleaner. It eats the bacteria causing the smell.
For persistent, embedded smells like smoke or mildew, you need an ozone generator. It floods the cabin with ozone gas that breaks down odor molecules. This is a powerful tool that requires you to vacate the car and follow safety instructions precisely. For a sale, eliminating the source of the smell, not masking it, is what adds real value. Sometimes, even with ozone treatment, additional cleaning is necessary to completely remove bad odors.
Forgotten Zones
Buyers with a keen eye will check these spots. They tell the true story of ownership. Wipe them down with an all-purpose cleaner.
- Seat Tracks: Caked with dirt and grease. A brush and cleaner works.
- Underside of Seats: A forest of crumbs and lost toys.
- Glove Box: Empty it and wipe the interior liner.
- Door Jambs: The framed edges of the door opening. They collect grime.
- Trunk/Spare Tire Area: Remove everything, lift the floor, and vacuum the well.
Exterior Revival: From Dull to Showroom Shine
The exterior is your first and best chance to say “this car is valuable.” A gleaming paint job suggests mechanical care. A dirty one suggests neglect.
Wheel & Tire First Impressions
Start here. Dirty wheels ruin a clean car. For caked brake dust, like on my Porsche 911’s alloys, use a dedicated iron fallout remover. Spray it on dry wheels, watch it turn purple as it dissolves the metallic particles, then rinse.
For tire dressing, choose a water-based product. It gives a rich, dark black finish without the greasy, sling-prone look of old-school dressings. A clean, satin-black tire makes the whole wheel look newer.
The Two-Bucket Wash is Mandatory
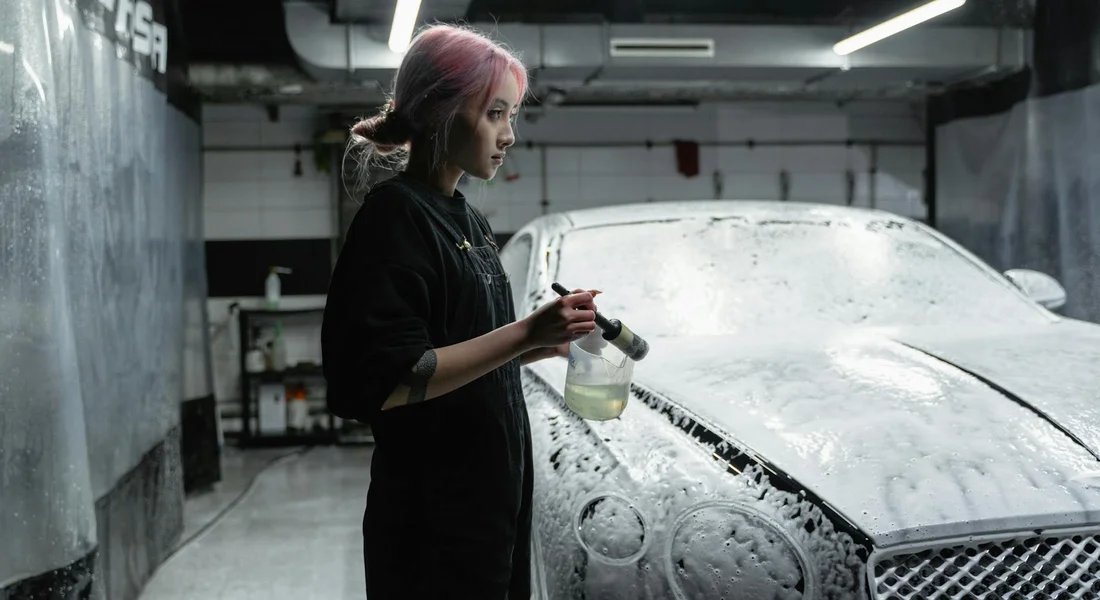
You must wash the paint without scratching it. The two-bucket method is non-negotiable. One bucket has your soapy wash water. The other is filled with clean rinse water.
You dip your wash mitt in soap, wash a section of the car, then rinse the mitt in the clean water bucket to remove dirt before getting more soap. This prevents grinding dirt into your paint.
My Jet Black BMW 3 Series, the ‘Swirl Magnet’, is a permanent lesson in what happens when you use one bucket and a dirty sponge. It takes hours of correction to fix the spider-webbing scratches a bad wash creates in minutes.
Decontamination: The Secret Step
After washing, your paint may feel rough. That is bonded contamination like industrial fallout, rail dust, and tree sap. A clay bar removes it.
Use the “baggie test.” Put your hand in a thin plastic sandwich bag and lightly rub the clean, wet paint. If it feels gritty, like sandpaper, you need to clay. The bag amplifies the feeling. Lubricate the surface with a detail spray and gently glide the clay bar over it. You will feel it smooth out.
To Polish or Not to Polish?
This is your big value choice. Polishing removes a fine layer of clear coat to eliminate swirls and light scratches.
A one-step polish with a mild abrasive is worth it if your paint looks hazy or dull in the sun but feels smooth to the baggie test. It restores deep gloss quickly.
Leave deep scratches that catch your fingernail alone. Fixing them requires aggressive compounding, which risks thinning the paint too much on an older car.
The transformation on my 1995 Mazda Miata’s single-stage paint shows the power of correction. It went from oxidized, chalky pink back to a deep, vibrant red. That kind of change directly increases perceived value.
The Final Protective Layer
After cleaning and polishing, you must protect. A simple spray wax or sealant is easy and gives months of shine and water beading. A ceramic spray coating offers longer protection, often a year or more, with exceptional slickness.
Either is fine for a sale. The goal is that gleaming, slick finish a buyer can see and feel when they run their hand over the hood. It feels expensive.
And yes, it is worth getting a new car detailed. Applying protection from day one is the ultimate move for future resale value. It keeps the paint newer, longer.
Glass, Trim, and Exhaust Tips
Finish strong. Use a dedicated glass cleaner and a separate, clean microfiber for windows inside and out. Streak-free glass adds sparkle.
Restore faded black plastic trim with a dedicated trim restorer. It brings back a consistent dark color. For chrome exhaust tips, use metal polish and fine steel wool to remove carbon buildup.
And to answer a common search, “exterior detailing” refers only to cleaning and protecting the outside surfaces of the car. It does not include interior work or lights, which are their own separate processes.
The Real Math: Is DIY Detailing Worth It Before a Trade-In?
You asked directly, and I will answer directly. Yes, detailing your car absolutely increases its trade-in value and sale price. The real question is whether the money and effort you put in comes back to you. I have done this many times, for my own cars and for friends, and the math almost always works in your favor. It’s important, though, to consider the cost of detailing in your calculations.
Let us break down a realistic scenario. You drive a common five-year-old family sedan or crossover.
- DIY Path: You buy a basic kit: a good cleaner, sealant, glass cleaner, interior brushes, and microfiber towels. This costs between $50 and $150. You then invest a solid Saturday, about 4 to 8 hours of your time.
- Professional Path: You take it to a reputable shop for a full interior and exterior detail. This runs from $200 for a good clean to $600 for paint correction and deep cleaning.
- Potential Value Increase: A clean, odor-free car with shiny paint can easily net you $500 to $2000 more than a dirty, smelly one. A dealership has a “clean” bonus built into their appraisal software, usually a few hundred dollars. A private buyer pays a visual and emotional premium for a car that feels cared for.
Your potential return on a $150 DIY detail is massive, and even a $600 professional job can pay for itself if it pushes your car into the next valuation bracket.
The strategy changes based on who is buying. A dealership appraiser looks for reasons to deduct. They will give a standard “clean” adjustment, but they are not emotionally swayed. A private buyer is different. They fall in love with a car that smells new and shines in the sun. For a private sale, detailing is not an option. It is a requirement to get top dollar.
The Top 3 Value-Adding Tasks
Focus your energy here for the biggest impact.
- Odor Elimination. Nothing turns a buyer off faster than a bad smell. It screams neglect. Whether it is old fast food, kids, pets, or smoke, you must neutralize it. This is your number one priority.
- Paint Polishing and Sealing. The paint is the first thing people see. Removing light swirls and applying a slick sealant makes the color pop and gives a “well-maintained” feel. You do not need a show car finish. You need bright, reflective paint.
- Deep-Cleaned Driver’s Area. The steering wheel, driver’s seat, and pedals see the most wear. Grime on these spots tells the story of a tired car. A thorough cleaning here makes the entire interior feel fresher and less used.
3 Tasks NOT Worth It For Pure Resale
Do not waste time or money on these before a sale.
- Engine Bay Detailing. It looks impressive, but almost no buyer checks it. A quick wipe-down of the plastic cover is plenty. A detailed engine bay does not move the needle on an offer.
- Correcting Deep, Isolated Scratches. If you have a single deep scratch on a door, professional repair is expensive. A buyer will see it and discount for it regardless. Focus on making the overall paint look fantastic, which makes that one flaw seem more like an anomaly.
- Applying Long-Term Coatings Like Ceramic Pro. These are fantastic for you, the owner. They are a terrible investment just before you sell. The new owner will not pay you extra for it. Use a durable spray sealant that lasts 3-6 months instead.
How to Vet a Professional Detailer
If you see an ad for “interior exterior detailing 46% off,” be careful. Extreme discounts often mean rushed, low-quality work. Do not choose a detailer based on price alone. Look at their portfolio of finished cars. Read detailed reviews that mention specific results, not just “they did a good job.” A true professional will ask you questions about your goals for the sale. They should be able to explain exactly what their package includes. A good detail before a sale is an investment, and you should pick your partner for that investment wisely.
Quick Fixes for Common Deal-Killers
Eradicating Pet or Smoke Smell Overnight
For my Honda Odyssey, the “Kid Hauler,” smell removal is a science. You have two effective paths.
Option 1: The Ozone Generator. This is the professional method. You can rent one from a tool rental or some detail suppliers. Here is exactly what to do. Ozone generators are a common tool for car odor removal. When used properly, they target odor molecules at the source inside the vehicle. First, vacuum the interior completely. Wipe all hard surfaces with an interior cleaner. Then, place the ozone generator on the center console. Roll up all windows, close all doors. Run the generator for 30-45 minutes. Critical Safety Step: Let the car air out with all doors open for at least one hour before you get in. Ozone is harmful to breathe. This method destroys odor molecules at the source.
Option 2: The Baking Soda Bomb. For milder smells, this works. Vacuum thoroughly. Sprinkle baking soda liberally over all carpet and cloth seats. Let it sit for several hours or overnight. In cars, baking soda is a simple, proven way to remove car smells by absorbing odors from upholstery. This makes it a handy prep step before deodorizing with an enzyme-based odor eliminator. Vacuum it all out, and I mean all of it. Follow up by spraying an enzyme-based odor eliminator on the same surfaces. It breaks down the organic matter causing the smell. This takes more time but is very effective for food or pet accident odors.
Making Cloth Seats Look Unstained
Spills happen. For coffee, soda, or milk stains, do not just scrub. You will push the stain deeper. First, blot up any liquid. Then, spray a dedicated fabric stain remover or a diluted all-purpose cleaner directly onto the stain. Let it dwell for 5-10 minutes to break down the residue. The key tool is an extractor or a wet/dry vacuum. Use it to suck the cleaner and dissolved stain out of the seat. If you do not have one, use a stiff brush to agitate, then blot repeatedly with a clean, damp microfiber towel. The goal is to lift the stain out, not rub it into the fabric.
Reviving Hazed Headlights
Cloudy headlights make any car look old and unsafe. Restoring them is one of the highest visual returns for effort. Use a dedicated restoration kit like I did on my 1995 Mazda Miata. They come with sanding pads and a clear coat sealant. If you’re aiming to cleanly restore yellowed headlights, this method targets the oxidation effectively. Tape off the paint around the headlight. Wet-sand with the included pads, starting with a more abrasive grit and moving to a fine one. This removes the oxidized yellow layer. Then, polish the lens with the provided compound. Finally, apply the UV sealant. This final sealing step is crucial. Without it, the haze will come back in months. In 90 minutes, you have transformed the front end of the car.
Minimizing Scratches and Swirls Without a Polisher
You do not need a machine polisher to make swirls disappear for a day or a week. Use a “glaze” or “pre-wax cleanser.” These products contain light oils and fillers that temporarily fill in shallow scratches. Wash and dry the car. Apply the glaze by hand with a soft foam applicator pad using light pressure. Wipe it off immediately with a clean microfiber towel. Follow it with a spray wax or sealant. The paint will look deep, wet, and swirl-free under the showroom lights. This is a perfect trick for inspection day. It is not a permanent correction, but it is an incredibly effective visual enhancement.
The Final Walk-Around
On the day of the sale or trade-in, do this ten-minute checklist. It shows ultimate care and closes the deal.
- Clean all windows, inside and out, with a glass cleaner and a waffle weave towel.
- Empty every storage bin, cup holder, and the glove box of all personal trash.
- Fill the gas tank. A full tank is a small courtesy that feels generous.
- Present all keys, key fobs, and any original floor mats you have.
- Do a final wipe of the dashboard and door panels to remove dust.
This final touch leaves the impression that this car has been loved, not just used. That impression is what turns a good offer into a great one.
Final Thoughts on Maximizing Resale Value
The most critical step is to create a complete sensory experience that signals meticulous care, from a spotless, fresh-smelling interior to a deep, reflective paint finish. I’ve watched a comprehensive detail directly translate into a higher offer, whether for my kid-hauling Odyssey or my black BMW that needed every swirl removed.
Hand over a car with lingering odors or holograms in the paint, and you invite buyers to deduct the cost of professional correction from your asking price.
Citations and Authoritative Sources
- What’s the difference between Interior and Exterior Detailing?
- Interior and exterior detailing guide for beginners – Ralda’s Details
- Expert Car Detailing Services – Interior & Exterior Auto Detailing – Delta Sonic Car Wash
- Professional Auto Car Detailing in South Jordan, UT
- A Step-by-Step Guide to Interior and Exterior Car Detailing
Max Gunther
Max is an automotive enthusiast having worked as a car mechanical and in interior detailing service for over 25 years. He is very experienced in giving your old car, a new fresh vibe. He has detailed many cars and removed very tough smells and stains from all kinds of cars and models, always ensuring that his work and advice helps his customers. He brings his first hand experience to his blog AutoDetailPedia, to help readers breath new life into their car interiors.