How Do You Find a Car Wrap Installer Who Won’t Ruin Your Paint?
You are ready for a new color or a full protective wrap, but the thought of handing your keys to a stranger and hoping they don’t mess it up is keeping you up at night.
This guide will walk you through the entire process, from initial research to signing the work order. We will cover how to spot shop red flags, where to search online, the exact questions to ask during a consultation, and how to properly compare quotes and materials.
Choose wrong, and a poorly installed wrap will peel, bubble, and can even damage your factory clear coat.
Evaluate Their Portfolio: Look Beyond the Glamour Shots
You found a few shops online. Now you must separate the artists from the amateurs. A true portfolio shows the work, not just the result.
Do not just scroll through perfect, sunlit photos of Lamborghinis. Look for their work on common cars, like a Honda Odyssey or a Ford F-150. If they can make a minivan’s big, flat panels look flawless, they have skill.
Examine the details in their photos: edges should be tight and invisible, seams should be strategically placed, and the surface must be completely free of bubbles, wrinkles, or dirt specks trapped underneath.
Ask to see a vehicle in person if possible. Run your fingers over a wrapped edge. It should feel smooth and firm, not lifting or rough. On my Porsche 911, the wrap tucks perfectly behind the door handles and emblems. You cannot feel where it ends.
Understand the Quote: What You’re Really Paying For
A price that seems too good to be true usually is. A professional quote breaks down three things: labor, material, and complexity.
Labor is the installer’s skill and time. A full wrap is a two to four day job for a good team. Material cost depends on the vinyl brand. I trust names like 3M, Avery Dennison, and Oracal. They make consistent, durable films.
Complexity is your car. Wrapping a simple sedan is one thing. Wrapping a Ford F-150 with its massive hood, big doors, and textured trim is another. More curves, more mirrors, more bumpers mean more time and material.
A detailed quote protects you. It should list the vinyl brand, the warranty terms, any parts they will remove and reinstall, and the estimated timeline. A vague “car wrap installation near me cost” number is a red flag. Expect a professional wrap to start around $2,500 and go up from there, depending on all these factors.
The Questions You Must Ask Before You Commit
You are in the shop, talking to the installer. This is your moment. Your questions tell them you care about quality. They also protect your car’s paint.
Ask About Their Process and Paint Prep
The first thing a good installer does is wash and decontaminate your paint. I mean a full wash, clay bar treatment, and isopropyl alcohol wipe-down. Any dirt left on the paint gets sealed under the vinyl forever.
Ask them: “What is your paint preparation process?” They should describe these steps confidently. Proper prep is non-negotiable. It prevents damage and ensures the vinyl sticks perfectly for years.
Ask about disassembly. To do a perfect job, they often remove door handles, lights, and trim. This allows the vinyl to be wrapped behind edges, which prevents peeling. If a shop says they never remove anything, be cautious. For car wrap removal, professional disassembly helps reach edges and ensure no adhesive residue remains. A clean surface is essential for a seamless new wrap.
Get Warranty Details in Writing
There are two warranties: one for the material from the manufacturer, and one for the installation labor from the shop.
The vinyl warranty, often 3 to 10 years, covers fading, cracking, and adhesive failure under normal conditions. The installation warranty, typically 1 to 5 years, covers lifting edges, bubbles, and defects from the install itself.
Always ask for both warranties in writing on your final invoice. A shop that guarantees its work stands behind it. If they hesitate, walk away. My BMW’s wrap has a 5-year labor warranty. It gives me peace of mind.
Caring for Your New Wrap: Making It Last
Your car leaves the shop looking incredible. The work is not over. How you care for the wrap decides its lifespan and durability.
The Right (and Wrong) Way to Wash
Forget the drive-through brush wash. Those spinning bristles will scratch and lift the vinyl edges. Hand wash only.
Use a pH-neutral car shampoo and plenty of lubrication. The two-bucket method I use on my black BMW is essential here too. Grit trapped in a wash mitt will scratch the wrap just like it scratches clear coat.
Dry with a clean, soft microfiber towel. Do not let water spots dry on the surface, especially on matte or satin finishes. They can stain.
Never use wax, ceramic coating, or polish made for traditional clear coat on a vinyl wrap unless the product specifically says it is wrap-safe. Many contain solvents or abrasives that can damage the vinyl. For a vinyl wrapped car, choose products labeled wrap-safe to protect the finish. We’ll outline the best wax polish options for vinyl wraps in the next steps.
What to Avoid at All Costs
Be careful at gas stations. Do not let gasoline drip onto the wrapped areas, especially on the rear bumper. Fuel will melt and stain the vinyl immediately.
Avoid parking under trees that drip sap. Sap is incredibly difficult to remove from a wrap. Bird droppings and bug splatter should be rinsed off quickly. Their acidity can etch the surface if baked in the sun.
For cleaning, never use harsh chemicals, abrasive cleaners, or rubbing alcohol on the finished wrap. Do not use a pressure washer nozzle closer than 12 inches, and never spray directly at the edges of the vinyl.
Your installer is your best resource. Ask them for their recommended wash and care products before you leave the shop. They might sell a kit. For my Tesla Model 3’s wrap, I use a specific spray detailer the shop recommended. It cleans bug splatter off the flat front bumper without any streaks or residue.
What to Look For: Evaluating a Shop’s Skill and Reputation
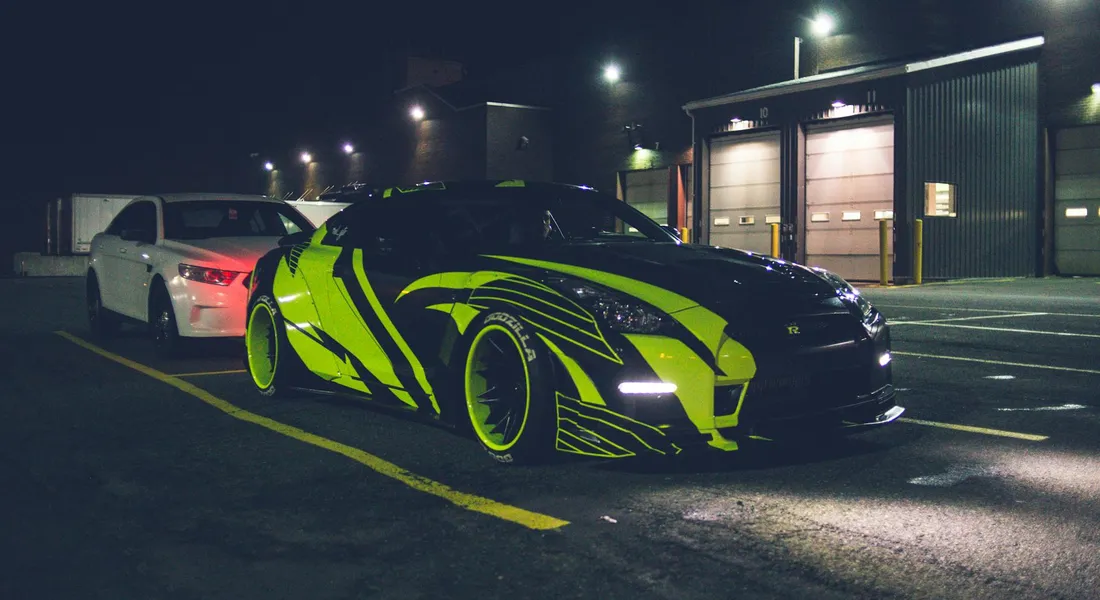
This is where you separate marketing from craftsmanship. You need to be a detective. A fancy website does not mean clean edges. A low price often means cut corners. Look beyond the surface.
Decode Their Portfolio: The Good, The Bad, and The Bubbly
Do not just look at glossy, far-away shots of colorful cars. You need to see the details. A skilled installer is proud of their work on the hard parts.
Look for close-up shots of edges, seams, and complex curves. A good portfolio shows challenging areas like door handles, mirrors, and front bumpers. If every photo is taken from twenty feet away, they might be hiding something.
Ask to see a project similar to yours. If you have a Tesla, see their Tesla work. The flat panels and specific emblems require a certain touch. If you want a chrome delete, ask for examples. They should show you how they handled the window trim on a BMW like my 3 Series, which is a common trouble spot.
Understand Reviews and Ask for References
Everyone has five stars. You need to read the words. Look for mentions of communication, timeline accuracy, and post-installation support.
A review that says “finished two days early” is good. One that says “they called me when they found a small scratch on my door and fixed it before wrapping” is great. That shows care.
Always ask the shop for 2-3 customer references from the last six months. A confident installer will have a short list ready. Call them. Ask about their experience from drop-off to pickup. Ask if they would do it again.
Common Mistakes and Red Flags That Can Ruin Your Paint
Your paint is safe under a good wrap. A bad installation traps problems or creates new ones. Here are critical warnings.
- Shops that skip paint correction. The surface must be flawless before the vinyl goes on. Any swirl, scratch, or piece of bonded contaminant gets sealed in forever. My black BMW taught me that.
- Installers who use razors directly on your paint. A professional knife should only ever touch the vinyl. The blade should never, ever contact your clear coat. This is a hard rule.
- No discussion of adhesive residues. Some older cars or certain paints can have adhesive transfer upon removal. A good shop will check your paint type and discuss this possibility upfront.
Paint damage prevention is non-negotiable. The shop must decontaminate, polish, and prep the paint before wrapping to avoid trapping swirls or scratches under the film. This step protects your investment.
Spotting a Low-Quality Installation Before You Pay
When you go to pick up your car, inspect it in good light. Run your eyes and fingers along the edges. Look for these flaws.
- Visible seams on flat panels like a hood or roof. Seams belong in door jambs, not in the middle of a panel.
- Air bubbles, especially small ones near edges. A few tiny ones may settle, but many are a sign of rushing.
- Poor alignment of patterns or carbon fiber prints. Lines should flow across body panels.
- Vinyl that does not wrap into door jambs or behind trim. It should look finished when you open a door.
- Dirt or hairs trapped under the vinyl. This is a clean room process.
Essential Questions to Ask Every Installer
Walk in with these questions. The answers tell you everything.
“What is the difference between a paint job and a wrap?” They should explain it is a non-permanent, protective vinyl layer applied over your factory paint for better protection. It can be removed. It also protects the paint from minor scratches and UV rays.
“How long do car wraps last?” An honest answer is 3 to 7 years. It depends completely on the material quality, your climate, and how you care for it. Garage-kept cars like my Porsche will see the long end of that range. The vinyl car wrap lifespan also depends on film quality and UV exposure. Proper maintenance can push you toward the higher end of that range.
“Can you leave a wrap on a car forever?” The answer must be no. Leaving a wrap on past its lifespan makes removal a nightmare, often causing adhesive damage that requires intensive polishing or repair. Plan to remove or replace it within the material’s warranty period.
Understanding the Price Tag: What Goes Into Car Wrap Installation Cost
One shop quotes $2,500. Another quotes $5,000 for the same car. This is not a scam. It is a story of labor, material, and detail. Let us demystify the quote.
Labor Cost: Paying for Experience and Time
Skilled labor for a full wrap is a slow, meticulous process. It can take 2 to 5 days for one expert to do it right. Cheaper often means faster and sloppier. You are paying for the installer’s patience and precision.
Complex vehicles cost more due to increased labor time. Wrapping the curves on my Porsche 911 takes significantly longer than wrapping the flat panels of a van. Every vent, intake, and sharp body line adds hours of careful work.
Material Cost: The Vinyl Tier List
The vinyl itself comes in different grades. This is the product tier list I explain to friends.
Product Tier List: Wrap Materials
Budget / Drive-Through Tier: Economical calendared films. Good for a short-term color change or a race car that needs a season’s look. Less durable, can shrink over time, and the gloss may fade quicker. This is the “where can I get my car wrapped for cheap” option.
Enthusiast Tier: Cast vinyl films from trusted brands like 3M, Avery Dennison, or Orafol. This is the sweet spot for most daily drivers. Excellent conformability to curves, reliable 5 to 7 year lifespan, and stable colors. This is what I would use on my F-150 or Model 3.
Show Car Tier: Premium cast and specialty films like satin, chrome, or textured finishes. Maximum durability, the best gloss retention, and the longest warranties. This is for garage queens, show vehicles, or someone who wants the absolute best material available.
Other Factors That Swing the Price
Many things change the final number. Vehicle size is a big one. Wrapping my Ford F-150 uses more material and time than wrapping my Mazda Miata. The amount of disassembly matters. Does the shop remove door handles, lights, and trim? That leads to a cleaner install but adds labor.
You must clarify what is included. Is paint correction or decontamination included in the “car wrap installation cost” or is it a separate line item? It should be listed. If it is not mentioned, ask. Proper prep is not optional, and you need to know what you are paying for.
After the Wrap: Installation Process and Care Tips
You found a great shop. You signed the paperwork. Now you drop off your car. The next few days are critical. A good shop follows a clear, disciplined process and uses professional car wrap installers. A rushed shop cuts corners you will see later. Here is what a proper installation looks like and how you keep your new wrap looking sharp for years.
The Right Way: A Good Installation Process Explained
Think of a vinyl wrap like a second skin. It must go on perfectly clean, smooth skin. Any dirt, wax, or scratch trapped underneath will show forever. The process is methodical, not rushed.
A proper installation starts with a bare, clean canvas, and that means stripping the paint down to its true surface.
- Thorough Wash & Decontamination: They start with a high-pressure rinse and a hand wash with a stripping soap. This removes all old waxes and sealants. Then, they use a clay bar or synthetic clay mitt. You feel the paint. It should be as smooth as glass. Any grit means contaminants are still there.
- Paint Correction (If Needed): This step is often missed by budget shops. If your paint has swirls or light scratches, the vinyl will conform to those flaws, making them more visible. A quality shop will lightly polish the panels to ensure a flawless base. My black BMW needed this. The installer spent half a day just polishing before the vinyl ever came out of the box.
- Panel Disassembly: For a seamless, professional look, certain parts often need to come off. Door handles, side mirrors, light housings, and emblems are typically removed. This allows the vinyl to be tucked behind edges, not just cut on the surface. If a shop tells you they never remove parts, be wary. You will see seams and edges that can catch and peel.
- Climate-Controlled Application: This is non-negotiable. The shop must be clean and climate-controlled. Dust in the air settles on adhesive. It creates bumps. Heat and humidity affect how the vinyl stretches and bonds. My Porsche’s PPF was installed in a bay with filtered air and controlled temperature. The result was zero dust specks under the film.
- Precise Application & Reassembly: The installer uses squeegees, heat guns, and their hands to slowly work the vinyl onto the panel, pushing out air and solution. They use sharp blades for precise trimming. After all panels are done, every part is meticulously reinstalled.
Warranties: Your Long-Term Peace of Mind
Your wrap is a financial investment. A warranty is your insurance policy. There are two types you must get.
A real warranty covers both the material’s failure and the installer’s work, and the shop should proactively help you with the paperwork.
- Labor Warranty: A reputable installer guarantees their workmanship. This covers edges lifting, seams separating, or premature peeling due to installation error. It typically lasts 1 to 3 years. Get this in writing. It shows they stand behind their craft.
- Manufacturer’s Material Warranty: Brands like 3M, Avery, and Oracal offer warranties on their vinyl, usually 3 to 10 years against fading, cracking, and adhesive failure. This is the direct answer to “how long do car wraps last”-the lifespan is backed by this warranty when installed correctly. A good shop will provide the warranty card and help you register it. If they do not mention it, ask.
Maintaining Your Investment: Wrap Aftercare Basics
Your care routine changes with a wrap. The vinyl is durable, but it is not paint. Treat it right, and it will look new for the full warranty period and beyond.
Hand-washing with gentle products is the single most important rule for wrap longevity, as automatic brushes are guaranteed to cause fine scratches and dull the finish.
- Use a pH-neutral car wash shampoo. Avoid “wash and wax” formulas or strong cleaners. These can degrade the vinyl or its adhesive over time.
- Use the two-bucket wash method with grit guards, just like you should for clear coat. This prevents dragging dirt across the surface.
- Dry with a clean, soft microfiber drying towel. Air blowers are even better to avoid any dragging friction.
Many people ask: should you protect your car wrap with ceramic coating? The answer is yes, but with the right product.
A ceramic coating formulated for vinyl wraps adds a protective, slick layer that fights UV rays, reduces staining from bugs and tree sap, and makes washing dramatically easier. It does not make it indestructible, but it turns a matte or gloss wrap into a much lower-maintenance surface. I had my Tesla’s wrap coated, and water and dirt just slide off — unlike when you wash and maintain an uncoated vinyl car wrap.
Your Final Step Before the Wrap Goes On
The single most important piece of advice I can give you is to put the installer’s skill above everything else. A true craftsman with a proven portfolio will make even a basic vinyl look incredible, while a poor installer can ruin the most expensive material.
Skip this legwork and you risk adhesive residue, premature peeling, and damage to your car’s factory paint that costs far more to fix than the wrap itself. Understanding how car wraps can damage paint helps you weigh the risks. In particular, knowing what to look for can prevent costly surprises down the road.
Citations and Authoritative Sources
- r/CarWraps on Reddit: Does car wrapping damage the paint?
- r/CarWraps on Reddit: How long is it safe to keep a wrap on? Risk of paint damage?
- Car Wraps: Do They Damage Paint? Get a FREE Expert Consult
- Can a Wrap Damage My Car Paint?
- Car Wrapping Myths: Does It Damage Your Paint
Max Gunther
Max is an automotive enthusiast having worked as a car mechanical and in interior detailing service for over 25 years. He is very experienced in giving your old car, a new fresh vibe. He has detailed many cars and removed very tough smells and stains from all kinds of cars and models, always ensuring that his work and advice helps his customers. He brings his first hand experience to his blog AutoDetailPedia, to help readers breath new life into their car interiors.