How Do You Strip Paint from a Car? Chemical, Mechanical, and Thermal Methods Explained
I know that look on your face, staring at peeling clear coat or old respray, wondering how to get it all off without wrecking the car underneath. It is a daunting first step.
I will guide you through the three core approaches based on my work with projects like my single-stage ’95 Miata. We will cover chemical removal using liquid strippers, mechanical removal with sanders and abrasives, and thermal removal using heat guns or specialized blasting.
Use the wrong method for your paint and substrate, and you will create deep scratches, chemical burns, or heat damage that makes a proper repaint impossible.
Key Takeaways: What You Need to Know Before Starting
Stripping paint is about removing layers, not cleaning them. You have three main tools for this job. Chemical strippers dissolve the paint, turning it into a sludge you can scrape off. Mechanical methods, like sanding and media blasting, physically abrade the paint away. Thermal removal uses controlled heat to soften the paint so a blade can lift it off. If you’re dealing with a clear coat on top of the color, you may strip only the clear layer first to preserve the base paint. That scenario—strip clear coat paint—will be covered in more detail in the next steps.
This is a major, messy project that belongs in a dedicated workspace, not your weekend wash bay. It creates fine dust, chemical sludge, and piles of debris. You are not detailing your car. You are deconstructing its finish.
Your personal safety is the first step. For chemical work, you need a high-quality respirator with organic vapor cartridges, heavy chemical-resistant gloves, and full eye protection. For mechanical stripping, a dual-cartridge respirator for dust is mandatory. Thermal stripping demands serious heat-resistant gloves and constant fire awareness. Ventilation is not a suggestion.
The best method depends entirely on your car’s condition. The thick, failing lacquer on my 1995 Miata’s fender is a perfect candidate for careful mechanical sanding. Trying to chemically strip a modern car’s factory clear coat, however, can be a disaster. You risk damaging the thin electrocoat primer underneath, which is your main defense against rust.
Be honest with yourself about time and skill. Stripping a single panel by hand can take a full day. Doing a whole car is a 40-hour week of grueling work. Media blasting is faster but requires pro-level equipment and containment. If the project feels too big, getting a quote from a professional strip shop is a smart move, not a failure.
When Should You Strip Paint from a Car? (And When Not To)
You strip paint when the existing finish cannot serve as a foundation. The primary reasons are a full ground-up restoration, severe paint failure, or preparing a damaged surface for a wrap.
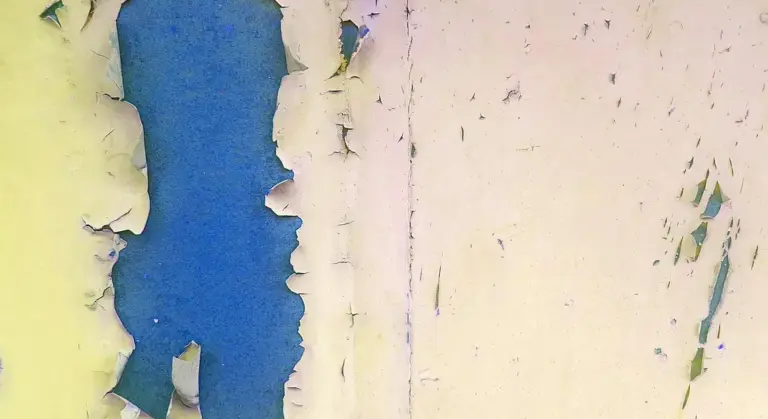
Paint failure means the layers are cracking (alligatoring), bubbling from rust, or delaminating from the metal or primer. Applying new paint over this is like laying new tile on a crumbling floor. It will fail quickly. For a vinyl wrap to look smooth and last, the surface underneath must be flawless. You cannot wrap over cracking paint or rust.
A common question is, “Should I strip a car before respraying?” The answer is usually no, if the existing paint is sound. Modern professional repaints almost always involve scuff-sanding the existing clear coat and painting over it, not removing it down to metal. Complete stripping is reserved for cases where the old paint is the problem.
My ’95 Miata is a textbook example. Its single-stage red paint had oxidized to a chalky pink. A heavy compound cut could bring back the color, but the paint was thin and tired in spots. For a true restoration, carefully sanding off the weak, aged lacquer to reach solid material underneath was the right path. This is a judgment call based on feel and experience.
Do not strip paint when it is overkill. If you just want a new color and the current paint is firmly attached with no cracks, sanding it is sufficient. If your goal is simply to remove old wax or sealant before a new coat, use a dedicated “pre-wash” or “prep solvent” made for that purpose. Stripping is demolition. These other steps are just deep cleaning.
Be extremely cautious about stripping modern factory paint. Cars from the last 30 years have a thin, corrosion-inhibiting electrocoat primer applied electrically at the factory. Aggressive sanding or harsh chemicals can strip this layer off, leaving the bare metal vulnerable. Often, the best base for a repaint is that factory primer, not the bare steel. This is especially true when using substances or methods that can damage car paint.
Your Paint Stripping Safety Kit: Non-Negotiable Gear
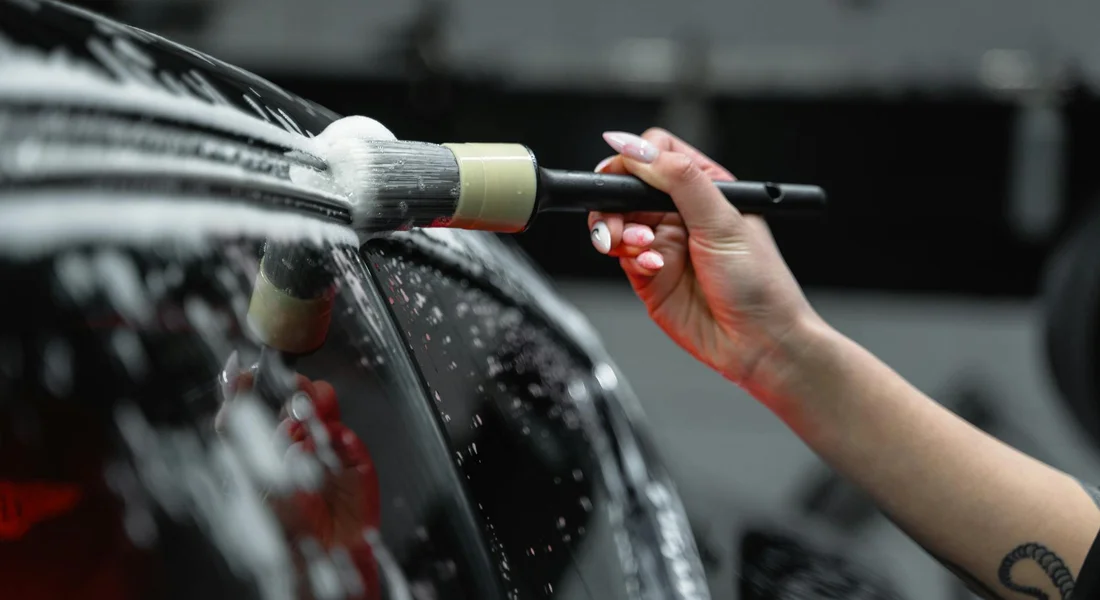
Before you touch a single chemical or tool, you need to dress for the job. This isn’t a regular wash. You are handling materials that demand serious respect.
I learned this the hard way years ago, getting a tiny splash of stripper on my wrist while wearing cheap gloves. The burn was instant. My gear list isn’t a suggestion. It’s what I use on my own cars when a project demands it.
- Chemical-Resistant Gloves: Not dishwashing gloves. You need thick, nitrile gloves that go up to your forearms. Latex is useless. I buy them by the box. Change them often, especially if you feel any seepage or they become slick.
- Sealed Goggles: Safety glasses with side shields are not enough. You need sealed goggles that fit tight to your face. Paint stripper fumes will make your eyes water, and a direct splash could cause serious injury.
- Organic Vapor Respirator: A dust mask does nothing here. You need a respirator with cartridges rated for organic vapors (OV). The smell is strong and toxic. Protecting your lungs is non-negotiable. Fit it properly so no air leaks around the edges.
- Heavy-Duty Coveralls: Wear dedicated, disposable coveralls or old clothes you will throw away. Synthetic fabrics can melt if certain chemicals splash on them. Cotton is safer, but it will be ruined. Cover every inch of your skin.
Your workspace is just as critical as your personal gear. The wrong environment turns a messy job into a dangerous one.
You must work outdoors in a well-ventilated area. A breeze is your friend. Never work in an enclosed space, even with the door open.
Keep everything away from any source of sparks or flames. Some strippers are flammable. Grinders and sanders create sparks. Keep a clear separation.
Your floor must be concrete, asphalt, or another surface you don’t mind contaminating permanently. Dripping stripper will stain and etch driveway pavers or garage epoxy. I do this kind of work on the far corner of my driveway.
Plan your cleanup before you make the first mess. Have a dedicated metal can with a lid for your used chemical rags and applicators. They can spontaneously combust as they dry. Let them fully dry out in the open air, away from any structure, before sealing them in the can for disposal.
Liquid chemical waste cannot go down any drain. Check with your local municipal waste authority for hazardous household waste disposal days. This is part of the job’s cost and responsibility.
I need to be very clear about your home. Never, ever do this in a garage attached to your house. Fumes will find every crack, follow HVAC lines, and seep into your living space. This is a severe occupant health risk. If you only have an attached garage, this project is not for you. Find another space.
Tools & Chemicals: The Paint Stripper’s Arsenal
Stripping paint isn’t a one-tool job. You need the right gear for the method you choose. Using the wrong item can turn a big job into a nightmare. Here’s what you actually need on hand before you start.
For the Chemical Method
Chemical strippers work by breaking the bond between the paint and the surface. You have two main paths here, and your choice matters.
- Methylene Chloride-Based Strippers: These are the heavy-duty options. They work fast and can tackle multiple layers of old paint or stubborn clear coat. The trade-off is serious. They emit strong, dangerous fumes and require extreme caution. I keep a can for the toughest jobs, like stripping the failed single-stage paint on my ’95 Miata project. You must use it outside with a serious respirator, not just a dust mask.
- “Safer” Citrus-Based Variants: These are slower and gentler, often made from d-limonene. The smell is like strong orange cleaner. They are better for indoor use or on smaller areas, but “safer” doesn’t mean “safe.” You still need gloves and ventilation. They struggle with modern, hard automotive clear coats.
Whichever stripper you use, you need a proper finisher. After the paint is scraped away, you must use a neutral pH (7.0) cleaner for the final wipe-down to neutralize any leftover stripper residue. Any acid or alkaline cleaner left on the bare metal or plastic will cause problems later. If your surface still carries wax or grease, a wax stripper or degreaser can be a helpful middle step in paint decontamination. Pair it with the neutral cleaner to ensure a clean, residue-free base for the finish.
For the Mechanical Method
This is about abrasion. You are literally sanding the paint away. Control and patience are your best tools.
- Dual-Action Sander / Random Orbital Polisher: This is your power tool. A true dual-action sander is built for this, but many detailers (myself included) use a random orbital polisher with a backing plate that accepts hook-and-loop sanding discs. The key is the dual-action movement-it spins and oscillates to greatly reduce the chance of digging into the base metal.
- Sanding Pads & Paper: Start aggressive and move finer. I begin with 80-grit discs for heavy removal, move to 180-grit to level the surface, and finish with 320-grit to create a uniform, scratch-patterned surface ready for primer. For tight curves, I use the same grits in a flexible sandpaper sheet by hand.
- Scrapers: Plastic razor blades and flexible body filler spreaders are indispensable for lifting paint that’s been softened by chemical or heat, without gouging the substrate.
If you are wet-sanding, a Grit Guard in your rinse bucket is non-negotiable to keep your water clean and prevent slurry from scratching the surface. I learned this the hard way on the black BMW.
For the Thermal Method
Heat makes paint brittle so it releases. It’s effective but requires a delicate touch.
- Heat Gun with Adjustable Temperature: Not a hair dryer. You need a professional-grade heat gun where you can dial in the heat. Too little does nothing. Too much can warp thin metal or melt underlying plastic bumper covers. Start low.
- Infrared Paint Remover: This is a pro tool that heats a larger area more evenly. It’s fantastic for flat panels like hoods and roof. It heats the paint from the inside out, causing it to bubble away from the metal with less risk of heat distortion.
- Plastic Scrapers: Once the paint bubbles, you use a plastic scraper to gently lift it away. Metal scrapers are a one-way ticket to scratches and digs in your bare metal.
A pressure washer can be used after thermal or chemical work to blast away loose paint flakes, but it is not a standalone stripping tool. It’s for cleanup.
General Supplies You Cannot Skip
These items protect you, your car, and your workspace.
- Heavy-Duty 500 GSM Microfiber Towels: For chemical wipe-off, you need towels that can hold up to the harsh chemicals without falling apart. Cheap towels will disintegrate and leave lint embedded in the stripper gel.
- Plastic Sheeting and Painter’s Tape: Masking is critical. You must protect glass, trim, rubber seals, and areas you are not stripping. I use the blue painter’s tape and 3-mil plastic sheeting to create safe zones, just like when I’m prepping for a wrap on the 911.
How to Strip Car Paint with Chemicals
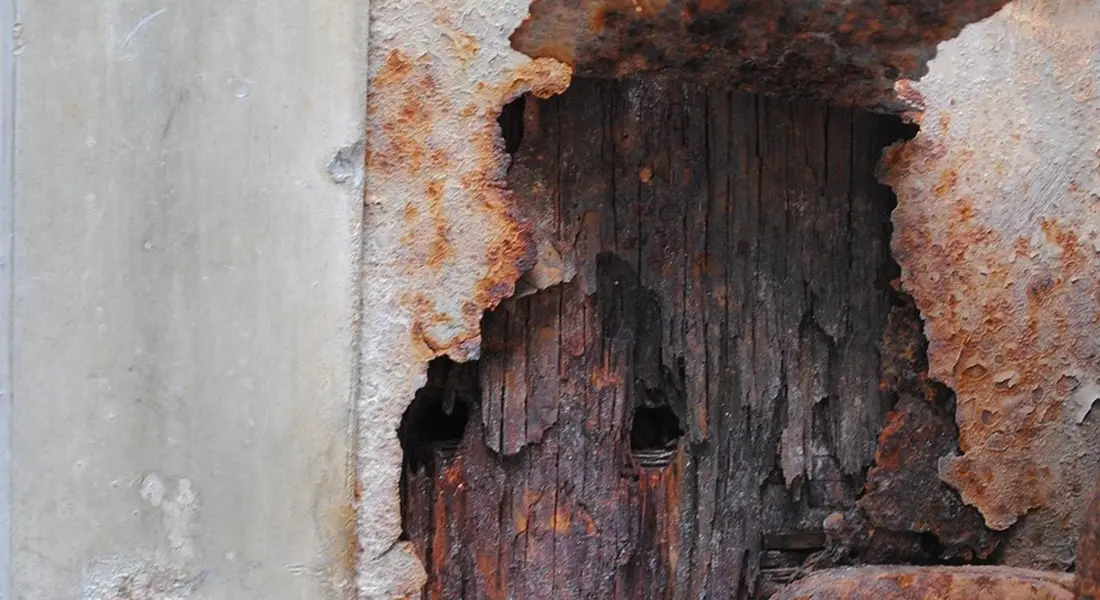
Think of chemical stripping as the “dissolver” method. It’s a hands-on, sometimes messy process where you let a formulated gel or liquid do the heavy lifting of breaking the paint’s bond. I’ve used this on sections of my 1995 Mazda Miata, the restoration project, to get into the tight crevices around the wheel arches that a sander could never touch. It’s a common choice for intricate areas or when doing a full, down-to-bare-metal restoration on a classic car where you need to see every inch of the original substrate.
Step-by-Step Chemical Paint Removal
This isn’t a rush job. Rushing leads to skipped safety steps and paint left in seams. Set aside a full day, at least. Your workspace must be outdoors or in a shop with massive airflow. The fumes are no joke.
Gear up first. This is non-negotiable. You need chemical-resistant gloves (nitrile is okay, but heavy-duty rubber is better), safety goggles that seal to your face, and a respirator with organic vapor cartridges. Wear old, long-sleeved clothes and pants you don’t care about.
The goal is to control the stripper, not let it control you. Meticulous preparation is the only way to do that.
- Mask everything that isn’t paint. Use painter’s tape and plastic sheeting or newspaper to cover glass, trim, rubber seals, and any plastic body parts. On my Miata, I spent 45 minutes just masking the convertible top frame and headlights. If it’s not bare metal or factory primer, cover it.
- Stir your chemical stripper. Never shake it. Using a cheap, disposable natural bristle brush, apply a thick, even coat. Don’t paint it on thin like a varnish. You want a generous, wet layer that won’t dry out. Start with a horizontal panel like the hood or roof to get a feel for it.
- Wait. This is the hardest part. Follow the manufacturer’s dwell time to the minute. Setting a timer is smart. You’ll see the paint start to wrinkle, bubble, and lift. If it dries, it stops working. In cool weather, it takes longer.
- Scrape. Use a flexible plastic scraper. Metal scrapers can gouge the underlying metal. Gently push the gooey, dissolved paint off. Have a metal can or disposable tray to scrape the waste into. This stuff is hazardous waste, not something for your regular trash.
- Repeat. One coat almost never gets it all. Apply a second coat to any stubborn areas, especially where old paint has filled seams or where there are multiple layers. You may need three applications on thick, factory paint.
- Neutralize and clean. Once all paint is removed, many strippers require a neutralizing step. This is often a water rinse or a wipe-down with mineral spirits. Read your product’s instructions carefully. Missing this step can leave active chemicals that will attack your new primer.
The Pros and Cons of Chemical Strippers
Like every method, chemicals have a specific place. They solve some problems and introduce others.
Let’s start with the good.
- They conform to any shape. The liquid gets into body seams, complex curves behind door handles, and intricate badging that a sanding disc would just skate over. For complete paint removal on a car with lots of details, chemicals are often the most thorough option.
- They are generally safe on the metal itself. There’s no heat to warp thin quarter panels or friction to create thin spots. When done correctly, you’re left with a clean, undamaged substrate ready for primer.
Now, the realities you must respect.
- The hazards are serious. The fumes can overwhelm you in an enclosed space. Skin contact causes severe chemical burns. I got a tiny splash on my wrist once, and it felt like a bad sunburn within seconds.
- It is incredibly messy. You are dealing with a toxic, goopy sludge. The cleanup is a project in itself, requiring proper solvent waste disposal.
- It will damage anything it touches that you didn’t mask. Trim, rubber, and certain plastics can melt or become permanently stained. There is no going back once it’s dripped on there.
Let’s clear up two common questions I hear in forums.
Can brake fluid be used to strip paint? Absolutely not. It’s a hydraulic fluid, not a paint stripper. It’s a contaminant that will ruin the bare metal for proper refinishing, and it’s wildly ineffective. Don’t try it.
Can I use Easy-Off oven cleaner? You could, but you shouldn’t. It’s not designed for automotive substrates. The lye can attack aluminum panels and leave residues that cause adhesion failures later. Using the wrong chemical creates more work and risk than using the right one slowly and carefully. Stick with products formulated for automotive paint stripping.
How to Strip Car Paint Mechanically: Sanding and Abrasion
For detailers and body shops aiming for a clean, predictable base, mechanical stripping is the go-to method. It gives you direct control over the process, letting you feel the paint come off and see the bare metal emerge. Unlike chemicals, there is no waiting for reactions or worrying about residue. You work until the job is done.
Choosing Your Tools: DA Sander, Drill, or By Hand?
Your tool choice dictates your control and risk level. Picking wrong can mean deep scratches or a warped panel.
The dual action (DA) sander is your safest bet for large, flat panels like hoods and doors. Its oscillating and rotating motion sands aggressively but is designed to minimize heat buildup and prevent you from digging into the metal. I always reach for my DA first. It is the workhorse for this job.
For tight spots-around badges, mirror bases, or complex body lines-a drill with a sanding pad attachment gets in where a DA cannot. You must be gentle. The direct rotary action can gouge metal in a heartbeat if you are not careful.
Then there is hand sanding. It is slow. Your arms will ache. But for final smoothing on curves or for areas where you need absolute precision, nothing beats a sanding block in your hand. It is the ultimate control.
Now, about a common mix-up I see online. Someone will ask about using an “airplane peeler” or a drum sander. An “aircraft paint remover” is a powerful chemical stripper, not a physical tool, and a drum sander is for floors, not car panels. That aggressive drum will eat through sheet metal before you can blink. Trust me, my BMW’s thin clear coat taught me to respect how little material is between you and disaster.
The Mechanical Strip Process from Start to Finish
This is a step by step march from coated to clean. Rushing here ruins the foundation for your new paint or wrap.
You start coarse to strip, and finish fine to smooth. Here is the progression I follow:
- Begin with 80 or 120 grit abrasive. This cuts through the paint layers fast. Your goal is to remove all color and clear coat, exposing the primer or metal.
- Once the paint is gone, switch to a 220 grit sandpaper. This removes the deep scratches left by the coarse paper and smooths the surface.
- Finish with 320 grit. This creates a uniform, smooth texture on the bare metal that is perfect for primer to adhere to.
The single most important habit is to stop, wipe the area clean with a microfiber, and inspect your work constantly. Look for low spots, stubborn paint, or, most critically, signs you are cutting into the metal itself. On my black BMW, learning its clear coat was paper thin changed how I sand everything. You check twice as often.
And for the pressure washer question? It pops up a lot. A pressure washer alone will not strip sound, adhered paint from a car. You might blast off loose flakes on a rotting vehicle. Its real use comes after chemical or thermal stripping, where it can help wash away softened, bubbled paint sludge. Do not rely on it to do the sanding’s job.
How to Strip Car Paint with Heat: Thermal Removal
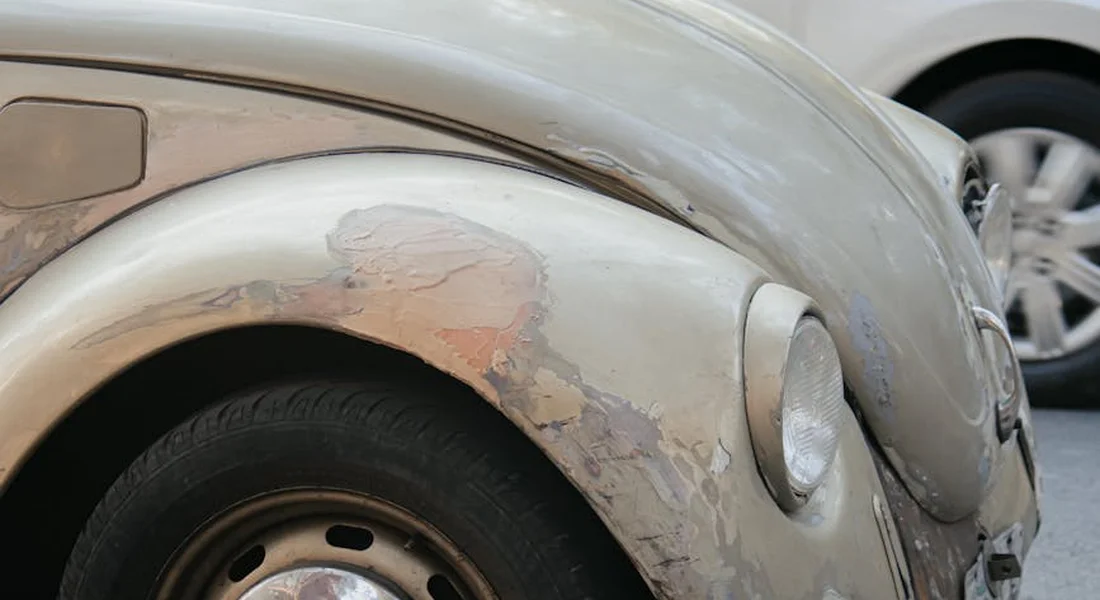
Thermal removal is exactly what it sounds like. You apply focused heat to the paint, causing it to soften, bubble, and blister. This breaks its bond with the surface below. Once it’s gooey, you scrape it away. It’s a physical, almost primal method. You can see and smell it working. For a small, stubborn area, it feels incredibly fast compared to sanding or waiting for a chemical to work.
I keep a heat gun in my shop. It’s a powerful tool. I’ve used it on fender flares and metal brackets. You must respect it. On modern car panels, especially thin ones, it’s easy to cause permanent damage in seconds. This isn’t a method for your whole car. Think of it for a single fender, a door handle recess, or stripping paint from a steel wheel.
Using a Heat Gun Safely and Effectively
The technique is everything. You are not trying to burn the paint off. You are gently warming it until it lets go.
Start by suiting up. Wear a respirator with organic vapor cartridges. Burning paint and primer release toxic fumes. Safety glasses are mandatory. Use heavy-duty gloves. Work in a ventilated space, away from anything flammable.
Plug in your gun and set it to a low or medium setting. High heat is for shrinking tubing, not for car paint. Hold the gun about four to six inches from the surface. Now, the most important rule: keep it moving. Never, ever hold the heat in one spot.
Move the gun in slow, steady circles over a section about the size of your hand. In 15 to 30 seconds, you’ll see the paint’s gloss change. It may start to bubble or wrinkle. The moment it looks soft, put the gun down.
Immediately use a plastic or nylon putty knife to gently scrape the warmed paint. It should peel up in ribbons or chips. If it’s not coming easily, apply a little more heat. Do not force the scraper. You will gouge the metal.
Work in small, manageable sections. Heat, scrape, move on. Let the metal cool slightly between passes.
Here is a critical warning from hard experience. A heat gun will melt body filler (bondo) in a heartbeat. If you’re working on an older repair, you’ll suddenly have a sticky, smelly mess. It also warps modern plastic bumpers, mirror caps, and trim instantly. I warped a test panel on my Honda Odyssey just to see how fast it happens. It was faster than I thought.
Where Thermal Methods Shine and Where They Fail
Every method has its place. Thermal stripping is a specialist, not a generalist.
It shines in a few scenarios. It’s very fast for small, confined areas. Removing a failed spot repair on a hood is a good example. It creates no chemical runoff or mess. For stripping multiple layers of paint from a solid, thick piece of metal like a vintage steel wheel, it can be very efficient.
The downsides are significant. The risk of warping thin sheet metal is high. You can permanently distort a door skin or a hood. The toxic fumes are a serious health hazard. There is a constant fire hazard from hot paint chips and the heat gun itself. You cannot use it near fuel lines, wiring, or interior components.
Thermal removal is a brute-force technique best left for simple, sturdy metal parts, and even then, it demands your full attention and respect for safety.
Answering the FAQ directly: “Are heat guns safe for removing paint?” Only with extreme caution, the proper PPE, and if you confine the work to thick, sturdy metal areas. It is not safe for plastics, composites, or areas with body filler. It is not a beginner-friendly technique. For most people refinishing a car panel, mechanical sanding is a far safer and more controlled choice.
Paint Damage Prevention: Common Stripping Mistakes to Avoid
Stripping paint is a one way street. You cannot put it back on. Because of that, rushing or guessing leads to damage that takes far more time and money to fix than the original job. I have made some of these errors myself, especially early on. Learning from them saves your project, especially when trying to fix paint runs or other imperfections.
Using Tools Too Aggressively
The most common error is attacking the paint like you are sanding wood. Using coarse sandpaper on a power tool or applying a razor blade with too much pressure digs deep scratches into the bare metal. These scratches are not just cosmetic. Deep gouges in the metal create low spots that must be filled with body filler, adding a complex step you likely wanted to avoid. You will often find that even after repairing deep scratches in car paint, these spots can be challenging to deal with. The goal is to remove the paint, not reshape the panel. Start with the least aggressive method that works. On a flat panel, a plastic scraper after a chemical stripper has softened the paint is often enough. If you must sand, begin with a finer grit than you think you need. You can always step up if progress is slow. My F-150 has thick, tough paint that can handle more persuasion. My Porsche’s delicate underlying layers cannot. The tool should match the task, not your frustration level.
Mixing Chemical Types
This is a serious safety warning. Never mix different chemical paint strippers. Do not combine a methylene chloride based stripper with a citrus based or caustic one. Mixing chemicals can cause violent reactions, releasing toxic gases or generating extreme heat that can cause severe burns or respiratory damage. Always use one product as the manufacturer directs. If you switch products, you must remove all residue of the first one and clean the surface thoroughly before applying the second. This is non negotiable. Your health and safety are more important than saving ten minutes.
Not Neutralizing the Surface
After using a chemical stripper, the metal surface is active. Acidic or alkaline residues remain. If you paint over this, your new primer or paint will not stick properly. It will lift, peel, or bubble in a matter of weeks or months. Failing to neutralize is the single biggest reason for paint adhesion failure after a strip job. The process is simple. After scraping off the sludge and old paint, wash the bare metal with a mixture of clean water and a neutralizer. For most strippers, a solution of baking soda and water works. Wipe it down, then rinse with clean water. Finally, wipe the surface down with a prep solvent or isopropyl alcohol to remove any final residues before it flash rusts. This extra twenty minutes of work guarantees your new paint has a fighting chance.
Stripping in Direct Sunlight or Enclosed Spaces
Your work environment matters. Chemical strippers work through prolonged contact with the paint film. In direct, hot sunlight, the solvent carrier evaporates too quickly. The stripper dries out and becomes a gummy, ineffective mess before it can penetrate. You will waste product, make cleanup harder, and likely scratch the surface trying to remove the dried gunk. Always work in the shade or a cool garage. The opposite problem is an enclosed space. Fumes from these chemicals are intense and hazardous. A garage with the door shut is a death trap. You need massive airflow-think open doors, cross ventilation, and a fan moving air from behind you, across the work, and out. A proper respirator with organic vapor cartridges is mandatory, not a suggestion.
Not Knowing Your Paint System
Assume nothing. The paint on my old Ford truck is a thick, single stage enamel. It is a brute. The paint on my modern Porsche is a complex, multi layer system with a thin clear coat, color coat, and potentially sensitive primer. Using a method calibrated for one on the other will cause irreversible damage. Before you start, test a small, hidden area. A door jamb or inside the trunk lid is perfect. Try your chosen method there first. See how the paint reacts. Does the chemical bubble it quickly? Does the sandpaper load up immediately? This test spot tells you everything. It reveals the paint’s hardness, thickness, and composition. That knowledge dictates your entire approach and saves you from turning a simple strip job into a major panel repair. For anyone exploring DIY car painting techniques, nailing the prep and the test spots is half the battle. That groundwork sets you up for a smooth, durable finish when you actually lay down the color.
Choosing Your Method: A Side-by-Side Comparison
Picking a method feels big. I get it. The table below lays it out clean. Look at your project, your garage space, and your own patience level.
| Method | Speed | Cost | Skill Required | Best Use Case |
|---|---|---|---|---|
| Chemical Stripper | Slow | Low to Medium | Low | Full body restoration, complex contours, old single-stage paint (like my ’95 Miata). |
| Mechanical (Sanding/Abrading) | Medium to Slow | Medium (tools, discs) | High | Panel-by-panel control, spot repair, learning paint depth on sensitive clear coats (like the BMW). |
| Thermal (Heat Gun/Scraper) | Fast (on small areas) | Very Low | Medium | Quick spot work, removing lifted paint before priming, stubborn badges or decals. |
The right tool changes everything, and so does the right mindset for the job ahead.
Matching the Method to Your Project
Look at your car. Be honest about the scope.
For a full classic resto, like bringing my oxidized Miata back to life, chemical stripping is the patient path. You slop it on, let it bubble, and scrape. It gets into every crevice a sander cannot touch. The mess is epic, but you know the entire shell is bare. This is a weekend, maybe two, of slow, careful work.
For panel-by-panel control, you go mechanical. This is for fixing a damaged fender or prepping a hood for a fresh coat. Mechanical removal demands respect for the metal underneath and a constant check of your paint depth gauge. It is how I maintain control on my black BMW, where one wrong move means digging into the primer. You feel every imperfection with your hands.
For quick spot work, grab the heat gun. Spotted some failing clear coat on a roof edge? A heat gun and a plastic scraper get it off fast without sending dust everywhere. It is immediate. You see results in seconds. But you must keep the gun moving. Hold it in one spot and you warp the sheet metal. I have seen it happen.
The Non-Negotiable First Step: The Test Patch
You would not use a new polish on your entire hood without testing it. This is a hundred times more critical.
No matter your chosen method, start in a hidden area. Inside a door jamb. Under the trunk lid gutter. Behind a wheel well liner.
- Chemical: Test for staining or etching on the bare metal.
- Mechanical: Test your grit sequence. Does 80-grit leave deep scratches that 180-grit cannot remove?
- Thermal: Test how the heat affects the metal. Does it discolour? Does the adhesive underneath turn into a gummy nightmare?
This test patch is your teacher. It tells you what you are really dealing with before you commit to the whole car.
A Word on Knowing When to Stop
This is hard, dirty, often frustrating work. Your back will ache. Your hands will be sore. You will question your life choices.
There is no shame in that. Knowing when to call a professional with a proper media blasting cabinet is not a failure, it is wisdom.
For a car with complex body lines, factory lead seams, or delicate vintage metal, a pro with soda, plastic, or crushed glass media can do in a day what might take you a month of weekends. And they will do it without warping panels or creating hours of extra bodywork for you. I have driven myself to the brink on a project only to realize that paying for that initial strip would have saved me time, money, and my own sanity. Sometimes the best tool is the phone to call someone who does this every day.
Choosing Your Paint Removal Path
The single most important step is to match the removal method to your car’s specific paint and substrate. I always test chemical, sandpaper, or heat on a hidden area first, just like I did on my Miata’s trunk lid, to see how the layers react.
Without this test, you risk etching the bare metal or melting underlying plastics, turning a refresh into a full repair.
Deep Dive: Further Reading
- Automotive Paint Stripping -The Complete PRO/ CONS Guide –
- Stripping Car Paint at Home – Empire Abrasives
- How to Strip Paint From Your Car: 2 Easy Ways
- The BEST Paint Removal Tool for Automotive Restoration
- Paint Stripping 101 – Get Schooled in the Many Ways to Take the Paint Off Your Car – Hot Rod Magazine
- Paint Stripping Car Panels
- r/projectcar on Reddit: Best way to strip paint
Max Gunther
Max is an automotive enthusiast having worked as a car mechanical and in interior detailing service for over 25 years. He is very experienced in giving your old car, a new fresh vibe. He has detailed many cars and removed very tough smells and stains from all kinds of cars and models, always ensuring that his work and advice helps his customers. He brings his first hand experience to his blog AutoDetailPedia, to help readers breath new life into their car interiors.