How Do You Paint Over Rust on Your Car and Stop It from Coming Back?
You see that brown bubble on your fender or door, and you know simply brushing on paint won’t fix it. I’ve been there, watching a quick cover-up fail on my old trucks, and it’s a waste of time and money.
This article shows you the correct way, from a detailer’s perspective, to permanently handle surface rust. We will cover identifying the true extent of the corrosion, completely removing the rust, prepping the bare metal, applying primer and paint in layers, and locking it all in with a protective sealant.
Paint over rust without these steps, and it will return faster, spreading underneath your new finish.
Key Takeaways: The Truth About Painting Over Rust
Let’s get this straight right away. What we’re talking about here is surface rust. It’s the rough, reddish-brown rash you see on a panel edge or a stone chip. The metal underneath is still solid. If you can poke a screwdriver through it, or if it looks like Swiss cheese, you are done. That’s a job for a body shop to cut out and weld in new metal. This guide is for stopping the small stuff in its tracks.
The single most important rule is this: you never, ever just paint over rust. Paint is not a bandage. It’s a finish. If you spray color over corrosion, you are just giving it a dark, moist place to grow. It will bubble back through in weeks. Your mission is to completely remove the rust or chemically convert it into a stable surface first.
Gathering the right tools is half the battle. You will need:
- A proper safety respirator with organic vapor cartridges. This is non-negotiable.
- Sandpaper in various grits (80, 120, 220, 400, 600).
- A sanding block.
- Rust converter liquid.
- Automotive primer.
- Color-matched paint (aerosol is fine for spots).
- Clear coat.
- Paint prep solvent or isopropyl alcohol.
- Microfiber cloths and masking tape.
Set your expectations. A proper job on one fender lip or door edge isn’t a 30-minute fix. You are looking at a few hours of active work spread over a day or two, because primer and paint need time to cure between coats. Rushing the dry times is the fastest way to a soft, gummy finish that fails.
When people search for “rust car painting,” this is the process they mean. It’s the method to halt corrosion for a cosmetic repair. It is not a permanent structural fix. On my 1995 Miata project, I used this exact protocol on small rear quarter panel bubbles. It bought me years of presentable driving while I saved for full quarter panel replacements. It’s a hold, not a miracle.
The Detailer’s Rust-Painting Protocol: Your Strict Checklist
This sequence is law. You follow it in order, without shortcuts. I learned this the hard way on the rocker panels of my F-150. Skip a step, and the rust comes back with a vengeance.
- Assess & Mask. Define the work area. Mask off a large section around the rust spot with painter’s tape and newspaper. Protect the surrounding good paint and trim.
- Sand. Put on your respirator. Using 80-grit paper on a block, grind away all loose paint and rust until you hit bare, shiny metal. You must see clean metal. Feather the edges of the surrounding good paint with 220-grit.
- Clean. Wipe the entire sanded area with a prep solvent on a clean microfiber. This removes every trace of sanding dust, grease, and finger oils. Any contaminant left here will cause fish eyes or adhesion failure.
- Convert Rust. If any tiny rust specs remain in pores of the metal, apply a rust converter. It turns iron oxide into a black, inert layer. Follow the product’s dwell time, then wipe clean. This step is your insurance policy.
- Prime. In a well-ventilated, dust-free space, apply 2-3 light coats of automotive primer. Hold the can 8 inches away. Let each coat flash off for a few minutes. The primer seals the metal and provides a surface for the paint to grip.
- Sand Primer. Once the primer is fully dry (check the can, usually 1 hour), sand it smooth with 400-grit paper, then 600-grit. Your goal is a surface as smooth as glass. Wipe clean with prep solvent again.
- Paint. Shake your color-matched can for a full two minutes. Apply 3-4 very light coats, moving the can in steady, overlapping passes. Start your pass off the panel, spray across it, and finish off the other side. Let each coat flash off. Build the color slowly.
- Clear Coat. After the color coat is touch-dry (about 15-20 minutes), apply 2-3 coats of clear. This provides UV protection and depth. This is what you will eventually polish.
- Blend & Polish. Walk away. Let the clear coat cure for at least 24 hours, preferably 48. Then, using a fine polishing compound and a soft pad, gently blend the edges of the new clear into the surrounding factory clear coat to remove any texture difference.
Rushing or skipping any of these steps is an absolute guarantee that rust will bubble back through your new paint. The enemy is moisture trapped under a layer of paint. Your job is to build an impermeable, sealed wall.
Please, work safely. A garage with the door open is the minimum. Wear your respirator, safety glasses, and gloves. These fumes are no joke, and sanding dust is terrible for your lungs.
Detailer’s Pro-Tip: The Feathering Touch
Feathering is everything. When you sand down to metal, you create a crater with a hard edge. If you paint up to that edge, you will see a visible line or ridge. Feathering is the art of sanding that crater’s edge so it slopes away gradually, like a smooth hill instead of a cliff. Use a soft foam block and light pressure with 220-grit paper. Work in circles, tapering the good paint down over an inch or two. Your fingertip should not catch on any edge.
After priming, use a “guide coat.” Lightly dust the primed area with a contrasting spray paint (black on gray primer works). Let it dry for a minute. Now, sand it lightly with 600-grit on your block. The guide coat will remain in any low spots you missed and sand off the high spots, revealing the perfect flat surface you need for paint. It turns invisible imperfections into a clear map.
Master the spray can rhythm. Most people hold the can still and blast one spot. That causes runs. The motion is “trigger off the surface.” Start moving your arm, then press the nozzle down as you pass over the panel. Release the nozzle before you stop moving. Keep the can a consistent 6-8 inches away. Use overlapping passes, like mowing a lawn. This gives you even, light coats that build beautifully without drips.
Step 1: Prepping the Rust Spot So Paint Will Stick
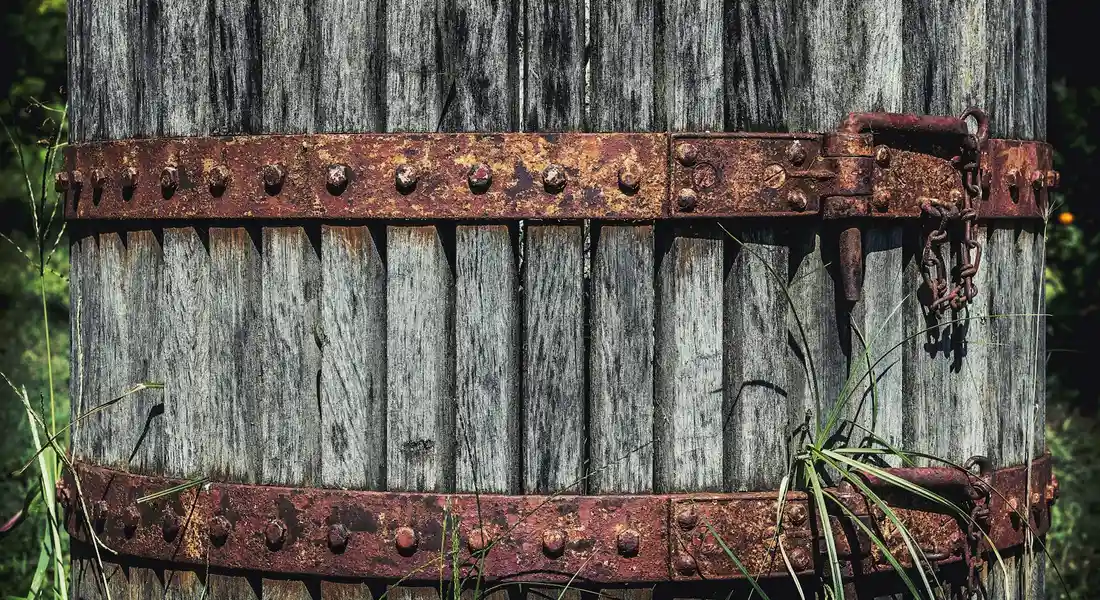
This step decides everything. If rust comes back, nine times out of ten it is because the prep was rushed or skipped. You are not just cleaning a spot. You are performing surgery on the metal to remove the disease and create a sterile, stable wound for new paint to bond to. Do not hurry.
How to Sand the Rust and Surrounding Paint
You need to remove every speck of loose, flaky rust. I use a dual-action sander for this on my F-150’s wheel arches, but careful hand sanding works. Start with 80-grit paper to aggressively grind down the bubbled scale. You will hear and feel the change when you hit solid metal.
Switch to 180-grit to smooth the area. Your goal is to create a shallow, smooth bowl, not a deep, sharp hole. Feathering the edge with 320-grit is non-negotiable; you must sand the good paint around the rust spot so the transition to bare metal is undetectable to your fingertip. Sand an area at least two inches wider than the damage you see. This wider work zone is the secret to blending later.
When people ask me how to paint a rust spot on a car and have it last, I tell them the answer is in the sound the sandpaper makes. It should go from a gritty crunch to a consistent, smooth whisper.
Cleaning and Degreasing the Bare Metal
After sanding, the metal is covered in invisible contaminants. Your skin oils, dust from sanding, and silicones in the air will ruin the paint job. I keep a spray bottle of 99% isopropyl alcohol and a bag of clean, lint-free shop towels in my kit. Wipe the sanded area thoroughly. Then wipe it again with a fresh towel.
A single fingerprint left on the bare metal will create a fish-eye in your paint, a tiny crater where the finish refuses to stick. Let the alcohol evaporate completely—it’s essential to use it cautiously on car paint. For this step, I treat the car like my black BMW’s paint—with paranoid-level cleanliness.
Applying Rust Converter or Neutralizer
This is your chemical shield. Rust converter reacts with iron oxide (rust) and turns it into a stable, black compound called iron tannate. It is paintable and stops the corrosion. Do not skip this on a modern car with thin, multi-layer paint, especially when trying to prevent rust through paint.
Shake the bottle well. Use a cheap acid brush to apply a thick, even coat over only the bare, rusted metal. It will look wet, then turn a deep blue-black as it dries. This is the reaction happening. These steps are part of the repair rust car paint workflow, prepping the metal for a durable finish. When it dries, you can continue with repairing rust car paint and applying the final coat. For how to paint over car rust and win, this dried black layer is the barrier that seals off the past. Let it dry as long as the can says, often a full 24 hours. Do not touch it.
Step 2: Painting, Blending, and Sealing the Repair
Now you build. This is where patience pays off in a finish that disappears into the original panel. You are an artist matching a texture and a depth of color.
Priming: Building a Stable Foundation
Never spray color directly onto rust converter or bare metal. You need primer. On a repair like this, I prefer a self-etching primer. It contains acids that microscopically bite into the metal for a grip paint alone cannot achieve. Experienced painters know it’s a crucial step when dealing with rust repairs on metal panels.
Shake the can for a full two minutes. Warm it in a bucket of lukewarm water for five minutes. This improves spray pattern and pressure. Hold the can about 8 inches away. Apply a first coat so light it looks like gray mist. Let it flash off for five minutes. Apply a second, slightly wetter coat. A third if needed. The primer should look even and semi-gloss, not thick and drippy.
Once fully dry, sand the primed area with 400-grit wet sandpaper (use water with a drop of soap). Sand until it is glass-smooth and perfectly level with the surrounding factory paint.
Matching and Applying Your Car’s Paint Color
Find your factory paint code. It is on a sticker in the door jamb or under the hood. Order a spray can of basecoat matched to this code. Do not guess. My red Miata’s single-stage paint and my Tesla’s tri-coat white are completely different animals; the code is your only hope for a match.
Shake and warm the color can. Spray a test pattern on cardboard. Your first coat on the car should be a dusting, just tiny dots of color that stick to the primer. This is a ‘tack coat.’ Wait three minutes. Before moving to the next coat, make sure the primer beneath is properly prepared and dry. Primer application lays the foundation for a smooth, durable finish. Apply a second, fuller coat, moving your arm in steady, overlapping passes. Executing how to paint a rust spot on my car is about building color in thin, even layers, not drowning it in one thick coat. Build up three or four coats this way, with proper flash time between each. The color should look rich and opaque but not wet and reflective yet.
Blending the New Paint and Adding Clear Coat
Modern cars have a clear coat. The color you just applied is dull and unprotected. Within 30 minutes of your last color coat, you must apply clear. This is the blending step.
Start your clear coat spray pattern an inch or two onto the good factory paint surrounding your repair. Sweep all the way across and finish an inch past the other side. Applying clear over a larger area blends the repair by creating one continuous, uniform glossy layer over both new and old paint. Do two to three coats of clear, following the same overlap pattern each time. You will see the depth and gloss appear.
The Final Polish and Protection
Walk away. Let the clear coat cure for at least a week, two is better. It needs to harden fully. Once cured, inspect for ‘orange peel’, that bumpy texture. Wet sand the entire repaired area lightly with 2000-grit sandpaper and lots of water until the surface is flat and uniformly dull. Then use a cutting compound on a foam pad to restore the gloss, followed by a fine polish.
Finish by applying a paint sealant or ceramic spray wax over the entire panel, not just the spot. This gives the whole area matching hydrophobic protection and UV resistance. This meticulous process is the opposite of how to paint fake rust on a car for a movie, which is just cosmetic. This is a lasting repair.
How to Prevent Rust From Coming Back After the Repair
A perfect repair means nothing if you walk away. Rust is a patient enemy. Your job now is long-term maintenance.
Think of it like detailing. You just performed a major paint correction. You would not then take a dirty towel to the fresh paint. Protecting a rust repair is the same mindset.
Your New Wash Routine is Non-Negotiable
Corrosion needs moisture and corrosive agents to start. Your goal is to never let them settle in. This is where detailing discipline saves your metal.
If you drive on salted roads, you must wash the undercarriage and rocker panels immediately after the storm passes, not weeks later. I use the touchless drive-thru for my F-150’s undercarriage in winter, then finish the painted surfaces at home with a two-bucket wash. The goal is to flush the salt away. A regular hose can do this; focus on the wheel wells, inside the frame rails, and behind the bumper covers.
For the painted surfaces, maintain a good coat of sealant or wax. A slick surface sheds contaminants better. On my daily drivers, I use a simple spray sealant after every wash for a constant barrier.
Protect What You Cannot See
The outside looks great. The real battle is inside the panels. Door skins, quarter panels, and frame rails have hollow cavities where moisture gets trapped and rusts from the inside out.
This is where a sprayable rust inhibitor or cavity wax is your secret weapon. These are thin, waxy fluids you spray into access holes or along seams. They creep into the joints and coat the bare metal inside, blocking moisture.
You need a spray wand attachment for the can or a dedicated applicator. Wear a respirator and gloves-this stuff is not for breathing. Spray inside door drain holes, along the bottom of rocker panels, and into frame rail openings. A little goes a long way. On my older Miata, this is a yearly ritual to keep its bones solid.
Become an Inspection Detective
Set a calendar reminder every three months. Walk around the car with a bright light. You are looking for the earliest signs of failure so you can fix it with a touch-up pen, not a grinder.
- Check the repair zone: Look for any tiny bubbles under the paint, a dulling of the clear coat, or a slight color mismatch that worsens. This is “rust char”-the character of the spot changing.
- Scan high-impact areas: Wheel wells for stone chips. Rocker panels behind the tires for sandblasting. The lower edge of doors. Undercarriage for any fresh, bright metal nicks.
- Feel the texture. Fresh paint should feel smooth. A spot that starts to feel slightly rough or gritty is asking for attention.
Smart Storage is a Force Field
If you can, keep the car in a dry, ventilated garage. This single step dramatically slows the chemical process of corrosion. For my 911, the garage is a climate-controlled must.
If you must park outside, a high-quality, breathable car cover is better than nothing. Avoid cheap plastic covers. They trap moisture against the paint and create a humid microclimate, which is worse than leaving it exposed. A breathable cover lets moisture escape while blocking rain and dew.
Understand the “Rust Char”
This is a term I use for knowing the personality of your repair. When you first finish the job, take a photo in good light. Note the color, the texture, the reflectivity.
Every few months, compare. Catching a problem early means a five-minute touch-up. Waiting means starting over from bare metal. That spot on your quarter panel has a story. You wrote the first chapter by repairing it. Make sure you keep editing the story before it writes its own destructive ending.
This vigilance is the true final step. It turns a one-time repair into a lasting fix.
Keeping Rust at Bay for the Long Haul
From bringing back the single-stage red on my ’95 Miata to managing the salt on my F-150, I always tell folks one thing: the paint is only as good as the bare metal underneath. Your absolute best defense is to remove every trace of corrosion and immediately seal the area with a rust-inhibiting epoxy primer-this creates the stable foundation your topcoat desperately needs.
Skip that meticulous preparation, and the rust will bleed through your new paint, guaranteed.
Further Reading & Sources
- r/bikewrench on Reddit: Is it bad to paint over small amounts of surface rust without removing the rust?
- Can you paint over rust? What are the consequences of painting over rust? – Quora
- Amazon.com: AGS RUST SOLUTIONS Rust Spray Paint, 14oz, Durable Matte Black Finish, Safe for All Surfaces, Eradicate Rust and Ensure Long-Lasting Protection Against Weather and Wear : Automotive
Max Gunther
Max is an automotive enthusiast having worked as a car mechanical and in interior detailing service for over 25 years. He is very experienced in giving your old car, a new fresh vibe. He has detailed many cars and removed very tough smells and stains from all kinds of cars and models, always ensuring that his work and advice helps his customers. He brings his first hand experience to his blog AutoDetailPedia, to help readers breath new life into their car interiors.