Where Can You Find Color-Matched Automotive Paint and How Do You Pick the Right Shade?
You see a chip on your hood or a scratch along the fender, and the worry of using the wrong paint color is real.
I will show you exactly how to get this right, covering the best places to buy paint, how to read your vehicle’s color code, and the trick to checking the match under real light.
Get the shade wrong, and your careful detailing work is ruined by a spot that never blends in.


- ✓
- ✓
- ✓
Key Takeaways: Your Paint Match Cheat Sheet
Before you buy anything, remember these three things. They will save you time, money, and frustration.
- The paint code on your car’s placard is your best and only reliable starting point. Everything else is a guess.
- Sun-faded paint on your car will never match factory-fresh paint from a can exactly. Age changes everything.
- Professional tools like spectrophotometers exist for a reason. They read your car’s current color, not the original formula.
Your project will fall on a spectrum. A small stone chip on my BMW’s hood might need a $15 touch-up pen. A long scratch on the door of my F-150 could justify a $100 custom-mixed aerosol can for a more seamless repair. This guide is for you if you are fixing chips, dings, and minor scratches. It is not for painting entire panels or bumpers. That is a different job.
Your Paint Code: The Golden Ticket for a Starting Point
This is step zero. If you skip this, you are guessing. The factory paint code is a sequence of letters and numbers. It tells the paint system exactly which formula was sprayed on your car at the factory.
You must find this code before you do anything else.
Grab a flashlight and look for a small metal or plastic placard. The most common spots are inside the driver’s side door jamb, on the firewall under the hood, inside the glove box lid, or in the trunk spare tire well. On my Miata, it’s on the driver’s door jamb. On the Odyssey, it’s inside the glove box.
I always check two spots. Sometimes a sticker fades or a placard gets painted over. Your owner’s manual will often list the location. Write the code down. Take a picture with your phone.
People often ask about getting paint “matched to the VIN.” This sounds high-tech. What it means is the dealership parts department can look up your vehicle identification number in their system. The system then tells them the original factory paint code. They are not scanning your car’s current paint. They are just pulling the code from a database. It is a helpful service if your placard is missing, but it still gives you the original color, not your car’s current faded color.
Why Your Factory Color Code Isn’t Always Enough
Here is the hard truth. That code is for paint that was wet and new the day your car was built. Your car is older now. The world has happened to it.
Sunlight is the biggest culprit. Ultraviolet rays break down pigments and clear coat. This is called oxidation. The paint loses its depth and vibrancy. It looks chalky or milky. Environmental stains from tree sap, bird droppings, and industrial fallout can also tint the surface over years.
My 1995 Miata is the perfect example. Its classic red is a single-stage paint, no clear coat. From the factory, it was a vibrant, deep red. After decades of sun, the hood and trunk lid had faded to a dull, pinkish hue. If I had bought paint using only the factory code, the new red would have stood out like a sore thumb against the faded pink panels.
This is why professional body shops use a technique called blending. They never just paint one door. They paint the door, then lightly fade the new color into the adjacent fender and quarter panel. This creates a gradual transition that your eye cannot detect. For a DIY touch-up on a small chip, you do not need to blend. But for a repair larger than a quarter, the mismatch will become obvious. Understanding this limitation keeps your expectations realistic.
Where to Buy Color-Matched Paint: From Quick Pens to Custom Cans

If you are wondering, can I buy paint for my car, the answer is a solid yes. You have more choices than you might think. I think of them in tiers, from the simplest quick fix to the pro-level solution. The right one for you depends on your car’s age, your budget, and the job’s size. Also, estimate how much paint your car will need to plan your purchase. This can help you decide between DIY touch-ups and a professional refinishing with fewer surprises.
Dealership Parts Counters (OEM Touch-Up)
This is the most straightforward answer. You walk in with your vehicle’s paint code, and they hand you a little pen or bottle. For my 2020 Tesla or 2022 Porsche, this is my first stop for stone chips. The formula is an exact match to the factory paint when the car was new.
The perfect match guarantee is the main draw, but it only works if your paint hasn’t faded a single day in the sun.
Think of it like buying a brand-new replacement part. It is correct, but it might not fit an older, worn vehicle perfectly.
- Pros: The color is the original recipe. The pen format is incredibly convenient for tiny chips.
- Cons: It is expensive for the tiny amount you get. It will not account for fade. On my 1995 Miata, factory red touch-up paint looks dark and wrong against the sun-bleached panels.
Remember, this answers “do dealerships paint cars” for small touch-ups only. They sell you the paint, not the painting service. If you’re tackling a small chip yourself, you can buy automotive touch up paint from reputable retailers to match your car’s color. This keeps the repair affordable and lets you control the result before considering any professional service.
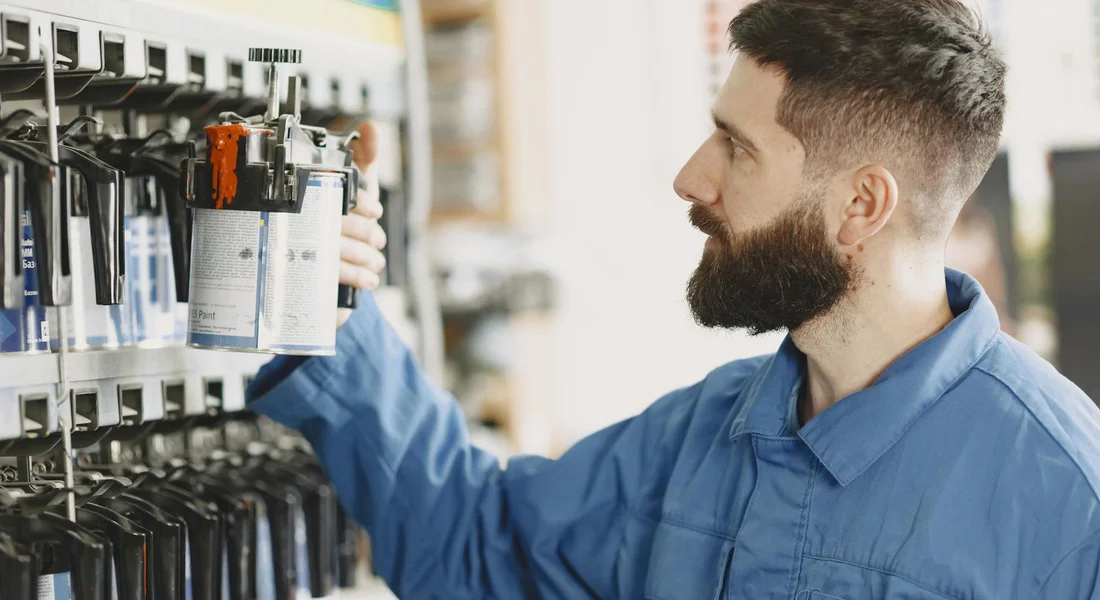
Major Auto Parts Stores
Stores like AutoZone or O’Reilly’s are where many people start their search. You can often find a lookup book or a kiosk. You enter your make, model, and year, and it spits out a paint code. They might have a small bottle of that color on the shelf.
The big advantage is you can drive there and have something in your hand in twenty minutes.
The quality is a gamble. Some brands are decent for hiding a scratch. Others are watery and lack proper pigment. They typically only stock paint for the most common cars from the last decade. Do not expect to find paint for a 2002 Saturn here.
This brings us to a common question: can Home Depot match car paint? I strongly advise against it. Big-box stores use tint machines for house paint. House paint and car paint are completely different chemicals with different binders, pigments, and finishes. The match will be poor, the paint will not adhere correctly, and it will fail quickly. It is a shortcut that always leads to a worse result.
Online Specialty Automotive Paint Retailers
This is the DIY detailer’s best friend. Websites like AutomotiveTouchup, PaintScratch, or Dr. ColorChip have massive databases. They have formulas for every color from every manufacturer, going back decades.
You are not limited to a brush-in-a-cap. These retailers are the primary source for automotive paint matched spray cans, which are fantastic for larger areas like mirror caps or small body panels. They also sell paint pre-thinned for your spray gun, larger touch-up bottles, and premium blending kits. If you’re looking to use spray paint for automotive projects, these are your go-to options.
I used an online retailer for my 2016 BMW’s touch-up. I ordered a small bottle and a spray can for a lower bumper scuff. The match was excellent because I gave them the exact paint code from my door jamb.
- Pros: Huge selection for any car. Every possible format. Often better quality than parts-store brands.
- Cons: You must wait for shipping. You cannot see the color in person before you buy. Always, always test it on a hidden area or a test card first.
Professional Automotive Paint Suppliers
When you search for “automotive paint matching near me,” this is the gold-standard result. Look for terms like “automotive paint supplier,” “body shop supply,” or “PPG/Axalta/Sikkens distributor.” This is where body shops and professional detailers go.
These shops have the serious equipment: the automotive paint matching camera, which is actually a spectrophotometer. They place this tool on your car’s panel, it takes multiple readings to account for fade, and their computer creates a custom mix formula.
For a faded paint job, like restoring my Miata’s single-stage red, this is the only way to get a true, blended match. They mix the paint fresh while you wait, using high-grade bases and clears.
- Pros: True custom matching for any condition. Top-tier professional materials. Expert advice on primers, reducers, and application.
- Cons: Can be intimidating for a first-timer. Some require a business account, though many will serve the public. It is the most expensive option per ounce, but you are paying for precision.
Walk in with your paint code and a humble attitude. Tell them what you’re working on. The staff usually loves to help someone who wants to do the job right. Bring the vehicle if you can, especially if the paint has faded.
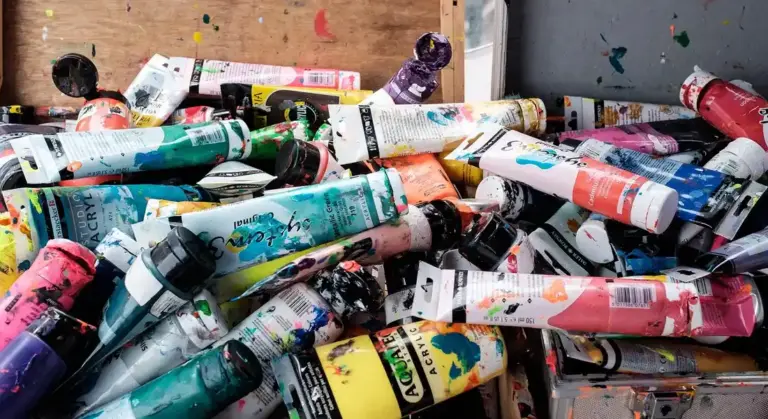
Product Tier List: Choosing Your Paint Format
Think of paint like a first aid kit for your car’s finish. You match the tool to the wound. A bandage for a scrape, stitches for a cut. I categorize these by how big the damaged area is and how steady your hands are. A quick fix on a daily driver needs a different approach than a show car repair.
Budget/Quick Fix: The Touch-Up Pen & Brush
This is the bandage. It’s that little pen you see at auto parts stores, usually with a brush in the cap or a felt nib. I keep one in my Ford F-150’s glovebox. It’s perfect for those pinhead-sized stone chips on the lower hood or door edges where perfection isn’t the goal, stopping rust is.
The limitation is all in the application. That brush is too thick and holds too much paint. You dab it on and often get a raised blob that looks worse than the chip. To avoid the blob, touch just the very tip of the brush to the chip and let capillary action pull the paint in. Do not brush it on.
- Clean the chip with isopropyl alcohol first. Any wax or dirt will ruin the bond.
- Shake the pen for a full minute. The pigment settles fast.
- Apply one tiny drop. Let it dry for a day. If it sinks, add another.
- Some pens have a clear coat side. Use it. It seals the color and adds gloss.
It’s a quick fix. On my black BMW, a blob on the hood would catch the light and scream “amateur hour.” But on the F-150’s bumper, it keeps the metal covered between proper details.
Enthusiast/Detailer: Bottled Touch-Up Paint & Clear
This is the model kit approach. You get a small bottle of basecoat and a separate bottle of clear coat. This is my go-to for the BMW’s door dings or a scratch on the Tesla’s bumper. It gives you surgical control.
You are not using the brush that comes with it. Throw it away. Instead, use a fine artist’s brush from a craft store or even a toothpick. The key is building the paint up in microscopic layers, exactly like the factory did. This method answers the real detailer’s need for invisibility.
- Prep the area. Clay bar the spot to remove embedded contamination, then wipe with a prep solvent.
- Use the toothpick or brush tip to place a minuscule amount of basecoat into the chip. Fill it just below the surface.
- Let it cure for several hours. Patience is your best tool here.
- Repeat with a second layer if needed. The goal is flush, not overflowing.
- Once the color is level, apply the clear coat the same way, feathering it over the edges.
- After a full cure, you can gently level it with a polishing compound.
I restored a deep scratch on my Miata’s single-stage paint this way. It took an afternoon, but you have to look for it to see it now. The separate clear coat is what makes the finish look factory, not repaired.
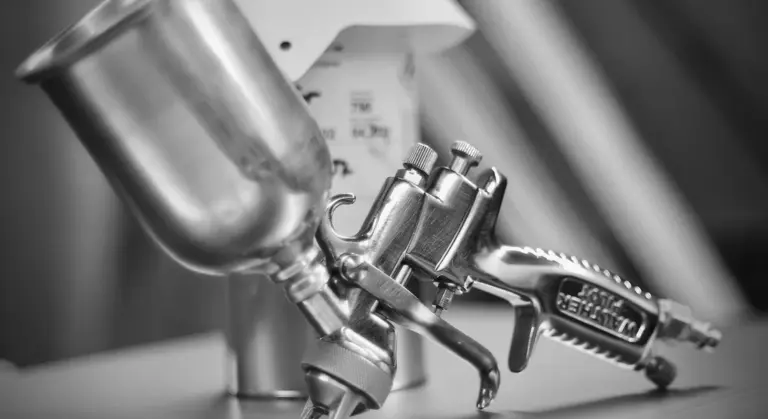
Show Car/Larger Area: Custom Aerosol Spray Can
Yes, you can buy spray paint to match your car rather than mix paint yourself. Companies will mix your exact paint code and put it in an aerosol can. This is for covering a galaxy of chips on a hood or repainting a mirror cap on the Porsche. It is not a rattle-can shortcut. It is professional painting in a can, demanding professional prep.
Spraying paint is an art of patience, preparation, and perfect environment. The paint must be warm, the air must be still and dust-free, and you must be masked up. I use a small spray booth in my garage for this, with a ventilator mask. If you’re doing spray paint job on a car at home, the same rules apply. A dedicated space helps keep temperature stable and the air clean.
- Start with bare, sanded substrate. For a chip cluster, sand the entire panel with 600-grit sandpaper to create a uniform surface for adhesion.
- Apply a primer if you’ve sanded down to bare metal or plastic. Let it dry and sand it smooth.
- Mask everything you don’t want painted. Use professional automotive tape and paper. Newspaper can leave fibers.
- Shake the can vigorously for two minutes. Spray a test pattern on cardboard first.
- Apply the basecoat in multiple light, misting coats. Hold the can 6-8 inches away. Never try to cover in one pass.
- Let the basecoat flash off, then apply the clear coat from a separate can the same way. Two to three coats of clear is standard.
- After it cures for a week, you can wet-sand and polish the clear coat to a perfect, seamless gloss.
This is how I repainted a faded spoiler on the Honda Odyssey. It looks factory because I treated the process like a factory would. The can is just the tool. The skill is in your hands and your prep work.
How to Select the Right Shade: Beyond the Code
You have the factory paint code. That is a great start. It tells you what the color was when your car left the assembly line, under perfect lights, on fresh paint. The real world is different. Sun, weather, and washes change paint. If your car is more than a few years old, the factory formula will likely not match your faded panels. This section is for when you ask, how can I match my car paint color code without just trusting the code.
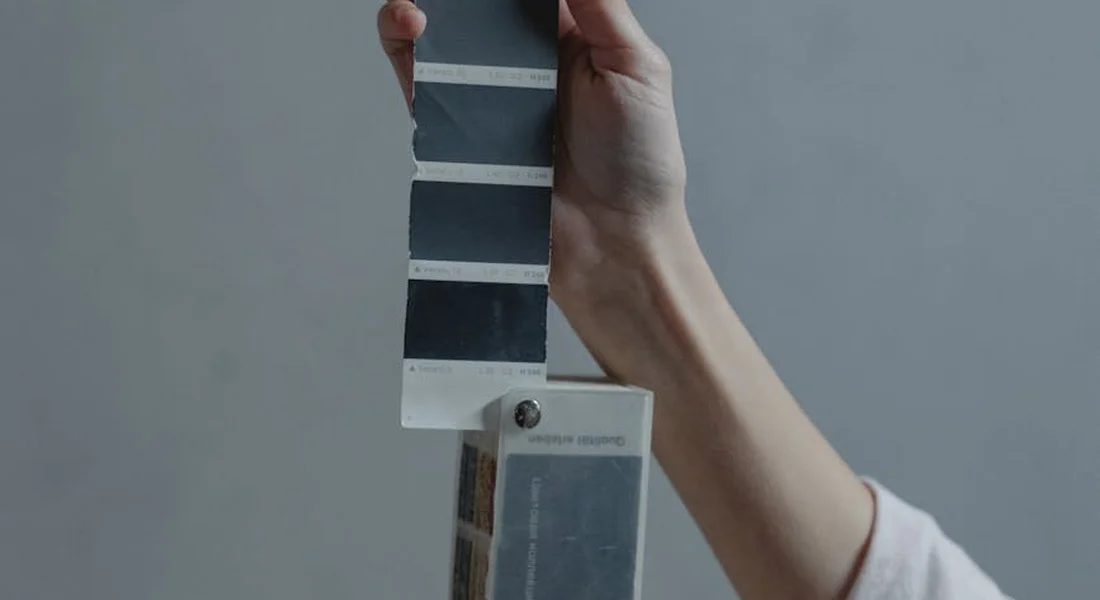
The Swatch Test: Your Essential Reality Check
Before you buy a single spray can or touch-up bottle, get a physical sample. Many online paint retailers and every professional automotive paint supplier can make a “spray-out card” for your code. This is a small metal or plastic card sprayed with your exact formula. It’s especially useful when spray painting car parts like fenders, doors, or bumpers. It lets you test color and finish on the sample before you spray the real panels.
This card is your truth teller. Do not look at it under one light and call it a day.
Take the card to your car. Clean a section of undamaged paint on the panel you need to match, like the door or fender. Now, test it in three lights:
- Direct Sunlight: Holds the card so it catches the sun just like the car’s curve. Metallic flakes will pop. Look for a hue shift.
- Open Shade: Move into the shadow of a building or a tree. This is the most critical test. If the color matches in open shade, it will look right to the human eye in most daily conditions.
- Garage/Incandescent Light: Check it at night under a typical bulb. Some colors, like certain reds and blues, can look very different here.
If the swatch looks off, the paint has faded. A pro shop might use an automotive paint match chart, which is a giant fan deck of colors, to find a closer starting point than your original code. For a DIYer, the swatch test saves you from wasting money on a paint that will look like a mismatched patch.
When to Call in the Pros: The Spectrophotometer
Sometimes the swatch test shows the gap is too big. For my Jet Black BMW, a pure factory black looked blue-gray next to its 8-year-old, sun-baked finish. This is when you need technology.
A professional painter or a high-end automotive paint supplier uses a handheld device called a spectrophotometer. You might hear it called an automotive paint matching camera. Here is how it works:
- You clean a spot of good, original paint on your car. It must be clean and free of wax or sealant.
- The pro places the device directly on the paint and triggers a scan. It flashes a light and measures the precise color reflectance.
- The tool does not care about the factory code. It measures the color as it sits today, factoring in all the fade and micro-scratches that change its appearance.
- It sends this data to a computer, which creates a brand new, custom paint formula to replicate your current, exact shade.
For a faded car, this is the only way car paint can be matched exactly. The machine does not guess. It reads. If you have a large repair or a highly visible panel, restore your faded car paint before applying the matched paint. It’s worth the trip and the extra cost. It turns an impossible match into a seamless one.
Technique Tweak: The Detailer’s Method for Applying Touch-Up Paint
You have the perfect paint. Now, applying it is the final, delicate hurdle. The factory brush is often too wide and clumsy for a true, invisible repair. I learned this the hard way on my BMW, the “Swirl Magnet.” A few blotchy touch-ups from years past still haunt its hood. This method is different. It’s about patience and precision, not speed.
Gather a few simple tools. You’ll need a fine-point wooden toothpick, a quality, clean microfiber towel, and a bottle of isopropyl alcohol (70% or higher). For chips that go down to bare metal or plastic, a dedicated primer pen or bottle is non-negotiable. A magnifying glass or a bright, handheld work light is also a huge help.
- Step 1: Deep clean the chip with isopropyl alcohol. This isn’t a casual wipe. Soak a corner of your microfiber in the alcohol and press it firmly onto the chip for ten seconds to dissolve any wax, grease, or leftover cleaning products. Then, use a dry corner to buff the area completely dry. Your surface must be surgically clean. Any contamination will trap itself under your paint forever.
- Step 2: Use the tip of a toothpick to place a microscopic dot of paint only in the bottom of the chip. Do not fill it level in one go. This is the most critical step. Dip just the very tip of the toothpick into the paint. You want a droplet smaller than a pinhead. Gently touch it to the very center of the bare spot in the chip. The goal is to let capillary action pull the paint into the edges, not to glop it on top. If you overfill now, you create a ugly blob that’s impossible to fix without sanding.
- Step 3: Let it dry completely (24 hours). Repeat, layer by layer, until the paint is just below the surrounding clear coat. Walk away. Seriously. Let the first dot dry for a full day. It will shrink and cure. The next day, inspect it. You’ll likely need another dot, maybe two or three. Each layer is a whisper. Your final layer of color should sit slightly recessed, leaving a tiny well for the clear coat. This patience separates a hack job from a pro repair.
- Step 4: Apply a dot of clear coat using the same method, letting it mound slightly above the surface. Use a fresh toothpick for the clear coat. Apply it the same way, but this time, you want to slightly overfill the little well you created. The clear should form a small dome that rises just above the level of the factory paint. This gives you material to work with in the final step. Let this cure for at least 48 hours. Longer is better.
- Step 5: After 48+ hours of cure, use a fine polish on a foam pad to carefully level the clear coat bump and blend it into the surrounding area. This is the magic. Use a very mild finishing polish, the same kind I use to maintain the gloss on the Porsche’s PPF. Put a small amount on a soft foam applicator pad. Using the tip of your finger for control, gently rub the polish over the raised clear coat spot. Use almost no pressure. You are not sanding. You are slowly abrading the high point of the dome down until it is perfectly flush with the surrounding clear coat. Wipe frequently with a clean microfiber to check your progress. When the reflection is seamless, you’re done.
This method turns a glaring chip into a minor flaw only you will know about. It respects the paint’s chemistry and the reality of how light reflects off a finished surface. It works on my Ford’s scratch or my Tesla’s bumper with equal care. Give the materials time to do their job, and your touch-up will last for years.
Prepping and Applying Aerosol Touch-Up Paint
We have covered finding the right paint code and selecting brush-on touch-up. Now, let’s talk about spray cans. A rattle can is the right tool for a deeper scratch, a small dent repair, or a rock chip that has started to rust on a door. It is not for painting entire fenders or hoods. That requires professional equipment. For a spot the size of your hand, done with care, a spray can can blend a repair into the surrounding panel. However, using spray cans for large areas is not recommended.
I keep a can of my F-150’s specific blue and clear coat on my shelf for this exact reason. The workhorse gets nicked. But the process I use on my black BMW, where any flaw is a beacon, is the same. The goal is invisibility.
Safety and Prep Are Everything
You are not spraying air freshener. You are aerosolizing chemicals that you do not want in your lungs or on your skin. I never start without my respirator. Not a dust mask. A real NIOSH-approved respirator with organic vapor cartridges, nitrile gloves, and safety glasses. A well-ventilated garage is your friend. Open the door, use a fan to move air out, but not one that kicks up dust.
The single biggest cause of a failed paint job is poor surface preparation. You have already sanded the area smooth, feathered the edges of the surrounding clear coat, and applied a thin layer of bonding primer to any exposed metal. Right before you paint, you must make the panel surgically clean. Wipe it down with isopropyl alcohol. Then, take a painting tack cloth-a sticky, cheesecloth-like material-and gently drag it over the entire panel. It will grab every speck of dust your eye missed. Do this immediately before you spray.
The Spray Technique: Avoiding Runs and Texture
The enemy here is a run, an ugly drip of paint that sags down the panel. It happens when you spray too heavily, too close, or try to get full coverage in one pass. We fight it with patience and technique.
First, warm your can. Submerge it in a bucket of warm water for five minutes. This thins the paint slightly and increases the pressure inside, giving you a finer, more consistent spray. Shake it. And I mean really shake it. Listen for the ball bearing inside to move freely, then shake for two full minutes. Mixing is non-negotiable.
Find a piece of cardboard. Practice your motion before you ever point the can at your car. Hold the can about 6 to 8 inches from the surface. Start moving your arm sideways before you press the nozzle. Pass over the repair area, and release the nozzle after you have passed it. Your motion should be one smooth, horizontal sweep.
Your first coat, and every coat after, should be a light dusting, just a mist that barely covers the surface. You are building color in translucent layers. Walk away for ten minutes. Let that coat flash off. Apply a second mist coat. It will look a bit more solid. Wait again. A third coat should bring you to full, even color. This method gives the solvents time to evaporate between layers, preventing runs and allowing the color to develop its true depth. After the color coats have fully cured, follow the same mist-coat process with your clear coat aerosol.
It feels slow. It is. But watching a perfect, run-free repair dry is a special kind of satisfaction. Rushing it only leads to sanding it all off and starting over, which I have also done on my Miata’s fender. Learn from my mistake.
Why Your Perfect Paint Might Still Look “Off”
You found the perfect paint code. You got the can from a reputable source. You followed the prep steps. Yet when it dries, the color looks wrong. It’s close, but it’s not right. This is the most common, frustrating part of paint matching.
Why does paint match look different? It’s almost never just the pigment; it’s a combination of texture, metallic flake alignment, and the age of your car’s clear coat. Your car’s factory paint job was applied by robots in a climate-controlled booth, baked at high temperatures. Your repair is done by hand in a garage. These conditions are different, and the results will be, too.
Will touch-up paint look just like the rest of my car? For small chips, a dab from a brush can be virtually invisible from five feet away. For larger areas, like a scratch or a whole panel, a perfect, invisible blend is a professional-grade challenge. For us, the goal is a match so good it doesn’t draw the eye.
The Orange Peel Mismatch
Look closely at your car’s paint in sunlight. See that subtle, dimpled texture? That’s called orange peel. Every factory car has it. Your spray can or touch-up gun will lay down paint with a different texture. This difference in surface texture scatters light differently, making an identical color look darker or lighter.
Even with the perfect color, a texture mismatch will make the repair stand out like a sore thumb. My Jet Black BMW 3 Series shows this worse than any car I own. A smooth patch next to the factory texture looks like a black hole.
The solution is to adjust the texture. This means wet-sanding the entire panel with very fine grit sandpaper (like 2000 or 3000 grit) to level the texture, then machine polishing it back to a shine. This is advanced work. You can easily sand through the clear coat if you’re not practiced. If you try this, mask off adjacent panels and go slow. Keep the sandpaper and panel lubricated with a detailing spray mixed with water.
Metallic and Pearl Mismatch
These are the hardest. Silver, grey, dark blue, white tri-coat pearls-they are nightmares for a perfect match. The issue isn’t just the color, but the size and lay of the metallic flakes or the depth of the pearl mid-coat.
A mismatch here is often an application issue, not a formula issue. If you spray at a different angle, distance, or air pressure than the factory robot did, you’ll orient the metallic flakes differently. They’ll reflect light from a new direction, making the color look off.
For touch-up brushes on metallics, the flakes often settle or clump. Shake the pen vigorously for a full minute. For spraying, practice your technique on a test card first. Use steady, overlapping passes. Let the paint flash between coats. Rushing a metallic coat will trap solvents and leave a cloudy, mottled finish that never matches.
The Clear Coat Factor
Your car’s clear coat is years old. It has slight micro-scratches, has been polished, and has undergone chemical changes from the sun. Your new clear coat is perfectly glossy and fresh. That difference in gloss level makes the underlying color appear different.
Time and sun exposure will help it blend as the new clear coat yellows very slightly. But you can speed up the process. Using a light polish on the entire panel, not just the repair, can help marry the gloss levels. This knocks down the high shine of the new clear and adds a tiny, uniform layer of fine scratches to the old clear, making them look more similar.
Use a fine finishing polish and a soft foam pad. On my F-150’s hood repair, I used a one-step cleaner wax over the whole thing. It took the stark edge off the new clear coat. Remember, you’re not cutting or correcting, just blending. Wipe the panel clean with a soft microfiber, like a Gerson tri-color towel, to inspect your work.
Securing a Flawless Paint Match
The single most important piece of advice I can give you is to always start with your vehicle’s factory paint code. That code is the definitive roadmap to your exact color, eliminating the guesswork that leads to mismatched panels. Once you have the mixed paint, test it in a small, hidden area to see how it looks in sun and shade before you touch the damaged spot.
Ignore this, and you will be left with a permanent, off-color blotch that ruins the car’s seamless appearance.
Expert Resources and Citations
- Exact-Match Automotive Paint for Less: Buy Touch-Up Auto Paint Online for High Quality at a Low Price | AutomotiveTouchup
- Perfect Match Premium Automotive Paint | Duplicolor
- Automotive Touch Up Paint
- Dupli-Color EBNS05727 Perfect Match Automotive Spray …
- Amazon.com: Dupli-Color EBNS05687 Perfect Match Automotive Spray Paint – Aztec Red, AG2-8 oz. Aerosol Can : Automotive
- OEMatch Basecoat Paint | OEM Factory-Matched Automotive Paint – The Spray Source
- Automotive Touch Up Paint from PaintScratch – Order Pro Grade Paint – PaintScratch.com
Max is an automotive enthusiast having worked as a car mechanical and in interior detailing service for over 25 years. He is very experienced in giving your old car, a new fresh vibe. He has detailed many cars and removed very tough smells and stains from all kinds of cars and models, always ensuring that his work and advice helps his customers. He brings his first hand experience to his blog AutoDetailPedia, to help readers breath new life into their car interiors.