How Long Does a Car Wrap Really Take? Your Installation Timeline Guide
You’re ready to change your car’s color, but you need to know how many days you’ll be without your keys. I get it-I’ve planned wraps around school runs and work weeks myself.
This article walks you through the honest time commitment, straight from the detailing bay. We will cover what drastically changes the hours needed, the meticulous stages from wash to final seal, and how to schedule your life around it.
Guess wrong on the time, and you invite wrinkles, poor edges, and a wrap that fails before its time.
Key Takeaways: What Really Decides Your Wrap Timeline
Forget the simple answer. A good shop will not give you a single number. Your wrap timeline is decided by three concrete things.
The first is vehicle size and complexity. Think about surface area and trouble spots.
- A small, simple car like a Miata or a Honda Civic is a two to three day job for a full wrap. There is less material to handle and fewer complex curves.
- A full-size pickup truck or a large SUV can easily take four to five days. The hood alone is like wrapping two sedan hoods. More square footage means more time.
- Complex body lines add hours. The deep character lines on a modern BMW or the dramatic curves of a Porsche 911 require meticulous stretching and heat to avoid wrinkles. Bumpers with many vents and fog light housings are slow work.
The second factor is the prep work your paint needs. This is where most DIY attempts fail. You cannot wrap over dirt or scratches.
- If your paint is in great shape, prep is a thorough wash and decontamination. This takes a few hours.
- If your paint has swirls, light scratches, or oxidation, it needs correction. This step alone can take a full day. I spent nearly eight hours correcting the black paint on my BMW before its last wrap. Wrapping over defects just seals them in and makes them more visible under the vinyl.
The third, and most important, factor is installer experience. A veteran with ten years of experience works faster and cleaner than someone with one year. They know how to handle the film, where to make relief cuts, and how to manage large panels without trapping air. Choosing an installer based on a low price or a fast promise often leads to a longer shop visit for fixes, or a wrap that fails early.
Remember, the clock starts after design. Your custom design and material printing add one to three business days before the car ever enters the bay. This is not part of the installation time.
A critical safety note for your paint. If your car has been freshly repainted, you must wait. Factory paint needs about 30 days to fully cure and release solvents. A high quality repaint needs 60 to 90 days. Wrapping over fresh paint traps those solvents underneath the vinyl, which can cause the adhesive to fail, create bubbles, or even damage the new paint. A reputable shop will ask about recent paintwork.
Investing time upfront pays off. A quality wrap film, installed correctly on a properly prepped surface and maintained with the right products, should last you five to seven years.
The Wrap Installation Protocol: Order of Operations
This is the non negotiable checklist. Every professional shop follows these steps. The timeline is built around them.
- Initial Consultation & Design
This is the planning stage. You talk about color, finish (gloss, matte, satin), and graphics. The shop takes photos and measurements. This happens before your drop off date.
- Vehicle Drop Off & In depth Inspection
The real assessment begins under shop lights. The installer walks around the car with you, noting every dent, chip, and scratch. They check panel alignment and paint condition. This document protects both of you. It sets the baseline for what the wrap will and will not cover.
- Deep Decontamination Wash & Clay
The car gets a thorough wash to remove loose dirt. Then, we use an iron remover spray to dissolve metallic brake dust particles embedded in the paint. It turns purple as it works. Finally, a clay bar or synthetic clay mitt is glided over every square inch to pull out bonded contaminants you cannot see or feel. Your paint should feel as smooth as glass after this step. If it feels gritty, the wrap will not adhere properly.
- Paint Correction (If Needed)
This is not always required, but often is. Using a dual action polisher and a series of compounds and polishes, we remove the fine scratches and swirls. We do this to create a flawless surface. A wrap is like a second skin. Any imperfection in the paint will telegraph through the vinyl film, especially with glossy wraps. For matte paint wraps, repairing scratches is essential to prevent imperfections from telegraphing through the film. Keeping the wrap looking uniform often hinges on careful scratch repair.
- Final Panel Prep & Wipe Down
Right before wrapping each panel, we wipe it down again with a high purity isopropyl alcohol and water mixture. This removes any final oils or dust from the correction stage. The surface must be surgically clean.
- Film Installation
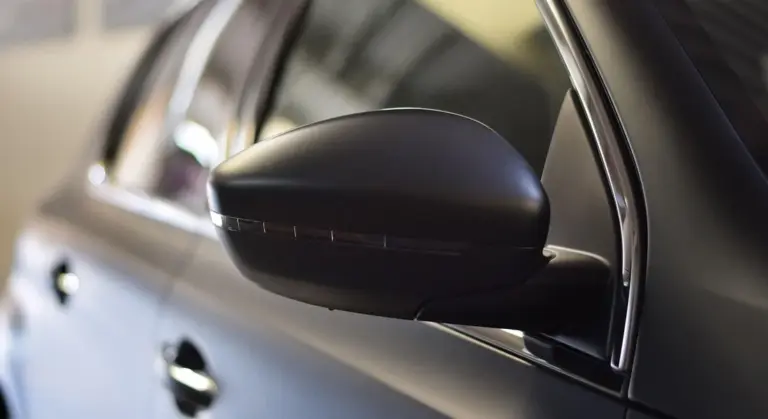
The main event. The installer measures, cuts, and positions the vinyl. They use a combination of soft squeegees, heat guns, and their hands to slowly work out air and conform the film to every curve and recess. Large, flat panels like a hood go relatively fast. Complex areas like a side mirror or a bumper take patience.
- Trimming & Seam Setting
Once the film is applied, the excess is carefully trimmed away along panel edges, door handles, and badges. Seams are placed in discreet areas, like along a body line. Heat is then applied to all edges and seams to activate the adhesive and ensure a tight, long lasting bond that will not lift.
- Initial Cure Time
The wrap needs to rest. The adhesive needs time to fully bond to the paint, and the vinyl needs to relax and shrink slightly. A good shop will let the car sit indoors for at least 12 to 24 hours after installation before the final inspection. We do not wash it during this time.
- Final Inspection & Pickup
Under bright lights, the installer and you do a walk around. They check for any lifting edges, air bubbles, or imperfections. This is your chance to ask questions. They should give you clear instructions on how to care for your new wrap, including which chemicals are safe to use.
Look at steps three through five. The cleaning and correction stage is not just a quick rinse. Proper vehicle prep is a detailed process that can easily consume an entire eight hour workday before a single piece of vinyl is even unpacked. Rushing this part guarantees problems later.
Vehicle Prep: The Hidden Time Sink You Can’t Skip
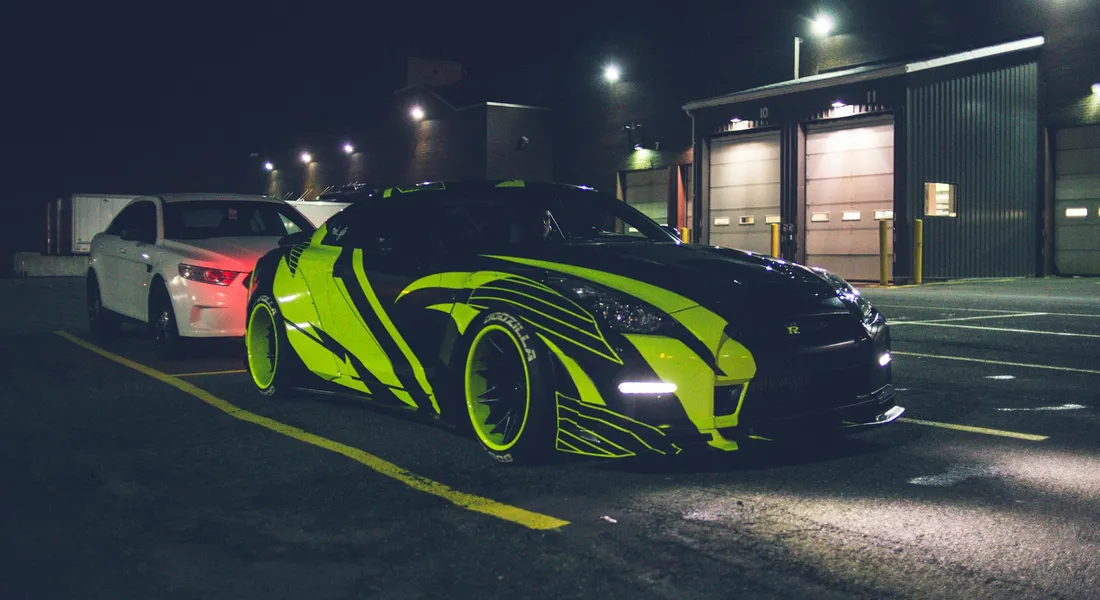
Most folks see a wrapped car and think about the vinyl. They picture someone smoothing a big sheet over the hood. That final step is what you see. What you don’t see are the four to eight hours of work that happen before the first piece of film comes off the roll. Prepping the surface is the single most important factor in how long your wrap lasts and how good it looks. Skip it, and you’ll see every speck of dirt underneath, and the film won’t stick right.
This is not a car wash. It’s a surgical scrub. You start with a standard two-bucket wash to get the loose dirt off. Then, you move to chemical decontamination. I spray an iron remover, like Iron X, over the whole car. It turns purple as it dissolves tiny metal particles from brake dust that are baked into the clear coat. After that, I clay bar every square inch. The clay bar pulls out the bonded contaminants that washing left behind-tree sap mist, industrial fallout, hardened bugs. You feel it go from dragging like sandpaper to gliding smooth.
Next comes paint correction. This is where time estimates explode. The goal is a perfectly flat, smooth surface. On my white Tesla, the paint is soft but the color hides flaws. I might just do a single light polish with a fine finishing pad to clean up the surface after claying. That adds maybe an hour. On my black BMW, it’s a different story. Black paint shows every single swirl and hologram. To get it flat enough for a showroom wrap, I’m looking at a two or three-step compounding and polishing process. That alone can take a full day for the entire car. Surface preparation of automotive paint is the foundation: cleaning, decontamination, and masking before correction. When it’s done well, the correction goes smoother and the wrap sticks better. The color and condition of your paint directly dictates how many hours of correction are needed before the wrap even starts.
A common question I get is, “How long after painting a car can you wrap it?” This is critical. You can drive a car a few days after a quality paint job once it’s dry to the touch. But you cannot wrap it. Fresh paint needs weeks, often 30 to 90 days, to fully cure. It releases solvents, a process called off-gassing. If you trap those gasses under a vinyl wrap, they have nowhere to go. This can cause the adhesive to fail, creating bubbles, wrinkles, and causing the film to not stick at all. The paint can also darken slightly as it cures. Wrap it too soon, and the color might shift under the edges of the film. Always, always follow your painter’s cure-time recommendation.
Detailer’s Pro-Tip: The Tape Test for Clean Paint
After all that washing, decontaminating, and polishing, how do you know the panel is truly clean? My foolproof method is the tape test. Take a 6-inch strip of clear packaging tape. Lightly press it onto the cleaned paint panel and slowly run your fingernail over it to ensure good contact. Now, peel it off in one quick motion. Listen.
If you hear a smooth, quiet zip, you’re golden. If you hear a gritty, crackling sound-like pulling tape off a dusty box-the panel is not clean. That sound is tiny contaminants still on the surface. If you wrap over that grit, you will see and feel every single piece under the vinyl. This simple two-minute test prevents debris from being sealed under the wrap, saving you hours of frustrating rework later. Do this test on every major panel before you start cutting film. It’s the final check before point of no return.
From Design to Door Handle: Breaking Down the Phases
You don’t just show up and get your car wrapped. The process is more like a project, with distinct stages that all add to the clock. Understanding these phases takes the mystery out of the timeline.
Phase 1: Design & Material
This happens before any vinyl is even printed. For a full-color change, it’s simple. You pick a color from a swatch book, and the shop orders the rolls. The time is just shipping, usually 2-5 business days.
For a custom graphic wrap, this is where the real work begins. A designer creates the artwork to fit your specific vehicle’s template. You get proofs to review. Every round of revisions-moving a logo, changing a font-adds time. A simple design might be settled in a day. A complex one with multiple revisions can take a week or more.
Once the design is approved, it goes into the print queue, gets printed, and then must laminate. Laminating is putting a clear protective film over the printed graphics. This is non-negotiable. It prevents fading and makes the wrap last. From print to laminated roll ready for install, budget 1-3 days.
Phase 2: The Install
This is the hands-on time you’re thinking about. It’s not one action. It’s a series of meticulous steps repeated for every panel on your car.
The Universal Sub-Stages (Every Panel, Every Vehicle)
- Deep Decontamination: The car must be cleaner than you’ve ever seen it. This isn’t a wash. It’s a full decon wash, clay bar treatment, and an isopropyl alcohol wipe-down. Any speck of dirt left behind gets trapped under the vinyl forever. On my black BMW, this step alone takes over two hours.
- Disassembly: A quality install often involves removing parts. Door handles, tail lights, side markers, and badges are commonly taken off. This allows the vinyl to be tucked neatly behind edges, preventing premature peeling.
- Panel Preparation: The installer sprays the panel with a slip solution (soapy water). This lets them position the vinyl before squeegeeing it down.
- Application & Stretching: The vinyl is laid onto the wet panel. Using heat guns and skilled hands, the installer gently stretches and forms the material over curves and recesses. Too much heat or stretch causes failure later.
- Squeegeeing & Sealing Edges: The water is worked out from under the film with soft squeegees. All edges are firmly sealed. This is where patience prevents bubbles and lift.
- Trimming & Reassembly: Excess vinyl is trimmed away with a fresh blade. All removed parts are put back on, securing the vinyl edges underneath.
Timeframe: Sedan vs. Large SUV
Think of it panel by panel. A skilled installer might wrap two doors and a fender in a morning. A complex bumper with lots of curves and vents could take all afternoon.
For a standard sedan (like a Honda Civic or Toyota Camry): A professional two-person team can often complete a full color-change wrap in 2 to 3 full days. The panels are relatively flat and accessible.
For a large SUV (like a Chevrolet Suburban or Ford Expedition): The timeline stretches. You have more square footage. The doors are bigger. The hood is massive. The same two-person team is now looking at 3 to 5 full days of work.
What Adds More Time? The Details.
Some techniques slow the installer down but guarantee a better, longer-lasting result.
Inlays: Some recesses are too deep to stretch the main piece into. An installer will cut a separate piece of vinyl just for that recess and “inlay” it, butting it seamlessly against the main piece. It’s like doing two perfect installations on one panel. It adds significant time.
Knifeless Tape: This is a brilliant but time-consuming tool. A special tape is laid down before the vinyl. After the vinyl is applied, a cord in the tape is pulled, giving a perfectly straight, cut-line seam without ever risking a knife touching the car’s paint. Using knifeless tape for clean seams on hoods or roofs adds hours, but it’s the mark of a top-tier install that protects your paint.
The goal isn’t to be fast. It’s to be precise. A rushed wrap will look good for a month. A careful one will protect your paint for years. It’s the same philosophy I use with paint correction on my 911: slow, deliberate steps win every time.
What Slows a Wrap Job Down? (The Big Five Factors)
Think of wrapping a car like painting a room. A small, square bathroom is quick. A large living room with crown molding and vaulted ceilings takes longer. The same logic applies to your vehicle, but the variables are more intense.
Vehicle Size & Shape
This is the most obvious factor. My Mazda Miata is a tiny canvas. A skilled installer can wrap its simple curves in a day, maybe two. Now, look at my Ford F-150. The sheer surface area of that hood, those massive doors, and the expansive bed sides adds hours of labor. More square footage means more film to handle, more seams to plan, and simply more physical space to cover.
Complex curves are the real time-eaters. My Porsche 911 has subtle body lines and dramatic rear fenders that the vinyl must stretch and conform to without wrinkles or lifts. Each complex panel requires careful heating, strategic stretching, and meticulous trimming. A flat panel on a van is fast. A rounded bumper with sharp edges is slow.
Paint Condition
Vinyl adheres to your car’s clear coat, not the color underneath. If that surface is rough, the wrap will be too. I learned this the hard way on my jet-black BMW. Its swirled paint felt like sandpaper. Wrapping over that would have trapped every defect, creating a lumpy, unprofessional finish. That’s the kind of detail you’ll find in vinyl car wrap explained. It breaks down why prep matters and how the adhesive behaves on rough surfaces.
A proper wrap shop will insist on correcting the paint first. This means a thorough decontamination wash, a clay bar treatment to pull embedded grit, and often a single-stage polish with a machine like my DA polisher. For a heavily swirled or contaminated car, this paint correction adds a full day of work before the first piece of vinyl is even cut. It’s non-negotiable for a quality result.
Film Type & Design
Standard gloss color wraps are the baseline. Films like satin, matte, or chrome finishes are much less forgiving. Every fingerprint, every tiny stretch mark, and every imperfection in the adhesive underneath becomes visible. The installer must work with extreme care, often using specific slip solutions and heat settings.
Printed graphics or full-color changes add massive time. Designing and aligning complex patterns, managing printed seams so the image flows perfectly, and handling delicate printed film without scratching it is a specialist’s game. What takes 3 days for a solid color can easily become a 5-day project for a full custom print.
Shop Environment
You cannot install a wrap in a dusty garage. A single speck of dirt under the film becomes a permanent blemish. A professional shop uses a climate-controlled, positive-pressure clean bay. The air is filtered, the floors are clean, and the temperature is steady around 70°F.
Cold vinyl doesn’t stretch or adhere. Hot vinyl becomes too soft and gummy. Humidity can affect the adhesive. Working in a subpar environment forces the installer to fight the material, leading to wasted film, re-dos, and a longer, more frustrating process for everyone. This is one area where the DIY driveway attempt most often fails.
Installer Skill
An expert moves with an economy of motion that comes from thousands of hours of practice. They know exactly how much to stretch the film over a mirror cap, how to make a single, perfect cut along a body line, and how to hide a seam where you’ll never see it. This speed comes from precision, not rushing.
A less experienced installer will pause, re-heat, re-lift, and re-apply sections. They might waste material on bad cuts. The fastest installers are not the ones who hurry, they are the ones who get it right the first time, every time. Their skill directly translates to a shorter shop time and a flawless final product. It’s worth paying for.
The Waiting Game: Curing and Your First Wash
Your car looks incredible. The installer hands you the keys. You are not done.
The vinyl is on the car, but the adhesive underneath is still getting to know your paint. This bond needs time to strengthen, or cure. Think of it like a sticker. When you first press it down, it holds, but it gets a much stronger grip over the next few days.
This cure time depends heavily on temperature. In a warm garage, around 70°F, full bond strength can happen in about 48 hours. In a cold shop, say 50°F, it can take a full week. For the first two weeks, treat your new wrap with extra gentleness.
The most common question I get next is about cleaning. How long after wrapping a car can you wash it?
You must wait at least one to two weeks before that first hand wash. Even then, be very careful. Use a gentle stream from a garden hose, not a pressure washer. Keep that pressure washer nozzle away from the edges and seams of the wrap. A strong blast can sneak under the vinyl and start peeling it back.
Use a pH-neutral car shampoo and a soft microfiber mitt. Dry with a clean plush towel, blotting gently instead of dragging it across fresh edges.
This initial care sets the stage for how long your wrap will last. People ask, how long can a wrap last on a car?
With proper care-regular gentle washing, prompt removal of bug splatter and bird droppings, and use of a vinyl-specific spray sealant-a high-quality wrap can look great for 5 to 7 years. I use a spray sealant on my Tesla’s wrap every few months. It makes cleaning easier and adds UV protection.
Do not leave a wrap on for a decade. The vinyl itself becomes brittle. More critically, the adhesive can harden and cure permanently to your clear coat. Removing it then becomes a nightmare, often pulling paint off with it. Plan to remove it within the manufacturer’s warranty period, which is usually a good indicator of its safe lifespan.
Technique Tweak: The Post-Install Heat Pass
Here is a pro secret that separates a good install from a great one. It adds time, but it is non-negotiable for durability.
During installation, the installer uses a heat gun to soften the vinyl so it can stretch and conform. After the vinyl is fully applied, trimmed, and tucked, the real magic happens. The installer goes back over every single panel with the heat gun again.
This time, they use a low, even heat, moving constantly over the surface. They follow immediately with firm, even pressure from a soft felt squeegee. This does two critical things.
First, it reactivates the adhesive, helping it flow into every microscopic pore of your clear coat. Second, it relieves any residual tension in the vinyl, preventing it from wanting to shrink or pull back later. This final heat pass ensures the vinyl is not just stuck on, but molecularly bonded to the panel.
It is absolutely critical in cold climates. On my BMW, which lives through New England winters, this step is what keeps the wrap sealed against salt and moisture. Skipping it to save an hour is a gamble with the entire job’s longevity. A true professional will never cut this corner.
Setting Realistic Expectations With Your Installer
Once you have a general sense of the timeline, the real work begins: finding the right shop. This conversation is your chance to separate the professionals from the pack. A good installer won’t dodge your questions. They will welcome them.
Walk in prepared. You are not just buying vinyl; you are buying skilled labor and peace of mind.
The Questions You Must Ask
Start with prep. It is the foundation of everything. The paint must be surgically clean. I mean, you could eat off it clean. Any wax, sealant, or leftover polish will stop the vinyl from sticking. Ask plainly: “What’s included in your prep? Walk me through the steps.” You want to hear about a thorough decontamination wash, a clay bar treatment, and a final wipedown with a high-grade isopropyl alcohol solution. If they say they just “give it a good wash,” walk away.
Get everything in writing. A professional operation runs on schedules. “Do you provide a written timeline or project milestones?” This isn’t about micromanaging. It is about setting clear expectations for both of you. It shows they are organized and respect your time. My 2022 Porsche 911, the “Garage Queen,” needed its PPF installed. The shop gave me a day-by-day breakdown. It was reassuring.
Plan for the unexpected. What lies beneath your paint? What is your process if you find damaged paint, deep scratches, or rust during disassembly? A professional will stop and show you the issue. They will explain their recommended fix and provide a new quote for the extra work. A rushed shop might just slap the vinyl over it. The adhesive will react with the compromised surface, and you will see every flaw. Worse, it can fail early.
The True Cost of a “Fast and Cheap” Quote
Let’s be direct. A quote that is significantly cheaper and faster than all others is a red flag. Time is money in a wrap shop. To cut the price and the hours, steps get skipped.
Maybe they do not fully remove emblems or door handles. They cut the vinyl around them. This leaves edges that will catch and peel. Perhaps they skip the clay bar and alcohol wipe. The vinyl sticks to dirt, not paint. It might look okay for a month. Then you will see bubbles, discoloration, and edges lifting.
Cheaper now almost always means costly failure later. The vinyl itself is a major expense. Paying for a proper removal and a second wrap is a financial nightmare. Investing in a thorough, slower installation protects that initial investment, especially considering the lifespan of vinyl car wraps.
Time is Your Investment in Quality
Remember this: a vehicle wrap is a major paint replacement, not a sticker job. You are covering every painted surface with a thin, adhesive film that must conform to complex curves, withstand sun and car washes, and look flawless. If you’re considering painting over a vinyl wrap, there are important prep steps and compatibility considerations to keep in mind. We’ll explore painting over vinyl car wrap in the next section.
The days spent in the shop are not idle time. They are filled with meticulous steps. Each panel is measured, the vinyl is precisely plotted, knifeless tape is laid for perfect seams, and heat is carefully applied to mold the material. Rushing any of this introduces errors.
View the installation time as a direct deposit into the longevity and beauty of your wrap. A job done right, with patience and skill, will protect your paint for years and turn heads. A rushed job will be a source of constant annoyance. Choose the shop that values time as much as you should.
Final Thoughts on Wrap Installation Time
Focusing on a perfect surface and patiently working panel-by-panel is how you get a professional result that lasts for years. Rushing through prep or trying to install a full wrap in a single weekend is the fastest way to end up with a job you aren’t proud of.
Ignore this process, and you’ll see edges lifting, bubbles forming, and a finish that looks rushed from day one.
Expert Resources and Citations
- How Long Does a Full Car Wrap Really Take?
- How Long Does It Take to Install a Car Wrap? | Dynamax – Dynamax
- How Long Does a Commercial Wrap Installation Take?
Max Gunther
Max is an automotive enthusiast having worked as a car mechanical and in interior detailing service for over 25 years. He is very experienced in giving your old car, a new fresh vibe. He has detailed many cars and removed very tough smells and stains from all kinds of cars and models, always ensuring that his work and advice helps his customers. He brings his first hand experience to his blog AutoDetailPedia, to help readers breath new life into their car interiors.