Is Ceramic Coating Worth It for Your Car? The Real Benefits and Protection Explained
You wash your car every weekend, but the shine fades fast, and water spots seem permanent. I know the feeling, staring at my black BMW after a rainstorm, seeing every flaw.
This article breaks it down. We will cover how a ceramic coating actually works on a molecular level, its key benefits for daily drivers and garage queens alike, and what the different protection levels mean for your paint’s long-term health.
Skip this knowledge, and your paint faces a slow death by a thousand cuts-swirls, UV fade, and etching from road grime that no quick wax can stop.
Quick Snapshot: Ceramic Coating vs. The Old Way
Let’s cut through the noise. I keep all these products in my shop because each has its place. This table shows you why you might choose one over the other.
This is a broad guide. A specific brand’s “consumer” coating might outperform another’s “pro” product from five years ago. I use a ceramic spray on my F-150 for quick upkeep. The Porsche and the BMW got the full professional treatment.
So, What Is a Ceramic Coating, Really?
Forget thinking of it as a wax or a sealant. A ceramic coating is a liquid resin that forms a permanent, transparent shield on your car’s clear coat, providing enhanced paint protection.
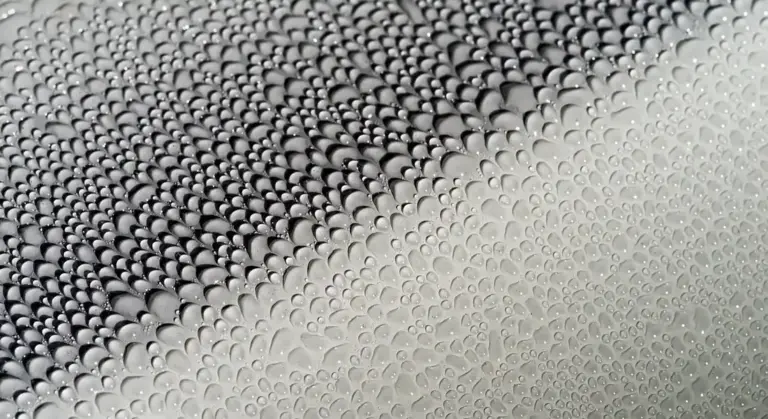
Imagine water on a hood. On a freshly waxed car, water beads up in tight, small droplets. They look pretty but they dry into spots. On a coated car, water doesn’t bead as much as it sheets. It flattens out and slides off the panel in wide, clean rivers, pulling dust with it.
The magic is in ingredients like silicon dioxide (SiO2) and titanium dioxide (TiO2). Think of them as microscopic, incredibly hard glass particles. When the liquid carrier evaporates, these particles cross-link and bond to your paint, creating that slick, durable layer.
How Ceramic Coatings Actually Work (The Nano-Tech for Your Paint)
The bond is what changes everything. Wax sits on top. A good sealant grips the surface. A ceramic coating becomes part of the surface through a chemical bond. You don’t buff it off. You level it and it cures, or hardens, in place.
This creates two key properties: hydrophobicity (water-hating) and oleophobicity (oil-hating). It repels road film, bug splatter, and bird droppings almost as well as it repels water. On my white Tesla, this makes removing summer bug guts a two-minute job instead of a fifteen-minute scrub.
Are ceramic coatings safe for cars? Absolutely, when applied correctly. The application requires care. You need a well-ventilated space, gloves, and sometimes eye protection because you’re working with chemicals. Once it fully cures, usually in 24-48 hours, the coating is inert and completely safe. The protection is there, but your paint can still breathe. For practical safety and effectiveness tips, consult our ceramic coating safety effectiveness guide. It covers PPE, ventilation, curing times, and safe handling.
This leads to the self-cleaning effect. Because the surface is so smooth and non-porous, contaminants have less to grip. A driving rain shower often cleans my coated cars halfway. Dirt doesn’t embed itself. This is the single biggest daily benefit I notice on my black BMW, the one that shows every speck of dust. It stays cleaner, longer, which means less touching, which means fewer swirls.
The Real-World Benefits: Is It Worth It for Your Car?
So, are ceramic coatings good for your car? I think that’s the wrong question. The better question is, are you ready for a long-term relationship with your paint? A coating is not a one-night stand. It is a multi-year commitment to a different level of care. The benefits are real, but they require you to change how you think about maintenance. To truly maintain a ceramic coating, you need a simple, ongoing care routine. Regular washes with mild products and careful drying go a long way.
Benefit 1: The “Wash Me” Sign Loses Its Power
This is the benefit you feel every single week. A proper coating makes water bead into tight, round pearls. When you rinse, those beads roll right off the panel, carrying loose dirt and dust with them. The surface is so slick that mud and road film don’t get the same grip.
I remember last March, after a slush storm. My blue F-150 was plastered with a gritty paste of salt and sand. It looked like a lost cause. With a coated surface, I just pre-rinsed with the pressure washer. I watched the thick slurry sheet off the hood and doors. What normally would have required a heavy foam soak and two bucket passes came clean with a light contact wash. The whole job took 20 minutes. It felt like a cheat code.
This leads directly to a common question: do car wash ceramic coatings work? You need to know the difference. A true ceramic coating is a liquid polymer that chemically bonds to your clear coat. It cures into a hard, semi-permanent layer. The “ceramic-infused” shampoos and spray waxes you see are great maintenance products. They add slickness and boost beading on top of an existing coating or wax. But they are a temporary topper. They are not the main event. They work with a coating, not instead of one.
Benefit 2: Paint Looks Deeper and Stays That Way
If you have ever spent a weekend correcting your paint, you know the heartbreak. You remove every swirl, and the color looks liquid deep. Then, two months later, the sun hits it just right, and you see the first fine scratches returning. A coating locks that corrected finish in place.
My black BMW is the perfect example. Black paint shows every single flaw. After I finally corrected the holograms from a bad detailer, I applied a coating. Now, the jet black finish has a wet, glassy look that persists between washes. The coating fills the microscopic pores of the clear coat, creating an optically flat surface. Light reflects evenly, without the diffuse scattering that makes paint look dull. It is like putting on a pair of glasses for your paint.
This clarity is protected by serious UV resistance. Ultraviolet light is what breaks down paint binders, turning that vibrant red into a chalky, faded pink. This is the battle I fight on my 1995 Miata. Its single-stage red paint has no clear coat to sacrifice. A ceramic coating acts as a sacrificial UV filter. It absorbs that damaging energy so your paint’s pigments don’t have to. For older cars or daily drivers in sunny climates, this is not just about shine. It is about preservation.
Benefit 3: Fighting Environmental Contaminants
Protection is a vague word. Let’s get specific. Your paint’s enemies are bird droppings, bug guts, tree sap, road tar, and especially road salt. These are acidic or corrosive. They begin etching into your clear coat the moment they land and bake in the sun.
A ceramic coating provides a chemically inert, non-porous barrier. That bird bomb doesn’t contact the paint directly. It sits on top of the slick, hardened coating. This gives you a critical gift: time. Instead of rushing to a gas station in a panic, you have a safer window to gently remove the contaminant. The surface is so slick that many contaminants have a weaker bond, making removal easier and less likely to scratch.
For the ceramic coating benefits chart road salt question people search for, here is the practical answer. Road salt is corrosive. It accelerates oxidation and can stain trim. On a coated car, the salty brine has a harder time adhering to the painted surfaces. When you rinse, it sheets off more completely. This doesn’t mean you can ignore undercarriage washes. It means the horizontal panels you see and care about have a fighting chance against winter’s worst. The coating turns a direct chemical attack into a surface-level skirmish you can easily win.
The Trade-Offs (The “Disadvantages” People Ask About)
No product is magic. Knowing the downsides helps you make a smart choice.
First, a coating is not an armor shield against scratches. It adds hardness, but it is only a few microns thick. If you wash with a dirty mitt or drive through an automatic brush car wash, you will instill swirls right into the coating. You are protecting the paint, but the coating itself needs proper care to stay perfect.
The upfront cost is real. A professional application requires hours of paint correction. You are paying for that labor and expertise. For a DIY kit, the cost is lower, but the time investment is massive. You must be prepared to spend a full weekend, maybe two, on proper decontamination and correction.
This leads to the most critical point: the coating locks in whatever is underneath. If you apply it over swirls, water spots, or oxidation, you are perfectly preserving those flaws for years. The prep is everything. The paint must be flawless to your eye under a bright inspection light.
Finally, DIY application has a classic pitfall: high-spots. This is when you apply too much product and it dries unevenly, leaving visible, hazy streaks. Fixing it means polishing the area to remove the coating and re-applying. It is a frustrating lesson in patience and working in small, manageable sections.
Understanding the “Levels”: From Spray to Pro-Grade
When people talk about ceramic coating “levels,” they’re usually referring to the type of product and its staying power, not a formal numbered system.
Think of it more as a spectrum of commitment, from a quick weekend wipe-down to a multi-year investment in protection. The right choice depends entirely on your goals, budget, and willingness to prep.
Level 1: Ceramic Sprays & Quick Detailers (The Maintenance Heroes)
These are your workhorses. I keep a bottle in every garage cabinet. They are not full ceramic coatings in the traditional sense. They are hybrid products, often a blend of polymers and silica, designed for easy use.
Their real power is in adding slickness and water beading to an existing base layer or refreshing a traditional wax. After I wash my Ford F-150, a quick spray and wipe across the hood makes the next rinse easier. They are perfect for the DIYer who wants a boost without a full weekend project.
So, do ceramic coatings for cars work if they’re just a spray? Yes, but with major caveats. They work to provide meaningful protection, but it’s measured in weeks or months, not years, especially when compared to traditional ceramic coatings.
I use them for specific, tough jobs. A spray on my Tesla’s wheels makes brake dust rinse off with just water. A light mist on the BMW’s windows improves visibility in rain. On textured black plastic trim, they restore a deep, dark finish without white residue.
- Best For: Topping up a coating, adding slickness to wax, quick maintenance.
- Durability: 1 to 3 months, depending on weather and wash frequency.
- Prep Needed: Just a clean surface. Wash and dry the car first.
- My Go-To: On the jet black BMW, a ceramic spray is safe and fast. It adds gloss without the risk of permanent high spots that thicker products can leave.
Level 2: Consumer “Kit” Coatings (The Committed DIY Project)
This is where the real DIY challenge begins. You buy a small bottle, maybe with an applicator and a prep wipe, from a detailing site or store. These are true coatings with higher concentrations of SiO2 (silicon dioxide). They bond to your paint.
Applying one is a serious, rewarding project that demands perfect paint preparation. You cannot skip steps. The surface must be surgically clean and perfectly polished. Any dirt, wax, or swirls you leave behind will be sealed in for the next two years.
The process is methodical. You must work in small sections, usually a 2×2 foot area. Apply the product in a cross-hatch pattern, let it haze, and buff it off completely with a clean microfiber towel. Miss a spot during buffing, and you get a “high spot”-a visible, streaky blemish that can be very hard to remove.
This high-spot risk is why dark colors like my BMW are a nerve-wracking test for a first-timer. Every flaw shows. You also need a controlled environment. A clean, cool garage is essential. Direct sun, wind, or dust will ruin the application as it cures.
- Best For: The committed car owner ready for a weekend of prep and precise application.
- Durability: A realistic expectation is 1 to 2 years with proper maintenance.
- Prep Needed: Full decontamination wash, iron remover, clay bar, and often a machine polish. This is 90% of the work.
- Safety Note: Work in a well-ventilated area. Wear nitrile gloves. The chemicals in these kits are stronger than sprays.
- My Experience: I applied one to my Tesla Model 3 in the garage. The flat, white panels were forgiving. The result was fantastic, but the hours of polishing beforehand were the real key.
Level 3: Professional-Grade Coatings (The Long-Term Investment)
This is the top shelf. These coatings are applied by certified, trained detailers. They often come with a written warranty for 3, 5, or even 10 years. That warranty is a promise of the product’s durability and the installer’s skill.
The difference is in the concentration and the skill required to apply it flawlessly. These coatings have a higher solid content. They are less forgiving. They cure harder and offer greater chemical resistance. An expert knows exactly how to layer them, how to read the flash time, and how to ensure perfect, even coverage on every complex curve.
This is what’s on the Porsche 911. For a car with that value and those lines, the guarantee of perfection is worth the cost. It is also likely what a detailer would recommend for the Tesla to provide the ultimate in gloss and low-maintenance care.
You are paying for the years of experience that prevent costly mistakes on your car’s paint. A pro has the lighting, the climate control, and the practiced hand. They handle the exhaustive prep so the coating has a perfect foundation. For most people, this is a smarter investment than attempting a pro-grade product themselves.
- Best For: Owners seeking maximum, guaranteed protection and a showroom finish without the DIY risk.
- Durability: 3+ years, often backed by a manufacturer and installer warranty.
- Prep Done: A detailer will perform a full paint correction, removing every scratch and swirl, before the coating ever touches the paint.
- The Result: This is the “hassle-free” care tier. Dirt releases easier. Maintenance washes become simple. The deep, liquid gloss is unmistakable.
How to Apply a Ceramic Coating (The Prep is Everything)
You do not just wipe this stuff on a dirty car. If you try, you will permanently lock in that dirt. You will waste your money and your weekend. I tell every client and every friend the same thing. Ninety percent of the work for a perfect ceramic coating happens before you ever twist the cap on the bottle. The coating is just the final, thin sealant over a flawless surface. Miss a step in preparation, and you seal in a flaw forever.
Step 1: The Deep Clean
This goes beyond a normal Saturday wash. We need to strip the paint down to its bare, clean state. Any wax, sealant, or old coating must go. All embedded contaminants must be lifted out.
Start with a foam cannon and a strong strip wash soap. Let the foam dwell and soak. This loosens the top layer of grime. Next, a strict two-bucket wash with grit guards. I use this on every car, but it’s non-negotiable here. You cannot add new scratches now, especially when dealing with DIY car scratch repair.
After rinsing, the real decontamination starts. Spray an iron remover over the whole car. You will watch it turn purple as it reacts with embedded brake dust and rail dust. This stuff is in your paint, even if you cannot see it. Rinse it off. Then, you must clay the surface. Use plenty of lubricant. Glide a clay bar or synthetic clay mitt over each panel. You will feel it grab and then glide smoothly when the contamination is gone. This step removes bonded contaminants the wash missed. Your paint should feel like smooth glass when you are done. Any roughness left behind will be trapped under the coating.
Step 2: The Paint Correction
This is the most critical and skilled part. A ceramic coating is like a magnifying glass for your paint. It adds incredible clarity and depth, which means every single scratch, swirl, and hologram will shine brighter than ever. Paint correction is where you permanently remove those scratches and swirls before the coating magnifies them.
This requires a dual-action polisher, the right pads, and the right compounds. Paint hardness varies wildly. My black BMW has a notoriously soft clear coat. It corrects easily but can be burned or hologrammed just as easily. I use a fine finishing polish on a soft foam pad. My blue Ford truck has a much harder clear coat. It takes a more aggressive compound and a firmer pad to cut through the oxidation and deeper scratches.
You work panel by panel, in good light, removing defects. The goal is not necessarily perfection, but a finish you are happy to preserve forever. This step can take a full day or more. Skipping it is the biggest mistake you can make. You are not coating the car. You are coating the flawless finish you just created.
Step 3: The Final Wipe & Application
The paint is clean and flawless. But polishing leaves behind oils. These oils will prevent the coating from bonding. You must remove them completely.
Wipe every inch of the car down with a prep spray like isopropyl alcohol (IPA) diluted with distilled water or a dedicated surface prep solution. Use a clean, soft microfiber towel. Change towels often. This final wipe ensures a perfectly clean, oil-free surface for bonding.
Now, finally, you can open the coating. Work in a cool, shaded, and dust-free garage. Apply the coating in small sections, like one door or half a hood at a time. Apply the product in a cross-hatch pattern with the supplied applicator, then level it gently with a clean, premium microfiber towel before it flashes. Watch for high-spots, which look like oily streaks that do not wipe away. If you see one, apply a tiny bit more product to that spot and level it again immediately.
Follow the product’s flash time instructions exactly. Some coatings need 30 seconds, others a few minutes. The climate affects this. The coating will become slick and almost dry to the touch when it’s ready to level. A common question is about using a tool for application. Some pros use a dual-action polisher with a special foam applicator pad for large, flat panels like hoods and roofs. This can help achieve a very thin, even layer faster. This “coating drill” technique is only for large, flat panels and requires a very steady hand and experience to avoid applying too much product. For your first time, and for curves and complex body lines, stick with the hand applicator. It is safer and gives you more control.
Move methodically around the car. Do not rush. The final result, a slick, hydrophobic, and incredibly glossy finish, is worth every minute of the long preparation.
Living With a Coated Car: The Maintenance Mindset
Let me be straight with you. A ceramic coating is not magic armor that lets you neglect your car. I learned this the hard way on my black BMW. I coated it, thought I was bulletproof, and got lazy with my wash routine for a month. The coating was still there, protecting from etching, but the surface lost that slick, just-done feel. It was covered in a fine layer of embedded grime. That’s why maintaining the coating is just as important as applying it.
A coating changes your relationship with maintenance. It shifts the goal from constant protection to gentle cleaning. You are no longer trying to add shine each wash. You are preserving a finish that is already at its peak. The coating does the heavy lifting on protection, so your job is simply to keep it clean without harming it.
The Right Way to Wash
Your wash technique becomes the most important factor in your coating’s longevity. This is where you can make it last years or degrade it in months.
First, the soap. You must use a pH-neutral car shampoo. Think of your coating like the clear coat itself. Harsh alkaline soaps (like dish detergent or all-purpose cleaners) and strong acidic wheel cleaners will slowly break down the coating’s bonds. They strip away everything. A pH-neutral shampoo lifts dirt without attacking the silica layer you paid for. On my F-150 and Odyssey, I use a coating-specific shampoo that suds well in cold water and provides extra lubrication.
Your tools matter more now. Swirls and scratches will still happen if you drag dirt across the paint. The coating protects from chemical stains, not physical marring.
- Use the two-bucket method with grit guards. Every time.
- Wash from the top down, rinsing your mitt frequently.
- Dry with a clean, plush drying towel. I use a large hybrid weave microfiber. Letting water air-dry on a coated car is the fastest way to create stubborn water spots, as the water beads tightly and deposits minerals as it evaporates.
For my Porsche and Tesla, which see lighter dirt, I often use a waterless or rinseless wash. I pre-spray a lubricant, gently wipe one panel at a time with a fresh microfiber towel, and immediately buff with a dry one. This is safe on a coated car because the surface is so slick and the towels glide without grinding in dirt.
Toppers and Boosters
This is the pro detailer’s secret for client cars. A ceramic spray sealant, often called a “topper,” is your best friend. It is not a coating. It is a maintenance product that bonds to your existing coating.
I use them two ways. First, as a drying aid. After washing, I mist a spray sealant lightly onto the wet panel. As I dry with my towel, it spreads the product and leaves an incredible, slick finish. It takes 30 extra seconds and makes the car look freshly detailed.
Second, as a deliberate booster every 4-8 weeks. When the hydrophobic effect (the water beading) seems less vigorous, a full application refreshes it. Here is my simple process:
- Wash and dry the car completely.
- Spray the product onto one panel.
- Immediately spread it thin with a soft applicator pad.
- Wait 60 seconds.
- Buff off any residue with a clean microfiber towel. It should come off easily.
The result is a dramatic resurgence of that deep gloss and water behavior. On my daily drivers, this ritual keeps them looking showroom-fresh with minimal effort. Think of your base coating as the long-term foundation and the spray sealant as the renewable top layer that keeps everything performing and looking its best. This one-two punch is how you get five years of perfect performance from a two-year coating.
Ceramic Coating vs. Wax: The Final Comparison
Forget the marketing hype. Let’s put these two protectants side by side, based on what really happens in your garage and on the road over months and years. The difference is not just in the bottle, it’s in the daily experience.
The Feel Test
Run your hand across a panel protected by a high quality carnauba wax. It feels warm. It has a rich, deep gloss that seems to absorb light. It feels like polished wood. Now, run your hand across a true ceramic coated panel. The sensation is completely different. It feels hard, like glass. It is profoundly slick to the touch. Water beads into tight, hard spheres and simply falls away.
I notice this most on my cars. After a fresh coat of wax, my black BMW has a glow that feels classic. But after I coated my Porsche 911, the paint felt like a smooth, impenetrable shell. The feel tells you everything about the material: wax is an organic topping, while ceramic is a synthetic shield.
The Time Test
This is where the real separation happens. A traditional paste or liquid wax, even a good synthetic sealant, will degrade. Ultraviolet light, washing, and weather wear it down. You are looking at reapplying every 8 to 12 weeks to maintain peak protection and shine.
A professionally applied ceramic coating bonds to your clear coat. It does not evaporate or wash off. Your maintenance shifts from reapplication to gentle cleaning. A single application defends your paint for 2 to 5 years.
Think about cost over time, not just the price tag. A pot of wax might cost $50. If you apply it four times a year for five years, that’s twenty applications. You have spent $50 on product, but more importantly, you have spent 20 to 30 hours of your time. A DIY ceramic coating kit costs $80 to $150 and takes one afternoon. For five years of protection. The math on time and effort makes ceramic the clear winner for long term ownership. My Tesla Model 3 still beads water like it’s new, three years after I coated it.
The Protection Test
Wax is a brilliant hydrophobic layer. It shines incredibly and provides a solid barrier against fresh water and some contaminants. Think of it as a raincoat.
Ceramic coating is body armor. Its real advantage is chemical resistance and environmental shielding. It resists acidic bird droppings, harsh water spots, industrial fallout, and road salt far better than any wax can. This was the deciding factor for my Ford F-150, which sees construction sites and winter roads. Even though it doesn’t outperform wax in scratch protection, its durability against chemicals is unmatched.
Here is the final verdict: wax is not bad. It is a fantastic, accessible product that makes any car look amazing, as long as you understand its properties and application. But a ceramic coating is a different, longer term tool for a different job. It is for the owner who wants maximum defense with minimum repeated effort.
Product Tier List: What to Buy
Not all ceramic products are the same. Here is how to navigate the options, from a quick touch up to a full show car treatment.
Budget/Quick Fix: Ceramic Spray Sealants
These are your maintenance heroes and quick detailers. They contain ceramic ingredients (SiO2) in a sprayable form. They do not offer long term bonding like a true coating, but they add slickness and beading for 2 to 4 weeks. Perfect for boosting protection after a wash or adding gloss to a waxed car. I use these on my Honda Odyssey for a fast wipe down after cleaning sticky handprints.
- Look for: Ease of use (spray on, wipe off), no high spot risks.
- Use Case: Regular maintenance, drying aid, or protection for a car that is not fully corrected.
Enthusiast DIY: Consumer Grade Coating Kits
These are real, cureable ceramic coatings sold in small bottles for home use. They require proper paint preparation but offer 1 to 2 years of serious protection. This is the sweet spot for a dedicated car owner.
Preparation is non negotiable. The paint must be perfectly clean, decontaminated, and polished to remove any defects, or you will lock them under the coating. The coating process itself is methodical: apply a few drops per panel, spread thin, and level before it flashes. Work in small sections in a clean, indoor garage.
- Look for: Kits that include prep chemicals (panel wipe), multiple applicators, and clear instructions.
- Use Case: Your daily driver or weekend car that you can dedicate a full day to. This is what I used on my Model 3.
Show Car/Pro Level: Installer Only Coatings
The most durable coatings (5+ years) are typically reserved for certified professional installers. They have higher solid content and specific application requirements. If you are getting a pro install, you are paying for their guarantee and expertise.
You should know what to ask for. Inquire about the coating’s hardness rating (9H is a common marketing term, but actual chemical resistance matters more), its gloss characteristics (some enhance depth, others create a candy shell look), and the warranty specifics. A pro will prepare your car to a level most home garages cannot achieve.
- Look for: Certified detailers with strong portfolios. Ask about their paint correction process before coating.
- Use Case: High value vehicles, show cars, or any owner who wants the ultimate, guaranteed protection. This is the route for a car like my 911.
Final Thoughts on Ceramic Coating
Ceramic coating’s true value comes from its bond to the paint, and that bond only happens on a perfectly prepared surface. Take the time to wash, decontaminate, and polish your car’s paint until it’s slick and reflective before you even open the coating bottle.
Apply it over contaminants or scratches, and you’ll have a shiny, brittle shell that chips away, leaving your paint vulnerable again.
References & External Links
- Benefits of Ceramic Coating | Ceramic Coating Pros and Cons
- Ceramic Coating for Cars – Full Pros & Cons Guide
- r/AutoDetailing on Reddit: Can someone explain ceramic coating to me like I’m 5yrs old?
- What is a Ceramic Coating? (Benefits, Drawbacks, Cost, etc.) | Auto Care HQ
- Ceramic Coating For Car – Benefits, Drawbacks & Expert Care | The Detailing Mafia
- What Is Ceramic Coating & What Are Its Benefits? | FEYNLAB®
- The Top 10 Benefits of Ceramic Car Coating for Your Vehicle
Max Gunther
Max is an automotive enthusiast having worked as a car mechanical and in interior detailing service for over 25 years. He is very experienced in giving your old car, a new fresh vibe. He has detailed many cars and removed very tough smells and stains from all kinds of cars and models, always ensuring that his work and advice helps his customers. He brings his first hand experience to his blog AutoDetailPedia, to help readers breath new life into their car interiors.