How Do You Sand Primer for a Professional Paint Job?
Getting the primer surface wrong guarantees your paint will fail, revealing every sanding mark and imperfection. I’ve felt that sinking feeling after spraying a panel only to see the scratches I missed.
This article shares the exact process I use on cars like my red Porsche 911 to achieve a mirror finish. We will cover selecting sandpaper grits, wet sanding technique for a smooth base, and decontaminating the surface for perfect paint adhesion.
Cut corners here, and your new paint will chip or show a textured, unprofessional finish.
The Primer Sanding Mandate: Why You Can’t Skip This Step
Think of primer like the concrete slab under a house. It sticks to the metal, fills tiny scratches, and gives your paint something to grab onto. But it is not smooth. It comes out of the gun with a texture, like very fine sandpaper. Your shiny top coat cannot hide that. Primer is a foundation, not the finish, and sanding is how you make it ready for the beautiful part. In car paint primer application, the goal is to lay down an even, controllable layer that can be sanded to a uniform surface. A careful coat sets the stage for the color you’ll apply next.
Do I have to sand primer before painting a car? The answer is a firm, non-negotiable yes. I learned this on my 1995 Mazda Miata restoration. I got impatient, sprayed a fender with primer, and thought it looked flat enough to paint. It was a costly mistake. Painting over unsanded primer is a guarantee of problems. The paint will not stick properly. It will amplify every bump in the primer’s texture, creating a distorted finish called orange peel. You will waste your money on paint that will chip or look terrible. Properly sanding the primer is a crucial step in car paint preparation.
If you skip this step, you are setting your hard work on fire. The paint will not adhere. It might peel off in sheets after a year. It will look wavy and unprofessional. You will see every imperfection. Painting over unsanded primer leads directly to orange peel, poor adhesion, and a wallet full of regrets. No amount of skill can fix these issues, no matter how difficult your DIY car painting project might be.
This same rule applies if you are asking, “Do I need to sand my car before painting?” when putting new primer over old paint. Absolutely. Old clear coat or paint is too slick for primer to bite into. You must sand it to create what we call “mechanical adhesion.” A rough surface gives the primer thousands of tiny footholds. My BMW, the black swirl magnet, taught me that every layer needs proper preparation for the next one to succeed.
Your Primer Sanding Arsenal: Tools and Chemicals
Gathering the right tools is half the battle. Here is what you need on your bench.
- Sanding Paper: You will need several grits. I buy it in bulk.
- Sanding Blocks: A firm rubber block for flats and a soft foam block for curves. Your hand is not flat enough.
- Guide Coat Powder: This is a dark powder you dust over the primer. It sits in the low spots so you can see what you need to sand.
- Spray Bottle with Water: Essential for wet sanding to keep the paper from clogging.
- Bright Work Light: A LED light you can move around. Shadows reveal highs and lows.
Now for the specific details pros use. For the final wipe down, use a Microfiber Towel with a 300 to 500 GSM weight. It is plush enough to grab dust without scratching. If you need to buff out a sanding haze, a Dual-Action Polisher with an 8mm throw is gentle and effective. Before you paint, the final chemical wipe is critical. Use Isopropyl Alcohol diluted with distilled water (a 1:1 mix is common) for a pH-neutral, oil-free clean. If you are wet-sanding, keep a bucket of clean water with a Grit Guard in the bottom to rinse your sandpaper. It traps the sludge so you are not putting it back on the car.
You have two main methods: wet sanding and dry sanding. Dry sanding is faster for initial shaping and removing major texture. It creates a lot of dust. Wet sanding uses water as a lubricant. It gives you a finer, smoother finish and keeps the dust down. Use dry sanding for your first coarse passes, then switch to wet sanding for your final smoothing grits. It is the difference between rough carving and fine sculpting.
What grit sandpaper should you use to sand primer? It depends on your final paint. For a standard base coat, follow this progression.
| Starting Grit | Intermediate Grit | Final Grit (for base coat) |
| 400 (dry or wet) | 600 (wet) | 800 (wet) |
Start with 400 to knock down the primer’s peak texture. Move to 600 to remove the 400-grit scratches. Finish with 800 to create a uniform, satin surface for the paint to cling to. For a single-stage paint job on a classic like my Miata, I might stop at 600 for more tooth. Always move in one direction with each grit, and change directions with the next grit to see when the old scratches are gone—especially when you prepare a primed surface for spray paint.
This work creates fine dust that is bad for your lungs and eyes. Do not be casual about it. Always wear a tight-fitting N95 mask or a respirator, nitrile gloves to keep oils off the surface, and sealed safety glasses. Your health is the most important tool in the shop.
The Protocol: The Step-by-Step Primer Sanding Technique
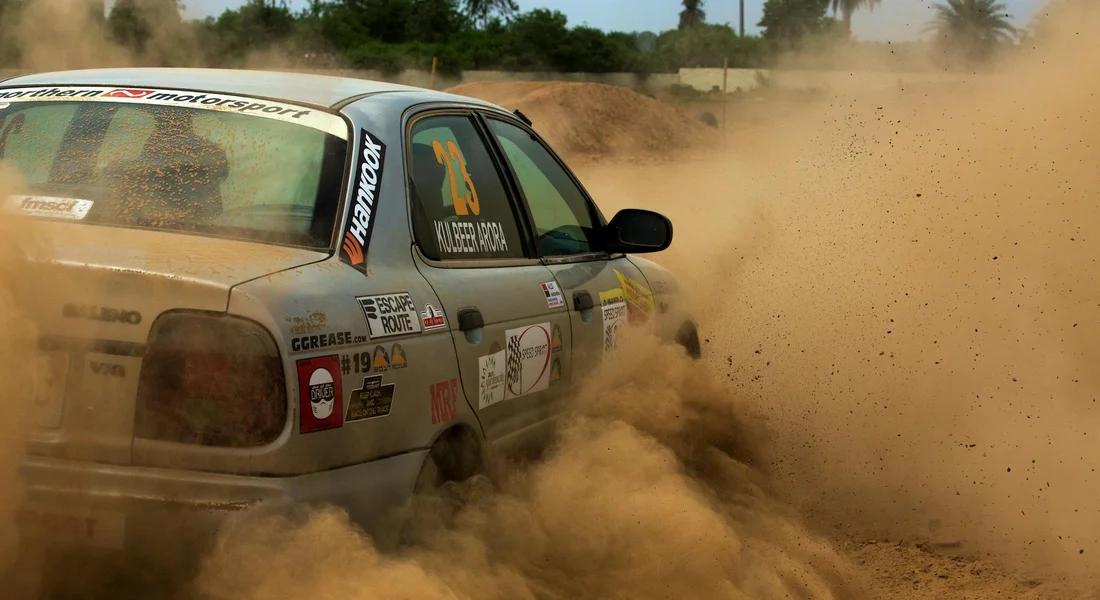
Getting this right is the difference between a finish that looks like glass and one that looks like an orange peel. I learned this the hard way on my 1995 Miata. The process is not just sanding. It is a system.
1. Apply Guide Coat
This is your truth-teller. A guide coat is a very light, dry mist of a contrasting spray paint (often black) over your primed surface. Do not lay it on thick. One or two light passes are enough. This dusting of color will sit in the low spots, revealing every dip, wave, and sanding scratch you need to level out. Without it, you are sanding blind.
2. Sand with Coarse Grit (Level)
Start with your leveling grit, usually 400 or 600 on a sanding block. Your goal here is not smoothness. Your goal is flatness. The motion is everything. Hold the block with your fingers spread flat across its back. Use the weight of your arm, not your shoulder muscles. Make long, straight, overlapping passes along the body line of the panel. Imagine you are applying a coat of wax. You want even, consistent pressure from end to end of your stroke. Sand until the guide coat is completely removed from the high points. The low spots will still hold color. That is your map. Keep going.
3. Sand with Fine Grit (Finish)
Once the panel is level, switch to your finishing grit. This is often 800 or 1000. Now you are sanding to erase the scratches left by the coarse paper and create a uniform surface for paint. The motion is the same, but be even more mindful of pressure. You are merely kissing the surface now. Switch to a fresh, clean sanding block for this step to avoid embedding old, coarse grit into the soft primer, as it can cause scratches or defects in the paint.
4. Inspect Under Light
Get a bright work light. Angle it across the panel. Get low and look down the reflection. You are looking for two things: the complete absence of your guide coat and a consistent, dull matte finish with no shiny low spots or deep scratches. Run your clean fingertips over the surface. You should feel nothing but uniform smoothness. If you feel a bump or see a shiny spot, the guide coat is gone but the panel is not flat. Go back a step.
5. Wipe Down
Do a preliminary wipe with a dry, clean microfiber to remove the bulk of the sanding residue. Do not skip to the final clean yet. This is just to see your work clearly before moving to the next panel.
How do you properly sand primer for a smooth finish?
The smooth finish comes from the sequence. Coarse grit levels, fine grit finishes. Rushing the leveling step with too fine a grit will leave waves. Skipping the fine grit will leave scratches that paint will magnify. Always use a sanding block. Your hand is not flat enough. On curved areas, use a flexible block or a foam pad that can conform. My black BMW taught me that soft blocks are your friend on complex curves. These basics map directly to smooth car paint techniques. Master them to achieve a flawless, even finish on curves and flat panels.
Should I wet sand or dry sand primer?
For primer, I almost always recommend wet sanding. The water acts as a lubricant, carries away debris, and keeps the paper from loading up with primer dust. It creates a finer, more consistent scratch pattern. Dry sanding is faster and less messy, but it heats the primer and can cause clumping. It also creates a lot of fine, airborne dust you do not want to breathe. Wet sanding is the cleaner, cooler, more controlled method for a high quality result. Use a spray bottle to keep the surface wet.
Detailer’s Pro-Tip: The Cross-Hatch Pattern
Here is a technique tweak I use on large, flat panels like a hood or door. Sand your first set of passes in one direction, left to right. Then, for your next set of passes, sand at a 90 degree angle, up and down. This cross-hatch pattern ensures you are cutting the primer evenly from all angles. It prevents you from creating grooves or valleys by sanding in only one direction. Think of it like mowing a lawn in a different pattern each time to keep the grass even.
How do I know when the primer is fully sanded and smooth?
Your eyes and fingers will tell you. The guide coat method gives you a visual map. When the panel is a uniform, flat color with no traces of the guide coat left, you are level. For smoothness, the fingertip test is key. Put on a nitrile glove. Your bare skin has oils. Lightly drag your fingertips across the panel. You should feel no texture change, no grit, no scratches. Just a consistent, silky feel. If it feels like fine sandpaper, you need to move to a finer grit.
After the Dust Settles: Cleaning and Decontaminating the Surface
This is the moment. You have spent hours sanding to perfection. Do not ruin it now by being lazy with the clean up. Contaminated surfaces are the number one cause of fisheyes, poor adhesion, and dirt nibs in fresh paint. I treat this step with the same focus as the sanding itself.
The Critical Cleaning Process
- Blow Off Dust with Air: Use a compressed air gun with a moisture trap. Start at the top of the panel and blow all the sanding residue out of every crevice, emblem, and body gap. Hold the panel door open and blow out the jambs too.
- Wipe with a Damp Microfiber: Take a clean, premium microfiber towel. Fold it into a pad. Dampen it with clean water (distilled is best) and wring it out completely. Wipe the entire sanded area using straight, overlapping strokes. Turn the towel to a clean side often. This lifts the slurry and fine dust.
- Use a Prepared Surface Cleaner: Mix isopropyl alcohol (IPA) and distilled water in a spray bottle. A 1:1 ratio is a good start. Mist it on a section. Immediately wipe it off with a fresh, dry microfiber. The IPA dissolves any remaining oils, silicone, or wax. It also flashes off quickly, leaving no residue.
- Final Tack Cloth Pass: Is a tack cloth necessary? For a final, pre-paint pass, yes. A quality, non-residue tack cloth is the best tool for grabbing the microscopic lint and dust the other steps missed. Gently drag it over the surface. Do not rub it in. Use it once per panel area and discard it.
How do I clean the surface after sanding?
Follow the four step sequence above. The key is moving from gross contamination to microscopic contamination. Air removes chunks. The damp towel removes slurry. The IPA wipe removes chemicals. The tack cloth removes lint. Skipping any step risks leaving something behind.
Is it necessary to use a tack cloth?
Before the final paint application, yes. Microfiber towels, even the best ones, can shed a tiny fiber or two. A tack cloth is specifically designed to be sticky enough to grab those. Do not use a cheap, oily tack cloth from a hardware store. Seek out automotive grade “non-residue” tack cloths. The last thing you want is the tack cloth itself leaving behind a silicone based oil that causes fisheyes.
The No-Touch Zone and the Baggy Test
Once the panel is cleaned, it is a no-touch zone. Do not lean over it. Do not point at it. Do not set tools near it. If you must touch it to position masking, put on fresh nitrile gloves.
To be absolutely sure, do the baggy test. Put your hand inside a new, clean plastic sandwich bag. Now, lightly run your bag covered fingertips over the prepared surface. You will feel every single piece of contamination, every tiny speck you missed. It feels like sandpaper if it is dirty. If it feels perfectly smooth, you are ready for paint.
How do I ensure the surface is free of contaminants before applying paint?
You follow the system. You use the right materials in the right order. You create and respect a no-touch zone. You perform the baggy test. Then, right before you spray, give the whole area one more light blow with clean, dry air to dislodge any dust that settled in the last minute. Contamination is the enemy you can beat with meticulous process. Your paint will thank you for it. When you move to color, use spray paint automotive-grade finishes for a durable, showroom-worthy result. The next steps will guide you through automotive spray painting techniques and product choices.
Final Lockdown: Masking and Last-Minute Checks Before Paint
You’ve done the hard work of sanding the primer to a perfect, uniform finish. Now, you protect that work. Masking is not just taping paper over things. It is the final defense against overspray ruining your trim and windows. A single mistake here can mean hours of cleanup later.
I learned this on my black BMW, the ‘Swirl Magnet.’ Its window trim is delicate. Using the wrong tape or rushing left adhesive residue I spent an afternoon carefully removing. Do not make my mistake.
The Art of the Sharp Line
Your goal is a crisp, defined edge where paint stops and trim begins. The wrong tape bleeds. The right technique seals.
- Choose the Right Tape: For most body edges, a good-quality automotive masking tape in a 3/4″ width is perfect. For the sharpest lines on mouldings or for complex curves, you need fine-line tape. This thin, flexible tape bends easily and gives you surgical precision. I keep a roll of each in my detailing cart.
- Clean the Edge First: Tape will not stick to dust or wax. Wipe the very edge of the trim or panel you are masking with an Isopropyl Alcohol (IPA) and water mix. Let it dry completely.
- Press and Seal: Apply the tape in smooth strokes, pressing it down firmly as you go. Run your fingernail or a plastic trim tool along the edge that faces the area to be painted. This burnishes the tape down and creates a physical seal paint cannot creep under.
- Protect the Rest: Use proper masking paper or plastic sheeting to cover large areas. Drape it, do not just tape the edges. Overspray dust has a way of finding any gap. On my Porsche 911, I spend extra time bagging the wheels and covering the entire rear engine grill.
Control Your Environment
You can do everything right and still get a dusty, ruined finish. The space matters.
Dust is your enemy. If you are in a garage, sweep the floor and lightly mist it with water to keep dust from kicking up. Turn off any central heating or cooling that blows air around. If you have a box fan, fit it with a basic furnace filter and use it to pull dust *out* of the space, not push air around.
Temperature and humidity matter too. Most paints apply best between 65°F and 75°F. High humidity makes paint dry cloudy and slow. Cold temperatures prevent proper adhesion. Check your paint manufacturer’s guidelines. This is not a guess. A simple hygrometer from the hardware store is a wise investment.
The Final Prep Steps After Sanding
Your sanded primer surface feels smooth, but it is a dust magnet. The final steps are all about making it surgically clean.
- Blow It Out: Use an air compressor with a blow-out gun to remove all sanding dust from cracks, gaps, and body lines. Get the door jambs, the edges of the hood, everywhere. This is what I do on my F-150’s large panels before any protection goes on.
- Tack It Down: Take a tack cloth-a cheesecloth impregnated with a light wax-and gently drag it across the primed surface. Do not rub. The tack cloth picks up the fine dust the air left behind. Fold it frequently to use a clean section.
- The Solvent Wipe: This is the most critical step. Mix a solution of Isopropyl Alcohol and distilled water (a common ratio is 1:1). Using a fresh, clean microfiber towel, soak a section and wring it out so it is just damp. Wipe the entire primed surface in one direction using straight lines. Immediately follow with a second, dry microfiber towel to buff the surface completely dry before the solvent flashes off. This removes any final oils, fingerprints, or silicones.
This solvent wipe leaves you with a perfectly clean, dry, and ready surface. There should be no lint, no streaks, no residue of any kind.
Ready for Paint
You are now at the moment of truth. That perfectly prepped panel is ready for its base coat. The uniform primer provides the foundation, and your meticulous cleaning ensures the paint will stick flawlessly.
A pro tip I follow every single time: just before you pick up the spray gun, do one more quick pass over the area with a fresh tack cloth. Dust can settle in minutes. This final re-tack is your last line of defense.
Once that base coat is down and cured, a whole new set of questions begin, like “Do I sand before clear coat on car?” That is a topic for another day. For now, take a breath. Your prep work is complete. That is most of the battle.
Your Paint’s Foundation Starts Here
The entire goal of sanding primer is to create a perfectly level, uniform canvas for your paint. Your final finish will only be as smooth and flawless as the surface you create right now using the proper sandpaper grit for paint preparation. Rushing this step guarantees that every minor flaw will be amplified and sealed under your beautiful new color.
Ignore the fundamentals of proper sanding, cleaning, and inspection, and you will see every skipped step staring back at you through the clear coat for as long as you own the car.
Industry References
- r/paint on Reddit: Today I learned you need to sand primer before paint. Paint applied, now what?
- painting – What’s the reason to sand after priming? – Home Improvement Stack Exchange
- Sanding Your Primer for a Smooth Finish – RepcoLite Paints
- r/Autobody on Reddit: Do I need to sand primer before paint for longevity if I don’t care how it looks, as long as the paint stays on?
- which sand grid after primer • How to Paint Your Own Car, Auto Body Discussion Forum & Videos • AutoBody101.com
- Sanding Primer | Professional Painting Contractors Forum