What Does Egg Do to Your Car Paint and How Do You Clean It?
Finding egg splattered on your car is a gut punch, and that sticky mess can quickly turn into a permanent nightmare for your paint.
We will cover the exact chemical reaction that damages your clear coat, the safe, step-by-step cleaning method, and the products that actually work.
Wait too long or clean it wrong, and the egg’s acid will etch into the paint, leaving a stain that no simple wash can fix.
Why Eggs Are a Car’s Worst Breakfast: The Science of the Damage
An egg hitting your car is a two-part assault. First, the physical shell shatters on impact. Those tiny, hard fragments act like sandpaper grit sitting on your paint. The real villain, though, is the chemical attack. The yolk contains albumen and sulfur compounds. When heated by the sun, they begin to chemically bond with your car’s clear coat. This process is called etching. It doesn’t just sit on the paint; it starts to “eat” into the top layer, breaking down the polymers that give your paint its shine and protection.
Are eggs bad for car paint? Absolutely. Can eggs ruin car paint? Yes, if left untreated, they can permanently etch the clear coat. This is not a surface stain you can simply buff off later. The damage goes deeper.
Some paints show this damage more starkly than others. My 2016 BMW 3 Series, “The Swirl Magnet” with its Jet Black paint, is the perfect example. Its soft, deep clear coat shows every flaw. An egg etching on that paint looks like a permanent, cloudy watermark. To the touch, it feels rough and textured, like very fine sandpaper, even after everything is cleaned off. That’s the etched clear coat. It won’t wipe away with a towel.
How Long Do You Have Before the Damage is Done?
You are racing against the clock. The main factors are heat and your paint’s existing protection. Direct summer sun on a dark hood will cook the egg and accelerate the etching in minutes. A car parked in cool, shaded conditions might buy you a little more time. A high-quality ceramic coating or a fresh layer of sealant can act as a sacrificial barrier, giving you crucial extra hours.
Do not think in terms of days. Think in terms of hours. For a fresh egg in direct sun, you may have only 1-2 hours before noticeable etching begins. Overnight is almost always too long.
The risk differs between paint types. Modern base-clear coat systems (like on most cars from the last 30 years) have a separate, hard clear layer that gets etched. On my 1995 Mazda Miata with its single-stage paint, the egg’s chemicals attack the colored paint layer itself. This can be both worse, as it removes pigment, and sometimes easier to polish out, as you’re working on one uniform layer instead of a thin, delicate clear coat. Consider choosing care products with safe chemicals for car paint to minimize risk to the finish.
The Emergency Clean-Up Protocol: Your Step-by-Step Guide
This is damage control. Your goal is to remove the egg without adding scratches from the shell fragments. The order of these steps is critical. Do not skip ahead.
Gear Up: What You’ll Need to Fight the Egg
Using the right tools prevents making the problem worse. Here is what you need:
- Multiple clean, plush microfiber towels.
- A dedicated car wash mitt (microfiber or lambswool).
- Proper pH-neutral car shampoo.
- A hose with a gentle spray nozzle or a pressure washer on its widest, lowest-pressure setting.
- A detailing spray or rinseless wash solution (as a lubricant).
Do not use kitchen paper towels, old t-shirts, or dish soap. Paper towels will scratch, and dish soap will strip any protective wax or sealant, leaving your paint bare and more vulnerable.
The Step-by-Step Battle Plan for a Fresh Attack
Step 1: The Safe Retreat (Don’t Touch It!)
If you can, move the car into a shaded spot immediately. This slows the chemical reaction. Fight every instinct to wipe at the mess with your hand or a rag. Those shell pieces are abrasive. Wiping them across the paint is like using a very fine grinding paste. You’ll create a web of scratches right over the etching, which can be difficult to fix properly.
Step 2: The Gentle Flood
Using your hose or pressure washer on a gentle fan spray, start flushing the area from the edges. Aim to push the egg mass and shell fragments off the paint. Start from the top of the splatter and work down. You are not trying to blast it into the paint. You are using a flood of water to dilute the yolk and carry the debris away without any physical contact. Do this for a full minute or two.
Step 3: The Lubricated Wash
Now, it’s safe to touch the area, but only with lubrication. Foam the area generously with your car shampoo, or soak it with suds from a bucket. Fill two buckets: one with soapy water, one with clean rinse water. Dip your wash mitt into the soap bucket, and gently glide it over the egg spot. Use straight-line motions, not circles. Rinse the mitt in the clean water bucket before reloading with soap. This two-bucket method traps the last bits of shell grit in the rinse water, not back on your paint. The shampoo will safely lift the remaining oily residue.
Step 4: The Thorough Inspection & Dry
Rinse the entire area thoroughly with your gentle water stream. Then, pat it dry with a clean, dry microfiber towel. Do not rub. Now, for the inspection test. Put your hand inside a clean, thin plastic sandwich bag. Gently run your fingertips over the spot where the egg was. The plastic sharpens your sense of touch. If the paint feels perfectly smooth, you likely caught it in time. If it feels gritty, sandy, or textured, the clear coat is etched. That roughness is the damage.
What If the Egg is Already Dry or Baked On?
A crusted, sun-baked egg requires a different first move: rehydration. Do not pick or scrape at it. Lay a very wet, sopping microfiber towel over the dried egg. Let it sit for 10-15 minutes. You can gently re-wet it to keep it damp. The goal is to soften the egg back into a removable gel. This takes patience. Once it’s soft and gooey again, carefully lift the towel straight up to avoid dragging shell pieces. Then, go directly to Step 2: The Gentle Flood, and follow the full process from there.
When the Damage is Done: Fixing Egg Etching on Paint
You followed the wash protocol, but you can still see a faint outline or a dull spot where the egg was. It happens. The yolk and albumin started their chemical reaction before you could stop it. Here is what you need to know: light surface etching can often be fixed by hand, but deep, cloudy etching that you can feel with a fingernail likely needs a professional with a machine polisher.
The Diagnostic Bag Test
You need to know what you are dealing with. Grab a thin, clear plastic sandwich bag. Put your hand inside it and gently glide your fingertips over the damaged area. Without the bag, your skin oils mask the true texture. With it, you will feel every imperfection. A rough, gritty feeling means there is still contaminant residue stuck to the paint that needs to be removed. A smooth but visually dull or stained spot means the clear coat itself has been etched. This test tells you your next move.
The Correction Order of Operations
Do not skip steps or jump straight to polishing. Follow this path:
- Clean: Perform the full gentle wash from the emergency protocol. The area must be perfectly clean.
- Clay: Decontaminate the surface to remove any bonded particles.
- Polish: Level the clear coat to remove the etching.
- Protect: Seal the fresh, corrected paint immediately.
1. The Clay Bar Treatment: Can It Remove Egg?
A detailing clay bar or synthetic clay mitt is like a rolling pin for your paint’s surface. It picks up and pulls out microscopic particles of brake dust, industrial fallout, and in this case, dried protein residue that is cemented on. Clay will remove the leftover egg film that is sitting on top of the paint, but it cannot fix the etching that is already eaten into the clear coat. It is a crucial step to ensure you are not rubbing contaminants into the paint during polishing. Proper techniques and understanding the science behind clay bars can make a significant difference.
Spray a generous amount of clay lubricant or diluted wash soap onto the area. Knead your clay until it is soft, flatten it into a disc, and glide it back and forth with light pressure. You will hear a slight squeaking sound when it is clean. Use liberal lubricant the entire time; dragging dry clay on paint will inflict fine scratches, creating more work for you.
2. Polishing: The Only Way to Remove Etching
Polishing is the careful, controlled removal of a microscopic layer of clear coat to level the surface. Imagine the etching as a shallow valley. Polishing slowly sands down the peaks around it until the valley disappears.
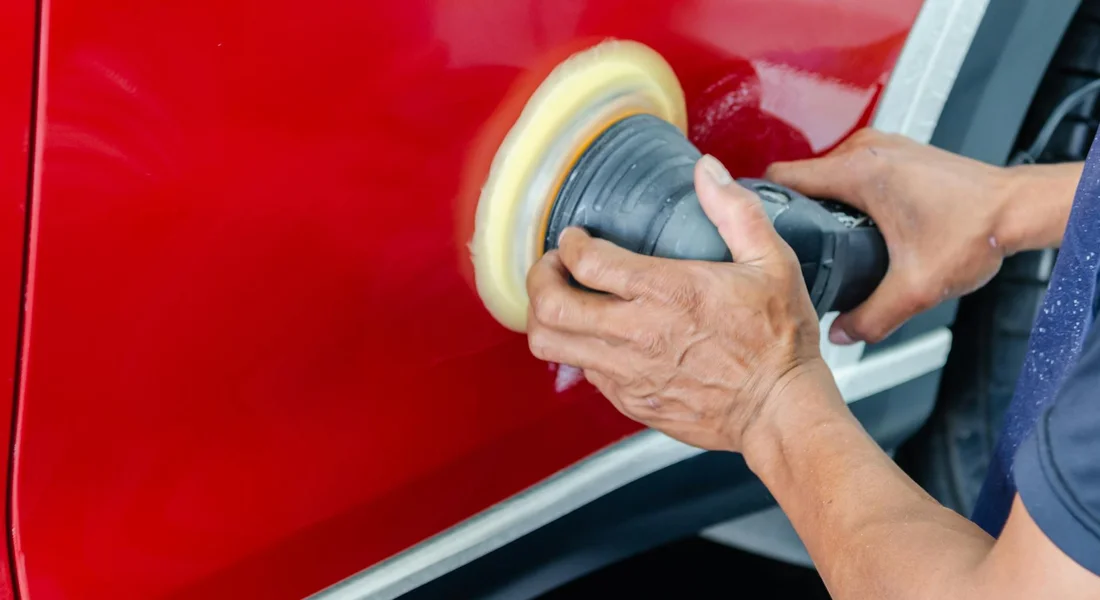
For a faint shadow or very light etching, a quality hand polish and a soft foam applicator can work. Apply a small amount, work it in a circular motion with firm pressure until it becomes clear, then wipe off. For anything more pronounced, a dual-action polisher is the right tool. This is the exact process I use on my Jet Black BMW, the “Swirl Magnet,” to remove similar defects. You start with a light polishing compound and a soft pad, then assess. Will polish remove stains from egg? Yes, but only because the “stain” is actually physical damage to the clear coat that the polish is removing. If the discoloration remains after polishing, the damage may have penetrated through the clear coat entirely, which is a much more serious issue.
Special Scenarios: Glass, Wraps, and Plastic Trim
Eggs have a way of splattering across every material on your car. Here is how to handle the other targets.
Egg on Car Windshield or Glass
Glass is much harder and more chemically resistant than your clear coat. The egg itself will not etch it. The real danger is the dried, opaque film creating a major blind spot, which is a serious safety hazard. After a general wash, spray a dedicated automotive glass cleaner on the area. Use a clean, low-lint microfiber towel to wipe it away. For a stubborn, baked-on film, you can carefully use a fresh razor blade holder. Keep the blade at a very shallow angle to the glass, almost flat, and gently scrape. Use plenty of glass cleaner as a lubricant to prevent scratching.
Egg on a Vinyl Wrap or PPF
This is where things get nuanced. Choosing between vinyl wrap and PPF is about aesthetics versus protection. A colored vinyl wrap is essentially a thick, adhesive plastic sticker on top of your paint. It is more vulnerable to chemical staining than factory clear coat. Paint Protection Film (PPF), like what’s on my Porsche 911 “Garage Queen,” is a clear, thermoplastic urethane designed to absorb damage. Follow the same gentle wash protocol for both, but avoid any harsh solvents like rubbing alcohol or adhesive removers on vinyl, as they can discolour it. If etching occurs on PPF, the film has sacrificed itself for your paint. Light polishing can sometimes improve it, but deep etching means the PPF needs to be replaced in that section, which is a patch repair job.
Egg on Plastic Trim or Rubber
Porous black trim and rubber window seals can absorb the egg yolk, leaving a yellowish stain. For this, I use an All-Purpose Cleaner (APC) diluted for interior use, about 10:1. Spray it on a soft bristle detailing brush, agitate the stained trim, then rinse thoroughly. Once clean and dry, apply a protectant like a trim restorer or a water-based interior detailer to condition the material and help repel future spills.
Paint Damage Prevention: How to Harden Your Car’s Defenses
Let’s make sure this never happens again. After an egg attack, the goal shifts from cleanup to building a stronger shield. This is about making your paint resilient.
The Best Protection is a Strong Seal
Think of your car’s clear coat like skin. You wouldn’t go out in harsh weather without protection. Your paint needs the same care. A quality spray wax, paste wax, or synthetic sealant is that protective layer. It sits on top of your paint and sacrifices itself to keep contaminants out.
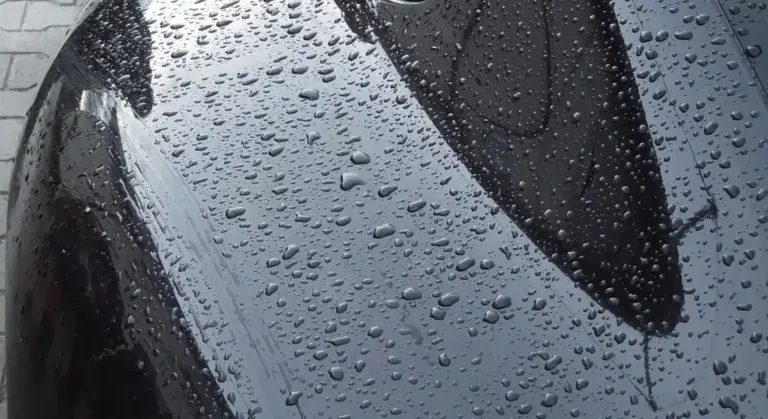
I see it on my 2018 Ford F-150 all the time. After I apply a synthetic sealant to that dark blue hood, water beads into perfect, tiny spheres. They roll right off. That beading action means egg residue is more likely to slide off before it can etch into the surface. The sealant gives you critical extra time to safely clean it off.
Spray waxes are great for monthly touch-ups. Paste waxes offer a deep, warm glow. Synthetic sealants last for months. Choose one. Apply it. Reapply it. For extra protection, consider layering waxes and sealants. Layering them can boost durability and gloss. Maintaining a sacrificial sealant layer is the single most effective thing you can do to prevent egg damage.
Common Mistakes That Make the Problem Worse
Panic leads to bad decisions. I’ve made a few myself over the years. Here is exactly what not to do when you find egg on your car.
- Wiping dry egg: Once egg dries, the proteins harden and the shell becomes brittle. Wiping it is like rubbing fine sandpaper on your paint. You will inflict swirls and scratches.
- Using dish soap or household cleaners: These are degreasers. They will strip the protective wax or sealant right off your paint, leaving it bare and more vulnerable next time. They can also dull the finish.
- Washing in direct sun on hot paint: Heat bakes contaminants into the clear coat. Your soap and water will dry into spots before you can rinse them, trapping egg residue and making removal harder.
- Using abrasive scrub pads or brushes: Even a soft-looking kitchen sponge can mar automotive clear coat. The paint on your car is softer than you think.
One more tip I always stress. Do not reach for your quick detail spray. Quick detail spray is designed as a lubricant for removing light dust, it is not a solvent that will dissolve dried egg albumen. You will just spread the sticky mess around and potentially cause more scratching.
Protecting Your Paint After an Egg Attack
Speed is everything when cleaning egg from your car. Wash it off fast with plenty of water and car wash soap to prevent the acids from bonding and etching the paint.
Wait too long, and you will be left with permanent, cloudy stains that only a full paint correction can fix.
Research and Related Sources
- How To Fix Egg on Car Paint | nextzett USA
- 4 Ways to Remove Egg Stains from Car Paint – wikiHow
- Remove Egg From Car Paint Without Any Damage – THIS Worked!
Max Gunther
Max is an automotive enthusiast having worked as a car mechanical and in interior detailing service for over 25 years. He is very experienced in giving your old car, a new fresh vibe. He has detailed many cars and removed very tough smells and stains from all kinds of cars and models, always ensuring that his work and advice helps his customers. He brings his first hand experience to his blog AutoDetailPedia, to help readers breath new life into their car interiors.