How Do You Stop Snow and Ice from Scratching Your Car’s Paint This Winter?
You see your car covered in a crust of ice and snow, and you just know that beneath it all, salt and grit are grinding away at your clear coat. I feel that worry every time I brush off my Jet Black BMW, the ultimate swirl magnet.
Based on my hands-on experience with everything from daily drivers to show cars, this article will show you how to shield your paint, focusing on a pre-winter wash and sealant application, the correct tools and techniques for ice removal, investing in a paint protection film or ceramic coating, and adapting your washing routine for cold months.
Neglect these steps, and the abrasive winter mix will etch permanent scratches and swirls into your paint, requiring a full correction come spring.
Key Takeaways: Your Winter Paint Survival Kit
You do not need to feel helpless. Here are three things you can do today.
- Apply a strong synthetic sealant or wax to your car’s paint before the first storm hits. This is not optional.
- Get the right snow removal tool. A soft snow brush or a dedicated foam snow mitt is key. Throw away any brush with stiff, plastic bristles.
- Learn the rinseless wash method. It lets you clean your car safely in a garage when temperatures are below freezing.
Your best defense is a slick layer of protection applied to clean, dry paint while you still can. On my black BMW, I apply a ceramic spray sealant every fall. It makes the snow slide off easier and gives the paint a fighting chance against salt.
I see more paint scratches from the tool in someone’s hand than from the weather itself. Using a cheap brush or an ice scraper on your paint is the fastest way to ruin your clear coat.
When a hose would freeze, a rinseless wash saves the day. You use a capful of concentrated cleaner in a bucket of water and many soft microfiber towels. It safely lifts dirt without scratching. I use it on my Tesla every few weeks in winter to remove salt film.
What Actually Scratches Your Paint in Winter? (It’s Not Just the Snow)
Soft snow itself is not the enemy. The problem is everything mixed in with it. Imagine dragging a dirty, gritty sponge across your car’s hood. That is what winter does.
Three things will scratch your paint:
- Abrasive contaminants like sand, road salt, and fine gravel embedded in snow and ice.
- The tools you use to remove the snow and ice.
- Forcing thick ice off the paint, which can grab and tear at the surface.
Can a snow brush scratch your car? Yes, if it has stiff bristles or if you use it on paint that already has gritty snow on it. You are essentially sanding the finish.
Can an ice scraper scratch your car? Absolutely, the moment that hard plastic touches your painted surface. Even a gentle tap can leave a mark, and chipping at ice almost always leads to a slip.
Hail is a separate issue. Can hail chip car paint? Can hail damage car paint? Yes, but through direct impact, not scratching. Hailstones can cause dents and chips, which is physical damage, not something you can prevent with washing technique. Protecting your finish from hail is worth considering—explore options to shield car paint from hail damage. From protective films to covered parking, there are practical strategies you can use.
The Gritty Truth: Abrasives in Snow and Slush
Cities spread sand and cinders on roads for traction. This material does not disappear. It gets kicked up by tires and snowplows, landing on your car and trapping itself in every layer of snow and slush.
That brown, salty spray you see on your doors? That is snowplow spray. It is a gritty brine that coats your lower panels and dries into an abrasive crust. The rocker panels on my Ford F-150 look like they have been sandblasted by February because of this.
Tool-Time Trauma: How Good Intentions Cause Scratches
Compare a cheap, hard-bristled snow brush to a proper foam snow mitt. The cheap brush feels rigid and scratchy. The mitt is soft and pliable, designed to push snow away without grinding the dirt beneath it.
Using any plastic ice scraper on your car’s paint is a guaranteed scratch. The plastic is harder than your clear coat. Any tiny grain of sand on the paint becomes a cutting tool under the scraper’s edge. I only use scrapers on glass, and even then, I am careful. If you ever end up with scratches on your car, you’ll know how to fix them.
The Fall Prep: Your Paint’s Best Defense Happens Before the First Flake
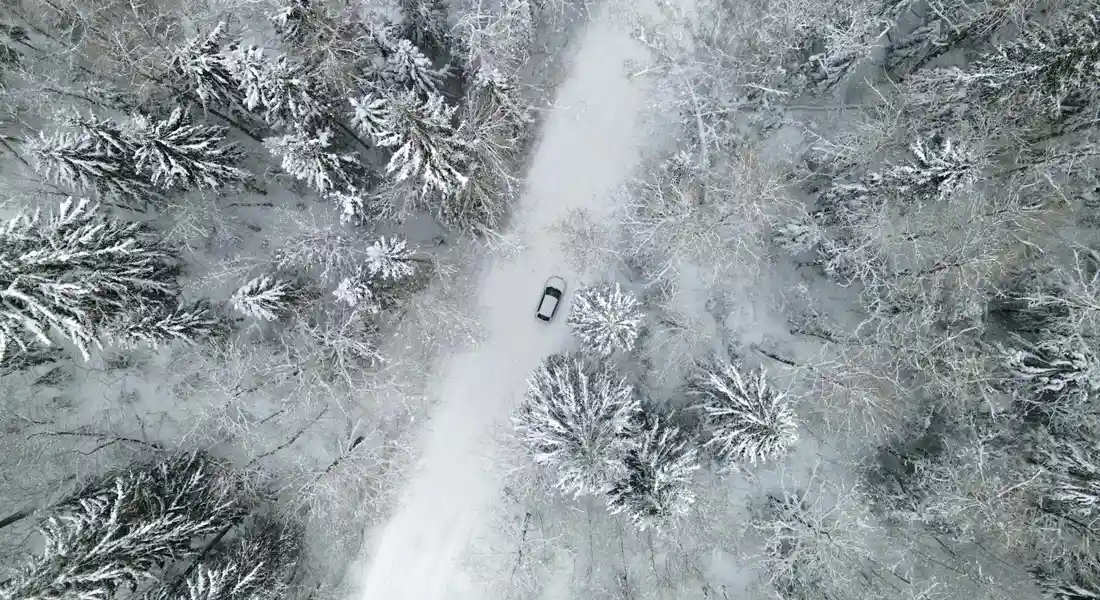
I know the feeling. You see the forecast and think you’ll just deal with the snow when it comes. That is how paint gets wrecked. The single best thing you can do happens on a dry, cool fall day. Your goal is to create a perfectly clean, ultra-smooth, and heavily protected surface so that snow, ice, and salt have a harder time sticking and bonding in the first place. This prep work is your paint’s true winter coat.
Think of it like putting a raincoat over a clean, dry suit. If your suit is already wet and muddy, the raincoat just traps that grime against the fabric. We are making sure the ‘suit’-your paint-is immaculate before we put the protective ‘raincoat’ on. This is the core of winter paint protection.
Step 1: The Deep Clean and Decontamination
Do not just run it through a tunnel wash. This is a surgical clean. Start with a two-bucket wash. One bucket has your shampoo, the other is just clean rinse water for your mitt. This simple step prevents you from grinding the dirt you just washed off back into the paint. After the wash, spray an iron remover over the paint and wheels. It will turn purple as it dissolves embedded brake dust and rail dust. Rinse it off.
Now, the clay bar. After the car is clean, gently glide a lubricated detailing clay over the paint. You will feel it grab tiny, invisible contaminants. Clay bars pair with iron removers to target bonded contaminants for true paint decontamination. Your paint should feel as smooth as glass when you are done. A thorough decontamination lays the foundation for lasting protection through winter. This decontamination is non-negotiable; sealing over bonded contaminants locks them against your paint all winter.
This is also your last, best chance to fix existing scratches before you seal them in. On my black BMW, the ‘Swirl Magnet,’ I do a light polish every fall. Those holograms from a bad wash last summer? Gone. The shallow scratches from brushing against a branch? Minimized. Starting winter with a corrected surface means you are protecting perfect paint, not flaws.
Step 2: Applying Your Shield: Sealant vs. Wax for Winter
Now for the shield. You have two main choices: synthetic sealants and natural carnauba waxes.
Synthetic sealants are engineered polymers. They bond to your paint like a thin, clear coat of plastic. They last for months, offer fantastic chemical resistance against road salt and grime, and shed water aggressively. Carnauba wax gives a deep, warm glow that is hard to beat. But it melts at a lower temperature and degrades faster against harsh chemicals. It is like a hearty handshake versus a welded bond. That’s the classic synthetic vs carnauba wax debate. Your choice comes down to long-lasting protection versus a warmer, richer shine.
For winter, I recommend a sealant for nearly everyone. Durability is king. Apply it to every exterior surface: paint, glass, plastic trim, and wheels. A high-quality sealant is your workhorse barrier, keeping contaminants at arm’s length for the long, grim months.
Can you layer them? Absolutely. I often do a sealant base coat on my vehicles, then top it with a spray wax after each wash. The sealant provides the long-term defense, the wax adds extra hydrophobicity and that final bit of depth. It is a fantastic one-two punch.
Beyond Liquid: Considering Paint Protection Film (PPF) or a Cover
For the ultimate defense, you step into physical barriers. Paint Protection Film (PPF) is a clear, thermoplastic urethane film applied to the paint. It is a self-healing shield that takes the rock chips and abrasion so your paint does not. My Porsche’s front end is wrapped in PPF. It is the difference between worrying about every piece of gravel and having real peace of mind.
A car cover in winter is a tricky proposition. A soft, indoor-rated cover will shred in the wind. A waterproof outdoor cover can trap moisture underneath it against your paint, leading to micro-scratches from movement and even promoting corrosion. If you must use one, it needs to be a soft, breathable, and snug-fitting outdoor cover. Even then, putting a frozen, snow-covered cover on your car is a miserable chore. View a cover as a last-resort shelter for a parked vehicle, not a daily-use solution for a driver, especially when considering paint protection. It is the outermost layer in that ‘raincoat over a suit’ mindset, but it comes with its own risks.
The Right Way to Remove Snow and Ice (Without the Scratches)
Your paint is prepped and protected. Now comes the daily test. Most scratches happen right here, in the hurried minutes before work. Good technique with the right tools makes all the difference, especially when you know how to remove scratches and correct paint defects.
The Toolbox: What to Use and What to Lose
You need two dedicated tools. First, a long-handled snow brush with a soft, foam-padded head. The bristles should be pliable, not stiff plastic. Second, a separate plastic ice scraper for glass only.
Now, for what to lose. Throw away that old brush with the stiff, yellowed bristles and the scraper built into the handle. That combo tool tempts you to scrape paint. Also, lose the broom, the shovel, and the credit card. A good snow brush feels gentle against your hand; if it feels rough to you, it is brutal to your clear coat. A dedicated, soft-bristled brush and a separate scraper keep your intentions clear: brush paint, scrape glass.
The Safe Removal Technique: A Step-by-Step Plan
- Start the car and set the defroster to maximum heat. Let the engine and windshield begin to warm up from the inside. This patience pays off by loosening the bond of ice on glass.
- Take your soft brush and gently sweep the bulk snow off the car. Always start at the roof and work down. This prevents you from dragging snow from the roof over the dirty side panels. Use long, lifting strokes. Do not scrub.
- Use your ice scraper only on the windows. Hold it at a shallow angle and clear the glass. This rule is absolute: never, ever chip or scrape at ice on your painted surfaces, trim, or rubber seals. That is instant scratch city.
- For a sheer sheet of ice frozen to the hood or roof? Patience is still the best tool. A safe, paint-friendly de-icing spray can help loosen the bond. Let it work for a minute. Avoid any product containing antifreeze (ethylene glycol), as it can stain and damage paint and is terrible for the environment. If you can wait, the cabin heat will eventually warm the sheet metal enough to help release the ice.
Handling the Aftermath: Road Salt, Chemicals, and Sudden Thaws
Winter damage is not just from the storm itself. The time between storms, when things start to melt and refreeze, is where the real long-term harm happens. This phase is about managing chemical exposure and preventing trapped grime from etching into your clear coat.
Why You Can’t Just Let it Melt (And Why You Can’t Always Wash)
Think of a melting snow blanket on your car as a slow-release acid bath. As the snow melts, it doesn’t wash the salt away. Instead, the water evaporates and leaves behind a more concentrated layer of salt, calcium chloride, and other de-icing chemicals directly on the paint. This concentrated brine accelerates corrosion and can stain trim.
Letting it ‘melt off’ is one of the worst things you can do for your paint’s long-term health.
But you can’t always hook up the hose when it’s 20 degrees outside. Washing in freezing temperatures risks ice forming in seams, locks, and on the paint itself, which can cause bigger problems. The solution I rely on for my dark blue F-150 between proper washes is a rinseless or waterless wash. You can do this in a garage above freezing.
Here is how I do a safe winter rinseless wash:
- Park in a garage, even if it’s only 40 degrees. That’s warm enough.
- Fill a bucket with a gallon of water and the prescribed amount of a high-lubricity, pH-neutral rinseless wash product.
- Use a dedicated rinseless wash mitt or several plush microfiber towels. Soak and wring out your mitt in the solution.
- Wipe one panel at a time, using gentle, straight-line strokes. Fold your mitt or use a fresh towel side frequently.
- Immediately follow with a dry, clean premium microfiber towel to buff the panel dry before moving on. This prevents any leftover moisture from freezing.
A rinseless wash is like giving your car a sponge bath; it safely lifts and encapsulates grime without the need for a risky rinse in the cold.
The Touchless Drive-Through: A Necessary Evil?
Sometimes, you just need the salt off. I use them. The touchless drive-through is a tool, but you must know its limits. The high-pressure spray is better than leaving caked-on salt for weeks. It can blast loose contamination from wheel wells and the undercarriage.
But understand what it is. These systems use very strong, alkaline soaps and sometimes harsh spot-free rinse aids to clean without touching the car. These chemicals can degrade your wax or sealant faster than a gentle pH-neutral soap, especially if you remove wax or sealant from your car paint. More critically, if your paint already has a layer of gritty road film, the high-pressure spray can slam those particles across your paint, causing fine scratches.
I treat it as a last-resort rinse, not a wash. If my truck is coated in fresh salt slush and a warm garage wash isn’t possible for days, I’ll run it through the touchless cycle. I view it as a salt-removal rinse, knowing I’ll need to reapply a spray sealant afterwards. I always choose the “undercarriage wash” option if available. Every little bit helps.
Common Winter Washing and Protection Mistakes
Winter forces shortcuts, but some shortcuts cause permanent damage. Here are the big mistakes I see every year.
- Mistake 1: Washing a frozen car or in direct, freezing wind. Water will freeze on contact, trapping dirt in ice on the paint. This makes cleaning impossible and guarantees scratches. Wait for a day where the temperature is safely above freezing, even if just in a sunny, sheltered spot.
- Mistake 2: Using a snow brush or scraper on dirty or icy paint. Your goal is to clear windows for visibility. If you drag a brush across your hood or roof, you are sanding your paint with every grain of frozen grit underneath. Clear snow gently with a soft brush, and leave anything frozen to the paint alone until it can be safely melted.
- Mistake 3: Pouring hot water on your windshield or paint. This is a great way to crack glass or cause clear coat checking from thermal shock. Use a proper automotive de-icing spray and your defroster. Patience is cheaper than a new windshield.
- Mistake 4: Using household glass cleaner or de-icer not formulated for auto paint/trim. Ammonia-based cleaners damage tint and dry out rubber seals. Harsh de-icers can stain plastic trim and strip protection. Use products designed for vehicles.
- Mistake 5: Ignoring the undercarriage. The top rusts from the bottom up. When you get a chance at a self-serve bay or a touchless wash with an undercarriage spray, use it. That quick rinse flushes salt and mud from suspension components and frame rails, slowing down corrosion.
Winter Paint Protection: A Product Tier List for Your Garage
Forget searching for a single “best” product. The right choice depends on your car, your budget, and how much time you have. Think of it like winter gear. You don’t wear the same jacket to shovel the driveway as you would to climb a mountain. Here is how to match your protection to your reality.
Tier 1: Budget/Drive-Through Survivor
This is for the daily driver, the commuter, the family SUV that sees every storm. My 2019 Honda Odyssey, the “Kid Hauler,” lives here in winter. The goal is not perfection. It is creating a sacrificial, slick layer that makes cleanup easier and prevents the worst of the damage.
You need three things.
- A High-Quality Spray Sealant: Look for a “spray wax and sealant” hybrid. I keep a bottle in my garage. After a touchless wash, or during a warm spell, you spray it on a wet panel and rinse it off. It takes ten minutes. This creates a hydrophobic layer that prevents ice from bonding as tightly and makes snow slide off easier.
- A Soft Snow Brush: Do not use a cheap, stiff-bristled brush. It will scratch your paint. Spend a few extra dollars on one with dense foam or soft, noodle-like bristles. The head should glide over the paint, not scrape it.
- A Basic Rinseless Wash Kit: For the warmer days above freezing. Get a gallon of rinseless wash concentrate, two buckets, and several plush microfiber towels. This lets you clean salt off without needing a hose, preventing corrosive buildup.
Remember your goal. Apply the spray sealant every 4-6 weeks. Brush snow off gently, always from the top down. Use the rinseless wash when you can. This simple system works. It keeps my Odyssey’s paint intact through a season of sliding doors, spilled hot chocolate, and road salt.
Tier 2: Enthusiast/Weekend Warrior
This is for the car you care for. My Jet Black BMW 3 Series, the “Swirl Magnet,” demands this level. You are investing in durability and safer tools to maintain a higher standard of protection all season long.
- A Dedicated Liquid Ceramic Sealant: This is a step above spray-ons. Applied to a clean, dry car in the fall, it bonds to the paint and can last 6-12 months. It provides superior slickness and chemical resistance against road salt and magnesium chloride.
- A Premium Snow Removal Kit: Ditch the single brush. Use a dedicated snow mitt for the roof and hood. It is like using your hand but without the cold. Use a separate plastic scraper for glass only, never paint. Keep a soft brush for final dusting.
- A High-Lubricity Rinseless Wash: In winter, lubrication is everything. Use a premium rinseless wash that creates a super slick solution. This safely encapsulates abrasive grit during a wash in your garage.
- A Dedicated Iron Remover: This is your secret weapon for spring. Spray it on the paint after the last frost. It dissolves and bleeds purple as it removes embedded brake dust and rail dust that act like sandpaper under your wash mitt.
The process matters. Apply the sealant in a warm garage for best curing. Remove snow with the mitt first, touching the paint as little as possible. Wash monthly with the rinseless system. Come spring, decontaminate with the iron remover. This protocol keeps black paint looking deep and scratch-free.
Tier 3: Show Car/Garage Queen
This is for preservation and maximum defense. My 2022 Porsche 911, the “Garage Queen,” gets this treatment. We are combining physical armor with chemical barriers for vehicles that see limited winter use or are high-value.
- Paint Protection Film (PPF) on the Front End: This is a clear, urethane film applied to the bumper, hood, fenders, and mirrors. PPF is a self-healing physical barrier that absorbs the impact of kicked-up ice chunks and road sand without damaging the paint underneath. It is the ultimate scratch prevention.
- A Professional-Grade Ceramic Coating: Applied by a detailer or a skilled DIYer over the entire car (or over the PPF). This is a semi-permanent glass-like layer. It creates an incredibly hard, hydrophobic surface that makes snow removal effortless and prevents contaminants from sticking.
- A Dedicated, Soft Indoor Car Cover: Only if stored in a garage. A soft, breathable, cotton-blend cover keeps dust and incidental contact off the finish. Never use an outdoor cover in winter, it will trap moisture and scratch the paint.
The strategy here is layered defense. The PPF takes the physical hits. The ceramic coating provides chemical resistance and makes everything easier to clean. For the Porsche, this means brake dust from alloy wheels rinses off easily, and road film does not bond to the paint. The car cover is the final shield for storage. It is an investment, but for the right vehicle, it is peace of mind.
Winning the Winter Against Scratches
After seasons battling New England roads with my F-150, I keep coming back to one rule: a robust sealant or ceramic coating, topped with gentle washing, is what truly guards your paint. That protective layer turns your car’s surface into a non-stick pan for snow and contaminants, making all the difference between a clean spring detail and a full paint correction. A ceramic coating for car paint protection takes that protection to the next level, offering a long-lasting shield against salt, grime, and UV. Combined with gentle washing, it keeps the sheen and minimizes the need for frequent detailing.
Skip this foundation, and you’re letting salt and grit grind directly into your clear coat, guaranteeing a spring full of swirls just like on my black BMW.
Relevant Resources for Further Exploration
- How to Avoid Scratching Your Vehicle’s Paint When Removing Snow or Ice | Morrey Auto Body and Glass
- Does Snow Damage Car Paint?
- How Ice Scrapers Can Damage Your Car | DaSilva’s Auto Body
- Scratches on my car from ice/snow scraper during the winter | Jeep Wrangler Forum
- Mythbusting – Does ice/snow scratch the paint | Detailing World Forum
Max Gunther
Max is an automotive enthusiast having worked as a car mechanical and in interior detailing service for over 25 years. He is very experienced in giving your old car, a new fresh vibe. He has detailed many cars and removed very tough smells and stains from all kinds of cars and models, always ensuring that his work and advice helps his customers. He brings his first hand experience to his blog AutoDetailPedia, to help readers breath new life into their car interiors.