How Do You Clean Road Salt, Protect Your Car, and Defrost Windows in Winter?
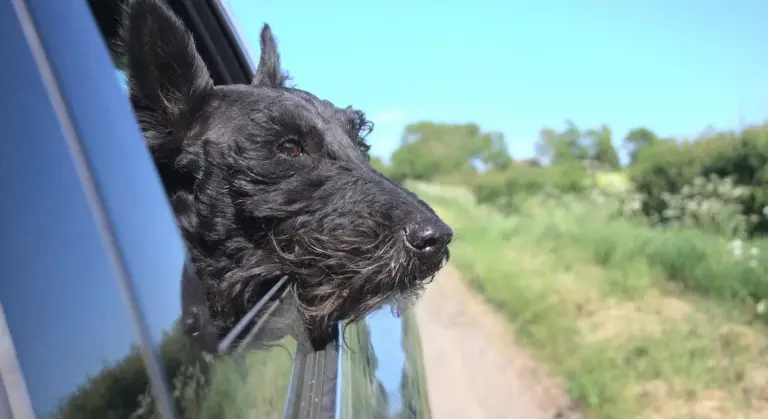
That gritty white film on your car isn’t just dirt; it’s corrosive road salt eating away at your paint. Frosted windows turn every morning into a frustrating battle.
Based on years of keeping cars like my salt-caked Ford F-150 and sleek Tesla Model 3 in showroom condition, I’ll show you safe chemical-free salt removal, durable paint and trim protection, and fast defrosting methods that won’t harm glass or seals.
Neglect this routine, and the spring thaw will reveal a canvas of rust spots and hazy, scratched paint.
The Winter Detailer’s Order of Operations (Your Weekly Checklist)
This is your weekly routine. Follow it exactly. I use this same sequence on all my cars, from the daily driver to the garage queen. It prevents mistakes and saves your paint.
- Pre Rinse (to loosen salt). Start with a gentle flood of water over the entire car. Do not use high pressure yet. You want to soak and dissolve the top layer of salt. On my Ford F 150, I watch the dusty salt turn into brown streaks and wash away.
- Wheels & Under carriage Blast. Now use a stronger stream. Focus on the wheels, wheel wells, and underneath the car. This is where salt and grime pack in tight. My BMW’s wheels get caked with brake dust and salt, and this blast clears it out.
- Contact Wash (if possible). If the temperature is safely above freezing, use a wash mitt and car soap. If it is too cold, skip this step. A frozen mitt can scratch paint. For my Tesla Model 3, I use a soft mitt and pH neutral soap to care for the delicate clear coat.
- Final Rinse. Rinse from the top down with clean water. Remove all soap and suspended dirt. This rinse flushes the dissolved salt away from every panel and crevice.
- Dry/Sheeting. Dry the car with a clean microfiber towel or use the sheeting method. In freezing weather, skip drying to avoid ice. On my Porsche 911, I gently pat the surface dry to avoid adding swirls.
- Glass & Wipers. Clean all windows inside and out with a good glass cleaner. Wipe the wiper blades free of salt residue. Clear glass is non negotiable for safe winter driving.
- Interior Wipe down. Wipe door jambs, sills, and floor mats. Salt gets tracked inside on boots. In my Honda Odyssey, I use a damp microfiber to clean sticky spots and salt from the kids’ shoes.
When it is very cold, you can skip the contact wash and the drying step. But the pre rinse and final rinse are not optional. Those two rinses are the most important thing you can do to stop salt damage.
How Road Salt Eats Your Car (And Why Just Rain Isn’t Enough)
Road salt is a silent killer. I have seen it turn solid metal into flakes of rust. Let me explain how it works.
Salt makes rust happen faster. Rust is just metal oxidizing, and salt acts like a catalyst. Salt is also hygroscopic. That means it pulls water from the air and holds it tight against your car’s metal. This creates a constant, wet environment perfect for corrosion.
Run your hand over a car coated in salt dust. It feels gritty and coarse, like very fine sandpaper. When you drive or wipe the car, that grit grinds into your clear coat. On my black BMW, this creates tiny scratches that catch the light and ruin the deep shine.
Many folks ask how to clean their car after a rain. They think the rain washed it clean. It did not. Rain water mixes with the salt to form a corrosive brine. This brine gets washed into seams, cracks, and underbody areas where it then sits and eats away. A rainstorm does not remove salt, it just moves it to places you cannot see. After rain, a thorough wash is essential to remove the salt and brine. Regular washing helps protect the paint and underbody. You still need to actively rinse the salt off yourself.
Focus on the vulnerable spots. Wheel wells collect a mix of salt, sand, and mud. Door jambs get salt from opening doors. The underbody takes a direct spray from the road. Lower panels on the doors and rockers are constantly wet with salt spray. On my Ford F 150, I make sure to rinse these areas longer because they rust first.
The Right Way to Clean Salt Off Everything

Salt does not wait. It starts working as soon as it lands on your paint. Cleaning it off is not about making the car look perfect. It is about stopping the chemical attack. You can absolutely detail a car in the winter. The process just changes. You trade some perfection for urgent protection.
Setting Up for a Safe Winter Wash
Winter washing is about managing water and cold. Your first decision is where to wash. If the air temperature is below freezing, do not use running water outside. It will freeze on your car and on your driveway, creating a dangerous ice rink.
If you must wash outside, only do so when the temperature is reliably above 40°F and rising.
Your toolkit changes for the cold:
- Insulated Rubber Gloves: Your hands will be wet. Cheap knit gloves get soaked and make things worse. Good rubber gloves with insulation keep you working longer.
- Adjustable Nozzle or Pressure Washer: You need strong, focused water to blast salt out of crevices. A fan pattern is useless for wheel wells.
- Touchless Snow Foam (Optional): A pH-neutral foam applied before rinsing can help lift and loosen salt without touching the paint. This is a great first step at a coin-op bay.
- Dedicated Undercarriage Sprayer: Many pressure washers have an attachment for this. If using a coin-op, this is the most important function on the dial.
The best winter wash often happens in a garage that’s just above freezing. A rinseless or waterless wash product, used with plenty of microfiber towels, is a safe, effective way to clean salt without creating a sheet of ice.
The Touchless Drive-Thru & DIY Rinse Strategy
This is my most frequent method for my F-150. You are not getting a show-car finish. You are performing salt-ectomy surgery.
Here is the precise method:
- Start with the undercarriage spray. Drive slowly over it. Then, stop, put the car in neutral, and hit the undercarriage again for a full 30-60 seconds. Salt packs into every seam and brace.
- Use the “wheel blast” function. Aim the wand directly at the barrel of the wheel, behind the spokes, for at least 20 seconds per wheel. This gets the salt-laden brake dust.
- Select the “high-pressure rinse” or “pre-soak” cycle. Do not use the bristled brush. Let the chemicals and water do the work.
- Repeat step 1. Always finish with a final undercarriage flush.
The coin-op bay is for removing bulk salt; your follow-up is for the details. Keep a spray bottle of dedicated glass cleaner and a clean, plush microfiber towel in your car. After the wash, quickly wipe all windows, mirrors, and door jambs dry. This prevents water spots and clears the salt residue the automatic dryer always misses.
How often? After every storm where salt is laid down. For my daily drivers, that can be twice a week. It feels like a chore, but it beats rust repair.
Full Contact Wash: The Two-Bucket Method in the Cold
On a rare mild winter day, or in a heated garage, you can do a proper wash. The goal is to remove salt without grinding it into the paint. My black BMW demands this care to avoid new swirls.
The process is condensed but deliberate:
- Pre-Rinse Like Mad: Spend twice as long rinsing as you normally would. You must blast away every grain of loose salt and sand from the paint surface before a wash mitt ever touches it.
- Use a High-Lubricity Shampoo: In cold water, shampoos are less slick. Choose one labeled for high lubrication or “wash & wax” to add extra slickness. This gives your mitt a safety cushion.
- Two-Bucket Method, Fast: Work in small sections, top to bottom. Rinse your mitt in the rinse bucket after every pass. Your goal is to get the salt off, not to achieve deep gloss. Dry immediately with a large drying towel to prevent freezing.
Cleaning your car after a rainy winter day uses this same method. The rain washes away some salt, but leaves a dirty film. The pre-rinse step is easier, but the two-bucket wash is still needed to lift the grime safely.
Detailer’s Pro-Tip: The Forgotten Salt Zones
Salt hides in places the broad spray misses. You have to get deliberate.
For wheel wells, get on your knees. Angle the spray wand upwards and move it back and forth along the entire inner liner. You will see chunks of ice and mud fall out.
Open every door, the trunk, and the fuel filler door. Rinse the painted door sills and the hinges. Salt sits here, trapped out of sight, and causes hinges to creak and sills to corrode.
Finally, pull down the rubber seals around your windows. Clean and restore them properly to ensure longevity. Wipe the hidden channel behind them with a damp microfiber. This is where salt residue melts and seeps, staining the rubber over time.
Building an Invisible Shield: Salt Protection That Works
Cleaning removes the enemy. Protection keeps it from sticking so hard next time. A good layer of protection makes every subsequent wash easier and safer for your paint.
Sealants and Coatings Beat Wax in Winter
Not all protections are equal in the face of salt and road grime. Think in terms of durability.
- Traditional Carnauba Wax: Beautiful warmth and depth. It might last 4 to 8 weeks in perfect conditions. A few salty slush attacks will strip it away.
- Synthetic Polymer Sealant: The old reliable. A good sealant can last 3 to 6 months. It provides excellent chemical resistance against salt and acidic contaminants.
- Spray Ceramic Coating (SiO2): The modern workhorse. Products in a spray bottle that create a slick, hydrophobic layer. A proper application lasts 6 months or more. This is my top recommendation for winter defense on most cars.
The ceramic spray is the best bang-for-buck. It sheets water dramatically, so salt-brine doesn’t get a chance to cling and dry. Dirt rinses off easier, which means less friction during your next wash.
Apply it to a perfectly clean, completely dry car in a garage. I applied a coat to my Tesla in late fall. One bottle can do two full cars. It takes 30 minutes. Do this once before winter, and your battle is half-won.
Undercarriage Spray: Worth It or Not?
This is a common question. Products like fluid film or rubberized undercoatings create a sticky, waxy barrier meant to displace water and prevent salt contact.
There are pros. A professionally applied, high-quality coating can be very effective, especially for older vehicles or those in extreme salt zones. This naturally ties into the broader discussion of professional vs. DIY ceramic coatings. We’ll weigh durability, cost, and maintenance to help you decide which route is right for your car.
There are significant cons for the DIYer. If the undercarriage is not meticulously cleaned and dried first, you are sealing moisture and salt against the metal. The application is messy and often requires getting the car on lifts. The coatings can trap road grit, which then grinds against the film.
For most people, my advice is simpler and more effective. Commit to a frequent, high-pressure undercarriage rinse routine at the coin-op wash. This mechanically removes the salt before it has time to work. It requires no special products, no messy application, and doesn’t risk trapping corrosive materials. For my vehicles, this routine has proven more practical and reliable than any spray-on product I’ve tried.
Clear Vision: Defrosting Windows Without Damage or Stress
This section answers “How do you defrost windows in Winter and Rainy Conditions?” Frozen glass tests your patience every cold morning. Doing it wrong can cost you a windshield. Doing it right takes two minutes and preserves your sanity.
The Safe, Fast Defrost Protocol
Rushing leads to mistakes. Follow this order every time and you will get clear glass without the risk.
- Start the engine. Set your HVAC system to full heat and the max defrost setting. Turn the air recirculation button OFF to pull in colder, drier outside air, which absorbs moisture faster.
- While the cabin warms, gently scrape the *outside* ice using a flexible plastic scraper. Hold it at a shallow angle and push, don’t dig. Never use a metal blade or a credit card.
- If the *inside* is fogging, press the A/C button. The compressor will run, dehumidifying the air, even while the heat is on full blast. This clears interior fog faster than heat alone.
I see this every year and it makes me cringe. Never pour hot water on a frozen windshield. The sudden temperature change, called thermal shock, can cause the glass to crack or shatter instantly. The repair bill is much colder than a two-minute wait.
Windshield and Wiper Care for Reliable Clarity
Your wipers smear because the glass is dirty with an invisible road film. A deep clean fixes this. In my garage, I keep a spray bottle of 70% isopropyl alcohol and a dedicated glass cleaner. On a dry day, I spray the alcohol directly on a clean microfiber towel and wipe the entire windshield and side windows. I follow up immediately with the glass cleaner on a second towel. This strips the oily film. Your wipers will glide silently and clear rain perfectly, a true safety upgrade for rainy conditions.
Before a predicted ice storm or heavy snow, lift your wiper blades off the glass. It takes ten seconds. This prevents the rubber from freezing to the windshield. A frozen blade that gets switched on can tear its rubber or burn out the wiper motor. My F-150’s wipers stand up every snowy night.
Detailer’s Pro-Tip: The Overnight Anti-Frost Trick
This is my secret weapon for light frost mornings. On a dry evening when frost is forecast, mix equal parts water and 70% isopropyl alcohol in a spray bottle. Mist it lightly onto a clean microfiber towel. Wipe down all the exterior glass. The alcohol lowers the freezing point of any moisture, so frost struggles to form a hard bond. The next morning, you might just brush off a light powder. A crucial warning: do not use this mixture on interior glass. The fumes are not safe to breathe in a closed cabin.
Managing the Interior Salt Invasion
You track it in. It grinds under your boots. That gritty, white salt residue is more than a nuisance. It is a corrosive abrasive that ruins carpets and stains fabrics. In my Odyssey, after a week of winter sports, the floor mats look like a salt flat.
Your first and best defense is a set of heavy-duty, full-coverage rubber floor mats. They contain the slush. You can pull them out, hose them off, and let them dry. Everything underneath stays pristine.
For the weekly clean up, you need two tools: a wet/dry vacuum and a pack of damp microfiber towels. Vacuum the floors and seats thoroughly to get the dry, loose crystals. Then, dampen a towel with plain water or a mild interior cleaner. Wipe down every hard plastic surface, the pedals, and the lower door panels. For leather or synthetic seats like in my Tesla, use a dedicated cleaner for that material. This routine removes the salt before it gets ground in, protecting your resale value and your family’s health from the dust. Left unchecked, that salt moisture will permanently stain fabric and accelerate wear on everything it touches. For quick touch-ups, use household cleaners labeled for car interiors on the seats and plastics—test a small area first. This keeps upholstery looking fresh between deeper cleanings.
Keeping Your Car Protected All Winter Long
Winter car care comes down to a simple, consistent routine. Wash and dry the paint frequently to remove salt, and apply a durable sealant or wax at the season’s start to give that salt less to grab onto. That combination is your strongest defense.
Ignore this routine, and that thin, gritty film will etch into your clear coat and accelerate rust, turning a seasonal chore into a costly restoration project.
Industry References
- What’s the Fastest Way to Defog Car Windows? via @ConsumerReports
- How to defrost a car windscreen – step-by-step guide | The AA
- r/cars on Reddit: Is there a standard way to defog car windows?
- 4 Settings to Defrost Your Windshield Faster | Tulley BMW of Manchester
Max is an automotive enthusiast having worked as a car mechanical and in interior detailing service for over 25 years. He is very experienced in giving your old car, a new fresh vibe. He has detailed many cars and removed very tough smells and stains from all kinds of cars and models, always ensuring that his work and advice helps his customers. He brings his first hand experience to his blog AutoDetailPedia, to help readers breath new life into their car interiors.