
How Do You Repair Rock Chips and Stone Chips in Car Paint?
I spot a new chip on my Ford F-150’s dark blue paint and feel that same pinch of frustration. You are right to look at that flaw and think about rust eating away at your car’s finish.
This article will teach you my hands on method. We will cover assessing the chip depth, cleaning the area perfectly, applying touch up paint without blobs, blending for a seamless finish, and locking in the repair with sealant.
Get it wrong, and that small spot will grow into a corroded eyesore that requires a full panel repaint.
Key Takeaways: Your Quick Answer
Can you fix paint chips on a car? Yes, you absolutely can. The real question is how well you can fix them.
Can car detailing fix paint chips? I need to draw a clear line here. Detailing, what I do most days, fixes the clear coat. It removes light scratches and swirls. A paint chip is different. It’s a wound that goes through the color layer, sometimes down to primer or bare metal. Detailing cleans and polishes the surface. For a chip, you must add new material back. You need paint.
Your DIY goal is not perfection. On my black BMW, a perfect repair is nearly impossible for anyone. The goal is to make the chip less visible from five feet away and, most critically, to seal it from moisture and rust. You are performing protective first aid, not invisible plastic surgery.
Every good repair rests on three pillars. Forget one, and the job fails.
- Perfect Paint Match: This is 80% of the battle. “Close enough” looks terrible.
- Meticulous Cleaning: If you paint over dirt or wax, it will not stick. It will fail.
- Patience with Layering: This is a slow craft. One thick glob looks awful and never dries right.
Set aside a good afternoon. The process is not physically hard, but it demands a steady hand and a calm pace. Rushing guarantees a result you will hate.
The Protocol: Your Repair Checklist
This is the order. Do not skip steps. Do not swap them. I learned this protocol fixing hundreds of chips on my own cars, from the Miata’s thin single-stage to the Porsche’s modern clear coat. It works.
-
Wash & Dry the Vehicle. Start with a completely clean car. I use my standard two-bucket wash on the whole panel. You cannot properly assess chips through a layer of road film. Dry it thoroughly.
-
Locate & Assess All Chips. Run your fingertips over the clean paint. You will feel the divots. Use a bright work light. For each chip, ask: Is it just clear coat? Is the color layer gone? Do I see grey primer or, worse, silvery bare metal? The metal chips on my F-150’s hood are the priority. They will rust first.
-
Decontaminate the Chip. This step is silently missed by most. First, clay bar the entire area. This pulls out embedded iron particles. Then, take a cotton swab soaked in isopropyl alcohol (diluted 1:1 with water) or a dedicated paint prep solvent. Swirl it inside the chip itself to dissolve any leftover wax or silicone. If you skip this, your touch-up paint will simply peel out in a month.
-
Apply Primer (if bare metal). If your assessment shows shiny, untreated metal, you must prime it. A tiny dot of touch-up primer is all you need. This creates a surface the color paint can chemically bond to and provides the first layer of rust prevention. Let it dry completely according to the product instructions.
-
Layer Touch-Up Paint. This is the art. Do not use the brush in the bottle cap. It’s too big. Use a toothpick, a fine sewing needle, or a dedicated applicator pen. Place one microscopic drop of paint in the center of the chip. Your goal is to fill the hole, not paint the surrounding area. Let it dry for at least one hour. Come back and add another micro-drop. You may need three or four layers, drying between each, to build the paint up just barely above the surrounding surface.
-
Level the Paint Blob. Once the final layer has cured for at least 24 hours, you must flatten it. I use a very fine, dry 3000-grit sanding pad or a bit of compound on a firm foam pad. You gently knock down the high spot until it is flush with the factory paint. This is nerve-wracking but simple. Go slow, check often.
-
Polish & Protect. The leveling step will leave the area hazy. Now, you polish it just like any scratch. Use a fine finishing polish to restore the gloss over your repair. Finally, apply your sealant or wax over the entire panel to lock in your work and blend the protection.
Think of this as a recipe. You cannot decide to not add flour to a cake. Skipping a step here doesn’t save time. It guarantees you will see your mistake every time you walk up to your car.
What Exactly Is a Rock Chip (And Why Should You Care)?
Think of your car’s paint like an onion. A modern factory paint job has layers. On top is the clear coat, a thin, transparent layer of protective plastic. Under that is the color coat, the paint you actually see. Beneath that is a primer layer, and finally, the bare metal or plastic of the car’s body panel.
A rock chip is a small, violent event that peels those layers back.
- Clear Coat Damage: This is the mildest form. The rock fractures the clear coat, leaving a white-ish star or scratch. The color layer underneath is still intact. You can often feel the rough edge with your fingernail.
- Color Layer Gouge: A harder impact punches through the clear coat and into the color. You see a small crater where the paint color is missing, revealing a different color beneath (often gray primer or black undercoat).
- Exposed Primer/Metal: The worst kind. The impact is severe enough to go through all the paint layers. You see bare, unprotected primer or, in a severe case, the shiny silver glint of bare steel or dull gray of aluminum.
The danger of a rock chip is not how it looks, but what it lets in. That tiny opening is a direct path for moisture, road salt, and atmospheric pollutants to attack the bare metal underneath. It starts as a tiny brown speck of rust you might ignore. Left alone, that rust spreads underneath the surrounding paint, causing it to bubble and flake off. What was a $20 DIY fix becomes a $500 professional repaint.
This corrosion happens fastest on panels like the hood, bumper, and front fenders. They catch the brunt of road debris and are constantly bombarded by moisture. On my dark blue Ford F-150, I find new chips after every highway drive in construction zones.
How a chip acts also depends on your paint. Modern cars use a basecoat/clearcoat system. The chip is contained. My 1995 Mazda Miata, however, has single-stage paint. There is no separate clear coat. The color and the protective layer are one. When a rock hits it, the damage oxidizes and spreads faster, turning the vibrant red into a faded pink spot if I don’t catch it quickly.
Should You Fix It Yourself or Call a Pro?
This is not a test of manhood. It is a simple choice based on three things: the size of the chip, where it is on the car, and how much patience you have in your toolbox. Getting it wrong can turn a small flaw into a glaring eyesore.
I fix most chips on my own vehicles. But I also know when to pick up the phone.
DIY Territory: Your Time to Shine
You can handle this. I promise. The ideal candidate for a do-it-yourself touch-up meets a few clear conditions.
- Small, isolated chips. Think the size of a pinhead or a small grain of rice. One or two on a panel is fine. A dozen in one spot is a different story.
- Location on lower or horizontal panels. The hood, front bumper, and lower doors are battle zones. A minor imperfection here blends in. My F-150’s hood has a few of my own repairs. From five feet away, you cannot see them.
- Your daily driver or work vehicle. The goal is protection from rust and making it look better from a normal viewing distance, not achieving concours perfection.
If this describes your chip, you will save significant money and learn a valuable skill. The process is forgiving on these panels.
Call a Professional: The Smart Investment
There are times when paying an expert is not a cost. It is an investment in your car’s value and your own sanity. Call a pro for these scenarios.
- Large clusters or “shotgun” patterns. When the entire front end looks like it has acne, touch-up pens will make it worse. This needs professional assessment, possibly wet sanding and a partial respray.
- Deep chips that expose bare metal, especially on a new or high-value car. That little silver dot on your brand-new car’s fender? That is the steel substrate. Ignoring it invites rust that will blister under the paint, creating a far more expensive problem. On my Porsche, any chip to the primer or metal gets professional attention immediately.
- Chips on complex curves or body lines. The sharp crease along a door, or the complex curve of a fender arch, is brutally hard to level touch-up paint on without leaving a noticeable blob.
Pros have the tools, the practiced hand, and the experience to make these repairs virtually disappear. Trying it yourself on a complex curve often ends with you staring at a shiny bump of paint you cannot unsee.
Who Does This Work?
You have two main options, and they are not the same.
Do car dealerships fix paint chips? Yes, their body shop certainly can. They will often use the exact factory paint code. This is usually the most expensive route, as you are paying dealership labor rates for what they may consider a minor repair. This can feel disproportionate for a single chip compared to doing a touch-up yourself.
Do car detailers fix paint chips? Many skilled detailers offer professional touch-up and chip repair as a service. This is a great middle ground. A detailer’s goal is cosmetic perfection, not structural repair, so their approach is focused on making the chip visually disappear. They will often wet sand and polish the area to blend it seamlessly. It is not a full repaint. It is an artful correction, and for most chips, it is the best balance of result and cost.
How to Find Your Exact Paint Code (This is Critical)
You cannot guess with paint. “Red” is not a color. It is a category. Factory paint has a specific formula, a recipe with a name. This is your paint code. Using the wrong shade, even slightly off, will make the repair more obvious than the original chip. Finding and using your exact factory paint code is the single most important step for a professional-looking repair.
I learned this the hard way on my black BMW. I bought a generic “Jet Black” touch-up pen from an auto parts store. It looked fine in the bottle. On the car, it dried to a dull, flat gray. It stood out like a sore thumb. I had to carefully remove it and start over. Your car’s color, especially metallics and tri-coats, has a precise blend that changes in different light. Only the factory code gets you the right match.
Where to Hunt for Your Paint Code
The code is a short combination of letters and numbers, like “G1M” or “PW7.” Manufacturers hide it in plain sight. Here is where to look, from most common to less common.
- Driver’s Side Door Jamb: Open your driver’s door and look at the body pillar, not the door itself. There is almost always a manufacturer’s sticker there. Your paint code will be listed, often next to abbreviations like “C/TR” for Color/Trim. On my F-150, it’s right there, clear as day: “PNJ” for its Dark Blue.
- Under the Hood (Firewall): Pop the hood and look at the vertical wall between the engine and the windshield. Another common sticker location. My Model 3 has its code (“PPSB” for Pearl White Multi-Coat) on a sticker under the frunk liner.
- Glove Box or Owner’s Manual: Sometimes the code is on a sticker inside the glove compartment. Always check the cover of your owner’s manual or the supplemental maintenance booklet.
- Spare Tire Well or Trunk: Lift up the trunk carpet or remove the spare tire. Look for a stamped metal plate or a sticker on the floor or side wall.
If you get stuck, a quick online search for “[Your Car Year, Make, Model] paint code location” will almost always yield a forum post with a picture. Someone has already found it.
Smart Sourcing: Where to Get the Right Paint
Once you have the code, you need the paint. Not all sources are equal.
- Dealership Parts Counter: This is the most straightforward source. Give them your VIN or paint code, and they will sell you the factory-authorized touch-up bottle or pen. It is guaranteed to match, but it is often the most expensive option and the paint quality in those little bottles can be mediocre.
- Dedicated Automotive Paint Suppliers: Companies like AutomotiveTouchup or PaintScratch are my go-to. You enter your make, model, year, and paint code online. They mix fresh, high-quality paint to order in various sizes, from tiny pens to 4-ounce bottles. The match is excellent, and the paint flows and levels better than most dealer options.
- Quality Aftermarket Kit Makers: For chip repair specifically, systems like Dr. ColorChip are brilliant. You give them your code, and they send a kit with paint, a proprietary blending solution, and applicators. Their method is less about precise filling and more about “painting” over the chip and then wiping away excess, which is incredibly forgiving for beginners.
Avoid the generic “color-matched” pens and bottles on the racks at big-box stores. They work from a limited palette. Their “Ford Oxford White” might be close to your Ford Oxford White, but if the formula is a year off, it will not match. You did the hard work finding your code. Use it. Trust me, seeing a perfect blend on my Miata’s single-stage red was worth every minute of the search.
The Step-by-Step Repair Protocol
Fixing a rock chip is not about painting. It is about filling a hole with precision. You must break the job into clear, actionable steps. Miss one, and the repair will fail. I have seen it on my own cars, like when road salt and grit peppered the hood of my Ford F-150. Follow this protocol. Viewed within a scratch repair paint correction workflow, this prep lays the groundwork for a flawless finish. In the next steps, we’ll connect these steps to the full workflow for a seamless result.
Step 1: The Surgical Clean
Any wax, sealant, or dirt left under the new paint will cause it to peel or discolor. Failure starts here. First, wash the entire panel with your regular car shampoo and rinse it well. This removes loose grime and prepares the surface to properly fix peeling car paint.
Now, focus on the chip itself. You need to strip it bare. I use a microfiber towel folded into a point, dampened with isopropyl alcohol (a 70% mix works). Gently scrub inside the chip. You can also use a dedicated prep solvent. The goal is to reach the raw, clean metal or primer at the bottom.
Use your phone’s camera zoom or a cheap magnifying glass to inspect the chip for tiny, trapped debris. What looks clean to your eye often hides specks that will ruin the fill. This inspection is non-negotiable.
Step 2: Applying the Paint – Less is More
Do not just start brushing. Choose your tool. The brush-in-cap that comes with touch-up paint is often too thick. Fine-tip applicator pens offer more control. Airbrush-style pens can spray a wide, thin coat which is great for clusters of chips.
The technique is everything. You are not painting. You are filling. You must “dot” the paint into the center of the chip, avoiding the surrounding clear coat. Imagine placing a single drop of water into a thimble. That is the motion.
Touch-up paint shrinks as it dries. One thick glob will dry sunken and ugly. Apply a tiny amount-just enough to coat the bottom of the chip. Let it dry completely. This often means 24 hours in a garage. Then apply the next micro-layer. It may take 3 to 5 layers to fill the hole flush. Patience here saves you hours of sanding later. For a full DIY car paint touch up, these basics are just the start. The next steps guide you through color matching, blending, and sealing to finish the job.
Detailer’s Pro-Tip: The Toothpick Method
For absolute precision, I ditch the brush. Here is my physical hack. Snap a wooden toothpick in half. Dip the very sharp, broken end into the touch-up paint bottle. You want a tiny bead on the tip, not a drip.
Now, gently touch that bead to the center of your surgically cleaned chip. Using a toothpick lets you place a micro-drop directly into the chip, which completely prevents the common “blob” problem from the factory brush. It is the difference between using a crayon and a fine-tip marker. On my black BMW, where every flaw shows, this method is a lifesaver.
Step 3: Leveling the Repair (The Secret Step)
After the final layer cures, you will feel it. The dried touch-up paint will sit as a raised, rough blob on the surface. Most people stop here and see a shiny bump forever. This step flattens it.
For advanced users, the professional method is wet sanding with 2000-grit or finer sandpaper, followed by compounding. It is risky on clear coat. A slightly safer pro product is a “leveling fluid” that chemically dissolves the high spot.
For a safer, consumer-friendly alternative, wait a full week for the paint to fully cure, then use a specialized finishing compound and a soft microfiber pad by hand to carefully abrade the high spot. Apply very light pressure in small circles. You are not sanding. You are polishing down the peak until it is flush with the surrounding clear coat. Go slow, wipe often, and check your progress with a sidelong glance under light.
After the Repair: Blending and Protecting
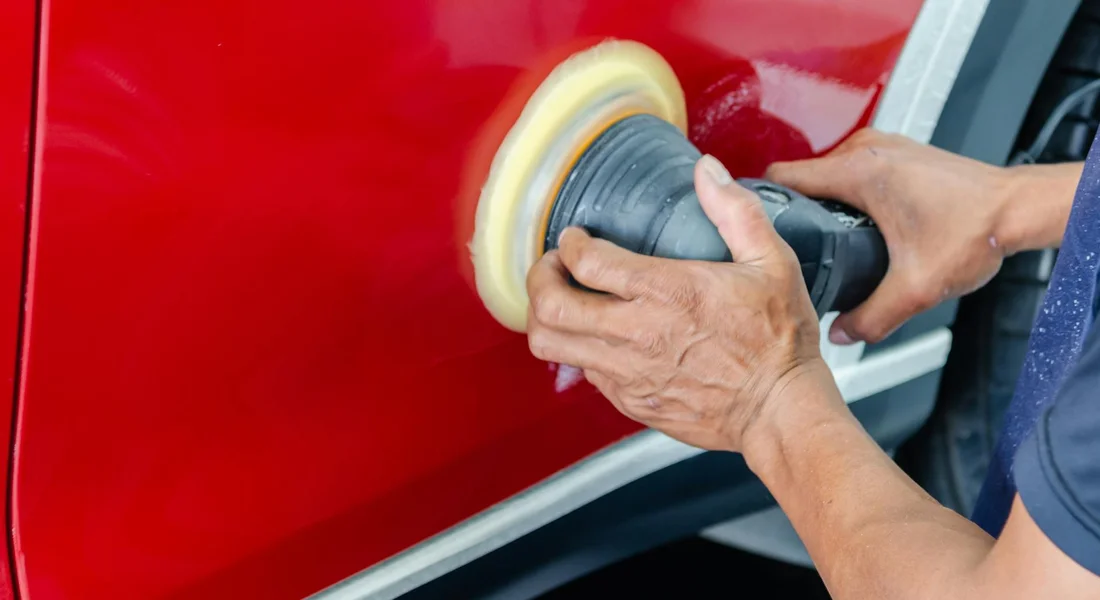
The paint in your chip is filled and level. Now you need to make it part of the panel again. Fresh touch-up paint, even after drying, often leaves a slight haze or a tiny raised edge where it meets the original clear coat. You fix this with a very careful polish.
Wait at least 24 hours for the paint to cure. Longer is better, especially in cold or humid weather. I give repairs on my black BMW a full 48 hours before I even look at them sideways. You need the paint fully hard. Car paint cure time can vary by paint type and conditions. A quick reference link will follow in the next step.
Use a mild finishing polish and a clean, soft foam or microfiber pad on a dual-action orbital polisher. Hand polishing here is risky; you won’t have the control to keep the abrasion even. Apply a pea-sized drop of polish to your pad. Work on the repaired spot and the immediate inch around it. Use the lowest speed setting. Your goal is not to cut-you are gently abrading the very top surface of the new paint and the surrounding clear to create a uniform finish.
Make two or three slow passes over the area. Stop and wipe with a clean microfiber towel to check. The haze should vanish. The transition from your repair to the factory paint should be smooth to your fingernail. If a slight edge remains, one more gentle pass may be needed. Do not overdo it. You are polishing a postage stamp, not the whole hood.
Your new paint is naked and vulnerable. It has no protective layer. This is the most critical step most people miss. You must seal it immediately.
Apply a durable sealant or synthetic wax over the entire panel, not just the chip. This gives uniform protection and sheen. For a door, do the whole door. For a hood, do the whole hood. I keep a bottle of spray sealant in my detailing cart for this exact job. On my F-150’s hood, I use a spray ceramic sealant. It bonds well and lasts months. On the Porsche’s fender, I might use a dedicated paint coating. The choice is less important than the action.
Ensure the panel is perfectly clean and free of polish dust. Apply your protectant in thin, even layers according to the product’s instructions. Let it cure. This layer is what will fend off water, UV rays, and contaminants, giving your repair a fighting chance to last.
Stand back and look. In the right light, you will likely still see the chip. The color match is close, but perfect is rare, especially on aged or complex metallic paints. That is okay.
Run your fingertip over the spot. It should be glass-smooth, with no crater to catch your nail. Visually, it is a filled, sealed blemish. Functionally, it is a healed wound. The bare metal is covered. The primers are sealed off from moisture. You have stopped the rust and preserved the panel. On my Miata, the front end is a collection of these tiny, smooth scars. Each one is a story, but none of them are eating away at the metal beneath. That is a win.
When to Hand It Over to a Professional
You can fix a lot on your own. I have touched up chips on every car I’ve owned. But knowing when to stop is what separates a good detailer from someone who makes a bigger, more expensive problem.
If you have a cluster of more than five or six chips on a single panel, or if the chip has gone deep enough to show bare, gray metal, it is time to call a pro. The same goes for any damage on a complex curve, like a hood edge or fender flare, where a DIY touch-up will almost certainly look lumpy. My black BMW taught me this lesson. What started as a few small chips I could manage turned into a spider-webbed section on the hood after a gravel road trip. At that point, my bottle of touch-up paint was just a temporary cover-up.
What Determines Rock Chip Repair Cost?
When you get an estimate, the price isn’t random. It is built on a few key factors you should understand.
- Number of Chips: This is the biggest driver. A shop charges per chip for touch-up, or by the panel for a full repaint. Ten chips on a hood will cost significantly more than two.
- Vehicle Size and Panel: Repainting a massive truck hood uses more material and time than a Miata fender. Some panels, like a bumper cover, are more labor-intensive to remove and remount.
- Paint Complexity: This is critical. A standard solid white is straightforward. A three-stage pearl white, like you often find on luxury or modern cars, costs more. Metallic and tri-coat paints require precise layer application and blending to match perfectly.
How a Professional Repair is Different
A professional does not just use a better brush. Their entire process is on another level.
First, they use professional spray equipment. This allows them to apply the base color coat in a fine, even mist that layers perfectly. Then, they blend this new paint into the surrounding original paint. Blending is the art of feathering the new color over a wider area so your eye cannot see a hard line where the repair starts and stops. It is a skill that takes years to master.
Finally, they clear coat the entire panel. They do not just dab clear over the chip. They sand the area smooth, mask off the panel, and spray a fresh, even layer of clear coat over everything. This seals the repair and restores a uniform gloss. It is the only way to make a repair truly disappear on most modern clear-coat finishes.
Finding “Rock Chip Repair Near Me” the Right Way
Searching online is a start. Looking at reviews helps. But you need to dig deeper to find a shop that will do the job right.
- Look for Paint-Specific Shops: Seek out “collision repair” or “auto painting” specialists, not just general mechanics. Their entire business is color matching and finish.
- Ask About Their Process: When you call, ask directly: “Do you blend the paint into the surrounding panel, or just spot-treat the chip?” A quality shop will explain their blending process without hesitation.
- Require a Written Estimate: Never accept a verbal guess. A written estimate should detail the cost per chip or panel, include paint materials, and list labor. It protects you and shows the shop is professional.
Your goal is to find a technician who sees your car’s paint not as a cover, but as a finish that needs to be restored as a whole. The right shop will make you feel confident that your car’s factory look is in good hands. For a result akin to factory professional automotive painting, seek shops with proper booth setups and color-matching specialists. This helps ensure a durable, showroom-grade finish that stays true to your car’s original appearance.
How to Stop New Chips Before They Start
Fixing a chip feels good. Preventing the next ten feels better. A complete approach to paint care means looking forward, not just fixing the past. That includes preventing car paint cracking and chipping through protective coatings and routine maintenance.
Your daily driving habits are the first and cheapest line of defense against new damage. I learned this the hard way with my black BMW. Tailing a dump truck on the highway is a recipe for a peppered front end. Increase your following distance significantly. Give yourself and the vehicle ahead space. If you see gravel or debris on the road, change lanes or slow down gently. It sounds simple, but this conscious effort saves more paint than you might think.
Build a Physical Barrier
When driving habits aren’t enough, a physical barrier is your best bet. This is about stopping the rock before it meets the paint.
Paint Protection Film is the gold standard for vulnerable areas like bumpers, hoods, and mirrors. My Porsche’s front end is covered in a high-quality PPF. It’s a clear, urethane film that acts like a second skin. When a rock hits it, the film absorbs the impact. You might get a small mark in the film itself, but the factory paint underneath remains perfect. Modern films are self-healing, meaning light scratches from bushes or washes disappear with a little heat from the sun. For a daily driver, a partial front-end kit is a smart investment. For a show car or a vehicle you plan to keep forever, a full wrap is worth considering.
Aftermarket mud flaps are a hugely effective, often overlooked tool for trucks and SUVs. My F-150’s factory flaps were decorative. I installed a set of rigid, extended mud flaps. They don’t look flashy, but they work. They catch gravel, slush, and road grit thrown up by the front tires before it can sandblast the rocker panels and lower doors. For anyone who drives on gravel roads or in winter conditions, this is a must-have.
Maintain a Strong Sacrificial Layer
Your wax or coating won’t stop a direct hit from a large rock. But a robust top layer can help deflect smaller debris and make cleanup easier.
A durable synthetic sealant or ceramic coating gives your paint a harder, slicker surface. Think of it like a raincoat for your car. A rock is more likely to glance off a slick, coated surface than stick to bare, thirsty paint. On my Tesla’s flat front bumper, I use a strong ceramic spray coating. It makes bug splatter and tiny road grit much easier to wash off, reducing the chance of scratching during cleaning. The coating itself takes the micro-abrasion, not your clear coat.
Focus this protection on high-impact zones. The front bumper, hood, front quarter panels, and side mirrors see the most abuse. I always apply an extra layer of my preferred sealant to these areas on all my vehicles. It is a sacrificial layer. It wears away so your paint does not have to.
Final Thoughts on Stone Chip Repair
Whether you’re fixing a chip on your daily driver or a garage queen, the one rule I live by is to never rush the cleaning stage. A perfectly matched paint will only fail if it’s applied over a surface with even a speck of wax or road film.
Neglect that initial clean, and you’ll seal in dirt and moisture, guaranteeing a bubbled, discolored patch that invites rust to spread.
Related Guides and Information
- Home – Dr. ColorChip
- The TouchUp RX Kit – TouchUp RX
- r/howto on Reddit: How do I fix the paint chip on my car?
Max Gunther
Max is an automotive enthusiast having worked as a car mechanical and in interior detailing service for over 25 years. He is very experienced in giving your old car, a new fresh vibe. He has detailed many cars and removed very tough smells and stains from all kinds of cars and models, always ensuring that his work and advice helps his customers. He brings his first hand experience to his blog AutoDetailPedia, to help readers breath new life into their car interiors.