How Do You Remove Scratches and Correct Paint to Restore Your Car’s Finish?
Those fine scratches and hazy swirls marring your car’s paint don’t have to be permanent. I’ve felt that frustration, watching the sun reveal every flaw on my jet-black BMW’s surface.
This article will teach you the professional method to safely erase defects and achieve a deep gloss. We will cover assessing scratch depth, choosing the correct abrasive compounds and polishing pads, using a dual-action polisher effectively, and applying a final sealant for lasting protection.
Use the wrong technique, and you will grind those scratches deeper or burn through the clear coat.
Key Takeaways: The Roadmap to a Perfect Finish
Let me give you the straight talk I needed when I started. Paint restoration is not about slapping on a product to fill scratches, it is about carefully removing a thin layer of clear coat to level the surface and erase the defects. You are sculpting the finish, not painting over the flaws.
Every job that turns out right follows three phases. You cannot skip one.
- Perfect Prep: The paint must be absolutely clean. Any dirt left behind will get ground into the surface during polishing, making things worse.
- Systematic Correction: This is the polishing stage, using machines or hand tools with specific compounds and pads to safely abrade the clear coat.
- Durable Protection: After you create a perfect surface, you lock it in with a wax, sealant, or coating to shield it from the elements.
The best tool you have is not your polisher, it is your patience and your technique. I have fixed the chalky, oxidized single-stage paint on my 1995 Mazda Miata and the spider-webbed clear coat on my 2016 BMW 3 Series. The roadmap was identical. Good prep, mindful correction, strong protection.
Step Zero: The Clean Slate (Prep is 90% of the Job)
Washing a car you plan to polish is a different kind of clean. If you scrub a scratched panel with grit on it, you are sanding your paint with every pass. You must eliminate all contamination first.
The two-bucket wash method with Grit Guards is non-negotiable. One bucket holds your shampoo mix. The other is plain water for rinsing your wash mitt. The Grit Guards sit at the bottom to trap dirt. I use this on my black BMW every time. It is the only way to prevent adding swirls during the wash.
After the wash, you need chemical decontamination. Spray an iron remover over the paint and wheels. It will cling to embedded brake dust and rail particles, turning a purple or red color as it works. Let it sit for a few minutes, then rinse it off. Next, use a detailing clay bar or a synthetic clay towel with plenty of lubricant. This step pulls out the stubborn contaminants that are bonded to the paint, things your wash mitt cannot grab.
To know if the paint is truly bare, do the “baggy test.” Put your hand inside a clean, thin plastic bag. Gently run your fingertips over the wet paint. Through the plastic, you will feel every speck of grit. The surface should feel like smooth glass. If it feels sandy, you need to clay more.
Before any polishing, tape off everything that is not paint. Use automotive masking tape on trim, badges, rubber seals, and sharp body lines. This blue tape protects these areas from polish residue and prevents the polishing pad from catching and damaging edges. On my Honda Odyssey’s plastic cladding or my Porsche’s emblems, this saves me from a big headache later.
How to Properly Wash a Car for Paint Correction
You need the right chemicals for the job. Here is what I always use from my cart.
- pH-neutral car shampoo: It cleans effectively without damaging existing coatings or drying out trim. Do not use dish soap.
- Iron and fallout remover: A specialized spray that dissolves metallic deposits. On my white Tesla, seeing the purple runoff tells me it is working.
- Detailing clay or a synthetic alternative: A traditional clay bar works, but clay mitts are easier for beginners and cover large areas faster.
The claying motion is simple but critical. Spray a generous amount of lubricant on a two-foot square section, then glide the clay bar or mitt back and forth in straight lines using very light pressure. Do not use circles. If the clay falls, throw it away. You should feel it sliding smoothly. If it drags, add more lubricant immediately.
Understanding Your Enemy: What Kind of Scratch Is That?
Think of your car’s paint like a piece of fine furniture with a thick, protective lacquer on top. The goal is to fix issues in that top layer without going deeper. You need to know what you are looking at before you ever pick up a tool. The wrong approach can make things much worse.
Every single repair starts with a simple, universal test. Run your fingernail gently across the scratch. Does it catch? If your nail drops into the groove, the damage is deep. If your nail glides smoothly over the top, the defect lives only in the clear coat. This “fingernail test” is your most important diagnostic tool, separating dreams from reality in paint correction.
Clear Coat Scratches, Swirls, and Holograms
These are the defects you can truly erase. They exist only in the clear coat, the transparent protective layer over your car’s colored paint. They do not catch your fingernail. Instead, they catch light, scattering it and making your paint look dull, hazy, or scratched under the sun.
Swirl marks are fine, circular scratches. Imagine wiping a dusty phone screen with a rough shirt. It looks cloudy and covered in tiny lines. That is what swirls do to your clear coat. They come from improper washing, dirty towels, and automatic car washes. My black BMW is a swirl magnet. It shows every single one. If you want to fix this, learning how to remove swirl marks from car paint can restore that deep gloss. Small steps can make a big difference.
Holograms, or buffer trails, are different. They look like oily, swirling patterns in direct light, often in arcs. Holograms are almost always inflicted by improper machine polishing, using the wrong pad or product, or failing to finish the job correctly. They are a sign of a previous bad detail, not normal wear.
Can car detailing remove scratches? The answer is a definitive yes, but only for this category. Clear coat scratches, swirls, and holograms are 100% removable through a process called paint correction. This involves using specialized abrasives (compounds and polishes) to carefully level the clear coat until the scratches are gone.
Deep Scratches and Etching
This is where you must manage expectations. A scratch that catches your fingernail has penetrated through the clear coat and into the color layer (primer) or even the metal. You can make it look 80% better, but completely erasing it is often impossible without a repaint.
The process is the same: you level the surrounding clear coat to make the trench of the scratch less deep and obvious. It will become far less visible, but under certain light, you may still see a faint line. On my blue F-150, I have a few of these from branches. I made them nearly invisible, but I know where they are.
Etching is a special, stubborn case. It is a chemical stain or mark left on the clear coat. Common causes are:
- Bird droppings left to bake in the sun.
- Acid rain or industrial fallout.
- Hard water spots that have mineralized.
Etching feels smooth to the touch but looks like a permanent shadow. It can be shallow or surprisingly deep. Removing it requires abrasive polishing, just like a scratch. Sometimes, if it has sat for years, it cannot be fully removed.
Remember what detailing cannot fix. This work is about the paint surface. We do not repair dents, pull out metal, or fill deep rock chips that have exposed bare metal. For those, you need a body shop. Our job is to make the factory finish look its absolute best for as long as possible.
The Detailer’s Arsenal: Tools & Chemicals You Actually Need
Let’s talk tools. Not magic potions in shiny bottles. You are building a toolkit. The goal is control and results, not mystery. The wrong tool makes the job hard. The right one makes it simple.
Machines: DA Polishers Are Your Best Friend
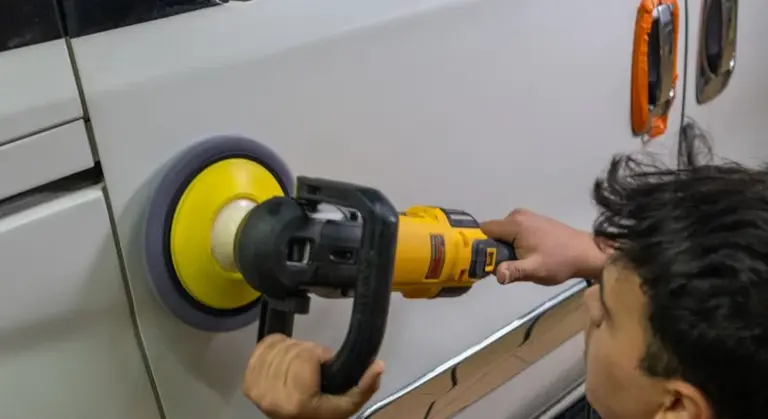
If you remember one thing, remember this: start with a Dual Action polisher. A DA spins and oscillates. This combo dramatically reduces the chance of burning through your clear coat. A rotary buffer only spins. It is for pros who know exactly how much paint is on a panel. I learned on a rotary and put a hologram in my dad’s trunk lid. I have not made that mistake since I switched to a DA.
Look at the throw size. This is how far the backing plate orbits. An 8mm to 15mm throw is the sweet spot. More throw means more cutting power for deeper defects. Less throw can be smoother for finishing. A 15mm throw is a great all-rounder. It has enough muscle for correction but is still very smooth to handle.
You have two choices: corded or cordless. A corded polisher gives you unlimited run time and consistent power. You need an outlet and an extension cord. A cordless polisher is all about freedom of movement. No cord to drag across the paint. The trade-off is battery life and a bit less power. For your first time, a mid-range corded DA is the safe bet. You will not run out of juice halfway through a door panel.
Pads and Polishes: The Cutting Combo
Think of this as a system. The foam pad is the muscle. The liquid polish is the brains. The pad’s texture and density determine its aggression. A firm, open-cell foam pad cuts more. A soft, dense foam pad finishes finer. Colors often indicate use, but brands vary. An orange pad is typically for cutting. A white pad is for polishing. A black pad is for applying sealants or very fine finishing.
The polish contains microscopic abrasives that level the clear coat. A compound has heavier abrasives to remove scratches. A polish has finer abrasives to refine the finish after compounding. You start aggressive and work your way down to perfect.
Begin with a simple two or three pad system and two liquids: one compound and one polish. An orange cutting pad with a medium-cut compound will tackle most swirls. Follow that with a white polishing pad and a fine polish to restore the gloss. That is your core process.
You will see all-in-one “paint restoration kits.” They can work on mild defects. They often use a one-step polish that cuts and seals. For my 2016 BMW, the “Swirl Magnet,” a one-step was not enough. The deep scratches needed a dedicated two-step process. A kit is a good test. If your paint needs serious help, you will need to build your own arsenal.
The Required Arsenal (Specs)
This is my go-to list for a first-time correction. These specs give you a professional result without guesswork.
- DA Polisher: Look for a model with a 15mm throw. This is the workhorse setting.
- Backing Plate: A 5.5-inch flexible plate. This size matches the pad perfectly for even pressure.
- Foam Pads (5.5-inch): Get at least two of each. Orange (for cutting), White (for polishing), Black (for finishing or sealant application).
- Compound: A medium-cut compound. It should say it removes scratches and swirls.
- Polish: A fine abrasive polish. It should say it enhances gloss and removes light haze.
- 70% Isopropyl Alcohol (IPA): Mix 1 part IPA with 1 part water in a spray bottle. You use this to wipe a panel clean after polishing. It removes leftover oils so you can see the true finish.
- Microfiber Towels: 500 GSM or higher. You need a stack of them. Use separate towels for compound removal, polish removal, and your final IPA wipe. Never let a towel hit the ground.
- Grit Guard: This insert sits in the bottom of your wash bucket. It traps dirt so your wash mitt does not pick it back up. It is essential for keeping scratches out after you correct them.
This is not a shopping list for a one-time trick. This is the foundation of maintaining perfect paint. Once you have it, you have it for life. Your car will thank you.
The Core Process: From Scratch to Swirl-Free in Stages
This is not about guesswork. You do not just pick a product and start buffing. A professional result comes from a methodical, scientific approach. You test, you verify, and then you execute.
Performing a Test Spot: The Most Important Step
Before you touch the whole car, you must perform a test spot. This small, controlled experiment tells you everything you need to know. Pick a typical 2×2 foot area on a flat panel, like the hood or a door. Clean it thoroughly. Start with the least aggressive combination you have-a soft polishing pad and a fine finishing polish.
Work that small section completely. Then, take a bright LED work light. Hold it at a sharp angle, almost parallel to the paint. The light will reveal every remaining scratch and swirl. Move the light around. Get your eyes right down there.
If the defects are gone, you have your winning combination and can proceed with confidence across the entire vehicle. If scratches remain, you move up one step in aggression. Maybe a medium-cut polish on that same soft pad. You test again, in a fresh 2×2 spot right next to the first. You only escalate to a cutting pad or compound if the polish fails. The goal is to remove scratches, not all of your clear coat. My black BMW taught me this the hard way.
Detailer’s Pro-Tip: The Technique Tweak
The machine does the work. Your job is to guide it. Do not lean on it. Use only the weight of the machine itself. Move it slowly, about one inch per second. Make your passes overlap by 50%. Up and down, then side to side.
Watch the polish on the paint. It will start out cloudy and thick. As the abrasives break down and do their job, it will turn nearly clear and watery. That is when you stop. That is the “breakdown” phase.
After every single section pass, wipe it off with a clean microfiber and inspect it under your light before moving on. This immediate feedback loop is how you learn and avoid having to re-do entire panels.
Working the Panel: A Systematic Approach
Once your test spot is perfect, work panel by panel. Divide each large panel, like a hood, into manageable sections, about 2×2 feet each. Your pass pattern is key for even correction. Make four to six slow, overlapping passes in one direction (say, up and down). Then, without adding more product, make another four to six passes moving side to side. This cross-hatch pattern ensures you don’t miss a single millimeter.
You will know a pad is “loaded” and needs to be changed or cleaned. It will feel gummy or tacky under the machine. It may start to drag or make a different sound. The polish will not spread evenly. Have several clean pads ready to swap out.
After you finish an entire panel, you have one final, crucial step before applying any wax or sealant. Do a wipe-down with a mixture of isopropyl alcohol and distilled water (a 10-20% solution is fine). This removes any leftover polishing oils that can hide micro-marring. This alcohol wipe reveals the true, naked finish, confirming your work is flawless before you lock it in with protection.
Advanced Techniques & Troubleshooting Common Hurdles
You have the basics down. Now you will hit real world problems. I hit them every week in my own garage. These hurdles can frustrate you, but they have solutions. Let me walk you through them.
Can Car Detailing Remove Stains (Like Water Spots or Oxidation)?
First, understand that oxidation is not dirt. It is failure. The clear coat on your paint dies from sun exposure and time. It turns chalky, flat, and loses its gloss. You cannot clean oxidation off, you must polish it away to reveal live paint underneath. My 1995 Mazda Miata taught me this. When I got it, the classic red looked pink and chalky to the touch. Using a dual-action polisher with a cutting compound, I removed that dead layer. The red came back, deep and wet looking, because I exposed the healthy paint below.
Water spots are a different beast. You need to know what kind you have. Fresh water spots from rain or a sprinkler are usually just mineral deposits sitting on top. You can often remove them with a spray detailer and a clean microfiber towel. But if those spots bake on in the sun, the minerals can etch into the clear coat. For etched water spots, you will need to polish. Use a light polish and a soft pad first. If the spot disappears, you are lucky. If it remains, the etching is too deep. Aggressive compounding might work, but you risk thinning the clear coat too much.
Dealing with Curves, Edges, and Tight Spots
This is where most people burn through their paint. The paint on sharp edges, ridges, and body lines is incredibly thin. A machine polisher generates heat and friction. On a flat panel, that heat spreads out. On an edge, it concentrates. You must treat curves and edges with a gentle hand, not a spinning machine. On my black BMW, I never use a polisher on the hood edges or door creases. I polish those by hand.
Here is how I do it. Apply a small amount of finishing polish to a soft foam applicator pad. Use your fingers to work it into the edge with slow, overlapping circles. Check your progress often by wiping the area clean with a microfiber. The goal is to blend the correction from the machined area into the hand-polished edge.
For tight spaces, your standard 6-inch pad is useless. You need to get smaller. I use a 3-inch backing plate and polishing pads for areas like the A-pillars, around door handles, and the tight curves near headlights on my Tesla. The smaller pad gives you precision and control, preventing you from slamming the polisher into adjacent panels. Keep the speed low and use light pressure. It is slow work, but it protects your paint.
When to Call a Professional: The Detailer’s Role
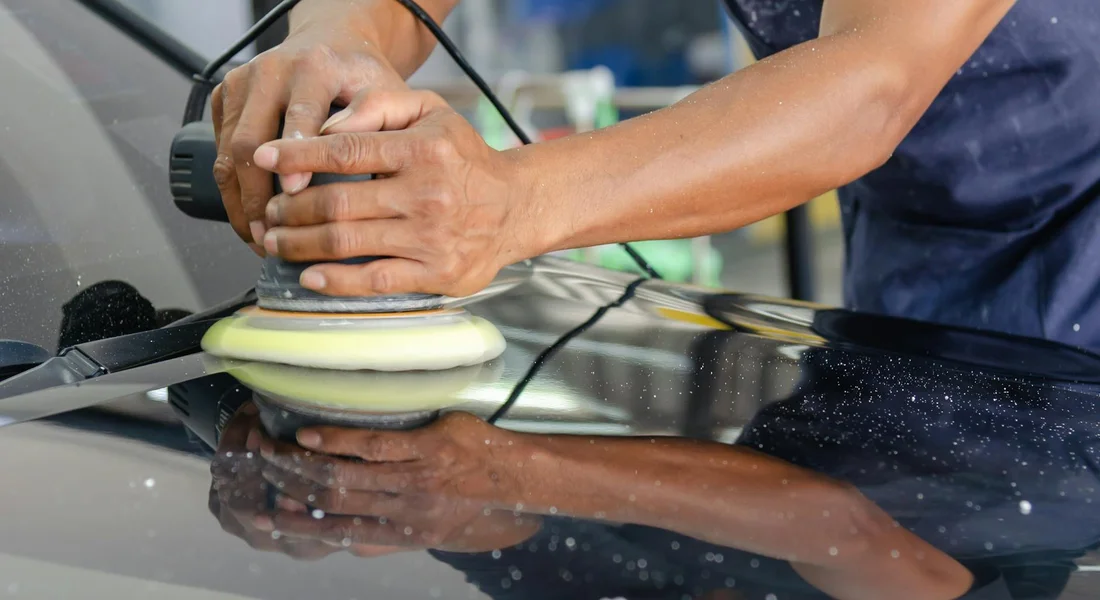
Knowing your limits saves your car’s paint and your wallet. I learned this the hard way on my black BMW. I was confident I could fix the swirls myself. I ended up adding holograms, those oily-looking swirls under lights, because my technique was off. It took a pro to remove my mistakes. If you’re staring at a heavily scratched or oxidized finish and feel a knot in your stomach, that’s your sign to get a quote. The line between DIY and pro is drawn by the depth of the defect, the thinness of your clear coat, and your own comfort with a polisher.
What Can a Professional Detailer or Correction Specialist Do That I Can’t?
Think of it like this: you can cook a good steak at home, but a master chef has better tools, perfect timing, and years of muscle memory. A pro detailer works with the same principle.
Their main advantage is a combination of knowledge and equipment you likely don’t have at home. A paint thickness gauge is their x-ray vision. They touch it to your hood, door, and roof. In seconds, they know exactly how much clear coat is left and can plan a safe correction. My Porsche’s PPF, for example, would be ruined if someone polished it without checking first.
They also master advanced tools. A rotary polisher, which spins in one direction, cuts faster and can handle severe defects. It also burns through paint in a heartbeat if you don’t know how to handle it. Pros use them with a cool confidence I still don’t have. Their efficiency is the other big factor. What would take me a sweaty, uncertain weekend, they can do in a day with flawless results.
Let’s answer two common questions directly.
Can a car detailer buff out deep scratches? Yes, but only to a point. If your fingernail catches in the scratch, it’s through the clear coat and into the color layer or primer. A detailer can make it less visible, but it cannot be fully removed without a touch-up or repaint. They will tell you this upfront. A pro can assess whether the damage is surface-level or requires painting. For repair car paint scratches beyond buffing, options include touch-ups or repainting to restore the finish.
Do car detailers fix dents? No, they do not. Dent repair is a separate craft called Paintless Dent Repair (PDR). A good detailer will have a trusted PDR technician they work with, often booking them to work on a car before the paint correction begins. This teamwork gets you the best final result.
Cost is always the big question. For a full multi-step paint correction, don’t expect a $200 bill. The price hinges on the car’s size and the defect’s severity. Correcting a Miata is less work than a full-size truck. Holograms from a bad wash are easier to remove than years of deep swirls and etched water spots. A typical range for a professional one-step polish on a midsize sedan might be $400-$700. A full two-step correction on a large SUV with severe defects can run $1,200-$2,000 or more. Get a few in-person estimates.
When you search for a “car paint restoration service near me,” look beyond the first ad. Vet them like you would a surgeon for your car. A true specialist will have a portfolio, not just glossy ads. Look for 50/50 shots showing half the hood corrected and half untouched. Read reviews that mention specific results, not just “nice guys.”
Ask them direct questions about their process. “Will you use a paint thickness gauge?” “What polish and pad combination do you think my car needs?” “Do you remove trim or tape it off?” Their answers will tell you everything. If they hesitate or give vague replies, thank them and walk away. Your car’s paint is too thin to trust to guesswork.
Protecting Your Investment: Locking In That Like-New Finish
You just spent hours bringing that paint back from the dead. It feels good. The sun hits it and you see a perfect reflection, no haze, no spiderwebs. Now, you must seal it. This step is not optional. Leaving that fresh, bare clear coat unprotected is like building a sandcastle at low tide. All that hard work will wash away. The next rain, the next dust storm, the next trip down the highway will immediately begin putting fine scratches back into that perfect surface. Applying protection is what turns your hard correction work into a lasting result.
Sealants, Waxes, and Ceramic Coatings
Think of paint protection as a spectrum, from traditional beauty to modern armor. Your choice depends on how much effort you want to put in and how long you want the protection to last.
Synthetic sealants are my daily drivers for a reason. They are engineered polymers that bond to the paint. They last a solid six to twelve months, shed water incredibly well, and have a slick, glassy feel. I keep a bottle of spray sealant in my detailing cart for my Ford F-150 and Honda Odyssey. A few sprays on a wet panel as I dry it adds months of protection in seconds.
Natural carnauba wax is a different experience. It comes from a palm tree and gives paint a warm, deep, liquid glow that synthetic products struggle to match. My Porsche’s red paint gets a paste wax treatment for that classic show car look. But it sacrifices durability compared to synthetic waxes. That beautiful warmth fades faster, usually needing a fresh coat every three to four months. It is less about chemical resistance and more about pure aesthetics.
Ceramic coatings are a serious commitment. These are liquid silica or quartz solutions that cure into a hard, semi-permanent layer on your paint. A proper coating can last two to five years, providing insane resistance to chemical stains, UV damage, and minor swirls. I had my Tesla Model 3 coated. Bird droppings and bug splatter on that flat nose wipe off with almost no effort. Applying a true ceramic coating is a meticulous, single-chance process that demands perfect paint correction first, but it offers the longest-lasting defense you can apply yourself.
For most people standing in their driveway with a freshly corrected car, I point to a high-quality spray sealant. It is foolproof. You cannot mess it up. The results are 95% as good as the fanciest options for a fraction of the cost and effort.
Be wary of products labeled “car paint restoration spray” you see on late-night TV. Most are glazes or heavy fillers. They contain oils and polymers that temporarily fill minor scratches and shine up faded paint, but they wash away in one or two rains. They are a bandage, not a cure. Do not confuse them with a real protective layer. If you’re looking to restore faded car paint, seek proven methods that rebuild color and depth. These approaches use durable polishes, compounds, and sealants rather than quick-fix sprays.
The Maintenance Wash: Keeping It Perfect
You have a flawless, protected finish. This is where the real test begins. Every single time you touch that paint, you risk putting scratches back into it. Your washing technique is everything now.
Abandon the sponge and the single bucket. Forever. Your new ritual is the two-bucket method. One bucket holds your clean shampoo solution. The other is your rinse bucket, filled with clear water and a grit guard at the bottom. After you wash a section of the car, you rinse your microfiber mitt in the rinse bucket, trapping the dirt at the bottom before reloading with clean soap from the first bucket. This simple system keeps abrasive dirt off your paint.
Use a plush, clean microfiber wash mitt. Old towels or harsh brushes are sandpaper. Dry the car with a large, soft microfiber drying towel. Do not let it air dry. Water spots are mineral deposits that etch into your clear coat and your new sealant.
Here is my secret: use a drying aid. As you dry each panel, mist it lightly with a spray wax or a quick detailer. This adds lubrication so the towel glides, it boosts your protection, and it helps eliminate any remaining water without streaks. I do this on every car, every wash.
The golden rule is simple but absolute: the way you wash your car determines how long your perfect correction will last. A safe wash keeps it perfect for years. A careless one will have you seeing swirls again in a month. My black BMW taught me this the hard way. Now, it only gets the two-bucket treatment, and it stays looking deep.
Maintaining Your Corrected Finish
The most important lesson isn’t the compound or the polisher, it’s your wash technique. Every scratch you just removed started as a piece of grit in a wash mitt or a dirty towel, and protecting your work begins the very next time you clean the car.
Ignore that, and my black BMW 3 Series-the one I spent eight hours correcting-will be a swirl magnet again before spring.
Deep Dive: Further Reading
- Repair & Renew Scratch Remover for Cars | Repair & Restore |
- Not All Scratch Removers Work-These Are the Ones That Smoothed Out the Scrapes on Our Car
- r/Cartalk on Reddit: I doubt there is anything I can do to fix this, but am I able to clean up these deep scratches on my car without having to go to a professional?
- Amazon.com: Touch Up Paint for Cars, White Car Paint Scratch Repair, 2-In-1 Car Touch Up Paint Fill Paint Pen, Quick & Easy Solution to Repair Minor Automotive Scratches 0.8 fl oz : Automotive
Max Gunther
Max is an automotive enthusiast having worked as a car mechanical and in interior detailing service for over 25 years. He is very experienced in giving your old car, a new fresh vibe. He has detailed many cars and removed very tough smells and stains from all kinds of cars and models, always ensuring that his work and advice helps his customers. He brings his first hand experience to his blog AutoDetailPedia, to help readers breath new life into their car interiors.