What Are the Best Products and Safest Techniques for Cleaning Your Car’s Interior?
You want a fresh, healthy cabin but worry that harsh sprays or rough scrubbing will damage your upholstery and plastics.
Based on my years detailing cars like my kid-hauling Honda Odyssey, this article walks you through choosing gentle, effective cleaners, the correct order to clean each surface, removing tough stains safely, and applying protectants without slick residues.
Use the wrong product or technique, and you can cause discoloration, attract more dirt, or leave behind fumes that harm your family.
Key Takeaways: The Interior Cleaning Mindset
Cleaning your car’s interior is not about making it look clean. It is about making it actually clean. There is a big difference. Smearing dirt around with a wet rag just moves grime from your dashboard to your door panel. Your goal is to lift contaminants off surfaces and remove them from the vehicle entirely, something that requires proper techniques.
This mindset shift changes everything, starting with the most important rule in detailing: always test your cleaner in a hidden spot first.
That spot under the seat or inside the door jamb? That is your laboratory. Spray your cleaner, let it dwell, wipe it, and see what happens. Does it discolor the plastic? Does it leave a weird residue? You want to find that out there, not on your center console. I learned this the hard way years ago on a customer’s vintage BMW. A cleaner I trusted on modern plastics left a permanent, milky haze on an old vinyl. Test first. Every time.
My core philosophy is simple. Pair gentle mechanical action with the right chemical. The chemical loosens the bond between the dirt and the surface. The gentle physical action-a soft brush swirling, a microfiber towel gliding-lifts it away. You should never have to scrub hard. If you are scrubbing hard, your chemical is wrong or you are not letting it work.
The Detailer’s Toolbox: What You Actually Need
You do not need a garage full of expensive gear. You need a few right tools used correctly. Here is what I use on every single car, from my kid-hauling Odyssey to the garage-queen 911.
- A Vacuum with Attachments: This is your foundation. The crevice tool is for seat tracks and between console and seat. The soft brush attachment is for delicate fabrics and dusting vents. The upholstery tool is for seats and floor mats. A small, powerful handheld vac can be better than a bulky shop vac for tight interiors.
- Soft-Bristle Detailing Brushes: These are your fingers. You need a variety. A 1-inch brush for air vents and button crevices. A wider brush for larger textured plastic. A soft, dense brush for carpets and fabric. My go-to set has nylon bristles that are firm enough to agitate but soft enough to not scratch. I have used the same set for years on everything.
- Microfiber Towels, Lots of Them: Not all are the same. You need two types. Plush, 500+ GSM towels for final wiping and applying protectants. They are soft and absorbent. Edgeless, textured “glass” or “utility” towels for scrubbing and cleaning. The texture provides light mechanical action. Use many, fold them to a clean side often, and never use the same towel on a dirty surface you just used on a clean one.
Now for the optional, game-changing tools.
A steamer is a powerhouse. It loosens set-in stains on cloth seats, sanitizes surfaces without harsh chemicals, and cleans gunk from cup holders by melting it away. The heat and vapor do the work, so you use less cleaner. For deep fabric cleaning, an extractor is the professional solution. It sprays cleaning solution, agitates, and then suctions the dirty water back out. It is the only way to truly deep-clean a cloth seat or carpet after a spill. I used mine to rescue the Odyssey’s middle row after a juice box incident.
What Can I Use to Clean My Car Interior If I’m Just Starting?
Start simple. Do not overcomplicate it. A perfect starter kit has four things.
- A vacuum you already own.
- A gallon of a quality, pH-neutral All-Purpose Cleaner (APC). Dilute it as the bottle says, usually 10:1 for interiors.
- A pack of good microfiber towels (get a few plush and a few textured).
- A set of soft detailing brushes.
With this kit, you can clean 95% of your interior. Spray diluted APC on a surface, agitate with a brush, wipe clean with a textured towel, and dry/buff with a plush towel. It works on plastics, vinyl, leather, and cloth. This simple process is more effective than using a dozen specialty sprays incorrectly.
Now, what not to use. Kitchen sponges are a disaster. The green scrubby side will put permanent, fine scratches in every plastic surface it touches. Glass cleaner is for glass. On your infotainment screen or dashboard plastics, it leaves streaky residues and can degrade anti-glare coatings over time. Household disinfectant wipes often contain bleach or alcohols that will dry out and crack vinyl and leather. Stick to products made for automotive surfaces. Your interior will thank you for years.
The Product Tier List: From Drive-Through to Show Car
Let’s break down your options. Think of it like tools in a workshop. You don’t need a sander for every job, but having the right one makes all the difference. I keep products from all three tiers in my own garage. My Honda Odyssey, the kid hauler, sees a lot of the first tier. My BMW and Porsche demand the others.
Budget/All-Purpose Tier: The Quick Fix
This is for maintenance, not miracles. You want a product that’s safe, cheap, and gets the job done fast after a drive-through coffee spill. A gentle, diluted all-purpose cleaner is your workhorse here. Look for a basic car interior cleaner spray that says “safe for vinyl and plastics” right on the bottle.
I use this tier weekly on the Odyssey’s dashboard and door cards. It cuts through light dust and sticky fingerprints without a fuss. The goal is to prevent grime buildup, not to achieve a deep, conditioned finish. For general wipe-downs, a quality all-purpose cleaner is the most efficient tool you can own. Just avoid anything labeled “degreaser” or with a strong chemical smell; it can dry out and crack your plastics over time.
- Example Product Type: Dilutable All-Purpose Cleaner (APC).
- Best Use Case: Quick cleaning of hard, non-porous surfaces like plastic trim, vinyl seats, and rubber floor mats. Perfect for a 10-minute tidy-up.
Enthusiast/Specific Tier: The Targeted Approach
You care about the details. You notice that your leather feels stiff, your fabric mats are dingy, and your touchscreens are smeared. This tier is about using the right chemistry for each material. It means having three or four different bottles instead of one.
On my Tesla’s white vegan leather, I use a specific synthetic cleaner. For the BMW’s black leather seats, a pH-balanced leather cleaner followed by a conditioner keeps them from cracking. Targeted products prevent damage and preserve the factory feel of each surface, something an all-purpose cleaner can’t do. Maintaining clean and conditioned leather car seats requires the right cleaners and conditioners. This approach helps keep them looking and feeling premium. A dedicated fabric cleaner, for instance, will lift a soda stain from cloth seats without leaving a ring or harsh residues.
- Example Product Type: Dedicated Leather Cleaner & Conditioner, Fabric/Upholstery Cleaner, Specific Screen Cleaner.
- Best Use Case: Seasonal deep cleaning, addressing specific stains, and preserving sensitive materials like real leather, suede, or delicate fabrics.
Show Car/Pro-Grade Tier: The Perfectionist’s Kit
This is for the garage queen or the professional detailer. The products here are about absolute control and unmatched results. We’re talking pH-balanced cleaners for every surface category, specialty brushes with ultra-soft bristles, and coatings that offer permanent protection.
When I detail the Porsche’s interior, I use a pro-grade Alcantara cleaner that lifts dirt without matting the fibers. The products are often more concentrated, requiring precise dilution. Pro-grade systems remove all doubt, ensuring every chemical is engineered to clean, protect, and leave zero residue behind. This tier is less about convenience and more about achieving a flawless, show-ready finish that lasts.
- Example Product Type: pH-Neutral Surface-Specific Cleaners, Interior Coatings (for plastics, leather, or fabric), Professional-Grade Extractors.
- Best Use Case: Concours-level detailing, restoring neglected interiors, or applying long-term protective coatings to a vehicle’s entire cabin.
Safety First: Ingredients That Harm Your Car and Your Health
Cleaning your car’s cabin is different from cleaning your kitchen. The space is small, sealed, and the materials are delicate. Using the wrong product here doesn’t just risk a bad clean. It can cause permanent damage and fill the air you breathe with harsh chemicals.
I learned this lesson years ago. I used a generic glass cleaner with ammonia on my old car’s dashboard. The plastic near the windshield developed a network of tiny, permanent cracks within a year. It became brittle and chalky to the touch. That mistake taught me to read every label.
What to Avoid in Your Cleaning Arsenal
Start by checking the bottles already in your home. Some common cleaners are silent killers for your car’s interior.
- Ammonia: This is public enemy number one for your interior. It will permanently haze and degrade plastic dashboards and trim. On your infotainment screen or navigation unit, it strips away anti-glare and anti-fingerprint coatings. For tinted windows, ammonia causes a permanent, purplish discoloration. You’ll smell that sharp odor for days.
- Bleach or Chlorine-Based Cleaners: These are far too aggressive. They will bleach color from fabrics and vinyl. On leather, especially the coated kind in most cars, they strip away protective dyes and finishes, leaving the material dry and prone to cracking.
- Abrasive Scrubbers or Powders: Steel wool, stiff-bristled brushes, or scouring powders are for pots, not cars. They will leave microscratches on every surface. On clear plastic instrument clusters, they create a fog of swirls you can never fully remove. On leather, they scratch the protective topcoat.
- Silicone-Heavy Dressings and “Shine” Products: This one tricks people. That greasy, shiny spray that makes tires and dashboards look “wet” is usually loaded with cheap silicones. It attracts dust like a magnet. More critically, it creates a slippery, dangerous film on your steering wheel, shift knob, and pedals. Over time, some silicones can actually dry out the vinyl they claim to protect.
The Hidden Damage of Strong Solvents
You might think a powerful cleaner that cuts through grime fast is the best tool. For car interiors, that power backfires. Many all-purpose cleaners or degreasers contain strong solvents like acetone or alcohols. To tackle greasy car parts, use a dedicated car parts degreaser rather than a generic cleaner. These products are formulated to lift grease without harsh solvents that could damage finishes.
These solvents don’t clean. They dissolve. On vinyl, plastic, and modern synthetic leathers, they strip away the plasticizers. These are the chemicals that keep the material flexible and soft.
Repeated use of harsh solvents leaves interior materials dry, faded, and brittle. I see it on older cars all the time. The door panel armrest is the first to crack because it’s cleaned most often. The material loses its flexibility and simply splits under normal pressure. Restoring that is a repair, not a detail.
My Honda Odyssey’s “Vegan Leather” seats are a perfect example. A strong solvent would attack the polyurethane coating, leaving them sticky and prone to peeling. A pH-balanced interior cleaner lifts the dirt without attacking the material itself.
Choosing Safer, Smarter Formulas
The goal is effective cleaning without the collateral damage. This is where pH-balanced, non-toxic formulas become non-negotiable, especially in your car’s cabin.
Your car is a confined space. When you spray a cleaner, those aerosols don’t just vanish. You breathe them in. Your kids in the back seat breathe them in. A non-toxic, low-volatile organic compound (VOC) formula protects your health as much as your car’s surfaces.
Look for interior-specific cleaners. A good interior cleaner for plastics, vinyl, and synthetic leather should have a neutral pH (around 7). It cleans with surfactants, not corrosive chemicals. For disinfecting, seek out products specifically designed for automotive interiors that use safer agents like citric acid or hydrogen peroxide.
Always test any new product in a small, inconspicuous area first, like the back of a seat or a lower door trim piece. Wait a few minutes. Check for any discoloration or texture change. This simple step has saved me from several disasters.
For glass, use an ammonia-free cleaner. For a natural sheen on dashboards and trim, use a water-based protectant. It gives a rich, matte finish that looks new and won’t make your steering wheel slippery. The difference in feel and safety is immediate.
The Right Order of Operations: A Step-by-Step Protocol
You can have the best products in the world, but if you use them in the wrong order, you will fight yourself. You will re-dirty areas you just cleaned. It is frustrating and wastes time. Follow this sequence every single time. It works for a quick refresh on my Model 3 and a full assault on the kid-hauling Odyssey.
1. Remove Trash & Debris
Start with the obvious. Open all doors, the trunk, and the glove box. Pull out every piece of trash, old receipts, forgotten toys, and empty coffee cups. Do this first. It clears your workspace and lets you see the real dirt hiding underneath. I keep a small trash bag right next to the car for this. You are not cleaning around garbage.
2. Pre-Vacuum Loose Dirt
Now, take your vacuum and get all the loose stuff. Crumbs, sand, leaves, that gritty dust on the mats. Do not use any liquids yet. Vacuuming dry debris now prevents you from turning it into mud or paste later when surfaces get wet. Use crevice tools to get between seats and consoles. Pull floor mats out and vacuum them separately on the ground. For my F-150, this step removes 80% of the interior dirt before I even touch a cleaner.
3. Clean Hard Surfaces (Top to Bottom)
Dust falls down. Always clean from the highest point to the lowest. Start with the headliner, then visors, then dash, then doors, then console, then lower plastics.
- Dust First: Use a soft, dry microfiber to gently wipe down the headliner and dash. A fluffy towel works best to trap dust without smearing it.
- Clean Second: For grimy spots, use a dedicated interior cleaner or diluted All-Purpose Cleaner (APC) on a separate microfiber. Spray the towel, not the surface directly, especially near vents and electronics.
- Focus on high-touch zones: steering wheel, shifter, touchscreens, and door handles. For sticky cupholders, I sometimes use a soft brush to agitate the cleaner.
Cleaning top-down ensures any drips or dislodged dirt falls onto a dirty area you haven’t cleaned yet, not onto a spotless seat.
4. Clean Upholstery & Carpets
With hard surfaces done, move to fabrics and leather. Identify your material. My BMW’s leather, the Odyssey’s cloth, and the Tesla’s vegan leather all need different approaches.
- For Leather & Vinyl: Use a pH-balanced leather cleaner. Wipe with grain. A stiff brush can help clean perforated seats.
- For Cloth & Synthetic Suede (Alcantara): Use a dedicated fabric cleaner. Agitate with a soft brush to loosen stains. For my kid’s spilled milk, I agitate, let it sit for a minute, then blot.
- For Stains: Pretreat with your chosen cleaner. Do not rub. Blot from the outside in to prevent the stain from spreading.
5. Deep Vacuum & Extract
Your upholstery cleaning loosened more debris. Now you need to remove it and any leftover moisture. This is the second vacuum pass, and it is critical.
- Vacuum the seats and carpets thoroughly. Use the brush attachment to lift fibers.
- For deep-set dirt or stains in carpets, use an extractor or a wet/dry vac. I use a portable extractor on the Odyssey. It pulls the dirty water and cleaner back out, leaving the fabric clean and nearly dry. Extraction is the single best way to truly clean cloth seats and carpets, not just cover dirt with foam.
6. Protect & Dress
This is the final, rewarding step. Protection locks in your hard work.
- Leather & Vinyl: Apply a protectant. I prefer a matte finish silicone or ceramic-based dressing. It should look natural, not greasy. Avoid shiny dressings on dashboards; they cause glare.
- Plastics & Trim: Use the same protectant. It repels dust and makes the next clean easier.
- Carpets & Cloth: Consider a fabric protector spray. It creates an invisible barrier against future spills, giving you time to blot them up. Test in an inconspicuous area first.
Do not skip protection. On my daily drivers, a good dressing is what makes grime wipe right off the dash a month from now.
Technique: How to Clean Vinyl, Plastic, and Dashboard Surfaces
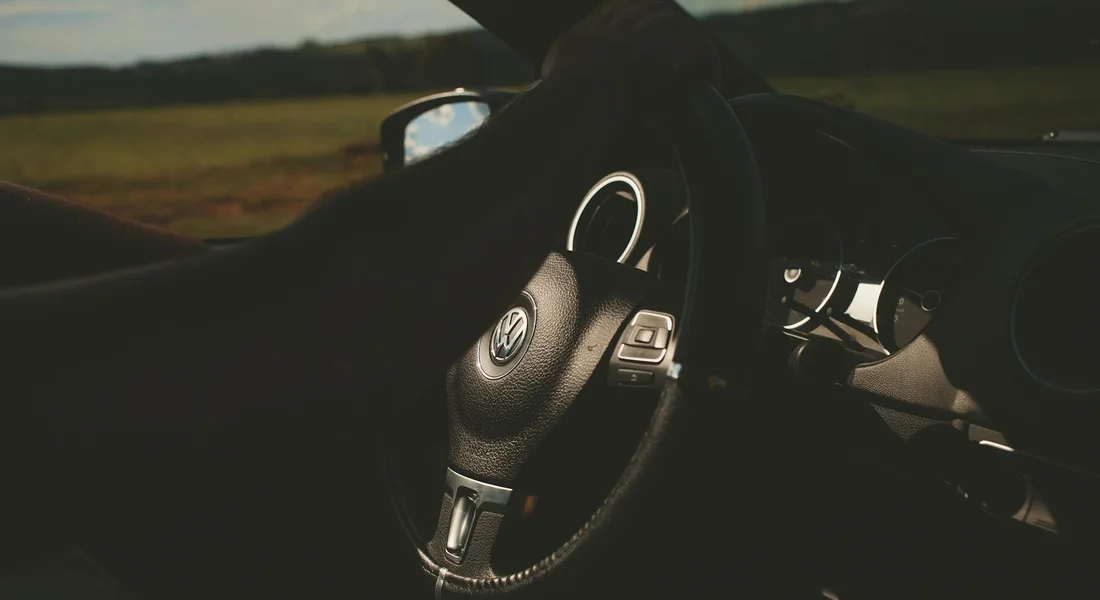
Cleaning a dashboard seems simple. You spray something on and wipe it off. I used to do it that way. I learned the hard way why you should not.
The cleaner drips down into the vents. It seeps into the seam where the dashboard meets the windshield. That overspray leaves a faint, sticky film on the glass that’s a nightmare to remove. The single best habit you can build is to spray your cleaner onto your microfiber towel first, then wipe the surface. You control the product completely.
My 2016 BMW 3 Series, the “Swirl Magnet,” taught me this. Its jet black dashboard shows every fingerprint and collects dust like a magnet. Spraying directly created streaks and hazy residues in the textured plastic. Now, I mist a pH-neutral interior cleaner onto a clean, plush towel. I fold the towel into quarters so I always use a fresh, clean section.
I work in small, overlapping sections, applying light pressure. For grained plastic or vinyl, I sometimes use a soft-bristled detailing brush to scrub the towel into the texture before wiping away the loosened dirt. This gets the dust out of the tiny grooves without scratching.
The Right Way to Use a Protectant
After cleaning, you might want to add a protectant. This is where most people create that awful, shiny, greasy look you see in old car commercials. You do not want that.
Modern protectants are not supposed to make surfaces glossy. They are meant to replenish lost oils and provide a UV shield with a matte, factory-satin finish. Apply protectant exactly like your cleaner: spray it sparingly onto a separate, dry microfiber towel, then wipe it evenly across the surface. Buff off any excess immediately with a clean, dry side of the towel. On the BMW’s dashboard, this leaves a clean, dark black finish that looks new, not slippery.
What Can I Clean My Car Interior With for Sticky Buttons and Cup Holders?
Sticky buttons and gummy cup holders are the universal sign of a lived-in car. My Honda Odyssey, the “Kid Hauler,” is a masterclass in this. The solution is not a stronger chemical. It is the right tool for agitation.
For most of this grime, a solid all-purpose cleaner and a soft detailing brush are all you need. Do not pour cleaner into the cup holder. You will just make a soup of old soda and coffee. Here is the method:
- Spray a small amount of your all-purpose cleaner directly onto the bristles of a soft detailing brush.
- Gently agitate the sticky area. The brush will get into the ridges around buttons and the deep corners of the cup holder.
- Wipe away the now-liquefied gunk with a microfiber towel. You may need to repeat this once or twice for really baked-on mess.
For the truly ancient, crystallized spills that brushing alone will not lift, a steamer is the ultimate tool. The heat from a detailing steamer melts away old residue instantly, often without any chemical at all. I use it on the Odyssey’s cup holders once a season. I hold the steam nozzle a few inches away, let the heat work for ten seconds, and then wipe. It comes out looking brand new. Always check your car’s manual first, as intense, direct steam on some sensitive electronic buttons is not advised.
Technique: How to Clean Fabric Upholstery and Carpets
Fabric seats and floor mats take the most punishment. Dirt gets ground in. Spills happen. The goal is to lift that grime out without forcing it deeper into the foam underneath. I treat every fabric surface in a car with the same basic, three-step method.
The Three-Step Fabric Cleaning Method
This process works for seats, carpets, headliners, and door panels. Do not skip steps.
- Dry Removal (Vacuum): You must remove all loose, dry soil first. If you add moisture to dirt, you make mud. Use a stiff brush attachment or a dedicated upholstery tool to agitate the fibers and pull up embedded sand and crumbs. Get into every seam and crevice.
- Chemical Application & Agitation: Apply a dedicated fabric or upholstery cleaner. Do not use dish soap or all-purpose cleaners; they often leave a sticky residue that attracts more dirt. Spray lightly, let it dwell for a minute, then agitate with a soft-bristled detailing brush. This breaks the bond between the stain and the fiber.
- Mechanical Extraction (The Most Important Step): This is where you remove the dissolved soil. Use a wet/dry vacuum with an extraction wand or, for smaller jobs, a clean microfiber towel dampened with plain water. Blot and lift. The key is to pull the dirty moisture back out.
Your success depends on removing the dirty water you just put in.
Case Study: The Odyssey’s Milk-Stained Seat
My grey Honda Odyssey is the kid hauler. A spilled sippy cup of whole milk once baked into the second-row seat for a full afternoon in the summer sun. The smell was sour and the stain was a yellowish, waxy ring. Here is exactly how I fixed it.
- I vacuumed the entire seat, focusing on the crusty stain area.
- I pre-treated the stain with an enzyme-based fabric cleaner designed for biological messes. Enzymes break down proteins. I let it soak for 10 minutes.
- Using a soft brush, I gently agitated the area, turning the waxy residue into a liquid again.
- I used my extractor. I passed over the stain slowly, holding the vacuum on the spot until no more moisture was pulled out. I repeated the clean-rinse-extract cycle two more times with plain water to ensure all cleaner and milk residue was gone.
- I rolled the windows down and let a fan blow on the seat for a few hours to ensure it dried quickly and completely.
The enzyme cleaner targeted the organic stain, and the thorough extraction prevented any lingering smell. A general cleaner would have masked the odor temporarily, but the enzymes eliminated the source.
The Critical Warning: Avoid the Soak
The biggest mistake I see is over-wetting. When you fully saturate fabric and the foam cushion below, you create a perfect environment for mold and mildew. It can take days or even weeks to dry in the core, leading to a musty smell that is very difficult to remove.
Work in small sections. Clean one seat cushion at a time, extract it fully, and move on. If you are just using a spray and towels, your towel should be damp, not soaking wet. Wring it out thoroughly. Your fabric should be only slightly damp to the touch when you are done, not wet.
Proper drying is part of the cleaning process, not an afterthought. Use air movement. Open doors, use a fan, or in dry climates, park in the sun with windows cracked. If the interior feels humid the next day, you used too much moisture.
Technique: How to Clean Leather and “Vegan Leather” (Synthetic)
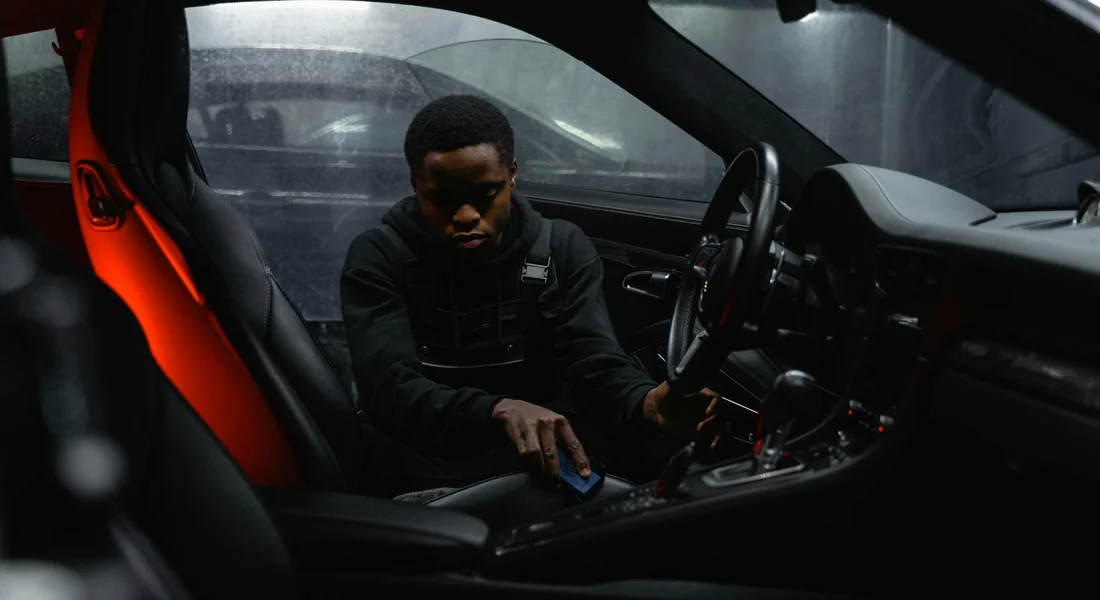
Cleaning your seats seems simple, but using the wrong product can cause permanent damage. The first step is knowing what you are actually cleaning. Modern car “leather” is almost always a coated, painted surface.
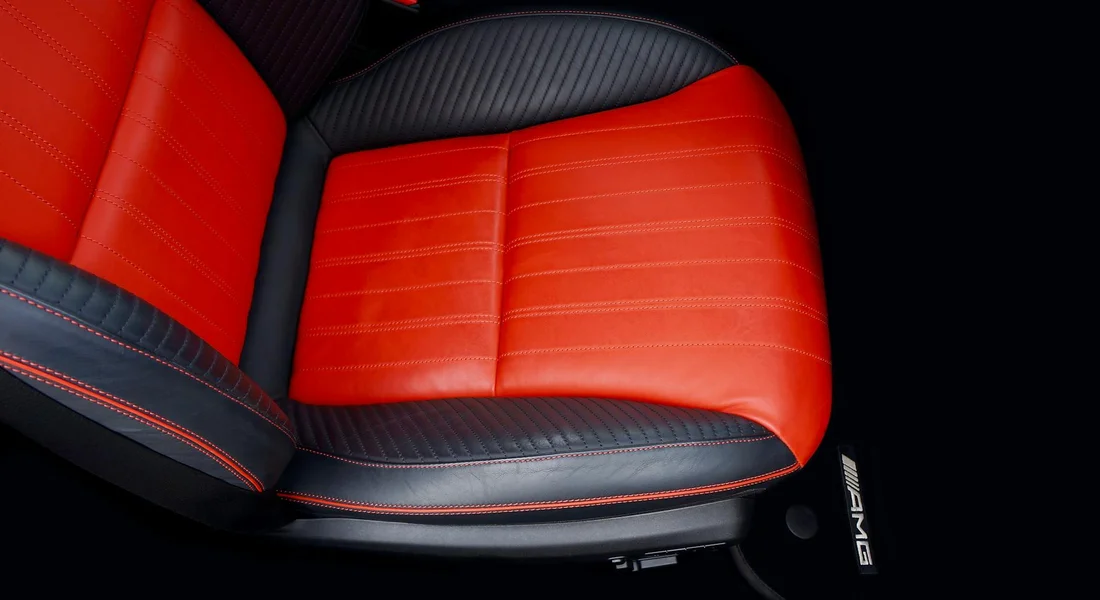
My Porsche’s red seats are a good example of premium, aniline leather. It feels warm and supple. This is one of the few true leathers left that actually absorbs a conditioner. My Tesla’s white “vegan leather” is the opposite. It’s a synthetic polyurethane. It feels cool and uniform to the touch. Treating it like real leather will only make it greasy and attract more dirt. Knowing how to clean stains leather car seats is a practical next step. Quick, proper cleanup prevents stains from setting and keeps both surfaces looking their best.
For the vast majority of cars-including most luxury brands-you have coated leather, which is just a plastic top layer over a leather base. Your goal is to clean the plastic coating, not feed the leather underneath.
Cleaning Coated and Synthetic Surfaces (Tesla, Honda, most BMWs, etc.)
This process works for the Tesla’s seats, the Honda’s captains chairs, and the “leather” in my F-150. You are cleaning a plastic surface.
- Vacuum thoroughly first. Grit trapped in seams scratches the material when you start wiping.
- Use a dedicated interior cleaner or a dilute all-purpose cleaner (like 10:1). Spray it directly onto a soft microfiber towel, not the seat. A soaked seat can let moisture seep into seams and cause issues.
- Wipe the surface using moderate pressure. For textured grains, use a soft-bristled detail brush (like a boar’s hair brush) to agitate the cleaner into the crevices.
- Immediately follow with a second, damp microfiber towel to wipe away any cleaner residue. Buff dry with a third, clean towel.
That’s it. No conditioner needed. A clean, matte finish is what you want. If you want a slight sheen, a very light spritz of a water-based interior protectant on your towel can add it. Avoid silicone-based “shine” products. They create a sticky film that attracts dust and makes surfaces slippery.
Cleaning and Conditioning Real, Uncoated Leather (Vintage Cars, some high-end options)
This is for leather like in my older Miata’s steering wheel or the Porsche’s seats. You can tell it’s uncoated because a drop of water will darken the spot as it’s absorbed.
- Clean using the same towel-method as above with a leather-specific cleaner.
- After cleaning and fully drying, apply a light, non-greasy leather conditioner. I prefer lotion-like conditioners over heavy oils. Again, apply to the towel first, then work it into the leather in a circular motion.
- Let it absorb for 15-20 minutes, then buff off any excess with a clean towel. The seat should feel nourished, not slick or oily.
Using a heavy oil or conditioner on a coated seat is a classic mistake; it sits on top of the plastic coating, never absorbs, and just collects grime. If your seats ever feel strangely sticky long after cleaning, this is usually the cause. You’ll need to use an interior cleaner and several towels to strip that residue off.
A Quick Test
Unsure what you have? Find an inconspicuous spot, like the back side of a seat bolster. Put a tiny drop of water on it. If the water beads up and sits on top, it’s coated or synthetic. Clean it only. If the water darkens the leather and sinks in slightly, it’s porous. Clean and condition it.
Troubleshooting Common Interior Disasters
You will face these problems. Every car owner does. The goal is not to panic, but to act quickly and correctly.
Ink or Crayon on Plastic & Vinyl
This happened in my Honda Odyssey. A red crayon melted on the center console on a hot day. The wax bonds to the plastic. Your first move is always to test your cleaner on an inconspicuous spot, like inside a door pocket, to ensure it won’t damage or discolor the surface. For standard ballpoint ink or fresh crayon, a quality all-purpose cleaner diluted 10:1 on a microfiber towel often works. Rub gently.
For stubborn wax-based crayon, you need to re-melt it slightly to lift it. I use a hair dryer on a low, warm setting. Hold it a few inches away and warm the wax for 10-15 seconds. Do not overheat the plastic. Immediately wipe the softened wax away with a dry microfiber towel. Any remaining color stain can be treated with a dedicated stain remover for plastics.
Vomit Odor Elimination
This is a health hazard. Put on disposable gloves first. Remove any solid matter with bags or paper towels. Your mission is two-fold: clean the stain and neutralize the odor-causing bacteria.
- Extract thoroughly. Use a carpet extractor or a wet/dry vacuum with an upholstery tool. Flush the area with cool water and an enzyme-based cleaner designed for biological waste. These break down the proteins that cause the smell. Extract until the water runs clear.
- Deodorize aggressively. After extraction, I treat the area with an odor-neutralizing spray, not a perfume that just masks it. For severe cases in my shop van, I’ve used a small ozone generator. Ozone is a powerful oxidizer that destroys odor molecules, but you must follow safety protocols: no people or pets in the car during treatment, and air it out completely afterward.
Coffee Stain on Fabric Seats or Carpet
Blot, do not rub. Rubbing grinds the stain deeper. Use a clean, absorbent towel to soak up as much liquid as possible. Mix a solution of warm water and a few drops of dish soap (like Dawn). Dab it onto the stain with another towel, working from the outside in to prevent a ring. Blot dry. For old or set-in stains, a fabric cleaner with a soft brush is needed. Agitate gently, then extract or blot the moisture out.
Hazy Film on Interior Windows
That greasy, hard-to-clean haze is often plasticizers off-gassing from your dashboard and vinyl, especially in new cars or during summer heat. Standard glass cleaner and paper towels will smear it. This residue can also settle on car windows. The next steps cover removing the film and cleaning car windows. You must first remove the oily film with an all-purpose cleaner, then follow with glass cleaner for a streak-free finish.
- Spray a mild all-purpose cleaner onto a clean microfiber towel. Wipe the window thoroughly. You will see the grime transfer to the towel.
- Take a second, dry microfiber towel and buff the window dry.
- Now, use your preferred automotive glass cleaner and a separate, clean glass towel for a final polish.
Sometimes, you open the door and know it’s beyond you. The stain is the size of a dinner plate, the odor has been baked in for months, or a previous cleaner damaged the dye in the seat. When a stain has physically altered the material or a pervasive odor remains after multiple treatments, it’s time to search for “car interior cleaners near me.” A professional with industrial-grade extractors, steam cleaners, and ozone machines has tools you likely don’t.
Should I Hire a Pro? Understanding “Car Interior Cleaners Near Me Prices”
Calling a pro is smart. Pricing isn’t a mystery. It’s based on labor, materials, and the size of the problem.
What changes the price?
- Vehicle Size: Cleaning a crew-cab pickup truck takes longer than a coupe. More square footage means more cost.
- Condition Severity: A light dusting versus ground-in mud and dog hair. Severe pet hair removal is a separate, time-intensive charge.
- Fabric Type: Delicate cloth, stain-resistant synthetic, or fragile vintage leather all require different processes and products.
- Add-on Services: Odor removal, fabric protection application, or headliner cleaning add to the base price.
To give you a rough idea, in a typical suburban area like The Woodlands or Hilliard OH, a basic interior clean for a sedan might start around $150. This would cover vacuuming, wiping down all surfaces, and cleaning windows. A full interior detail with deep carpet and upholstery extraction, thorough plastic cleaning, and leather conditioning could easily range from $250 to $400 or more for a large SUV in poor condition.
These are estimates. Always get a written quote.
Vetting a local detailer is simple. Ask direct questions.
- “What is your process for removing a coffee stain from a seat?” Listen for steps: extraction, cleaning, rinsing.
- “What type of products do you use?” Be wary of anyone who says “heavy-duty degreasers” for interiors; they should mention pH-balanced cleaners for fabrics and surfaces.
- “Do you use a carpet extractor or a steam cleaner?” Proper tools matter. A guy with only a spray bottle and a shop vac cannot perform a deep clean.
- “Can you show me before/after photos of similar work?” A confident professional will have a portfolio.
You are paying for their expertise and equipment. Make sure they have both.
Maintaining a Clean Interior: The Weekly Wipe-Down
I understand the struggle. You finish a long day, and the car feels like a lost cause. Crumbs gather, dust settles, and a faint smell of old coffee hangs in the air. You think you need a whole afternoon to fix it. You do not. A tiny habit changes everything.
With my 2019 Honda Odyssey, the kid hauler, I learned this fast. Spilled juice and cracker dust are weekly events. If I let it go, it becomes a science project. So, I built a five minute routine. It stops the mess from ever taking root.
Here is how you do it. Pick a trigger, like after you get gas or before your first Monday drive. Keep it simple and swift.
- Clear the debris. Open the doors and gather any trash, receipts, or empty bottles. Drop them in a bag. This takes thirty seconds and lets you see the real surfaces.
- Wipe all touchpoints. Spray a little quick detailer on a microfiber towel, not directly on the car. Wipe the steering wheel, gear selector, door handles, and every button you press. Your hands leave oils that attract more dirt, so cleaning this area first makes the biggest difference.
- Glide over the big surfaces. Use the same towel to clean the dashboard, the top of the center console, and the door panels. One smooth pass lifts the dust. For touchscreens, a second dry microfiber towel buffs away streaks.
- Brush the crumbs. Use a small detailing brush on the seat seams, the cup holders, and around the seat controls. A few flicks dislodge what wiping misses. This prevents grit from grinding into fabrics.
- Shake the mats. Pull out the floor mats and give them a firm shake outside the car. It kicks out loose dirt and sand before it gets ground in under your shoes.
That is the whole routine. Five minutes. Maybe six if you had a messy week. This small weekly effort completely prevents the need for dramatic, deep cleanings every few months. The cabin stays fresh, and you never feel overwhelmed.
To make this foolproof, assemble a small kit and leave it in your garage or by your door. Mine sits on a shelf next to my workbench. You only need three reliable items.
- A bottle of interior quick detailer. Choose a pH neutral formula that works on plastics, vinyl, and leather. I avoid strong fragrances. A light, clean scent is best for family health.
- Two or three high quality microfiber towels. Use a plush, clean towel for wiping surfaces. Keep a second, softer towel for final buffing and glass. Good towels grab dirt instead of pushing it around, which is the secret to a fast clean.
- A soft bristle detailing brush. Get one with dense, gentle bristles. It is perfect for air vents, around window switches, and between seat stitches where grime hides.
With this kit ready, you have no barrier to starting. The ritual becomes automatic. You will notice a change in how your car feels almost immediately.
When you slide into the driver’s seat after your weekly wipe, you will smell the clean. Not a fake pine scent, but the absence of old odors. You will feel the smooth, not sticky, steering wheel. This is not just about appearance, it is about creating a safe, healthy environment for your passengers, especially children. You remove allergens and germs regularly. I feel a quiet pride every time I buckle my kids into our clean Odyssey. It is a small gift to your family and to yourself.
Final Thoughts on Interior Care
The most important rule is to match your cleaning product to your car’s specific material and to always start with the gentlest method first. Your best tool is your own sense of touch and sight—if a surface feels dry, use a conditioner; if a cleaner leaves a residue, you need a different one. To guide your choices, explore the best car cleaning methods, tools, and products. This helps you select the right supplies for each material and finish.
Skipping these steps can lead to faded plastics, cracked leather, and a cabin that looks more worn than it should.
Related Guides and Information
- Best Car Interior Cleaners for 2025, Tested
- r/Detailing on Reddit: What is the best interior car cleaning solution in Walmart/Autozone?
- Interior Cleaner & Detailer Shoot-Out!
- Car Interior Cleaning Products | Chemical Guys
Max Gunther
Max is an automotive enthusiast having worked as a car mechanical and in interior detailing service for over 25 years. He is very experienced in giving your old car, a new fresh vibe. He has detailed many cars and removed very tough smells and stains from all kinds of cars and models, always ensuring that his work and advice helps his customers. He brings his first hand experience to his blog AutoDetailPedia, to help readers breath new life into their car interiors.