How Do You Wash a Ceramic Coated Car Without Damaging the Coating?
That slick, hydrophobic shine on your ceramic coated car is a big investment, and washing it wrong can strip away protection and introduce scratches. I get it-I’ve worried about the same thing with my own coated vehicles.
We will cover the essential pre-wash soak, selecting a truly pH-neutral shampoo, the safe two-bucket wash technique, and perfect drying to prevent spots.
Wash it incorrectly, and you will grind dirt into the coating, creating permanent swirl marks that dull your finish and ruin its self-cleaning ability.
Key Takeaways: Your 30-Second Ceramic Coating Wash Plan
The goal is simple. You must clean the car without scratching its slick, hard skin.
Your gentle washing technique is infinitely more important than any specific brand of soap or towel you buy.
Follow three core principles every single time.
- Use a dedicated, pH-neutral car wash shampoo.
- Use only clean, high-quality microfiber towels and wash mitts.
- Dry the vehicle thoroughly and immediately with a clean drying towel.
This method protects the coating on every vehicle I own. It works on my daily-driven F-150, my kid’s Odyssey, and my garage-kept Porsche. The rules do not change.
Why Your Ceramic Coating Demands a Different Wash Routine
A ceramic coating is not a soft wax or sealant you can feel with your fingernail. It is a cured, glass-like layer fused to your clear coat—a step above traditional wax or sealants.
Think of it like a high-end non-stick pan. Food slides right off, but you would never scrub it with steel wool. The coating makes dirt release easily, but abrasive tools will scratch it permanently.
Improper washing is the fastest way to ruin a coated car’s look. You create fine scratches called swirls. They catch the light and look like a spiderweb in the sun.
On my Jet Black BMW, a single wash with a dirty sponge made the entire hood look hazy and scratched under the shop lights. Those scratches were in the coating itself. Fixing them meant carefully polishing, which removes a tiny bit of the coating’s thickness. I do not want to do that often.
Remember this. The coating’s job is to repel water and dirt. Your only job is to lift that dirt away without dragging it across the surface. Everything in this guide is about that single idea.
Building Your Wash Kit: The Right Tools for the Job
Think of this like surgery. You need the right, clean instruments. Using the wrong tool on your coated car is like using a chainsaw for stitches. This list is non-negotiable.
- Shampoo: You must use a pH-neutral, ceramic-coating-safe formula. I look for brands that state “coating-safe” or “SiO2 infused” right on the bottle. A quick search for “ceramic coating wash soap reviews” will show you consistent winners. These soaps clean without degrading the coating’s chemical bond. On my black BMW, I use a shampoo that leaves a slick, glossy feel, not a squeaky, stripped one.
- Buckets: Two buckets are the law. Each one gets a Grit Guard insert at the bottom. This plastic grate traps dirt you rinse off your mitt. One bucket is for your clean shampoo solution. The other is just rinse water. You dunk your dirty mitt in the rinse bucket first, scrubbing it against the Grit Guard to release grime, before going back to the clean soap. It stops you from painting your car with dirt.
- Wash Mitt: A high-pile microfiber or a soft lambswool mitt. The long fibers cradle dirt away from the paint. I have a lambswool mitt for my Porsche’s clean surfaces and a dedicated microfiber mitt for the lower, dirtier parts of my truck. You never, ever use a sponge. A sponge grinds everything it picks up directly into your clear coat.
- Drying Towels: Plush, clean microfiber only. Look for a GSM (grams per square meter) weight of 500 or higher. A thick, thirsty towel like this soaks up water with just a gentle glide. I keep a stack of them, only used for drying, and they get washed after every use. A scratch often happens during drying, not washing.
- Pressure Washer or Hose: You need strong water pressure for the initial rinse. This is about force, not touch. A pressure washer on a wide-angle tip or a good hose nozzle blasts off loose sand and road film. This step removes 80% of the dirt before you even touch the car. It is your most important defense against swirls.
- Spray Bottle: For a pre-wash or “snow foam” application. I fill one with my coating-safe shampoo diluted with water. I spray this on the dry, dirty car before the rinse. It helps lubricate and start breaking down the grime. It is a simple step that makes the whole wash safer and easier.
- Wheel Brush: A dedicated, soft-bristled brush. Wheel dust is abrasive. A separate brush ensures you never introduce brake dust to your paint wash mitt. I use a long-handled brush for the spokes and a small, soft brush for the lug nut barrels. This brush only touches wheels.
What Not to Use: The Quick Ban List
Your kitchen and garage are full of enemies for a ceramic coating. Using these will cost you time, money, and that beautiful hydrophobic shine.
- Dish Soap (Like Dawn): This is a degreaser. Its job is to cut through oil and wax. Your ceramic coating is a sophisticated, cured layer of SiO2 (silicon dioxide). Dish soap will slowly but surely degrade it, making water bead less and reducing its lifespan. It makes the paint feel dry and dull. I learned this the hard way years ago.
- All-Purpose Cleaners or Degreasers: These are far too harsh and alkaline. They are designed for engines and tires, not your car’s delicate, coated finish. They will stain and damage the coating.
- Old Terry Cloth Towels or Shop Rags: These fabrics are woven like cheese graters for your clear coat. They trap hard, gritty particles and drag them across the surface. That is how you put fine scratches, called micro-marring, into a perfect finish.
- Silicone-Based “Quick Detail” Sprays: Many cheap detail sprays are loaded with silicones that create a fake, short-lived shine. They can leave a residue that builds up over time, making the surface gummy and attracting more dust. They do not play well with a true ceramic coating. Use a dedicated ceramic coating “booster” spray instead, and only as directed.
Stick to the simple, purpose-made tools and your coating will reward you with years of easy cleaning and deep gloss. This is not about buying the most expensive gear. It is about using the right gear. My kid-hauler Odyssey gets the same careful wash kit as my 911. The process protects the investment in the coating on every single car.
The Non-Negotiable Order of Operations
You do not improvise here. You follow these steps. Every single time. Your ceramic coating is a hard, slick shield, but it can still get scratched if you rub dirt into it. This routine minimizes contact and risk, helping maintain your ceramic coating over time.
1. The Initial Rinse
Do not touch the car yet. Your goal is to blast off loose dirt, sand, and pollen. Use a hose with a gentle fan spray nozzle, not a pinpoint jet that could force grit under pressure.
Start at the roof and work down. You want the dirty water to flow downward over areas you haven’t rinsed yet. On my black BMW, I can see a layer of dust just slide off. It is satisfying.
Missing this step means your wash mitt will start its life pushing around abrasive particles, which is how you create fine scratches even on a coated car.
2. Wheels and Tires First, Always
Your wheels are the dirtiest part of the car. They have brake dust, road tar, and greasy grime. You must clean them with dedicated tools you will never use on the paint.
- Use a separate bucket, brush, and mitts just for wheels.
- Spray a dedicated wheel cleaner. For my Porsche’s alloy wheels, I use a non-acidic, iron-removing spray. It turns purple as it dissolves the metallic brake dust.
- Scrub with a soft brush, then rinse thoroughly. Any splashback from this step will hit dirty lower panels, not clean paint.
This isolation is critical. Contaminating your paint wash bucket with brake dust is a surefire way to inflict swirls.
3. The Pre-Wash Foam Stage
This is where ceramic coatings shine. Apply a thick, clinging foam from a sprayer or foam cannon. The soap should be formulated for coated cars, meaning it is pH-neutral and free of harsh detergents or waxes.
Let the foam dwell and soak for three to five minutes. Watch it work. It gently lifts and encapsulates the remaining dirt, pulling it away from the super-slick coating. On my white Tesla, you can see lines of dirt slide down with the foam.
This step dramatically reduces the amount of dirt you will need to physically wipe away, which is the single biggest factor in preserving any finish, ceramic or not.
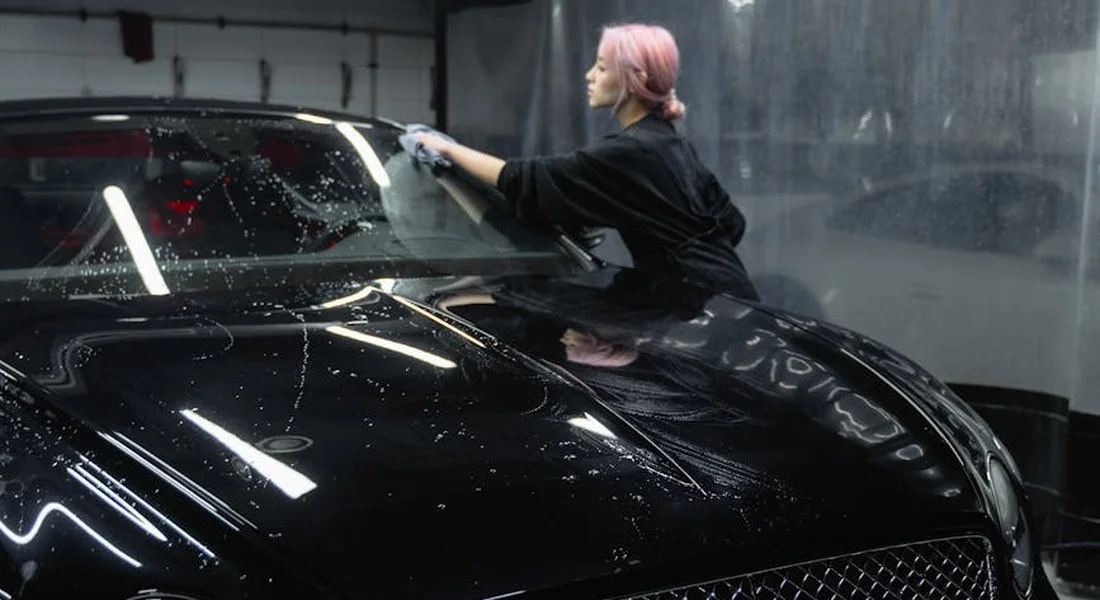
4. The Contact Wash: Two Buckets, One Mitt
Now you can touch the car. Use the two-bucket method. One bucket has your fresh, soapy wash solution. The other is your rinse bucket, filled with clean water and a grit guard at the bottom.
- Dip your clean, soft microfiber wash mitt into the soap bucket.
- Wash a single panel using straight-line motions, not circles. Start high on the roof or hood.
- Before dipping the mitt back into the soap, rinse it thoroughly in the rinse bucket. Scrub the mitt against the grit guard to release trapped dirt.
- Only then, reload with fresh soap from the first bucket and move to the next section.
This ritual prevents you from painting your car with dirt. On my kid-hauler Odyssey, I can do the whole van and the rinse water is still mostly clear because the foam and technique did the heavy lifting.
5. The Final Rinse
Use your hose, again with a gentle fan spray. Start at the top and flood the panels. The ceramic coating will cause the water to bead and sheet off dramatically.
Your goal is to remove all soap residue. Any leftover soap can cause streaking or hazing as it dries. Pay special attention to crevices like door handles, mirrors, and around the trunk where water likes to hide.
6. Drying is Not Optional
Even on a ceramic coated car, water spots are a real threat if tap water dries on the surface. You must dry it completely to prevent water spots on car paint.
Use a large, clean, plush microfiber drying towel. I prefer a damp towel for the first pass. Lightly blot and glide the towel over the surface. Do not scrub. The coating’s slickness makes drying easy. For best results, microfiber chamois synthetic drying towels can finish the job quickly with a streak-free shine. Follow up with a second dry towel for any remaining moisture.
Leaving the car to air dry is inviting mineral deposits to etch into your coating, leaving dull spots you will need to polish out. A few minutes of drying saves hours of correction later.
Executing the Gentle Touch Wash Method
This is where your patience pays off. The goal is to glide dirt off the coating without grinding it in. Think of it like polishing a pair of eyeglasses, not scrubbing a floor.
Always pick a spot in the shade or wash in the early morning or late evening. Washing in direct sun is a fast track to trouble. The heat bakes soap and water onto the paint before you can rinse or dry it, creating immediate water spots that can etch into the coating itself.
Your Two-Bucket Security System
This method is non-negotiable for a coated car. My black BMW 3 Series, the ultimate swirl magnet, taught me this the hard way.
- Bucket One (Soap): Fill with cool water and your recommended shampoo. Use the measured amount. More soap doesn’t mean more cleaning, it just means more residue.
- Bucket Two (Rinse): Fill with clean, cool water. This is your mitt’s cleaning station. Drop a Grit Guard insert into the bottom. That plastic grid traps heavy dirt particles at the bottom so you aren’t just swirling them back into your mitt.
The Panel-by-Panel Dance
Start at the roof and work your way down. Dirt flows downward, so you want to clean the cleanest area first and the dirtiest last.
- Soak your clean microfiber wash mitt in the soap bucket. Wring it out so it’s wet, not dripping.
- Apply it to one panel, say, the roof or a door. Use light, overlapping strokes. Let the lubricity of the soap do the work. You should not be pressing down. If you hear a grinding sound, stop. Your mitt is dirty.
- Before moving to the next panel, rinse the mitt in the clean water bucket. Swirl it across the Grit Guard. Watch the dirt sink. Wring it out. This one habit prevents 90% of wash-induced scratches.
- Reload with soapy water from Bucket One and move to the next section.
Work in small, manageable sections. A door, a fender, half the hood. Rinse the panel with your hose or pressure washer as you go, or after every two panels, to prevent the soap from drying.
Drying: The Pat and Glide
Do not drag a dry or damp towel across the paint. Even with a coating, microscopic grit can still be present. Dragging creates fine lines.
Take your large, clean, plush drying towel. Lay it flat against a wet panel. Using an open hand, gently pat and glide the towel to absorb the water. Lift it, reposition, and repeat. You are blotting the car dry. On my Tesla’s flat front bumper, this technique is the only way to avoid picking up a stray contaminant and scratching that soft clear coat.
How to Dry Without Leaving a Single Water Spot
Even with a ceramic coating, water can spot. The solution is a drying aid. I keep a bottle of spray ceramic detailer in my drying routine for every car, especially my garage queen Porsche.
After the final rinse, while the car is still wet, mist your drying aid lightly onto a panel. One or two sprays per panel is plenty. Then, take your drying towel and blot it dry as described. The drying aid adds extra slickness and lubrication, helping the towel lift water without friction, and it leaves behind a fresh layer of protection and deep gloss. It makes drying easier and gives you that just-detailed pop every single time.
Now, the most common mistake. You think you’re done. You walk away. Ten minutes later, a drip line appears from a door handle or a tail light seam. Open every door, the trunk, and the fuel filler flap. Run the corner of your drying towel along every seam and gasket. Dry inside the door handles and around badges. This final check separates a good wash from a flawless one.
Can a Ceramic Coated Car Go Through a Car Wash? The Real Answer
I hear this question all the time. “Can I go through a car wash with ceramic coating?” People see that slick, water-beading surface and think it’s invincible. It’s not. The answer is layered, like the coating itself.
Are car washes bad for ceramic coating? For traditional automatic washes with spinning brushes or dangling cloth strips, the answer is a definitive yes, they are bad. Those materials are traps for every piece of grit, sand, and metal shaving from the thousand cars before yours. They will inflict swirl marks and fine scratches directly into your coating, muddying its perfect clarity. My black BMW, the “Swirl Magnet,” taught me this lesson the hard way long before it was coated.
The Touchless Car Wash Compromise
A touchless automatic wash, which uses only high-pressure water and spray jets, is the safer public option. There is no physical contact to cause scratches. But there is a hidden cost.
Most touchless systems rely on extremely strong, alkaline (high pH) soaps and chemical “drying agents” to blast off dirt without touching it. These harsh chemicals are fantastic at stripping grime, but over repeated visits, they can also slowly degrade your ceramic coating’s hydrophobic properties. The coating won’t peel off, but its slickness and beading will diminish faster. Should you ever decide to refresh, you may need to remove the coating to reset the surface. This removal is a separate step that prepares the surface for a new application.
How to Use a Touchless Wash If You Must
A DIY hand wash is always the gold standard. Life gets in the way sometimes. If you must use a touchless wash, follow these steps to minimize risk:
- Seek out a wash that advertises “pH-neutral” or “coating-safe” chemicals. Call and ask. It’s worth the extra drive.
- Choose the most basic rinse cycle. Avoid any package that includes “triple foam,” “shine protector,” or “ceramic wax spray.” These are often the chemical culprits.
- After the wash, dry the car immediately. Use a clean, plush drying towel. The spot-free rinse water is not perfect, and letting it air-dry will leave mineral deposits on your coating.
Think of a touchless wash as an occasional reset button for heavy salt or pollen, not a weekly maintenance plan. I’ll use one on my white Tesla in a pinch during bug season, but I follow it with a full detail at home soon after.
Professional “Coating Care” Services
In many cities, like Seattle or Washington, D.C., you can now find detail shops offering dedicated “ceramic coating maintenance” washes. These can be a great solution if you lack time or space. Regular maintenance helps preserve the coating’s gloss and protective layer, keeping your finish looking like new for longer. With the right care and products, you can extend the coating’s life and maintain its performance between professional visits.
The key is to vet their methods. Before you book, ask them:
- Do you use pH-neutral shampoo specifically for ceramic coatings?
- What is your wash process? (The answer should involve a foam cannon, the two-bucket method, and soft microfiber mitts).
- Do you use any brushes on the paint? (The answer must be no).
A true professional service will understand these questions and give you the right answers. They should care for your coated car with the same gentle precision you would use at home.
Dealing with Road Grime, Bug Splatter, and Bird Bombs
A ceramic coating sheds water and repels dirt, but it is not a force field. Contaminants still land on the paint. The difference is in how you remove them. The wrong method can grind dirt into the coating, creating fine scratches that ruin its clarity. The right method uses the coating’s slickness to your advantage.
Take my two daily drivers. The Tesla Model 3, with its flat, blunt front bumper, is a bug splatter magnet after any highway drive. The Ford F-150, riding higher and tackling back roads, gets coated in a fine, abrasive layer of road film and dried mud. Both test the coating’s release properties and my washing patience.
The Gentle Method for Fresh Contaminants
For a car with recent road film or fresh bugs, the goal is to lift the dirt away without touching it. I never take a wash mitt directly to a dirty, dry panel.
Instead, I pre-soak the entire vehicle with a layer of lubricating foam or a spray-on detailer to encapsulate and loosen the grime before any contact is made. This step is non-negotiable for a safe wash. This is especially important for road grime on car paint, which can cling and etch if not softened. A proper pre-soak helps lift this grime without rubbing it into the finish.
- For the F-150’s road film, I use a foam cannon to apply a thick, shaving cream-like layer of pH-neutral car shampoo. I let it dwell and slide down the panels for three to five minutes. This soaking action gently pulls the fine grit away from the coating’s surface.
- For the Tesla’s bug splatter, I often spot-treat the bumper and mirrors with a dedicated bug remover spray or a diluted all-purpose cleaner. I spray it on, wait sixty seconds, and watch the remains loosen. A gentle stream from the hose then rinses most of it away.
Only after this pre-soak and rinse do I proceed with the two-bucket contact wash. The dirt is already mostly gone, so my wash mitt just glides over the surface to collect anything leftover.
Handling Baked-On or Dried Debris
Life happens. A bird bomb lands on your hood during a workday, or bug guts bake on for a week during a road trip. Do not pick, scrape, or use your fingernail.
For dried, stuck-on contaminants, the safest tactic is to soak a plush microfiber towel in your wash solution and lay it flat over the area like a compress. This lets chemistry and time do the hard work.
- Fold a clean microfiber towel into quarters.
- Soak it thoroughly in your bucket of wash solution or a dedicated detail spray.
- Lay the wet towel directly over the bird dropping or cluster of baked bugs.
- Wait. Give it two or three minutes to rehydrate and soften the mess.
- Gently lift the towel, folding it to a clean side. You can now lightly wipe the area. The contaminant should smear away with almost no pressure.
If it’s still stuck, reapply the wet towel for another few minutes. Patience prevents scratches.
A Critical Warning About Time
It is a dangerous myth that a ceramic coating makes your paint immune to damage from contaminants. A coating is a sacrificial layer, and acidic substances like bird droppings or tree sap will attack it if given enough time.
While the coating may buy you a few extra hours, letting bird droppings or bug acids sit for days can absolutely etch into and stain the coating itself. You will see a permanent mark that no amount of washing can remove, requiring a professional to level and reapply the coating in that spot.
The coating makes maintenance washing easier and safer, but it does not eliminate the need for prompt cleaning. Dealing with a fresh “bomb” takes two minutes with a quick detailer. Letting it bake on for a week turns it into a thirty-minute project with risk. I learned this the hard way on my black BMW’s hood one summer. The stain is still there, under the ceramic, a permanent reminder.
Keeping That “Just Coated” Look Between Washes
Washing is just one part of keeping a ceramic coating healthy. Think of the coating as a hard, slick foundation. Your job is to keep that foundation clean so dirt cannot bond and wear it down. A perfect wash removes contaminants without adding scratches, preserving that deep, reflective gloss for years.
Refreshing the Slickness with a Spray Booster
Even the toughest ceramic coatings can see their water beading slowly fade over months of sun and washing. This is normal. To restore that incredible hydrophobic pop, I use a ceramic coating “booster” or “topper” spray every three to four months. It is not a new coating, but a quick spray-on, wipe-off product that layers over your existing coating. On my black BMW, this one step makes water jump off the hood like mercury. Apply it to a clean, dry car after your regular wash for the best results. It takes 20 minutes and makes the car look freshly detailed.
Handling Light Dust Without a Hose
For light dust or pollen between washes, a full bucket wash is overkill. I keep a bottle of rinseless or waterless wash solution and a few plush microfiber towels in my garage. On my Tesla, which seems to attract every speck of pollen in the county, I use this method weekly. Spray the product liberally onto a panel, gently glide a folded towel to lift the dirt, then immediately buff dry with a clean, soft towel. The lubricants in the solution safely encapsulate dust particles so they do not scratch. This is only for lightly soiled surfaces, never for caked-on mud or grit.
Your Towels Are Just as Important as Your Soap
Dirty towels will ruin your coating’s finish. I wash my detailing microfiber towels separately from any other laundry. Never use fabric softener or dryer sheets, as they coat the fibers and destroy their ability to absorb water and grip dirt. I use a free and clear detergent on a warm wash cycle, then tumble dry on low heat. Inspect towels after washing. If one picks up a piece of gravel or gets stained with grease, retire it to wheel or engine bay duty. The towels that touch your paint should be perfectly soft and clean.
What Belongs in a Ceramic Coating Maintenance Kit
People ask what they need for ongoing care. A proper kit is simple and prevents mistakes. Here is what I keep ready for my Porsche and all my coated vehicles.
- PH-Neutral Shampoo: The cornerstone. It cleans without stripping the coating.
- Two Buckets with Grit Guards: One for soapy water, one with clear water for rinsing your wash mitt. Non-negotiable.
- A High-Quality Wash Mitt: Lamb’s wool or a dense, plush microfiber mitt. It holds suds and glides over the coating.
- Drying Aid or Spray Booster: Used during drying to add lubricity and protection. This is your secret weapon for a streak-free finish.
- Premium Drying Towels: Large, waffle-weave or plush microfiber drying towels. You need at least two for a whole car.
- Rinseless Wash Concentrate: For quick touch-ups and safe cleaning in any season.
- Separate Wheel & Tire Brushes: Keep these tools away from your paint. Contaminated brushes are a common source of scratches.
With these items, you can handle 95 percent of all maintenance washes safely and effectively. It is an investment that pays off every time you see that perfect, slick shine in your driveway.
Your Ceramic Coating’s Best Friend
If you remember nothing else, let it be this: treat the coating like the fragile skin it is. Use gentle, lubricated washes with proper microfiber and neutral pH soap to keep it shedding water and dirt for years.
Skip these steps, and that expensive, glass-smooth finish will soon look hazy and scratched, just like my black BMW did before I learned better.
Research and Related Sources
- get-over-the-gimmick-of-ceramic-in-automatic-car-washes- …
- r/AutoDetailing on Reddit: Do automated car washes negate the benefit of Ceramic coating?
- Is Ceramic Coating At The Car Wash Worth It?
- Uncovering the Benefits of a Ceramic Car Wash | myQQ Blog
- Ceramic Coating Cary NC
- Ceramic Coating Services – WashQ Detailing
Max is an automotive enthusiast having worked as a car mechanical and in interior detailing service for over 25 years. He is very experienced in giving your old car, a new fresh vibe. He has detailed many cars and removed very tough smells and stains from all kinds of cars and models, always ensuring that his work and advice helps his customers. He brings his first hand experience to his blog AutoDetailPedia, to help readers breath new life into their car interiors.