Can You Really Fix Scratched Car Windows? A Detailer’s Guide
You notice that thin, shimmering line every time the sun hits your windshield just right, and it drives you nuts.
We will cover how to tell if a scratch can be polished out, the exact two-step process for safe glass polishing, and the specific products that actually work without causing haze.
Use the wrong method and you will permanently distort your view or create a cloudy, ruined surface.
What Causes Those Annoying Scratches in the First Place?
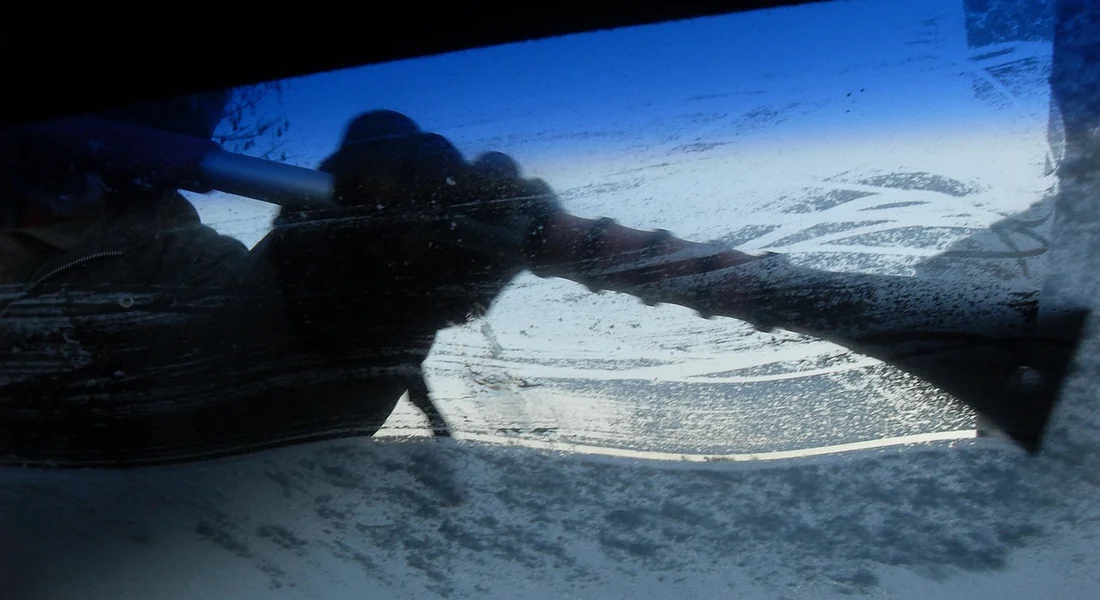
You do not need a rock or a key to scratch your glass. Most damage happens slowly, through simple repetition. Think about the gritty, sandy feeling you hear under your wipers on a dry windshield. That sound is abrasion.
Every swipe grinds that fine debris into the glass. Over weeks and months, it leaves a haze of fine lines.
The usual suspects are quiet but effective.
- Worn Wiper Blades: Old, hardened rubber does not flex. It drags tiny, hard particles across the glass instead of sweeping them away. The result is a pattern of shallow, parallel arcs right in your line of sight.
- The Wrong Cloth: Using a stiff towel, an old t-shirt, or even a paper towel to wipe a dry or dusty window is a recipe for trouble. These materials can trap grit in their fibers. You are not cleaning the glass. You are sanding it with whatever is stuck in the cloth.
- Road Debris: Sand, fine gravel, and brake dust kicked up by traffic coat your windows. Your wipers then act like a pestle, grinding this mixture into the surface. It is a slow, relentless polishing with the wrong kind of compound.
If you see repetitive, semi-circular marks that catch the light at certain angles, those are classic wiper scratches. If you see random, short, deep digs, that is likely from a rogue piece of gravel or sand.
I see this all the time on my black BMW, the ‘Swirl Magnet.’ Paint swirls are shallow scratches in the clear coat that scatter light. Glass scratches work the same way. They disrupt the smooth surface, creating visible lines or a cloudy appearance. The principle is identical, but glass is much harder than clear coat, which changes the repair process completely.
Can You Actually Fix a Scratch, or Is It Time for a New Window?
First, you need to know what you are dealing with. This takes ten seconds. Run your fingernail gently across the scratch. If your nail does not catch-if it glides smoothly over the top-the scratch is likely superficial. It is in the very top surface layer.
If your nail drops into a groove or catches with a sharp ‘click,’ the scratch is deep. This simple test tells you almost everything.
Light scuffs, wiper haze, and superficial marks you cannot feel are almost always DIY-friendly. You are polishing the surface level to restore clarity. It is a correction job, like removing fine swirls from paint.
Deep scratches you can feel, especially long ones, are a different story. They compromise the structural integrity of the glass. A deep scratch acts as a stress point. Under the pressure of driving or temperature changes, it can propagate into a crack. Polishing a deep scratch removes surrounding glass to level it out, which can further weaken the area and is often unsafe.
So, how do you know if you can remove scratches from your car windshield? Ask your fingernail. If it does not catch, you can probably improve it significantly. If it catches, you need a professional glass technician to assess it. They will likely tell you to replace the window for safety. For very light, surface-level scratches, you might consider polishing the car window glass to restore clarity. If you’d like to learn more, guides on polishing scratches on car window glass can help you decide.
Never attempt to polish over or near a crack or a chip from a rock impact. The heat and vibration from polishing can easily cause the damage to spread. Your goal is to fix cosmetic flaws, not to turn a small chip into a windshield-spanning crack. When in doubt, get a professional opinion. Your safety is more important than a scratch.
The Glass Scratch Removal Arsenal: Tools & Chemicals You’ll Need
Scratched glass feels personal. You see that fine line every time the sun hits it. I know the frustration. My old F-150’s windshield has a few souvenirs from branches on backroads. Fixing it requires the right tools. Using the wrong ones, like a harsh compound or a dirty rag, will just make the glass look hazy. That’s worse than the scratch. Keeping a clean windshield is the difference between seeing clearly and guessing at the road ahead. A spotless windshield makes the improvement obvious and helps you stay safe while driving.
You need a specific kit. This is not a place for guesswork or using whatever is under the sink. Think of it like surgery. You want precise, clean tools.
- Dual-Action Polisher: A machine is non-negotiable for any real correction. You need the consistent speed and pressure. Look for one with an 8mm or 15mm throw. This gives you control on the curved surface of a windshield. A 21mm throw is too aggressive and can chatter.
- Glass-Specific Polishing Compound: This is your medicine. It must be cerium oxide based. Cerium oxide is the only abrasive hard enough to safely abrade glass. The compound should also have a neutral pH. An acidic or alkaline polish can etch the glass or damage surrounding trim. Do not use metal polish or regular paint compound.
- Polishing Pads: You will need a firm, closed-cell foam pad. A typical black or white finishing pad for paint is too soft. A dedicated glass polishing pad, often orange or yellow, provides the firm backing needed to work the compound.
- Microfiber Towels (300-500 GSM): For wiping off residue and final buffing. The GSM (grams per square meter) measures density. Towels in this range are plush enough to absorb polish but not so thick they become clumsy. They must be clean and dedicated to this job only.
- Microfiber Towels (700+ GSM): A separate, ultra-plush towel for your final wipe. This is your insurance policy. It grabs any leftover abrasive dust so it can’t settle back and cause fine scouring.
- Grit Guard & Wash Bucket: Before you even touch the polisher, the glass must be perfectly clean. A two-bucket wash method with a Grit Guard at the bottom traps dirt you rinse from your wash mitt. This prevents grinding dirt into the glass during the initial wash, which would create more scratches.
- Glass Cleaner & Clay Bar: After washing, you need to decontaminate. Spray a professional-grade glass cleaner and glide a detailing clay bar over the surface. It will pull out embedded industrial fallout and tree sap that washing misses. If the glass isn’t smooth as ice, polishing will be useless.
Let’s talk about the toothpaste myth. People say it works because it’s slightly abrasive. This is true. But toothpaste is designed for enamel, not silica (glass). Its abrasives are irregular and often include baking soda or other particles that are too harsh. Its pH is also not controlled. A dedicated glass polish uses uniformly sized, ultra-fine cerium oxide particles in a neutral, gel-like carrier. The difference between toothpaste and real glass polish is the difference between sanding with a random rock and sanding with perfectly graded sandpaper.
Finally, safety. You are working with fine abrasive powders. Wear nitrile gloves to keep compounds off your skin and eye protection. I use basic safety glasses from the hardware store. Getting this dust in your eye is a terrible way to end a detailing session.
Your Non-Negotiable Tool List
Here is your shopping list. Copy it. This is everything from the arsenal above, laid out simply.
- Dual-Action Polisher (8mm/15mm throw): Delivers the controlled, smooth motion needed for curved glass without hopping.
- Cerium Oxide Glass Polish (Neutral pH): The specific abrasive that matches the hardness of glass for safe, effective cutting.
- Firm Foam Glass Polishing Pad: Provides the necessary backing pressure to work the polish against the hard glass surface.
- Medium-Pile MF Towels (300-500 GSM): Perfect for polish removal without leaving lint or scratching from trapped grit.
- Heavy-Pile MF Towels (700+ GSM): High GSM towels trap every last bit of abrasive residue so it doesn’t get dragged and re-scratch your finish.
- Wash Bucket with Grit Guard: Ensures your initial cleaning solution stays free of dirt that causes new scratches.
- Professional Glass Cleaner & Clay Bar Kit: Removes invisible bonded contaminants that would ruin your polishing effort.
- Nitrile Gloves & Eye Protection: Basic chemical and particulate safety for you. Never skip this.
The Detailer’s Protocol: Your Order of Operations for Scratch Removal
I treat glass scratch removal like I’m prepping the ‘Garage Queen’ Porsche for a new layer of paint protection film. There are no shortcuts. Rushing this process or skipping a step will absolutely make the problem worse. Follow this checklist in order every single time.
1. Deep Clean the Glass
This is non-negotiable. Any dirt, sand, or grit on the surface becomes an abrasive. If you start polishing with contaminates present, you are not fixing scratches. You are sanding new, deeper ones into the glass. Before any repair, clean and prepare the scratches to remove all contaminates. We’ll outline the clean-prep steps in the next section.
I use a dedicated glass cleaner and a brand new, clean microfiber towel. For heavy road film or water spots, I’ll use a 50/50 mix of distilled white vinegar and water. Spray, wipe, and immediately dry with a second clean towel. Your goal is a perfectly clean, dry, and squeaky surface before you touch it with any abrasive compound.
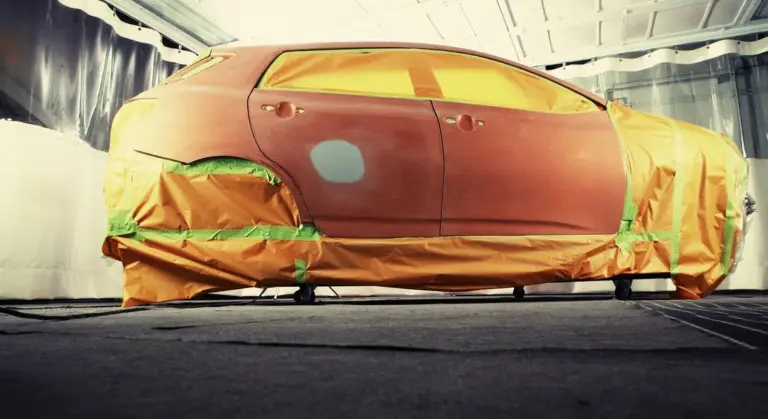
2. Tape Off Surrounding Areas
Glass polish and compounds are messy. They will stain trim, cloud rubber seals, and are a nightmare to clean off painted surfaces or window tint. Get a roll of low-tack painter’s tape-the blue or green kind.
Run a tight line of tape along the edge where the glass meets any trim, rubber, or painted bodywork. On my BMW’s windshield, I tape off the black cowl panel at the base. On the Porsche’s side windows, I protect the delicate rubber seals. This five-minute step saves an hour of cleanup.
3. Assess Scratch Depth
Now, with clean glass and protected trim, you can see what you’re really dealing with. Use your fingernail. Gently drag it across the scratch, perpendicular to its direction.
- If your nail catches in the groove, the scratch is deep. It may require professional attention or very careful work with aggressive compounds.
- If your nail glides over it without catching, the scratch is likely superficial. These are the ones we can often fix ourselves.
This test tells you how much material you need to remove. It sets your expectations.
4. Start with the Least Aggressive Method
This is the golden rule of all correction work, whether it’s my black BMW’s paint or your window glass. Always begin with the mildest product and pad combination.
For light surface scratches and haze, I start with a pure cerium oxide glass polish and a soft foam polishing pad on a dual-action polisher. If you’re working by hand, use a dedicated glass polishing block or a firm felt pad. Aggressive compounds can create a distorted, wavy finish on glass that is often worse than the original scratch. To broaden this, the repair buff polish scratches guide offers a structured, step-by-step plan. It explains how to gauge scratch depth, select the right product, and avoid introducing new damage.
Only step up to a more abrasive compound if the mild one shows zero improvement after several slow passes.
5. Polish in Controlled Sections
You cannot effectively polish an entire windshield at once. Work in small, manageable areas-about one foot square. Apply a small amount of polish to your pad, spread it on the glass at low speed, then increase speed slightly.
Use slow, overlapping passes. Keep the pad flat. The polish will turn clear as it breaks down. This is when it’s working. Apply very light pressure; let the polish and pad do the work. Heat is your enemy here. If the glass gets hot, stop and let it cool.
6. Final Wipe and Inspection
After polishing a section, wipe it clean with a damp microfiber towel, then immediately dry it with a second clean, dry towel. Inspect your work under direct light, like a sun gun or a bright LED flashlight held at an angle.
Look for two things: the reduction of the scratch and the clarity of the surrounding glass. If you see haze or micro-marring from the compound, that’s a sign you need to follow up with your less aggressive polish to refine the finish. The final wipe is not just for cleaning; it is your quality control check before you move to the next section.
How to Remove Scratches from Windshield with Toothpaste and Other Home Remedies

I get it. You see a shallow scratch on your glass and think, “I have toothpaste. I’ve read it works.” It’s the first DIY fix many people try. I’ve done it myself, on older cars and side windows. The results are a mixed bag, and you need to go in with the right expectations.
The Toothpaste Method: A Step-by-Step Cautionary Tale
If you’re going to try this, do it right. The goal is to minimize the risk of making the glass look worse.
- Clean the glass thoroughly with a dedicated glass cleaner and a fresh, lint-free microfiber towel. Any dirt on the surface will get ground in and act like sandpaper.
- Pick a plain, white, non-gel toothpaste. Avoid whitening formulas or gels with beads; their abrasives are too inconsistent for this.
- Apply a small dollop (a pea-sized amount) directly to a damp, soft foam applicator pad or a clean, soft cloth.
- Using light to medium pressure, rub the paste onto the scratch in tight, small circles. Keep the area you’re working on small-about the size of a credit card.
- Work the paste for 30-60 seconds. It will start to dry out and turn a light gray color.
- Immediately wipe off the residue with a damp microfiber cloth. Do not let it dry fully.
- Inspect the area under direct light. You may need to repeat the process 3-5 times. The scratch should become less visible, not disappear.
- Perform a final clean with glass cleaner to remove all residue.
Toothpaste works as a very mild, uncontrolled abrasive that can sometimes reduce the appearance of superficial scuffs, but it almost never fully removes a true scratch you can feel with your fingernail.
The Honest Pros and Cons of Using Toothpaste
Let’s be real about what you’re signing up for.
- Pros: It’s incredibly cheap and already in your house. For a tiny, surface-level mark on a side window, it can be a quick test. It requires no special tools.
- Cons: The abrasives in toothpaste are not designed for glass. They are irregular and can create a faint, hazy patch around the scratch. This haze scatters light and can be more noticeable than the original scratch, especially at night with oncoming headlights. I created this exact haze on the side window of my old Miata, and it took a real polish to fix it.
Toothpaste vs. Real Glass Polish: No Contest
Think of it like this: using toothpaste is like trying to sand a piece of wood with a random rock you found. Using a dedicated glass polish is like using the correct grit of sandpaper.
A product like CarPro CeriGlass or Griot’s Garage Glass Polish contains finely engineered, uniform abrasives suspended in a specialized formula. They are designed to break down correctly as you work, cutting the glass evenly without creating haze. You use them with a machine polisher (preferred) or a lot of hand effort on a specialized foam pad.
The result with real polish is a clear, optical-grade finish that removes the scratch completely, not just masks it with surrounding haze. The effort is higher and the cost is more, but the outcome is professional and permanent for that scratch depth.
FAQ: Does Removing Scratches from a Windshield with Toothpaste Really Work?
Based on my years of testing on beaters and project cars, here is the honest answer.
It can make a very fine, shallow scuff-the kind you can only see at certain angles-less noticeable. If you can feel the scratch catch your fingernail, toothpaste will not remove it. At best, it might slightly soften its edges. Often, the trade-off is that hazy ring I mentioned. On a critical area like the driver’s sightline on a windshield, creating haze is a safety issue and a deal-breaker.
For a deep, wiper-caused scratch on your main windshield, skip the toothpaste. You will save time and frustration by moving directly to a professional glass polish or consulting a glass replacement specialist.
A Word on Baking Soda Paste
Some guides suggest a paste of baking soda and water. I advise extreme caution here. Baking soda is a more aggressive abrasive than toothpaste. It is very easy to create severe, permanent micro-scratches and haze across a large area of your glass. You can irreversibly damage the optical clarity of your windshield in minutes with an aggressive home remedy like baking soda. I do not recommend it. If your scratch is deep enough that you think you need baking soda, the glass likely needs professional attention or replacement.
The Pro Approach: Using Glass Polish and a Polisher for Deep Scratches
When that fingernail test confirms a deep scratch, you need a more aggressive plan. You cannot rub it away by hand. The question becomes, how do you get scratches out of a car window when they’re that bad? You use controlled abrasion. This is the same principle I used on my ’95 Miata’s headlights. The plastic was yellowed and cloudy. I didn’t scrub it. I used a specialized polish and a machine to gently remove a microscopic layer of material, revealing the clear plastic underneath. Glass polishing works the same way, just with different, harder abrasives.
For this job, you need a dedicated glass polishing compound, a dual-action polisher, and a soft foam polishing pad. Do not use a paint polishing compound or a cutting pad meant for paint. Glass is harder and requires specific products. A dual-action polisher is safer than a rotary for beginners, as it’s much harder to burn or distort the glass.
The Step-by-Step Polish
First, clean the glass perfectly. Any grit will get trapped and make new scratches. Tape off the edges of the window trim, rubber seals, and the paint around the glass with painter’s tape. You do not want polish residue baking into those materials. If you spot any minor scratches after cleaning, there are repair options for car window glass you can explore later.
- Apply two or three small dots of glass polish directly onto your clean, dry foam pad.
- Spread the polish over a section about the size of a dinner plate at a low speed.
- Increase the polisher speed to a medium setting (around 4-5 on most machines). Use firm, even pressure and move the polisher in slow, overlapping passes. Work the polish until it becomes almost clear and dry.
- Wipe the residue away with a clean, dry microfiber towel. Inspect the area under a bright light.
- Repeat the process on the same section 2-3 times if needed, always starting with a clean pad or a freshly cleaned area of your pad.
Work in these small, manageable sections. If you try to do the whole windshield at once, the polish will dry out and become ineffective before you finish working it.
What Success Actually Looks Like
Manage your expectations. A deep scratch will fade and become much less noticeable, but it will rarely vanish completely. Your goal is not to erase it, but to soften its edges and blend it into the surrounding glass. The real victory is the overall improvement in clarity. You will remove years of microscopic pitting and haze. The glass will look darker, sharper, and more transparent when you’re done. On my black BMW, polishing the windows made a bigger visual impact than I expected. The world just looked clearer through them.
A Critical Warning on Wet Sanding
You may see videos of people wet sanding glass with extremely high-grit sandpaper (like 3000+ grit). This is an advanced technique with serious risk. Unless you are highly experienced, wet sanding can permanently distort the glass, creating a wavy, funhouse-mirror effect that you can never fix. The tolerance on automotive glass is thin. Removing too much material in one spot changes how light passes through it. I avoid it on all my personal vehicles. For 99% of us, a good glass polish and a polisher is the safest, most effective frontier for scratch removal (especially if you’re trying to remove paint overspray from car glass).
Detailer’s Pro-Tip: The Technique That Makes or Breaks Your Polish Job
You have the right tools. You have the right polish. This is where it all comes together. Polishing glass is about finesse, not force. Your physical technique determines everything.
Speed and pressure are your main controls. Move the polisher too fast, and you skip over the scratch without letting the abrasive work. Use too much pressure, and you generate excessive heat, which is the enemy of glass. I use a simple, repeatable motion.
- Set your polisher to a medium speed, around speed 4 or 5 on a typical DA.
- Start with the pad flat against the glass. Apply firm, even pressure. You want to compress the pad by about a third.
- Move the polisher painfully slow. I’m talking one inch per second. Make overlapping passes, like mowing a lawn, covering the same spot many times.
This is not a race. Let the polish and the pad do the cutting. On my BMW’s side windows, I’ll make 15-20 slow passes over a deep wiper scratch before I even check it.
Your Eyes Are Your Best Tool: The Light Test
You cannot fix what you cannot see. Proper lighting is not a suggestion, it is a requirement. Ambient garage light is useless for this.
Use a bright LED flashlight or sunlight. Hold the light source at a very low angle, almost parallel to the glass surface. Scratches will cast a shadow and look like white lines. As you polish, stop every few passes and re-inspect with the light. You will see the scratch begin to fade and eventually disappear. This real-time feedback is how you know you’re winning.
Managing Moisture and Heat
Glass polish can dry out and become gummy. A dry pad creates friction, and friction creates heat. Too much heat on localized glass is a bad idea.
I keep a spray bottle of clean water next to me. Every few passes, I give the working area a light spritz to re-lubricate the surface. A moist polish spreads evenly and cuts consistently, preventing the pad from grabbing and burning the glass. If you see steam or smell a hot, dusty smell, stop immediately. Spritz more water and reduce your pressure.
A Simple Checkpoint From the Shop
Here’s my personal rule of thumb. Polishing glass properly is a workout for your stabilizing muscles. You are fighting the tool’s vibration and maintaining perfect, slow movement.
If your forearm and shoulder aren’t feeling a bit fatigued from holding the polisher steady and controlling that slow movement, you are probably moving too fast. Speed feels easier in the moment, but it gives you a poor result. Slow down. Let the product work. Your arm will thank you later, and your windshield will be clear.
When to Throw in the Towel and Call a Professional
You gave it your best shot. I have been there, staring at a windshield in the garage light, wondering if one more pass with the polisher will finally clear it up. Sometimes, the smartest move is to stop. Your safety and clear vision are worth more than winning a fight with the glass.
Clear Signs Your DIY Attempt Has Failed
Glass does not forgive mistakes like paint does. Know these signs:
- You can feel the scratch with your fingernail. This is the rule. If your nail catches, the scratch is too deep for safe, effective removal by hand or with a basic polisher. On my black BMW, a deep scratch from a careless ice scraper was immediately obvious by touch.
- The wiper blade chatters, skips, or distorts your view in that one spot. This means you have created a low spot or an uneven surface. Polishing further will only make it worse.
- A widespread haze or dullness appears after polishing. This is often from using the wrong compound, a dirty pad, or too much heat. You have now added a new problem on top of the old one.
When you see or feel any of these, put the polisher down. Continuing will cost you more time and potentially the entire piece of glass.
Cost vs. Benefit: Your Time Has Value
Let us do simple math. A professional glass polish for a deep scratch might cost $150 to $300. A full windshield replacement for my F-150 was about $400.
Now, think about your own effort. Did you just spend four hours over a weekend, $50 on special compounds and pads, and still have a scratch that catches your nail? Your time, frustration, and materials have a cost. When the hours you invest approach the price of a professional fix, it is no longer a savings. It is a loss.
Polishing glass is brutally slow work. If the defect is not improving significantly after 20-30 minutes of focused effort, it is too deep for your setup.
What Can a Professional Actually Do?
This is the FAQ part. People ask what the difference really is. A pro shop brings two main things you likely do not have:
- Specialized, Powerful Equipment: They use dedicated glass polishing systems with more torque and specialized diamond-impregnated pads. These can remove defects deeper than what a dual-action polisher for paint can handle.
- The Knowledge of Limits: A good technician will inspect the scratch and tell you honestly if it can be polished out or if it compromises the glass’s structural integrity. They know when to stop.
Replacement becomes the only safe option when a scratch is so deep it creates a risk of cracking, or if it is directly in the driver’s critical sight line and cannot be perfectly restored. No amount of polishing fixes a crack or a deep gouge that weakens the glass.
Calling a pro for your windshield is not a defeat. It is the responsible choice. You are prioritizing a perfect view of the road and the structural safety of your car’s glass. I would rather have a clear, safe windshield on my kid-hauling Odyssey than a prideful, half-polished hazard. Know your limits, and you will always make the right call.
Final Thoughts on Glass Scratch Removal
Your single most important job is to test the scratch depth with your fingernail before you touch a tool. For the fine, shallow marks that don’t catch, a dedicated glass polish and a patient, controlled hand will restore that smooth, clear view.
Skip this step and use the wrong product or technique, and you will etch the glass or create a hazy distortion that cannot be undone.
Relevant Resources for Further Exploration
- r/AskMechanics on Reddit: Any advice on how to fix scratches on car windows? Thanks
- Amazon.com: Windshield Scratch Remover
- Can deep scratches on a car window be fixed? – Quora
- How To Remove Scratches From A Car Window | Turtle Wax
- Polish Out Glass Scratches
- How to remove scratches from your car’s windshield without replacing it – Quora
- Glass Scratch Repair Kits
Max is an automotive enthusiast having worked as a car mechanical and in interior detailing service for over 25 years. He is very experienced in giving your old car, a new fresh vibe. He has detailed many cars and removed very tough smells and stains from all kinds of cars and models, always ensuring that his work and advice helps his customers. He brings his first hand experience to his blog AutoDetailPedia, to help readers breath new life into their car interiors.