How Do You Remove Mold and Fungus from Car Interiors, Upholstery, and Surfaces?
That musty odor and those speckled stains in your car are more than an eyesore; they signal a problem that needs your immediate attention.
Based on my years of cleaning everything from the spilled-milk chaos in my Honda Odyssey to the delicate vinyl in classic cars, this guide will show you my proven method. We will cover identifying active growth versus old stains, selecting effective and interior-safe cleaners, the detailed cleaning process for cloth, leather, and all plastic surfaces, and the critical steps to ensure it never returns.
Handle this wrong, and you risk embedding the spores deeper or bleaching your upholstery, turning a cleanup into a costly replacement.
Key Takeaways: The Mold Removal TL;DR
Let’s get right to it. Yes, you can remove mold from a car interior. A thorough, professional-level detail is often enough if the infestation isn’t severe and hasn’t eaten into deep padding or the car’s structure. I’ve saved more than one car this way. It’s a three part job.
- Kill the spores. This isn’t just cleaning a stain. You need a product that neutralizes the living organism.
- Remove the stain and odor. Dead mold can still leave behind discoloration and a musty smell that needs to be lifted out.
- Eliminate the moisture source. This is the most critical part. If the car stays wet, the mold will be back in a week.
I rate this a Medium-Hard job. The work itself is straightforward but demanding. The real test is patience. Full, bone-dry results can take 24 to 48 hours with active help. Rushing this guarantees failure.
Listen to me on this one. Safety gear is not optional. You are disturbing and aerosolizing spores you do not want to breathe in or get on your skin. A basic N95 mask and nitrile gloves are the bare minimum. If you see heavy, fuzzy growth, consider a full respirator.
The Protocol: Your Mold Removal Order of Operations
You cannot wing this. Follow these steps in order. Skipping around or getting creative is how you waste a weekend and still have a smelly car. This is the exact sequence I used on my 2019 Honda Odyssey after a forgotten sippy cup of milk rolled under a seat for a month. It works.
-
Assess & Ventilate
Open all doors. If you have a sunroof, open that too. Get as much cross-ventilation as possible before you even touch anything. This is not the time for a closed garage. Put on your mask and gloves now. Look at the extent. Is it surface fuzz on vinyl, or are the cloth seat cushions soft and spongy? Deep, soaked foam may be a job for a professional with industrial extractors.
-
Gear Up
You have your mask and gloves. Add eye protection if you’re spraying anything upward under seats. Have a dedicated trash bag nearby for all used wipes, brushes, and filter bags. You will want to throw this contaminated stuff away immediately, not leave it in your shop vac.
-
Dry Vacuum & Brush
Do not add any liquid yet. Use a stiff bristle brush (a dedicated interior brush, not a wire one) to gently agitate the dry, fuzzy growth. Vacuum it up immediately with a shop vac. Use a crevice tool to get into seams and tracks. The goal is to remove the easy, loose spores so they don’t get turned into a pasty mess when you apply cleaner. Empty the shop vac canister or change the bag outside when you’re done.
-
Apply Cleaner & Scrub
This is the kill phase. For vinyl, plastic, and leather, a solution of distilled white vinegar and water (1:1) is a great, accessible start. It kills many types of mold. For cloth upholstery and carpets, you need an enzyme-based cleaner or a commercial mold remover designed for fabrics. Always test in a hidden spot first. Apply your chosen solution liberally. Let it dwell for 10-15 minutes to penetrate and work. Then, agitate firmly with a soft brush or a microfiber towel. You will see the discoloration start to lift.
-
Extract & Disinfect
For cloth and carpets, you must pull the dirty solution out. A wet/dry vacuum or a dedicated carpet extractor is essential. Go over the area multiple times with clean water in your sprayer and suction it out until the water you pull runs clear. For hard surfaces, wipe thoroughly with clean, damp microfiber towels. Follow up with a separate disinfectant spray on all surfaces, like a peroxide-based interior cleaner, to ensure any remaining spores are neutralized. Wipe dry.
-
Dry Completely
This step is where almost everyone fails. Your interior will feel damp. That is not good enough. Run the car’s air conditioning on full blast with the heat on max. The A/C dehumidifies the air, and the heat dries the surfaces. Place a powerful fan, like a window fan, inside the car blowing across the wet areas. Leave doors or windows cracked if it’s safe to do so. This process needs to run for hours, often overnight. Skipping a full, aggressive dry-out is the single most common reason mold comes roaring back.
-
Apply Protector
Once everything is 100% dry to the touch and smell, you can think about protection. For vinyl and plastic, a UV protectant helps guard against future sun damage. For cloth, a fabric guard can create a slight moisture barrier. This is the final seal on your work, but it means nothing if step six wasn’t done perfectly.
What Makes Mold Grow in Your Car? (And How to Stop It)

Mold needs three things to start a colony in your car. Think of it as a bad recipe you want to avoid. You need moisture, a food source, and stagnant air. Remove any one of these, and mold cannot grow.
Moisture is the biggest trigger. It is not always a flood. It is the small, forgotten dampness. In my grey Honda Odyssey, the “Kid Hauler,” a wet beach towel was left balled up in the back footwell for a week after a trip. The synthetic fabric seats above it stayed damp from trapped humidity. That was enough.
The food source is any organic material. This is not just old food. It is skin cells, spilled coffee sugar, pollen tracked in on shoes, or the natural oils in leather and fabric. My son’s spilled apple juice in the Odyssey provided a feast for spores.
Stagnant air lets the first two ingredients stew together. A car parked with the windows up, especially in a garage, has zero airflow. This creates a perfect, humid little greenhouse for mold.
To stop mold from coming back, you must break this cycle by controlling moisture and cleanliness after you remove the existing growth.
After any interior cleaning, especially a mold treatment, you must dry the car completely. This is non negotiable. I run the air conditioning on max heat for a cycle, then max cold, with the windows cracked. This circulates air and dehumidifies. In dry weather, I leave the windows down an inch in my garage for a full day. For cloth seats or carpets I have extracted, I use a small fan pointed at the damp area overnight. A bone dry interior is a dead end for mold. This care keeps the car interior clean and fresh. Small, consistent steps make the biggest difference.
Make a habit of removing trash and debris weekly. Vacuum crumbs. Wipe up spills immediately, do not let them soak in. For cars like my F 150 that see mud, shake out the floor mats every time. A clean car has less for mold to eat.
Finally, promote airflow. When you park, crack the sunroof or windows if it is safe and dry. Before storing a vehicle, use a moisture absorber like silica gel. I keep one under the seat of my BMW during the humid summer months. It is a simple, cheap defense.
Common Culprits: Leaks, Spills, and Humidity
Sometimes moisture comes from inside the car. Often, it sneaks in from the outside. You need to play detective and find the source. If you do not, your cleaning battle will never end.
Check for leaks methodically. The most common is a clogged sunroof drain. My black BMW 3 Series taught me this. The drains are tiny tubes in each corner of the sunroof frame. They get clogged with dirt and leaves. Pour a little water into the sunroof drain channel and see if it drains quickly near the front and rear wheels. If it pools, the drain is clogged. You can often clear it with a thin, flexible wire or compressed air.
Check door and window seals. Run a hose over the roof and windows while someone sits inside looking for drips. Worn seals can be temporarily helped with a silicone sealant conditioner, but may need replacement.
Do not forget the cabin air intake. On many cars, this is under the windshield cowl. If leaves clog it, water can seep into the blower motor and filter, making your whole A/C system smell. Keep this area clean.
Spills are obvious but tricky. A spilled milk in the Odyssey soaks deep into foam under the carpet. You must extract it, not just surface clean. Use a proper carpet extractor or a wet/dry vac with an extraction wand. Pouring cleaner on top just adds more liquid. You need to pull the moisture out from the base layer.
Humidity is a silent enemy. Washing your car and parking it immediately traps humid air inside, especially in the F 150 with its large cabin. After a wash, always dry the interior door jambs, wipe down the dash and windows, and drive with the windows down for a few minutes to exchange the damp air.
If you live in a humid climate, a rechargeable desiccant dehumidifier is a good investment for your garage. For inside the car, a hanging silica gel bag in the rear footwell or a tub under the passenger seat works. It pulls moisture from the air quietly. Check it monthly and recharge it when the crystals change color. It is a small habit that prevents a huge problem.
Suit Up: Non-Negotiable Safety Gear for Mold Removal
Mold is not just dirt. You are dealing with a living colony that defends itself by releasing microscopic spores into the air. Your first job is not to clean. It is to not get sick. I learned this the hard way years ago cleaning out a flooded sedan without a proper mask. The headache and sinus pressure lasted two days.
You must treat the interior of your car like a small, contaminated workspace, and your body is the most important surface to protect.
The Essential Personal Protective Equipment (PPE)
This is not a suggestion box. This is your kit. Do not skip a piece.
- N95 Mask or Half-Face Respirator: A basic N95 mask from the hardware store is the absolute minimum. It filters out 95% of airborne particles, including most spores. For a heavy infestation, or if you have allergies or asthma, step up to a half-face respirator with P100 organic vapor cartridges. I keep a respirator in my detailing kit specifically for mold and heavy chemical jobs. The difference in air quality is immediate. You simply do not smell that damp, musty odor.
- Nitrile Gloves: Your skin is porous. Mold and the strong cleaning solutions you will use can both cause irritation. I use heavy-duty, long-cuff nitrile gloves. They resist tears from sharp seat rails or trim pieces. Latex gloves can degrade with some cleaners and offer less tear resistance.
- Safety Glasses: Spores and cleaners can splash. Getting a drop of mold-killing solution in your eye is a fast track to the emergency room. Wear simple, wraparound safety glasses. They are cheap and effective.
Why This Gear Is Non-Negotiable
Inhaling mold spores can trigger allergic reactions, asthma attacks, and respiratory issues. For some people, the effect is minor. For others, it is severe. You do not know which one you are until it is too late. Gloves prevent direct contact, which can lead to skin rashes or dermatitis.
The goal is to create a barrier between you and the hazard, every single time. I even tape the cuffs of my gloves to my sleeves on bad jobs to prevent anything from crawling up my arms.
Your Space is Part of Your Gear
If you are working in a garage, open the doors. If you are outside, you have natural ventilation. Never attempt this in a closed space.
I use a simple box fan placed in a rear window or door, blowing outward. This creates negative air pressure, pulling spore-laden air out of the cabin instead of letting it swirl around you. Ventilation is your invisible teammate, actively removing the threat from your breathing zone. For my kid-hauler Odyssey project, which had a serious mildew smell, I ran two fans for an hour before I even started cleaning.
Put your gear on before you open the car door. Take it off only after you have stepped away from the work area and can wash your hands. This routine is what keeps you safe.
The Step-by-Step Mold Eradication Method
How do you clean mold out of your car? You follow a method that kills the growth and stops it from returning. I have done this on my own vehicles, from the kid-hauling Honda Odyssey to the workhorse Ford F-150. This is the same process I use every time.
This method works on surface fuzz and deeper infestations, but it requires patience and the right steps.
Step 1: Assess and Ventilate
First, open every door and window. You need fresh air moving through the cabin before you start. It protects you and helps dry the car later.
Now, look closely. Put on some gloves and a mask if the smell is strong. Is the mold just sitting on top of the seat fabric? Or do you see dark spots deep in the carpet seams? Surface mold wipes away easily. Deep mold means it has soaked into the padding. In my grey Odyssey, a spilled milk carton led to a deep, musty problem under the seat. That took more work.
Judge the extent by looking for color changes and feeling for damp, soft spots in the upholstery.
Step 2: Dry Removal First
Never start by spraying cleaner on dry mold. You will just spread the spores. Your first job is to remove all the loose, dry growth.
I use a vacuum with a HEPA filter. It traps the tiny spores so they don’t get back into the air. If you don’t have one, a very soft bristle brush will work. Gently brush the affected area to knock the mold loose, then vacuum it up immediately. On my black BMW’s carpets, this dry pass removes a shocking amount of fuzzy debris.
Always remove dry mold before anything gets wet, or you risk a bigger problem.
Step 3: Apply Your Cleaning Solution
Now you need something to kill the mold. You have two main choices.
A dedicated mold and mildew remover spray is powerful. It is designed for this job. The pros are strong, fast action. The cons are that it can be harsh on some materials and has strong fumes. It also helps remove musty smells and other odors from treated areas. Ventilate well during use for best results.
A diluted all-purpose cleaner is gentler. Mix it with water according to the bottle. The pros are it is safer for many surfaces and less smelly. The cons are it might need more scrubbing for stubborn spots.
I keep both in my kit. For a severe case on my F-150’s floor mat, I use the dedicated spray. For light surface mold on a door panel, the all-purpose cleaner works fine.
No matter what you choose, test it on a hidden area of the fabric or plastic first to check for discoloration.
Step 4: The Gentle Scrub
Apply your chosen solution to the area. Do not soak it. Just get it damp.
Use a soft tool. A detailing brush with soft bristles is perfect. A plush, clean microfiber towel folded into a pad also works. Scrub in gentle, circular motions. Let the cleaner do the work.
Aggressive scrubbing can damage the material. It can fray cloth fibers or leave scratches on plastic. On my Tesla’s white vegan leather seats, a gentle touch lifts the stain without harming the sensitive surface. That same gentle touch works for clean stains on leather car seats. It helps preserve texture and finish without harsh scrubbing.
Gentle pressure with a soft tool is always better than hard scrubbing with a rough one.
Step 5: Extract and Disinfect
You have loosened the mold. Now you must remove the dirty cleaner.
For fabrics, carpet, and cloth seats, you need to extract the moisture. Use a wet/dry vacuum or a carpet extractor. Press it firmly against the area and suck out all the liquid. You will see the dirty water come out. Repeat until the water runs clear.
For hard surfaces like the dashboard, console, or plastic trim, simply wipe the area with a clean, damp microfiber towel. Rinse the towel often. When cleaning these areas, it’s essential to use the right techniques to avoid damage, especially on delicate dashboard materials.
After cleaning, I do a final disinfection wipe. I use a mixture of 70% isopropyl alcohol and water (about a 1:1 ratio) on a fresh microfiber. This kills any lingering spores. It is a step I never skip on family cars.
Pulling the dirty solution out of fabrics is critical to removing the mold, not just moving it around.
Step 6: The Critical Dry-Out
This is the most important step. If the interior stays damp, the mold will come back. You must get everything completely dry.
Park the car in direct sunlight with all the windows down. The sun’s heat is a great dryer. Use portable fans pointed into the footwells and under seats. For a really wet car, a small dehumidifier placed inside works wonders.
If you can, put the car in a climate-controlled garage. I do this with my Porsche 911 after any deep clean. Check the area the next day. Press on the carpet. If it feels cool or damp, keep drying.
Complete drying is the only way to prevent mold from growing back in the same spot.
Tailored Tactics for Different Surfaces

Mold does not treat all materials the same. Your cleaning approach should not either. Here is how to handle each common surface inside your vehicle.
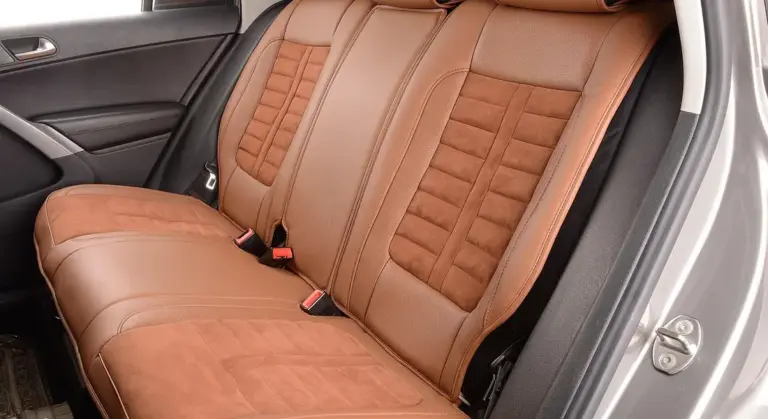
How to Get Mold Out of Fabric Upholstery and Headliners
My family’s grey Honda Odyssey has seen it all. Cloth seats are a sponge for spills and, when damp, for mold. For anyone looking to keep clean cloth fabric car seats looking fresh, the right approach makes all the difference. To clean them, you need a two-step process: agitation and extraction.
First, apply a dedicated upholstery cleaner or a diluted all-purpose cleaner. Use a soft-bristled brush, like a horsehair detailing brush, to gently agitate the area. Your goal is to lift the mold from the fibers without fraying or damaging the fabric. After agitating, you must extract the moisture and spores. A wet/dry vacuum is essential here. Go over the area multiple times until you pull up as much liquid as possible.
Headliners are a special case. The fabric is glued to a fragile backing board. If it’s soaked, the weight of water alone can cause it to sag or tear. For anything more than a light surface wipe, consider professional help to avoid a costly interior repair.
Technique for Stubborn Stains
For spots that refuse to budge, a steam cleaner can be your next move. The high heat kills mold spores and helps break down the stain. Hold the steam nozzle about an inch from the fabric and move slowly. Do not oversaturate the area. Follow immediately with your wet/dry vacuum to pull out the new moisture you just introduced.
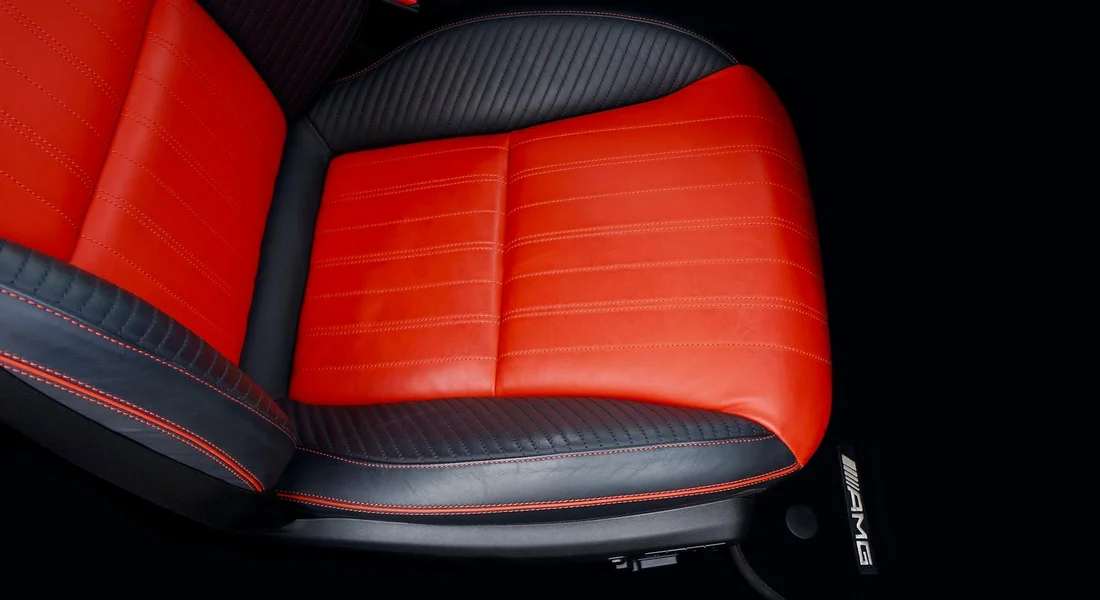
How to Clean Mold Off Leather and “Vegan Leather” Seats
On my white Tesla Model 3, mold is not just unsightly. It can actually eat into the dye, leaving permanent discolored patches on that bright surface. You must be gentle but effective.
Only use a pH-balanced leather cleaner. Harsh chemicals or all-purpose cleaners will dry out the natural oils in real leather and can damage the coating on synthetic “vegan” materials. Spray the cleaner onto a soft microfiber towel or a horsehair brush, not directly onto the seat. Gently work the cleaner in circular motions. This helps keep leather car seats clean and well-maintained over time. Regular, gentle cleaning supports preserving color and texture for years to come.
Conditioning is a final step, not part of the cleaning process. Only apply a leather conditioner after the seat is completely, bone-dry. Applying it to a damp surface can trap moisture and cause the mold to return.
How to Remove Mold from Car Carpet and Floor Mats
Start by removing the floor mats. Scrub them separately with a carpet cleaner and a stiff brush, then rinse with a hose and let them dry completely in the sun. This step helps maintain the overall interior, especially for clean car carpet floor mats.
For carpet fixed to the floor, use a carpet-specific cleaning solution. A stiff brush helps work the cleaner deep into the pile where mold roots itself. The single most important tool here is a powerful extractor or wet/dry vacuum to pull the contaminated water back out. If you just scrub and let it air dry, you leave spores and moisture behind.
If you see or smell mold coming from under the carpet padding, you have a deeper issue. This often means a clogged drain or a leak has soaked the floor pan.
How to Wipe Mold from Plastic, Rubber, and Vinyl Trim
This is the easiest win. These non-porous surfaces don’t allow mold to root deeply. A spray of interior all-purpose cleaner and a wipe with a clean microfiber towel will usually take care of it.
For air vents, seams, and intricate crevices, use a small detailing brush to agitate the cleaner. Wipe away the residue with a towel. These surfaces clean up quickly, giving you visible progress that keeps you motivated.
How to Clear Mold from Glass and Windows
Mold on glass often looks like a faint, smoky film or tiny spots. It hasn’t etched into the glass. A quality glass cleaner and a clean waffle-weave towel will remove it with ease.
Finding mold on your windows is a clear sign of exceptionally high interior humidity. It tells you that the problem was likely widespread, and you must focus on drying the entire cabin, not just wiping the glass.
Detailer’s Pro-Tip: The Lighting and Pressure Secret

You cannot clean what you cannot see. Overhead light hides shadows. Use a bright LED flashlight and hold it almost level with the surface you’re inspecting. This raking light will make every speck of mold cast a tiny shadow, revealing contamination you would otherwise miss, especially on dark carpets and upholstery.
When you scrub, more pressure is not better. Pushing down with your arm grinds spores deeper into the material. Let the bristles of the brush do the work by using just the weight of your hand. This gentle agitation lifts the mold to the surface where you can wipe or extract it away.
When DIY Isn’t Enough: Signs You Need Professional Mold Removal
Sometimes the job is bigger than a bottle of cleaner. You should call a professional detailer if you notice any of these red flags.
- A pervasive musty smell returns no matter how much you clean.
- You see visible growth on the underside of seats, inside the dashboard, or-critically-coming from the HVAC vents.
- You or your passengers experience allergy symptoms or respiratory irritation when using the car.
Professional shops have tools you likely do not. Industrial ozone generators to gas the entire cabin, antimicrobial foggers that reach every crevice, and the skill to partially disassemble interiors to treat the source. The cost for this service varies widely based on severity and your location, but it is an investment in your health and your vehicle’s value. In extreme cases where mold has rotted fabrics, professional repair may involve upholstery replacement.
How to Vet a Professional Detailer for Mold Removal
Do not just search for “car mold removal near me” and pick the first name. Call and ask questions. A reputable detailer will explain their process clearly.
Ask what EPA-registered disinfectants they use and how they ensure the interior is completely dry afterward. Look for specific terms like “antimicrobial treatment,” “odor elimination,” or “interior sanitization” in their service descriptions. A pro who specializes in this will talk confidently about containment, killing spores, and preventing recurrence, not just a basic shampoo.
Detailer’s Pro-Tip: The Lighting and Pressure Secret
You can have the best cleaner in the world, but if you miss half the mold or scrub it in deeper, you will fail. These two physical techniques change everything.
The Detective’s Flashlight Angle
Overhead garage light or even the sun makes mold invisible on dark fabrics and plastics. It flattens the view. You need shadow.
Take a bright LED flashlight, the kind you would use for paint correction. Hold it parallel to the surface, just an inch or two above the seat or dashboard. Slowly sweep it across the area.
Every speck of mold, every tiny colony, will cast a long shadow like a grain of sand, revealing itself against the material.
I found a whole network of white fuzz in the perforations of my BMW’s black leather seats this way. Overhead light showed nothing. The low-angle light made it look like a map of stars. You cannot clean what you cannot see.
The Weight-of-Your-Hand Scrub
When you see that mold, your instinct is to attack it. You lean in, grip the brush hard, and start scrubbing with your shoulder. This is a mistake.
Aggressive pressure does not kill mold. It grinds the spores and the organic matter they feed on deeper into the fibers of your cloth or the pores of your vinyl. You are planting seeds for the next outbreak.
The right way is gentle but thorough. Use a soft-bristled detailing brush or a microfiber towel. Rest your hand on the surface with a relaxed grip. Let the natural weight of your hand and the brush provide the downward force.
Now, use only your fingers and wrist to create a fast, jiggling motion. The bristles will agitate the surface without compacting it. This technique lifts the mold to the surface so your cleaner can neutralize it, instead of burying the problem where moisture will find it again.
On the delicate Alcantara of my Porsche’s steering wheel or the old cloth in the Miata, this is the only safe way to scrub. Your arm gets tired faster, but your results last much longer. If you also want to disinfect the steering wheel, opt for a car-safe cleaner that won’t harm the material. A quick wipe afterward ensures a clean and hygienic surface.
Always put on your nitrile gloves and an N95 mask before you start this inspection and cleaning. You are disturbing spores. Do not breathe them in.
When DIY Isn’t Enough: Signs You Need Professional Mold Removal
Sometimes, no matter how much you scrub or what cleaner you use, you hit a wall. The smell lingers. A stain keeps coming back. You start to wonder if you’re making it worse. I’ve been there. In my Honda Odyssey, a spilled sippy cup of milk led to a funk I couldn’t beat for weeks. That’s when you call for backup.
You should search for professional “car mold removal services” when the problem is out of sight or making you feel unwell. Look for a detailer who specializes in odor elimination and mold cleanup, not just a standard car wash. They have the tools and the know-how to go deeper than you safely can at home.
Here are the clear red flags that mean it’s time to pick up the phone:
- A pervasive musty smell that returns after cleaning. If you air out the car, it smells fine, but the odor comes back the next humid day, the source is still active deep in the padding or vents.
- Visible fuzzy or slimy growth on the underside of seats, inside door panels, or-most critically-within the HVAC ducts. If you see mold coming from the air vents when you turn on the fan, the system itself is contaminated.
- Any new or worsening allergies, asthma, or sinus issues when you drive. Your health is not worth the gamble. Mold spores are irritants, and prolonged exposure in a small space like a car is a legitimate concern.
A professional detailer tackles these issues with equipment you likely don’t have. They use industrial ozone generators to neutralize odors at a molecular level throughout the entire cabin. They have thermal foggers that fill every crevice with a dry, disinfecting vapor. Most importantly, they are not afraid to partially disassemble your interior-removing seats, door cards, and center consoles-to access and treat the root cause.
The cost for this level of service varies wildly based on severity and where you live. A car in humid Miami or rainy Seattle with a soaked carpet will cost more to remediate than one in dry Phoenix with a minor surface issue. You could be looking at a few hundred dollars for a comprehensive clean and ozone treatment, or over a thousand if seats need to be pulled and ducts need flushing.
In extreme cases where porous materials like fabric or foam are saturated and structurally damaged, cleaning might not be enough. The professional’s final assessment might include recommending upholstery or carpet replacement to truly solve the problem, which circles back to honestly assessing the initial damage we talked about earlier.
How to Vet a Professional Detailer for Mold Removal
Not every detailer is equipped for a true mold remediation job. You need to find someone who treats this as a serious health and cleaning challenge, not just a deep shampoo. When you call around, ask direct questions.
Ask specifically about their process for microbial growth. A good answer will include steps like containment, HEPA vacuuming, application of an EPA-registered disinfectant, and a final treatment like ozone or fogging. They should sound confident and detailed.
You need to know what they use and how they ensure it’s gone. Focus on these three points:
- Disinfectants: Ask, “What specific anti-microbial or disinfectant product do you use?” Listen for names like Bio-Bomb’s Oxygenator Aerator, or other products labeled for mold and mildew remediation. Avoid places that just say “a strong cleaner.”
- Drying Methods: Moisture left behind is an invitation for the mold to return. They should mention using wet/dry extractors, air movers, and dehumidifiers, and should guarantee the interior is completely dry before you get the car back.
- Post-Treatment Verification: Do they offer any follow-up or guarantee? While no one can promise mold will never return, a reputable shop will stand by their work and advise you on preventing a recurrence.
Look at their service descriptions online or on their estimate. You want to see specific phrases like “anti-microbial treatment,” “odor elimination,” “ozone generation,” or “interior sanitization.” A vague listing for an “interior detail” is likely not sufficient. Your goal is to find a technician who sees this as a specialized task, not just another car to vacuum.
Keeping Your Cabin Clean and Healthy
Protecting yourself with proper gear like gloves and an N95 mask is the non-negotiable first step to any mold cleanup. From there, winning the battle is all about patience and thorough drying-chase every bit of moisture from the carpets and vents after you clean.
Leave any dampness behind, and the spores will return, bringing back musty odors and potential health irritants.
Relevant Resources for Further Exploration
- r/cars on Reddit: Advice on cleaning mold from car interior?
- Car Interior – Mold Removers – The Home Depot
- Looking for recommendations for services to remove mold …
- Mold In Car? Causes, Removal Tips, And Prevention
- Professional Mold Remediation for Car Interior (Updated 2024 Guide)
- How to Get Rid of Mold Growing Inside Your Car | Lifehacker
- How to Clean a Car of Mold or Mildew | RestorationMaster
Max is an automotive enthusiast having worked as a car mechanical and in interior detailing service for over 25 years. He is very experienced in giving your old car, a new fresh vibe. He has detailed many cars and removed very tough smells and stains from all kinds of cars and models, always ensuring that his work and advice helps his customers. He brings his first hand experience to his blog AutoDetailPedia, to help readers breath new life into their car interiors.