How Do You Remove, Buff, and Protect Scratches on Black, White, Red, and Silver Car Paint?
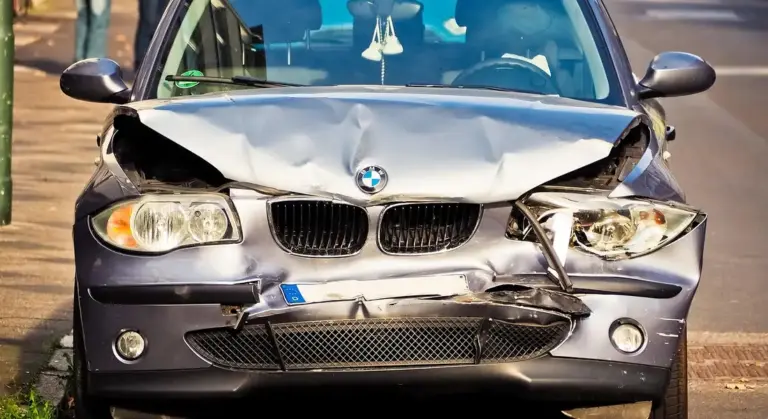
I know that sick feeling when you find a new scratch on your car. On my jet black BMW, even a light mark looks like a deep gouge.
I will show you exactly how to fix it. We will cover how to safely remove scratches, the best buffing pads for each paint color, effective repair methods for different scratch depths, and protective steps to keep your finish looking new.
Use the wrong method, and you will turn a small scratch into permanent paint damage.
First, Figure Out: Can You Even Buff That Scratch Out?
Your first move isn’t grabbing the polisher. It’s figuring out what you’re up against. The goal is to remove the scratch, not your paint. Here’s how to know the difference.
Run your fingernail gently across the scratch. Does your nail catch in the groove? If it does, stop. That scratch has cut through the clear coat and into the color layer, or worse, the primer. Polishing compound can’t fill that canyon. You’re looking at touch-up paint or professional repair.
If your nail glides right over it, you’re in business. That’s a clear coat scratch. Modern car paint is a sandwich. On top is the clear coat, a tough, transparent layer of protection. Under that is the base coat, the pigmented color you see. Under that is the primer, and then the metal or plastic panel. A buffable scratch lives only in the clear coat.
People always ask me if black cars show scratches more. They absolutely do. My Jet Black BMW is a swirl magnet. Think of it like a fingerprint on a bathroom mirror. On a black car, any light defect creates a high-contrast shadow. White and silver paints are the opposite. They scatter light, hiding fine swirls and light scratches beautifully. The scratch is still there, you just can’t see it as easily in most light.
This leads to the next common question: can a black car leave a white scratch? Yes, and it’s a bad sign. When you see a stark white line on black paint, you’re usually looking at bare primer or plastic. The clear coat and color have been completely scraped away. That’s not a polish job. That’s a fill-and-blend job with touch-up paint.
The Detailing Arsenal: Tools & Chemicals You Actually Need
You can’t win a battle with the wrong weapons. Using household towels and dish soap will add more scratches. Here is the kit that works, based on what I use in my own garage.
Get the basics right first. Your wash kit prevents new scratches while you fix the old ones.
- Two buckets, each with a Grit Guard insert at the bottom. This traps dirt so your wash mitt doesn’t swim in it.
- pH-neutral car wash soap. It cleans without stripping wax or sealants you’ll apply later.
- A high-quality microfiber wash mitt and several 300 to 400 GSM microfiber drying towels. Thicker towels absorb more and are less likely to grind dirt into your paint.
For the correction work, you need precision tools.
- A dual-action (DA) polisher. I recommend one with a 15mm throw for a good balance of cut and finish. It’s much safer for beginners than a rotary buffer because it’s very hard to burn the paint.
- A set of foam polishing pads. Start with a lighter polishing pad and a more aggressive cutting pad. Label them so you don’t mix them up.
- Compounds and polishes. Think of them like sandpaper in a bottle. A heavy-cut compound has more abrasive to level deep scratches. A fine polish has very fine abrasives to refine the finish and remove haze. I use a medium-cut compound on my BMW’s swirls and a fine polish on my Tesla’s soft clear coat.
- Isopropyl alcohol or a prep spray. After polishing, you wipe the panel down with this. It removes any leftover oils so you can see the true finish and prepare for protection.
Car scratch repair kits from the parts store have a specific, limited use. The pastes, sprays, and pens are for filling rock chips where paint is missing. They are not for removing swirls or scratches from the clear coat. You apply the paint to the chip, let it cure, and level it. It’s a cosmetic fix to make a chip less obvious from five feet away. It will not make a deep scratch you can feel with your fingernail disappear.
The Protocol: Your Non-Negotiable Order of Operations
You cannot rush this. Work in a clean, shaded area. Direct sun on hot paint will make products flash dry and hide defects from your eyes. Skipping ahead to step four is the most common mistake. You will grind microscopic dirt into the clear coat, creating a haze of fresh scratches. I ruined a panel on my black BMW doing that once. Follow these steps in order, every time.
The Protocol Checklist:
- Complete Wash & Dry
- Chemical Decontamination (Iron Remover)
- Mechanical Decontamination (Clay Bar)
- Scratch Assessment & Repair
- Final Polish
- Protect (Sealant/Wax)
1. Complete Wash & Dry
This is not a quick rinse. You need to remove all loose dirt without adding swirls. Use the two-bucket method with grit guards. One bucket for soapy water, one for rinsing your wash mitt. I use a pH-neutral shampoo. Start from the top and work down. For the lower panels and wheels, I often use a separate mitt. My BMW’s black paint shows every single water spot, so drying is critical. Use a clean, plush drying towel and gently glide it over the surface. Pull the towel, don’t scrub. This foundational wash prevents you from rubbing abrasive dirt into the paint during later steps.
2. Chemical Decontamination (Iron Remover)
After washing, your paint still has contaminants you cannot see. Brake dust and rail dust embed into the clear coat, feeling like rough sprinkles. Spray an iron remover over the cool, wet paint, avoiding direct sun. It will turn purple as it reacts with iron particles. Let it dwell for 3-5 minutes, then rinse thoroughly. Wear gloves. On my red Porsche, the wheels get heavy brake dust. I spray iron remover there first, before the paint, to prevent splash-up. This chemical step dissolves metallic particles that a clay bar would struggle with.
3. Mechanical Decontamination (Clay Bar)
Now, feel the paint with the inside of your hand. If it feels gritty, like sandpaper, you need to clay. Use a dedicated clay bar or synthetic clay mitt with plenty of lubricant. I use a quick detailer spray as lube. Glide the clay back and forth in straight lines with light pressure. You will hear a slight scraping sound. Fold the clay frequently to expose a clean surface. After claying, the paint should feel as smooth as glass. On my white Tesla, the flat front bumper collects everything. Claying there is always necessary. This mechanical step removes bonded surface contaminants that washing alone cannot.
4. Scratch Assessment & Repair
With a clean surface, now you can see the true scratches. Do the fingernail test. Gently drag your fingernail across the scratch. If it catches, the scratch is through the clear coat and may need touch-up paint. If it doesn’t catch, it’s likely in the clear coat and can be polished out. Black and dark colors like my BMW show every flaw. Silver and white are more forgiving. For clear coat scratches, start with the least aggressive method. Use a mild polishing compound on a foam pad by hand or with a dual-action polisher. Work a small section, maybe 2×2 feet. Proper assessment tells you if you can fix it or if you need to live with it. If the damage looks deeper, a quick guide on repair car paint scratches can outline your options. This helps you decide between DIY touch-up and professional refinishing.
5. Final Polish
After repairing deeper scratches, you need a final polish to remove any haze or micro-marring from the compound. This step brings back the deep gloss. Use a fine finishing polish with a soft foam pad. On black paint, this is where the magic happens. The swirls disappear and the reflection becomes a mirror. On my silver Honda, it brings out a bright, metallic shine. Work in overlapping passes until the polish breaks down to a fine dust. Wipe off the residue with a clean microfiber towel. A final polish ensures the surface is perfectly refined and ready for protection.
6. Protect (Sealant/Wax)
Your fresh, flawless paint is now vulnerable. You must lock in that finish. Apply a sealant or wax. Sealants, usually synthetic, last longer. Waxes, like carnauba, give a warm, deep shine but need more frequent application. On my daily drivers, I use a spray sealant for efficiency. On the Porsche, I might use a liquid wax for that extra depth on red. Apply a thin, even layer to one panel at a time. Let it haze, then buff off with a separate clean towel. This protective layer shields your work from the elements and makes future cleaning easier.
Color-by-Color Scratch Repair: A Detailer’s Guide
Scratch removal is the same basic process for every color. You inspect, you correct, you refine, you protect. The difference isn’t the work, it’s what the paint color reveals. My garage has taught me more about this than any manual — especially how some car paint colors hide scratches better than others.
How Do You Get Scratches Out of a Black Car? (The Swirl Magnet)
My 2016 BMW 3 Series is Jet Black. I call it the Swirl Magnet. The first thing you need to understand is that black paint does not scratch easier than white paint. It just shows you every single thing you do to it, good or bad. A perfect black finish is the most rewarding thing in detailing. A scratched one is a constant reminder of every bad wash.
You cannot fix scratches on black until you stop making new ones. That starts with your wash. Before you even think about polishing, perform a perfect two-bucket wash with grit guards and a ton of clean, plush microfiber towels. Any dirt left on the surface will get trapped under your polisher and create more of the fine scratches you’re trying to remove.
Lighting is everything. Use a bright LED work light and hold it at a low angle to the paint. You’ll see every swirl and scratch pop into view. This is your map. For correction, I use a medium-cut compound on a foam polishing pad with my dual-action polisher. But here’s the critical step most people skip on black.
After compounding, you will often be left with very fine holograms or haze from the aggressive pad and product. This is why a black car can look worse after a DIY correction. You must follow the compound with a fine-finishing polish and a soft, black foam finishing pad. This last step removes the microscopic haze and brings back the deep, liquid gloss. On my BMW, I never skip this second polishing step.
How to Fix Scratches on a White Car: Seeing Through the Haze
Fixing scratches on a white car, like my Tesla, is a game of perception. The defect is often just as deep, but your eye can’t find it against the bright background. The challenge isn’t the repair, it’s the diagnosis.
You need to create contrast. Sunlight is okay, but a dedicated LED light is better. Shine it across the panel at a 10 to 20 degree angle. The scratch will catch the light and cast a thin, dark shadow. Mark these areas with painter’s tape. Without this angled light, you are polishing blind.
White and light silver paints offer a small advantage during correction. Because the color is so bright, it is more forgiving of a slightly more aggressive first polishing step, as any leftover holograms or micro-haze are nearly impossible to see. This doesn’t mean you can be sloppy, but it does mean you can often use a one-step correction with a medium polish and achieve a fantastic, scratch-free result. The goal is to remove the defect, not necessarily achieve a 100% hologram-free finish, which on white is a task for contest cars, not daily drivers.
Scratch Repair on Red and Silver Paints: Managing Metallic and Bright Colors
Red and silver sit in the middle of the spectrum. They show flaws, but not with the brutal honesty of black or the hiding power of white. Each has its own personality.
For red cars, you have two eras to consider. Modern reds are clearcoats. Your job is to restore the clarity of that top layer to let the rich pigment underneath shine. Use the same two-step process as black for deep gloss. The old single-stage reds, like on my ’95 Miata, are a different beast. The color is in the entire paint layer. When polishing single-stage red, you must work slowly and check your pad often, as you can literally polish through the pigment, especially on high edges. The pad will turn red. This is “burn-through,” and it’s a permanent mistake. Use the least aggressive method first.
Silver paint is all about the metallic flake. Those tiny sparkles are great at hiding light swirls under diffused light, which is why silver is often called low-maintenance. But they make deep scratches look like glaring cracks in a mirror. The key is to polish without dulling the flake. Aggressive wool pads or heavy compounds can fracture or flatten the metallic particles, making the paint look muted and cloudy. Use softer foam pads and finer polishes to level the clearcoat around the scratch without damaging the metallic layer beneath. Your reward is a brilliant, sparking finish where the flake seems to float in liquid glass.
The Technique Tweak: How to Buff Without Burning Your Paint
This is where many people get nervous. You have a powerful machine in your hand. You are about to put it on your car’s paint. It is understandable. The goal is not to fear the tool, but to respect it. With a few fundamental habits, you can correct paint safely and effectively every single time.
The Detailer’s Pro-Tip: It’s All in the Hands
Forget everything you see in movies about pressing down hard. Modern dual-action polishers and the compounds we use today are designed to work with finesse, not brute force.
- Use the weight of the machine, not your arm. Let the polisher’s own mass provide the necessary downward pressure. Your job is to guide it, not crush it against the panel.
- Move slowly, about one inch per second. Rushing is the enemy of correction. A slow, steady pace gives the abrasive in your polish time to do its job. If you move too fast, you are just smearing product around.
- Keep the pad flat. Do not tilt the machine onto its edge. A flat pad distributes heat and pressure evenly. A tilted pad concentrates force on one small spot, which is a surefire way to burn through the clear coat.
- Work in 2×2 foot sections. Trying to do an entire door or fender at once is a mistake. You will lose track of where you have been, the polish will dry out, and your results will be inconsistent. A small, manageable area keeps you focused.
- Let the polish do the work. You are not sanding the paint. You are suspending microscopic abrasives in a lubricating oil and using a machine to move them in a controlled pattern. Trust the product.
Setting Up for Success: Priming, Passes, and Inspection
Good technique starts before the polisher ever touches the car. A dry pad on dry paint creates friction, heat, and marring. You must prime your pad first.
Spray 3-4 spritzes of a quick detailer or pad conditioner onto the face of the foam pad. Then, smear a small amount of your chosen polish or compound in an “X” pattern across the pad. Turn the polisher on its lowest speed and lightly dab it against the palm of your gloved hand for a few seconds. This spreads the product into the foam, creating a lubricated working surface. A properly primed pad drastically reduces dry buffing and gives you a perfect start to your first pass.
When you make your passes, use consistent, overlapping motions. Whether you choose up-and-down, side-to-side, or a crosshatch pattern, the key is overlap. Each pass should cover 50% of the area from the previous pass. This ensures uniform coverage and eliminates the chance of missing tiny spots. After 3-4 slow passes in one direction, make another 3-4 passes in a perpendicular direction. This crosshatching is non-negotiable for complete correction.
You must check your work often. After finishing a 2×2 section, wipe it clean with a fresh microfiber towel. Inspect it under good light. I use a bright LED work light and often move my head to look at the paint from different angles. On my black BMW, a haze or leftover scratch is obvious when the light skims across it. If the defects are gone, move on. If not, apply a little more fresh product to your pad and make another set of slow, overlapping passes. Do not just keep going with dried-out polish.
Buffing vs. Polishing: Cutting and Refining, Explained
In the detailing world, “buffing” and “polishing” are often used interchangeably, but they describe different actions. Think of it as a two-step process for perfect paint.
Buffing (or Cutting) is the aggressive first step. You use a cutting compound and a firm foam or microfiber pad to level the clear coat and remove the deepest scratches, oxidation, and heavy defects. This step removes material. It will leave the surface clean but hazy or full of very fine swirls. This is normal. My old Miata’s single-stage paint needed a serious cut to bring the red back from a chalky pink.
Polishing (or Refining) is the gentle follow-up. You use a finer polish and a soft foam pad to remove the haze and micro-marring left by the cutting step. Polishing refines the surface to a high-gloss, perfectly clear finish. It removes very little material. On my Tesla’s soft clear coat, I often skip cutting altogether and go straight to a fine polish with a soft pad to refine the surface without risk.
Your goal dictates your process. For a deep scratch on a red car, you might need a cut then a polish. For light swirls on a silver car, a single polishing step might be enough. Always start with the least aggressive method on a test spot. Sometimes deeper scratches require a controlled cut followed by a polish to blend them out. That cut-and-polish approach is what helps address car paint scratches without going too deep into the clear coat. The rule is simple: remove only as much clear coat as you need to, and never more.
Protecting Your Freshly Corrected Paint from New Scratches
Correcting those scratches was hard work. I know. After I spent a whole weekend polishing the swirls out of my black BMW, the last thing I wanted to do was see new ones next week. This is where protection becomes more than just shine. It’s your first line of defense.
The goal is to have a sacrificial layer on top of your perfect paint. Think of it like a clear, protective hood you put over your car. When a contaminant brushes against the surface, or a dirty towel drags across it, that top layer takes the hit. Without it, the scratch goes right into your clear coat. That’s the difference between wiping off a mark and needing another polish job.
Choosing Your Shield: Sealants and Ceramic Sprays
For long-term, hard-shell protection, I skip traditional carnauba waxes on daily drivers. They look great but soften and wash away quickly. Instead, I use a durable synthetic sealant or a ceramic-infused spray coating.
These products chemically bond to the paint, creating a slick, dense layer. They resist contaminants better and make washing safer because dirt slides off more easily. For my black BMW, the swirl magnet, this is non-negotiable. A product like Turtle Wax Hybrid Solutions Ceramic Spray Coating or Griot’s Garage 3-in-1 Ceramic Wax is my go-to. They offer months of protection and that critical sacrificial barrier.
Applying a robust sealant creates a harder, slicker surface that makes it difficult for fine scratches to even start.
The Daily Guard: Your Wash and Dry Routine
The best protection in the world won’t help if you grind dirt into the paint every time you wash. Your maintenance routine is everything.
- Two Buckets with Grit Guards: One bucket for your shampoo solution. The other, filled with clean water, is your rinse bucket. After you wash a panel, dunk your mitt in the rinse bucket. The Grit Guard at the bottom traps the dirt you just rinsed off, keeping it from getting back on your mitt. This single practice prevents most wash-induced scratches.
- Use a Dedicated Drying Aid: Never drag a dry towel across a dry panel. As the final rinse sheets off, spray a detailer or a quick ceramic spray (like the one you sealed with) onto the wet paint. This adds lubrication. Your drying towel now glides across the surface, lifting water without dragging microscopic grit.
- Safe Drying Technique: Use a large, clean, plush drying towel. My favorite is a giant microfiber waffle weave. Gently lay it on the paint and pull it across, using the weight of the towel to soak up water. Don’t apply heavy pressure. For tricky spots like mirrors and door handles, use a smaller, soft towel to blot the water away.
Your washing technique is the single biggest factor in keeping that flawless, scratch-free finish you just worked so hard to achieve.
When to Call a Pro: Understanding Car Scratch Repair Cost & Limits
Let’s be honest. Some scratches you can handle. Others will humble you. Knowing the difference saves your wallet and your paint. People often ask me, “What’s the car scratch repair cost?” The answer varies wildly, from a few dollars to over a thousand, especially when it’s small scratches vs. deeper ones.
For a basic polish to remove light swirls on one panel, a mobile detailer might charge $75-$150. A full multi-step paint correction for a whole car can run $500-$1,500. For deep scratches that need touch-up paint, wet sanding, and blending, you’re looking at $150-$400 per panel. A full panel repaint at a body shop starts around $500 and goes up from there.
When you search “car scratch repair near me,” look for detailers with paint correction portfolios, not just car washes. A true professional will give you a car scratch repair cost estimate only after feeling the scratch with their fingernail and inspecting it under a bright light. A quote over the phone is a guess.
The Clear Line Between DIY and “Call for Backup”
You should stop and call a professional in a few clear situations. I draw the line here for my own cars.
- The Fingernail Catches: If your nail clearly catches in the groove, the scratch is through the clear coat. This often requires filler paint, not just polish.
- You See Primer or Bare Metal: Any scratch that shows a different color (white, gray, or metallic) beneath your paint color is a deep scratch. On my black BMW, a white line means it’s down to primer. This is beyond buffing.
- The Area is Large or Complex: A long key mark across two doors and a fender is a big job. So are scratches on sharp body lines or complex curves, which are easy to burn through with a polisher.
- You Lack the Tools or Confidence: If you don’t own a dual-action polisher and haven’t practiced on a junk panel, today is not the day to learn on your daily driver.
- The Car is High-Value: This is my hard rule. I will polish my Ford truck or Honda minivan all day. But for a deep scratch on the red paint of my Porsche 911? I’m calling my paint guy immediately. The risk is too high.
What a Professional Actually Does
So what are you paying for? A pro brings skills and tools that go far beyond a bottle of scratch remover.
First, they perform a proper diagnosis. They’ll use a paint thickness gauge to see how much clear coat is left. This tells them how aggressive they can be. For a deep scratch, they might use spot wet-sanding with extremely fine grit paper and lots of lubricant to level the scratch edges without harming the surrounding paint.
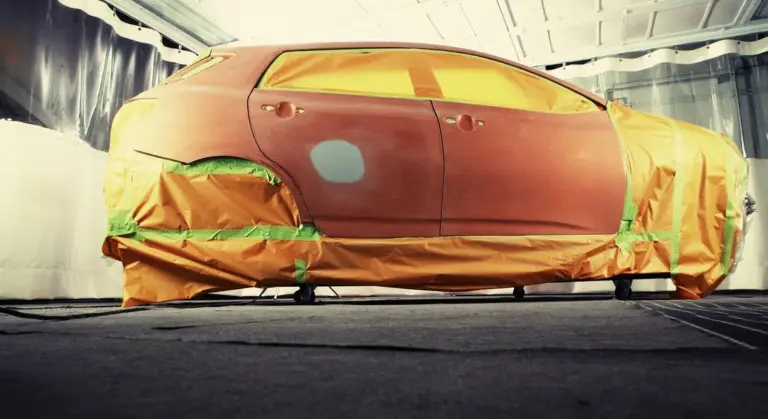
Next comes touch-up painting. A good technician doesn’t just glob paint in the scratch. They use a fine needle applicator to layer the color paint microscopically, letting each layer dry. Then they apply a clear coat filler. The final step is advanced blending. They will compound and polish the entire repair zone to seamlessly blend the repaired spot into the factory paint. The goal is to make the scratch disappear from a standing position, not just feel smooth.
Car Scratch Repair Kits: The Honest Truth
Those kits at the auto parts store have their place, but it’s a small one. They are essentially bottled clear coat with a tiny brush.
A scratch repair kit is sufficient only for a very specific job: an isolated, narrow scratch that is down to primer or bare metal, but is not on a major body line and is less than a few inches long. It’s for repairing, not hiding. You must clean the scratch thoroughly, apply the paint in thin layers, and sand it level after it fully cures. The result will be better than a raw scratch, but it will rarely be “invisible.”
It is a waste of time for clear coat scratches. If your nail doesn’t catch, the scratch can be polished out. Putting paint over it will look worse. It’s also a waste on wide scuffs or scratches on curved panels, where blending is nearly impossible for a novice.
I used one on a chip on the roof of my old Miata. It took three attempts over a week to get it acceptable. For a single chip on an older car, it’s a decent option. For anything on the hood or doors of a newer car, manage your expectations or call a pro.
Final Thoughts on Scratch Repair for Any Color
The single most important rule is to let the scratch depth, not the paint color, guide your correction method. Always test with your fingernail and begin with the least aggressive polish, saving compound for only the deepest defects.
Skip this careful assessment, and you will likely instill uniform haze or swirl marks that overshadow the original scratch, particularly on dark or bright paints.
Further Reading & Sources
- Not All Scratch Removers Work-These Are the Ones That Smoothed Out the Scrapes on Our Car
- r/cars on Reddit: Best way to remove scratches from paint?
- Different Types Of Scratches On Cars And How To Fix Them | Synchrony
- 6 Ways To Repair Car Scratches At Home: DIY Tips And Tricks
- How to Remove Scratches from Car Paint | DIY Guide for Scratch Repair
- Easy Ways to Remove Car Paint Scuffs and Scratches
- How To Remove Scratches On Car | Detailing Tips From Experts
Max is an automotive enthusiast having worked as a car mechanical and in interior detailing service for over 25 years. He is very experienced in giving your old car, a new fresh vibe. He has detailed many cars and removed very tough smells and stains from all kinds of cars and models, always ensuring that his work and advice helps his customers. He brings his first hand experience to his blog AutoDetailPedia, to help readers breath new life into their car interiors.