Brake Fluid on Car Paint: Does It Damage, Stain, or Eat Through Clear Coat?
That slick, oily spot on your fender is not just a mess. It is a chemical threat to your paint, and you are right to be worried.
I have cleaned this exact spill off my own black BMW and countless customer cars. This article will give you the facts and the fix. We will cover how brake fluid attacks clear coat, the immediate safe cleanup method, and how to assess and restore the finish.
Ignore it, and that fluid will dissolve the clear coat, leaving a permanent etched stain.
Key Takeaways: What You Need to Know First
Here is the simple truth. Brake fluid is a severe paint contaminant. A spill or drip can permanently stain and etch your clear coat in a matter of minutes.
If you get brake fluid on your paint, your first move is not up for debate.
- Flush the area immediately with a large amount of clean water. Use a hose or a bucket.
- Do not wipe or rub it. You will only smear the fluid and grind it deeper into the paint.
Time is your biggest enemy in this situation, and even a small, unnoticed drop left to dry will cause a blemish you cannot simply wash away.
A strong layer of wax or sealant can sometimes buy you a few critical seconds of reaction time by beading the fluid, but do not mistake it for armor. It will not stop the damage.
This guide focuses on paint, but we will also cover what happens to other surfaces like rubber tires and plastic trim, as they are often in the line of fire during brake work.
The Brutal Truth: How Brake Fluid Damages Car Paint
Brake fluid is hygroscopic. This is a fancy word that means it absorbs water from the air. This is great for your brake system’s function. It is terrible for your paint’s health.
Your car’s clear coat is a hardened, protective layer of paint. Brake fluid acts like a chemical solvent against it. Think of how acetone softens and removes nail polish. Brake fluid works on your clear coat in a similar, but more sneaky, way.
It does not just sit on top. It starts to break the clear coat’s chemical bonds. You will see this happen.
First, the area where the fluid landed will look stained or discolored. On my black BMW, it looks like a dull, cloudy patch. The paint loses its depth and shine right there.
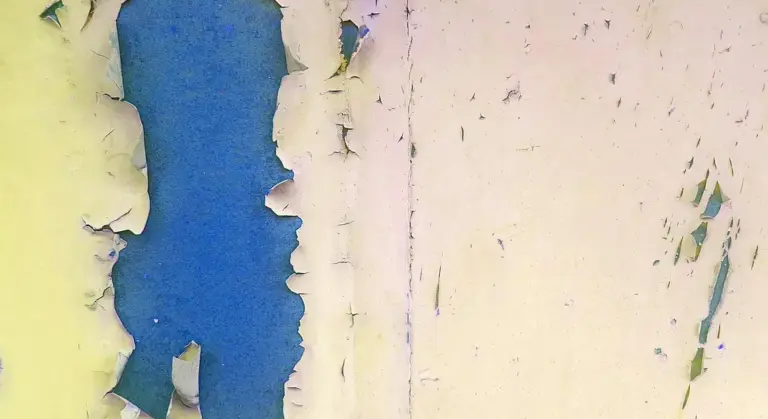
If left longer, the clear coat actually softens. It can become gummy to the touch. In the worst cases, it dissolves completely, exposing the soft color coat underneath to the elements. This is the direct answer to “does brake fluid destroy car paint”: yes, through a process of chemical etching that stains, dulls, and can erase the protective clear layer.
Let me be absolutely clear about something else. Brake cleaner is not the same as brake fluid, and it is far worse for paint. Brake cleaner is a powerful degreaser and solvent designed to evaporate quickly. It will attack and mar your paint nearly on contact. Never confuse the two, and keep brake cleaner spray away from your car’s body at all costs.
Don’t Panic, Act Fast: Your Immediate Response Guide
I spilled a little DOT 4 on the fender of my blue F-150 once. My heart sank. But I moved fast, and you can too. Follow this protocol the second you see the spill.
Your first goal is not to clean, but to dilute and remove the fluid without rubbing it into the paint.
- Contain and Flush.
Grab a hose or a bottle of water. Use a gentle, wide stream to flood the area. You want to push the fluid off the panel, not blast it. Keep the water flowing for a full minute.
Do not, under any circumstance, grab a rag and wipe. Wiping smears the corrosive fluid and grinds any grit into your clear coat. It turns a spill into a guaranteed scratch. Flushing is the only safe first move.
- Neutralize and Wash.
After the flush, you need a proper wash. Fill a bucket with water and a dedicated car wash shampoo. I keep a bottle of Meguiar’s Gold Class in my garage for this. Do not use dish soap. It strips waxes you might need and can be harsh on modern clear coats.
Use the two-bucket method. One bucket with your soapy wash solution, one with clean rinse water. Soak a clean microfiber wash mitt in the soap bucket, gently wash the entire affected area and surrounding paint, then rinse the mitt in the clean water bucket before reloading with soap. This prevents contaminating your wash water.
Rinse the entire panel thoroughly with your hose.
- Gentle Dry and Inspect.
Take a clean, plush microfiber drying towel. I use the Griot’s Garage PFM. Gently pat and glide the towel over the area to soak up the water. Avoid rubbing.
Now, get the car into bright light. Sunlight is best. Look closely at the spot. Do you see a dull patch, a haze, or a change in color? This inspection tells you what happens next.
This is emergency first aid, not a magic fix. Acting within the first 60 seconds can mean the difference between a simple wash and a full paint correction. If the fluid sat for an hour, the rules change.
How long does brake fluid take to damage car paint? On fresh, unprotected paint, staining can begin in under a minute. On a well-sealed surface with a good coat of wax or sealant, you might have a five-minute window. On my daily drivers with a spray sealant, I’ve caught spills quickly with no issue. On the bare, soft clear coat of my black BMW, I wouldn’t trust 30 seconds. The clock starts ticking immediately.
Diagnosing the Damage: Does Your Clear Coat Have a Stain?
After the emergency wash, you need to know what you’re dealing with. The type of damage dictates your repair.
Get your car in direct sunlight, or use a bright LED work light at an angle. Move your head around to see the light reflect across the paint. You are looking for two main things: a stain or an etch.
A surface stain looks like a shadow or a dull spot in the reflection. The paint texture feels smooth to your fingertip. This is often just discoloration in the top layers of your clear coat. If the stain persists, you can explore how to remove paint spots stains with simple, careful techniques. A stain has a good chance of being polished out with a mild abrasive compound.
An etch is more serious. It looks like a shallow crater or a rough patch. The reflection will break apart at that spot. This is where the fluid has eaten through the clear coat. Do the fingernail test. Gently drag your fingernail across the edge of the damaged area. If your nail catches, like going over a tiny cliff, the clear coat is compromised. You have an etch.
Paint color changes what you see. On my white Tesla, a stain appears as a faint yellow or grey blotch. It’s obvious. Etching is harder to see on white unless the light is perfect. On my jet black BMW, staining is less visible, but any etching looks like a glaring white scratch or a deep, dull void. Black paint reveals texture damage instantly, unlike some paint colors that hide scratches.
How to tell if brake fluid has damaged car paint? Look for these specific signs:
- A permanent dull spot that won’t shine up with quick detailer.
- A rough texture that you can feel with a light fingertip drag.
- A visible color change, often a whitish haze or a yellow tint.
- A depression in the surface that catches your fingernail.
- The damage follows the drip path of the fluid.
If you see only a stain, you can likely fix this yourself. If you feel an etch with your nail, the repair gets more complex. You are moving from cleaning into paint correction territory.
The Correction Process: Fixing Brake Fluid Stains and Etching
Fixing brake fluid damage is a step-by-step process. You start with the gentlest method possible. You only move to something more aggressive if the first step fails. This protects your clear coat from unnecessary removal.
Always start with a clean, cool surface in the shade, and wear gloves to protect your skin from any residual fluid.
For Surface Stains
Sometimes the damage is only on the surface. The fluid has left a stain or deposited contaminants in the microscopic pores of the clear coat, but hasn’t eaten into it. You can feel this as a rough, gritty spot on an otherwise smooth panel. These are classic signs of car paint defects caused by surface damage. Recognizing them helps tailor the proper repair approach.
A fine-grade detailing clay bar, used with plenty of lubricant spray, is your first and best tool here. The clay physically pulls the contamination out. It’s like using tape to lift lint off a suit jacket instead of scrubbing it. Once you’ve used a clay bar, you might want to explore other methods of paint decontamination to ensure a thoroughly clean surface.
- Spray a generous amount of detailing lubricant or a soapy water solution onto the stained area.
- Flatten a piece of clean detailing clay in your hand and gently glide it back and forth over the spot.
- Keep the surface lubricated. You will feel the resistance decrease as the clay grabs the contaminants.
- After claying, wipe the area dry with a clean microfiber towel. The stain will often be completely gone.
For Light Etching or Staining
If the stain remains after claying, the brake fluid has etched into the clear coat. The surface is microscopically uneven where the fluid softened the coating. To fix this, you need to level that area back down to the surrounding paint using a very fine abrasive.
I learned this on my Jet Black BMW, the “Swirl Magnet.” A tiny drop of fluid left a dull spot on the trunk. Claying did nothing. The spot felt smooth, but looked milky.
You need to polish the area with a mild abrasive compound, either by machine for best results or carefully by hand.
- Apply a dime-sized amount of a light polishing compound to a foam polishing pad.
- Using a dual-action polisher on a low speed setting, work the compound over the etched area and a bit of the surrounding paint. Use slow, overlapping passes.
- If polishing by hand, use a firm, clean applicator and moderate pressure in small, tight circles.
- Wipe away the residue with a clean microfiber. The etching should disappear, revealing clear, glossy paint again. Follow up immediately with a spray wax or sealant to protect the fresh surface.
On the BMW, two passes with a white polishing pad and a fine compound made the stain vanish like it was never there. The key was stopping the moment it was gone.
For Severe Damage
Sometimes the damage is too deep. If the brake fluid was left for hours or days, it may have burned completely through the clear coat. You will see a chalky, faded patch, or worse, a different colored layer underneath (the primer or base coat).
When the clear coat is gone, no amount of polishing will help; the damage is beyond detailing and requires professional repainting or expert touch-up. Attempting to polish a spot with no clear coat will just thin the surrounding good paint and make the damage more obvious.
A critical warning: never use brake cleaner spray in an attempt to fix any stains on car paint, including grease or brake fluid. Brake cleaner is a harsh, paint-stripping solvent. Spraying brake cleaner on car paint to remove a brake fluid stain will instantly destroy the clear coat, creating a catastrophic mess that guarantees a repaint. It is the exact wrong tool for the job.
Beyond the Paint: What Else Brake Fluid Can Ruin
Brake fluid is an equal-opportunity destroyer. While paint is the most common victim, this fluid attacks almost every other material on your car too. Here’s what to watch for.
Rubber Tires and Seals
Yes, brake fluid absolutely damages rubber. It is hygroscopic, meaning it absorbs water, but it’s also a powerful solvent. On rubber tires, door seals, or window trim, it causes the material to swell, become slimy, and then dry out, crack, and discolor permanently.
Once brake fluid soaks into rubber, the damage is usually irreversible, leaving it brittle and prone to failure.
First-aid tip: If you spill it on a tire or seal, flush the area immediately with a heavy stream of water, then scrub with car wash soap and rinse thoroughly to try and dilute and remove the fluid before it soaks in.
Plastic Trim and Bumpers
Unpainted plastic is highly vulnerable. Textured black trim (like on fenders or bumpers), hexmold body cladding, and even smooth plastic headlight lenses can be attacked. The fluid will often cloud the plastic, leave white, crazed stains, or in severe cases, actually soften and warp the material.
On modern cars with extensive plastic trim, a brake fluid spill can turn a simple detail into a parts replacement project.
First-aid tip: Blot, don’t rub, then quickly flush with water and a pH-neutral cleaner; avoid harsh all-purpose cleaners which can also damage plastics.
Interior Surfaces
Inside the car, the results are just as bad. On my Tesla’s “vegan leather” (a synthetic material), it would cause immediate staining and could break down the protective coating. On real leather, it strips dyes and oils. On vinyl or cheap hard plastics, it can cause discoloration and a permanent sticky feel.
Brake fluid on an interior surface often means a permanent stain or a need to re-dye or reupholster the affected section.
First-aid tip: Blot up every drop instantly with a dry, absorbent microfiber, then lightly dab with a damp cloth; do not saturate the material as you’ll spread the stain.
Wraps and Films
Paint Protection Film (PPF) and vinyl wraps offer a sacrificial layer. They can provide a few moments of protection, allowing you to wipe the fluid off before it reaches the paint. But they are not immune. If you’re weighing vinyl wrap vs. PPF, you’ll want to compare how each protects the finish and affects appearance over time.
Prolonged contact will stain or degrade the film itself, requiring that section of the wrap or PPF to be replaced to restore the appearance.
First-aid tip: Treat a spill on a wrap the same as paint: quick rinsing and gentle washing; the film gives you a small buffer, but don’t waste it.
The Detailer’s Arsenal: Prevention, Protection, and Product Picks
Paint Damage Prevention Tips
Stop the spill before it starts. Good habits are your first line of defense. I learned this the hard way years ago, leaving a faint stain on a fender from a careless drip. Now, whether I’m topping off the reservoir on my Odyssey or doing a full flush, I treat brake fluid with the respect it demands.
- Use a drip tray. A cheap plastic tray or even an old baking sheet under the brake line connections or master cylinder catches every drop. It’s simple and it works.
- Keep rags handy. I always have a stack of clean, absorbent microfiber towels within arm’s reach. The moment you see a drip, you can blot it, not smear it.
- Store fluids away from the car. Never leave an open container on the fender or hood. Set it on the ground, away from the paint. Close the cap immediately after use.
- Work clean and slow. Wipe the master cylinder and reservoir cap before opening it. Use a funnel with a thin spout for precise pouring. Rushing is how accidents happen.
The Role of Paint Protectants
A bare paint surface is vulnerable. A protected one has a fighting chance. Think of a quality wax, sealant, or ceramic coating as a sacrificial layer, a shield that takes the hit so your clear coat doesn’t have to. This barrier won’t make your paint immune, but it buys you precious time-often critical minutes-to notice and safely clean a spill before it eats through to the color layer. On my jet black BMW, the ‘Swirl Magnet,’ I always keep a synthetic sealant on it. That extra layer has given me the window I needed to safely rinse off brake fluid splatter more than once. Without it, the damage would have been instant and permanent.
Product Tier List for Cleanup and Defense
Your response to a spill and your ongoing protection plan should match your car’s use and your budget. Here’s how I break it down, based on what I use across my own fleet.
- Budget/Quick Fix Tier: This is for daily drivers where you need effective, no-fuss protection. Start with a reliable, pH-neutral car wash soap for the initial cleanup-it’s gentle and won’t worsen the chemical reaction. After washing and drying, lock in protection with a basic spray wax. It applies in seconds and provides a legitimate defensive layer. I use this combo on my F-150 for quick maintenance washes.
- Enthusiast/Prosumer Tier: You care about paint health and want stronger defenses. For cleanup, a dedicated iron-removing fallout cleaner is powerful. It chemically dissolves metallic contaminants and can help lift staining from embedded particles. Follow with a mid-range, polymer-based sealant. These products bond better to the paint and offer significantly better chemical and environmental stain resistance than basic waxes. This is my go-to for the Model 3 and the Odyssey.
- Show Car/Ultimate Protection Tier: For garage queens and concours contenders, maximum resistance is the goal. A professionally applied or high-quality DIY ceramic coating provides an incredibly hard, slick surface that makes chemical liquids bead up and roll off, offering the highest level of stain resistance. Pair it with a high-end paint sealant for layered protection. This is what guards the paint on my 911 and is the ultimate peace of mind.
Weave this final habit into your routine: always do a slow, deliberate walk-around check of your car’s paint after any under-hood work. Look for wet spots, drips, or smudges. Catching a problem while it’s still wet is the difference between a simple wipe-down and a costly repair. I do this without fail, even after just checking the oil. It takes ten seconds and has saved my finish more times than I can count.
Your Paint’s Defense Against Brake Fluid
Always wipe brake fluid off the paint right away with a damp microfiber cloth. Follow up with a thorough rinse and dry to stop the chemical from attacking your clear coat.
Ignore this, and you’ll see the clear coat melt away, leaving a dull, stained patch that’s tough to fix.
Relevant Resources for Further Exploration
- What Damages Car Paint: A Definitive Breakdown | UTI
- My Son Spilled Brake fluid on the hood of my car and didn’t clean it off, is the Paint ruined? – Quora
- What to Do if You Get Brake Fluid on Car Paint | Badell”s Collision
- What To Do if You Get Brake Fluid on Car Paint | Fix Auto USA
- Brake Fluid on car paint; how long before damage shows. : MGB & GT Forum : The MG Experience
- What Can You Do If You Get Brake Fluid on Your Car Paint – Chaney’s Collision Centers
- Spilled Brake Fluid On Your Car’s Paint? Here’s What You Need To Do ASAP – Jalopnik
Max Gunther
Max is an automotive enthusiast having worked as a car mechanical and in interior detailing service for over 25 years. He is very experienced in giving your old car, a new fresh vibe. He has detailed many cars and removed very tough smells and stains from all kinds of cars and models, always ensuring that his work and advice helps his customers. He brings his first hand experience to his blog AutoDetailPedia, to help readers breath new life into their car interiors.