How Do You Clean Coffee and Soda Spills from Car Seats?
That heart-sinking moment when a drink tips over in your car is something I know well from my own minivan. You need a clear plan to stop the stain and smell before they set.
I will share my hands-on process, covering the critical first blot, selecting the right cleaner for your seat material, my detailed cleaning technique, and how to eliminate every trace of odor.
Without the right approach, that spill will dry into a sticky, discolored patch that attracts more grime.
Your Spill-Cleaning Arsenal: Tools & Chemicals
You cannot win a fight without the right gear. This is not a job for old t-shirts and whatever cleaner you find in the garage. Using the wrong tool can turn a simple spill into a permanent stain. Gathering the right items before you start gives you the best chance for a clean, damage-free seat.
Think of this as your emergency kit. You should have these items ready to go.
- Clean, White 300+ GSM Microfiber Towels: I only use white towels for interiors. You need to see the stain and the dirt you are pulling up. A 300+ gram weight means they are thick, plush, and absorbent. Thin towels just push liquid around.
- A Soft-Bristled Brush: Look for a horsehair or soft detailing brush. This is for gentle agitation, not scrubbing. A stiff brush will fray fabric fibers and ruin leather grain.
- A Spray Bottle: For applying your cleaning solution with control. A mist is better than a pour.
- A Wet/Dry Vacuum or Extractor: This is the most important tool. A shop-vac with a clean wet filter works. A dedicated carpet extractor is better. It is the only way to pull the sticky residue and cleaner out from deep in the seat foam.
Choosing your cleaner is critical. You must match it to your seat material.
- pH-Neutral Interior Cleaner: This is for leather, vinyl, and plastic surfaces. A neutral pH (around 7) will clean without drying out or damaging the protective top coat on your materials. My go-to for the BMW’s leather and the Odyssey’s plastic trim.
- Fabric-Specific Upholstery Cleaner: These are formulated for cloth. They break down organic stains like coffee and soda and are designed to be extracted. Do not use a general-purpose cleaner on fabric. It can leave a sticky film that attracts more dirt.
- Distilled White Vinegar Solution (DIY Option): For a quick, safe mix, use one part distilled white vinegar to three parts distilled water in a spray bottle. The mild acidity cuts through sugary residues. Always test any cleaner, store-bought or DIY, in a hidden spot like under the seat first.
Your kitchen sink cabinet is a minefield. Do not grab these.
- Bleach or Ammonia-Based Cleaners: These will permanently discolor or bleach your seats. The fumes are also terrible in a closed car.
- Dish Soap or Harsh Degreasers: These strip away protective coatings and leave residues that make fabrics stiff and attract grime. They are for dishes, not car interiors.
The Order of Operations: Your Step-by-Step Protocol
Speed matters. The moment coffee or soda soaks in, the sugar and acids start to set. A warm seat makes it worse. You are not just cleaning a stain. You are preventing a sticky, smelly habitat in your seat foam. Follow these steps in order. Do not skip ahead.
- Soak Up Excess. Use the dry side of a microfiber towel. Gently press and lift. Get up every drop of free-flowing liquid you can. You are containing the spill.
- Blot, Never Rub. This is the rule. Use a fresh, dry towel and press straight down. Lift. Press. Lift. Rubbing grinds the stain deeper into the fibers, like grinding dirt into a carpet with your shoe.
- Apply Cleaner. Mist your chosen cleaner lightly onto the stain. Do not soak it. You want to dampen the area to break the stain bond, not flood it and push it deeper.
- Agitate Gently. Take your soft brush and lightly work the cleaner into the stain. Use small, circular motions. You should see the stain begin to loosen and transfer into a light foam.
- Extract and Rinse. This is the key. Use your wet/dry vacuum. Press the upholstery tool firmly onto the area and hold it there. Pull out all the dirty cleaner and stain residue. Follow by misting the area with plain distilled water and extracting again. This rinses out any leftover cleaner. Failure to rinse and extract fully leaves a crusty, sticky spot.
- Dry Thoroughly. Blot the area with a fresh, dry microfiber. Then, let air dry completely. Crank the heat or use a fan. A damp seat will grow mildew, and that smell is much harder to remove than coffee.
You know the smell of old soda in a hot car. It is a sickly-sweet, fermented odor. That is what happens when you do not extract and dry properly. The seat feels stiff and crusty to the touch. I have fixed many seats like this in the Kid Hauler. It takes three times as long as just doing it right the first time, especially when trying to remove stubborn odors from car seats.
What’s the First Thing I Should Do When I Spill?
You are driving. Coffee sloshes over the cup rim. Your heart sinks. Your first move determines if this is a five-minute cleanup or a weekend project.
You must blot, not rub. I see people panic and start wiping furiously with a napkin. This is the worst thing you can do. Rubbing is like taking a stain and hammering it into the seat. It pushes the liquid and particulates down through the fabric surface and into the foam below. Once it is in the foam, you are in extractor territory for sure. Blotting lifts the stain. Rubbing sets it.
If you are on the road, use what you have. Napkins, fast-food paper towels, even an extra t-shirt. Press, do not wipe. If you have bottled water, pour a little on a clean spot of your blotting material to dampen it. A damp blotter can help lift a fresh stain better than a dry one. This is pure damage control. Your goal is to get the seat to a state where you can drive home and perform the full protocol with your proper tools.
One question I get all the time: do you clean it up right away or let it dry? The answer is always, unequivocally, right away. Letting a sugary spill dry is a guarantee of a hard, sticky stain. It bakes onto the fibers. You will need stronger chemicals and more aggression to remove it, which risks damaging the seat itself. Attack it while it is still wet and fresh. The clock started ticking the moment the cup tipped over.
How to Clean Coffee and Soda from Fabric Car Seats
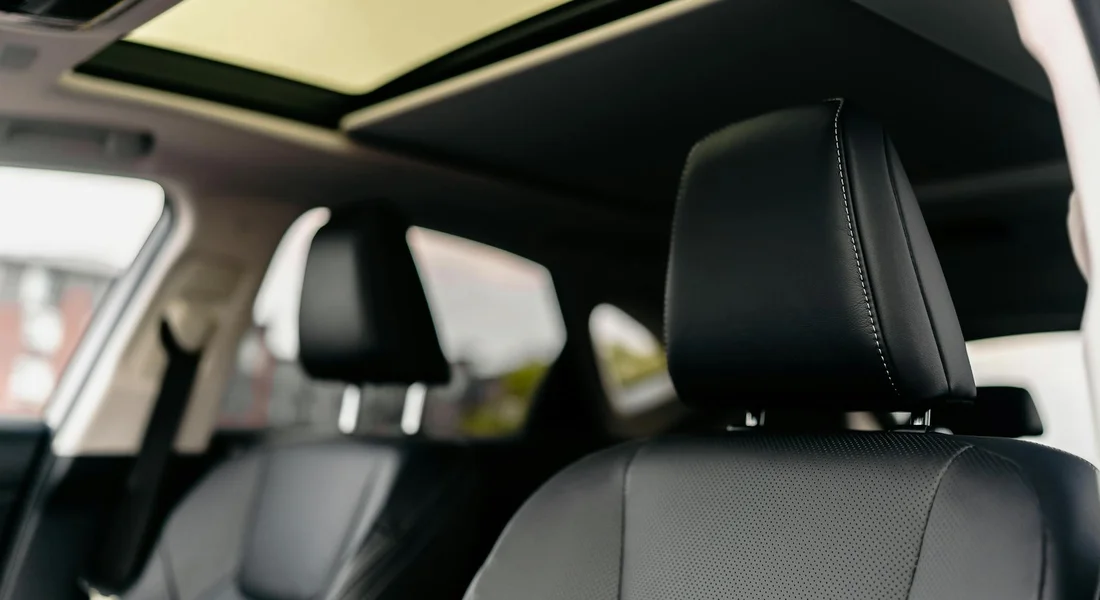
This is the process I use in my own 2019 Honda Odyssey, the “Kid Hauler.” It has seen more spilled chocolate milk and rogue juice boxes than I care to count. The goal is to lift the stain, not grind it in.
First, always blot. Use a clean, dry microfiber towel to soak up every last drop you can. Do not rub. Press down firmly and lift. Think of it like a sponge on a kitchen counter. Your first job is to remove the liquid, not spread it.
Now, for the cleaner. You have two reliable paths.
A DIY mix of distilled white vinegar, water, and a drop of dish soap is a powerful, affordable option you can make right now. The vinegar helps break down the sugars and acids, while the dish soap acts as a surfactant to lift the grime. The big pro is cost and availability. The con is that if you do not rinse it thoroughly, it can leave a soapy residue that attracts more dirt later.
The other path is a dedicated fabric cleaner. These are engineered to emulsify stains and are often low-residue. I keep one on hand for severe jobs. They are a bit more expensive, but they are formulated for the task.
Whichever you choose, test it on a hidden area of the seat, like under the front edge, first. Wait a few minutes to ensure it does not discolor the fabric.
Apply your cleaner lightly to the stain. Do not soak the seat. Then, take a soft-bristled detailing brush, like a boar’s hair or very soft nylon brush. Use gentle, circular motions to agitate the cleaner into the fibers. These steps are effective for clean stains on leather car seats. Keep the application light to avoid soaking the leather.
The key is to work the cleaner into the top of the fibers, not to scrub the fabric apart. Imagine you are brushing a delicate suede jacket, not scouring a pot. This gentle agitation helps the cleaner penetrate the stain without fraying the cloth.
Here is the most critical step. You must extract the dirty solution. Blotting with a towel helps, but it is not enough. A wet/dry vacuum is your best friend here.
Wiping with a cloth pushes the stain-laden liquid around and deeper into the foam underneath. A vacuum pulls it up and out. If you do not own one, you can rent a compact extractor or a quality wet/dry vac from a hardware store for a day. It is worth it.
Go over the area with the vacuum multiple times, adding small amounts of clean water to rinse and pulling it back out, until the water you extract runs clear. This is how you clean coffee off cloth car seats for good. This same method applies for how to clean chocolate out of a car seat, or any sugary, sticky mess.
Finally, air dry completely. Roll the windows down on a sunny, low-humidity day if you can. A damp seat will grow mildew, and that is a much bigger problem.
How to Clean Coffee and Soda from Leather and Vinyl Seats
Stop. Leather is not a pair of jeans. My Jet Black BMW taught me this the hard way. Harsh all-purpose cleaners, excessive water, and rough scrubbing will permanently damage leather. They can strip the protective topcoat, fade the dye, and leave the leather stiff and cracked.
You need a pH-balanced leather and interior cleaner. Why pH? Your leather has a delicate chemical balance. A cleaner that is too acidic or too alkaline can degrade the dyes and the protective sealant over time. A pH-balanced formula is designed to clean safely without causing that internal damage.
The process is gentle. Mist a small amount of cleaner onto a soft microfiber towel, never directly onto the seat. Wipe the stained area with light pressure. Follow immediately with a second, dry towel to buff away any moisture and residue. This method is particularly effective when trying to remove wax stains from car seats.
Never soak the leather, never use aggressive brushes, and always dry the surface completely. It is a mist, wipe, and dry operation—always water leather seats cautiously to avoid damage.
Here is a crucial check. Determine if your leather is coated or uncoated. Press your finger on a clean spot. If the texture does not change much and it feels smooth with a slight plastic-like feel, it is coated (also called protected or finished leather). This is what almost all modern car leather is. The above cleaner method is perfect for it.
If the leather immediately darkens where you press and feels porous and natural, it is uncoated (aniline or semi-aniline). This is rare and high-end. For this, you need a specific, gentle leather cleaner and conditioner approved for uncoated hides. When in doubt, use the gentlest method possible.
This exact same mist, wipe, and dry process works perfectly for vinyl seats, which are incredibly common. Vinyl is durable, but harsh chemicals can still make it brittle and fade it over time. A pH-balanced interior cleaner is the safe choice. Keep these vinyl seats looking new with a simple clean and maintenance routine.
What About “Vegan Leather” or Synthetic Suede?
Newer materials like the “vegan leather” in my Tesla Model 3 or the Alcantara on my Porsche’s steering wheel need special care. They are often more delicate than they look.
For synthetic leathers, use the same gentle, pH-balanced interior cleaner as for coated leather. Test in a hidden spot first, as some dyes can be sensitive. This approach fits into the broader guide on how to clean and maintain leather car seats.
For synthetic suede and Alcantara, never use a regular brush or aggressive rubbing. The nap can be easily matted. Use a very soft microfiber or a dedicated suede brush. Apply a light, foam-based interior cleaner. Dab at the stain, do not rub. Aggressive rubbing will distort the fibers permanently and create a shiny, worn spot.
Cleaning Removable Car Seat Covers and Dealing with Crumbs
If your seats have removable covers, you have a huge advantage. Washing the cover is often the best way to get a deep clean for fabric car seats and prevent a stain from becoming permanent.
Always start by checking the care tag sewn into the cover for specific washing and drying instructions. If there is no tag, a gentle, cold water cycle is your safest bet. Here is my process.
- Pre treat any visible stains on the dry fabric with a dab of your interior cleaner or a dedicated stain remover. Let it sit for five minutes.
- Place the cover in the washing machine alone, or with only a few other light-colored towels to prevent color transfer.
- Use a gentle, cold water cycle with a mild, dye free detergent. Avoid heavy duty detergents or fabric softeners, as they can leave residues that attract more dirt.
- Air dry the cover completely. Never put it in the dryer unless the tag explicitly says you can. Heat can shrink the fabric or melt any backing material.
A freshly cleaned cover is your best defense. It has no old stains to react with new spills and its fibers are more absorbent.
Before you put the clean cover back on, deal with the crumbs. After a spill, debris gets pushed deep into the seat seams. A standard household vacuum often lacks the power. This is where searches for a car seat cleaner vacuum make sense. You want a detailer’s crevice tool. It’s a long, skinny attachment that fits into seams. Use it to aggressively vacuum the bare seat surface under the cover. You will be shocked at what comes out.
Troubleshooting Tough Stains and Common Mistakes
That faint brown circle from a coffee spill two months ago is a set in stain. Surface cleaning won’t touch it. You need to re liquefy the stain and pull it out. For this, I use a dedicated upholstery stain remover in a paste or gel form.
Apply a thick layer over the entire stained area, not just the center. Let it dwell for at least twenty minutes, following the product label. The paste keeps the cleaning agents in contact with the stain instead of just drying on the surface. After it dwells, agitate it with a soft brush and extract it with your wet/dry vac or a microfiber towel. You may need two passes.
People often ask if it’s cheaper to do it themselves or hire a detailer. Let’s compare. Renting a carpet extractor from a hardware store might cost $40 for a day. A quality interior cleaner is another $15. Your time is free, but the rental machine is often bulky, cold water only, and you’re learning on the fly.
A professional detailer brings a truck mounted, heated extraction system that is far more powerful and efficient, and they have the experience to use it correctly. These are examples of professional car interior cleaning methods. They emphasize deep cleaning while protecting materials. For a $150-$200 interior detail, they will clean all your seats, carpets, and plastics. For a single, stubborn stain, it may be overkill. For a car full of spills and grime, it’s a very good value.
This leads to searches for car seat cleaner near me or car seat cleaner rental. My advice is this: if you have one stain and a simple extractor, try it yourself. If the seats are a mess, or you’ve tried and failed, call a pro. It will save you frustration. Especially when dealing with cloth or fabric car seats, which can be tricky to clean properly.
What should you NOT use? This list is non negotiable.
- Bleach or Ammonia: They will discolor and degrade fabrics and plastics instantly.
- Magic Erasers (Melamine Foam): These are abrasive. They will make cloth seats look fuzzy and will permanently dull plastic and leather surfaces.
- Scalding Hot Water: It can set protein based stains (like milk) and may damage fabric binders or adhesives under the seat cover.
- Dish Soap or Laundry Detergent: They leave sticky residues that attract dirt, making stains come back faster.
My Seat is Clean But Still Sticky. Help?
This is the signature move of a soda spill. You wiped up the liquid, but the sugar remains as an invisible, tacky film. Wiping with a dry or cleaner soaked cloth just smears it. You need to dissolve it and remove the solution.
Sugar is water soluble, so your weapon is a damp microfiber towel and a little patience. Lightly mist the area with clean water or a diluted interior cleaner. Using a fresh, damp section of the towel, wipe in one direction. Turn the towel to a clean section and wipe again. Repeat until your towel comes away clean and the surface feels smooth to your hand, not tacky.
I learned this the hard way in my grey Odyssey, the “Kid Hauler.” My son spilled pancake syrup on the cloth seat. I cleaned it, or so I thought. A week later, everything from goldfish crackers to library books was sticking to that spot. I had to go back, dampen the area, and use three separate towels to fully dissolve and lift away the syrup residue. The lesson was clear. What feels clean to a quick finger test might still be a sticky trap.
Keeping Your Upholstery Spill-Free
Your best defense against a permanent stain is to blot the spill with a clean, absorbent towel the moment it happens. Using a gentle, eco-friendly cleaner made for your specific seat material breaks down the sugars and acids safely. That same approach applies to spills on car carpet and upholstery. Quick blotting and a suitable cleaner prevent stains from setting.
Skip these steps, and you will be left with a hardened, discolored patch that smells and attracts more grime.
Sources and Additional Information
- How to Remove Liquid Spills from Fabric Vehicle Upholstery
- How to Clean Food Spills from Car Upholstery
- r/Adulting on Reddit: How do you clean oily liquid spill in your car seat?
Max Gunther
Max is an automotive enthusiast having worked as a car mechanical and in interior detailing service for over 25 years. He is very experienced in giving your old car, a new fresh vibe. He has detailed many cars and removed very tough smells and stains from all kinds of cars and models, always ensuring that his work and advice helps his customers. He brings his first hand experience to his blog AutoDetailPedia, to help readers breath new life into their car interiors.