What Wax Works With Your Car’s Paint and Clear Coat, and How Do You Apply It Correctly?
You’re holding a wax, worried it might cloud your black BMW’s finish or simply slide off your truck’s oxidized paint. I’ve fixed both results on cars that came through my bay.
Here, I’ll show you how to read your paint’s needs, select waxes that actually bond, and apply them so they last.
Use the wrong product or method, and you will add fine scratches or leave your paint unprotected.
What Kind of Paint and Clear Coat Do I Actually Have?
Think of your car’s paint like a piece of fancy cake. The color is the cake itself. The clear coat is the hard, glossy layer of frosting on top. That clear coat is a hard, transparent layer of paint designed to protect the color underneath from the sun and the elements. Nearly every car built after the mid-1980s has this two-stage system.
Some paints are different. My 1995 Mazda Miata has what’s called single-stage paint. There’s no separate clear layer. The color and the protective resins are all in one. This is common on older cars and some modern bright reds or whites. While single-stage paint changes how you polish it (color will come off on your pad), it doesn’t change what wax you can use. Any wax safe for clear coat is safe for single-stage. Safe materials car paint care practices help protect finishes like this. Choose products that are labeled safe for single-stage paint.
Then there are specialty finishes: matte, satin, or “frozen.” These have a textured, non-reflective look. The paint itself has flattening agents in the clear coat to kill the shine. You must never use a traditional wax, sealant, or glaze on a matte or satin paint finish (it will ruin the effect).
Not sure what you have? Here’s a quick test. Find a small, hidden scratch. Look at it in good light. If the scratch looks white or milky, you have a clear coat. You’re seeing light scatter in the damaged clear layer over the color. If you rub the scratch with a clean, white polishing pad and the pad picks up the color of your car, you have single-stage paint. That quick check helps you decide how to approach repairing car paint scratches. In the next steps, you’ll find guidance on the best repair options.
What Happens if I Use the Wrong Wax? (The Compatibility Guide)
Using the wrong product on matte paint is the one big mistake. Traditional waxes and sealants are designed to create shine and fill microscopic pores. On a matte finish, they will soak into the textured surface and create uneven, shiny patches called “high spots.” These are often permanent. The only fix is a very expensive repaint. For matte paint, you only use specific, pH-neutral matte finish cleaners and detailers.
For every other paint type-modern clear coat or classic single-stage-any product labeled “car wax” or “paint sealant” is safe. The result differences are about gloss, slickness, and how long it lasts, not about causing damage. A cheap paste wax won’t hurt your paint. A premium ceramic spray won’t either. You’re just choosing between a coat that might last a month versus one that lasts a year. When selecting products, look for safe, paint-friendly chemicals that are compatible with car paint and clear coats. Those formulas protect the finish without risking damage.
People often ask if they can use car wax on other stuff. You can. It will provide some protection. But it’s not ideal. Marine waxes have heavier UV blockers and more flexibility for hulls that expand in water. Ski wax is a completely different chemistry for gliding on snow. For wood furniture, a car wax might temporarily shine it but could soften certain finishes over time. For the best results and longest protection, use a product formulated for the specific material you’re treating.
Spray, Paste, or Liquid? Picking Your Wax Personality

Choosing a wax isn’t just about shine. It’s about matching the product’s personality to your car’s life and your own patience. Get this right and the job feels easy. Get it wrong and you’re fighting the product.
Spray Wax (The Quick Detailer)
This is your maintenance ally. Think of it like a fast polish for your shoes. It adds a thin, slick layer of protection and gloss in minutes.
I use it on my white Tesla after a plain water rinse to knock down water spots and add slickness. It’s perfect for the Odyssey’s sliding doors after a quick gas station wash to add a little protection where the kids grind in dirt.
- Best For: Boosting gloss and adding light protection between major details. Use on a clean, cool surface.
- How to Apply: Spray directly onto a clean microfiber towel or the panel. Wipe on, then immediately flip the towel and buff to a shine. No waiting.
- The Feel: It leaves the paint feeling slippery, not thick.
Spray wax is for the detailer who wants a “good enough now” result with almost zero effort.
Liquid Sealant (The Durability King)
This is synthetic protection. It bonds to your clear coat like a thin, clear shell. We’re talking months of defense against rain, sun, and road film.
This is what goes on my blue F-150. As a daily driver that sees mud and highway miles, it needs longevity more than a showroom glow. The synthetic polymers shrug off water spots and acidic contaminants better than traditional wax.
- Best For: Daily drivers, light-colored cars, and anyone who wants “set it and forget it” protection.
- How to Apply: Apply a few drops to a foam applicator pad. Work it into the paint in thin, even sections (one panel at a time). Let it haze fully, which can take 5-20 minutes. Buff off with a clean, fluffy microfiber.
- The Look: A bright, clear, sterile shine. It looks technically perfect.
A liquid sealant is your best defense for a car that lives outdoors and faces the elements daily.
Paste Wax (The Depth Champion)
This is the classic. Often a blend of natural carnauba and synthetic polymers, it warms the paint and adds a deep, liquid glow you can almost swim in.
It demands more elbow grease. I reserve it for my red Porsche and my jet black BMW. On dark colors, that warm, rich depth is unmistakable. It’s a ritual, not a chore. The results are sublime but typically last 4-8 weeks.
- Best For: Garage queens, dark-colored cars, and show car weekends where depth matters most.
- How to Apply: Swirl a clean applicator in the tin to get a small amount. Smear it onto the cool paint in thin, circular motions. A little goes a very long way. Let it haze, then buff off vigorously with a clean microfiber.
- The Look: A warm, deep, candy-like gloss. It makes metallics pop and solid colors look wet.
Paste wax is for the enthusiast who finds peace in the process and chases optical perfection.
The Non-Negotiable Prep Work Before Any Wax Touches Paint
Wax is a sealant. It locks in whatever is on the surface. Lock in dirt, you lock in scratches. Lock in smooth, clean paint, you lock in perfect reflection. This step cannot be rushed.
Step 1: The Perfect Wash
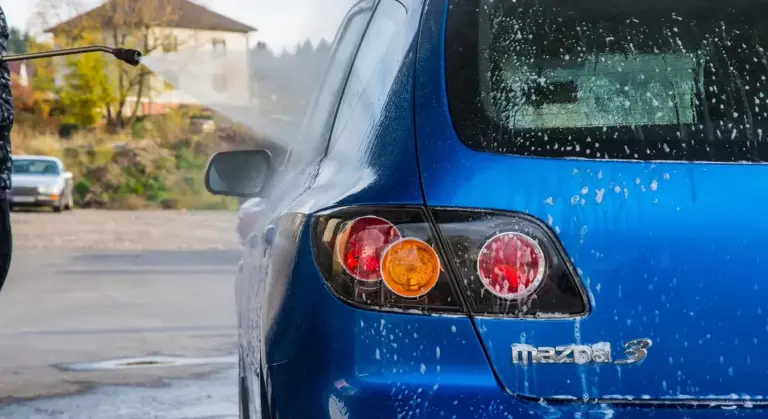
You must start with a contaminant-free surface. I use the two-bucket method on every car, every time. One bucket with soapy water. One bucket with clean rinse water for your mitt.
This prevents washing the dirt from your mitt back onto the paint. Work from the top down, rinsing the mitt in the clean water bucket after every panel. Dry with a clean, soft drying towel using a dragging motion, not rubbing.
A clean wash is the foundation. Any shortcut here will undermine every step that follows.
Step 2: The Decontamination Feel Test
After washing, your paint might look clean but feel like sandpaper. This is bonded contamination, tiny bits of rail dust, brake dust, and industrial fallout glued to your clear coat.
Do the baggy test. Put your hand inside a thin, disposable plastic sandwich bag. Gently run your fingertips over a clean, dry panel. With the bag on, you’ll feel every tiny speck as a bump. If it’s not glass-smooth, you need to clay.
Use a dedicated clay bar or a synthetic clay towel with a lubricant spray. Gently glide it over the surface. You will hear and feel it grabbing the contaminants. This step is mandatory before waxing a daily driver like my F-150.
Step 3: The Polish (Optional but Transformative)
Wax enhances the surface. It does not fix defects. For my swirled-up BMW or the oxidized single-stage paint on my classic Miata, wax alone is a waste.
A light, one-step polish with a dual-action polisher and a fine finishing pad removes shallow swirls, water spots, and hazing. It restores clarity. This is how you turn a dull finish into a mirror. After polishing, you must wash or wipe the panel again to remove polishing oils before applying your chosen wax or sealant.
Polishing is the difference between making a clean car shiny and making the paint itself look new again.
How to Apply Wax Correctly: A Step-by-Step Walkaround
Think of waxing like mowing a lawn. You do it in strips. You do not run around randomly. Working in organized sections keeps you from missing spots or letting product dry where you do not want it to.
I break every car into six or seven zones. Roof, hood, trunk, then each side. On my BMW, the hood alone is a full section because black paint shows every error.
Break It Down and Conquer
Start high and work your way down. Gravity is not your friend. Any dust or drips will fall onto panels you have not done yet.
- Section 1: Roof
- Section 2: Hood and front fenders
- Section 3: Trunk lid and rear quarter panels
- Section 4: Driver’s side doors
- Section 5: Passenger side doors
- Section 6: Front bumper (often the dirtiest, do it last)
- Section 7: Rear bumper
Complete one entire section, from application to buffing, before moving to the next. This method prevents the wax from curing too long and becoming difficult to remove.
Tool Talk: Your Hands Are Not Tools
The right tool makes the job feel easy. The wrong one makes it a fight.
- For Paste or Liquid Wax: Use a soft foam applicator pad. I keep a dozen clean ones in a bin. They give you perfect, even control. Put a small amount of product on the pad, not directly on the paint.
- For Removal: Use a clean, plush microfiber towel. The deep pile grabs the wax residue without scratching. I use different colored towels for application and removal so I never mix them up.
- For Spray Wax: Use two towels. One slightly damp towel to spread the product. A second, dry plush towel to immediately buff it to a shine. Spray waxes are meant to be wiped on and off in one pass.
Application Pattern: Thin is How You Win
This is the most common mistake I see. People think a thick coat protects better. It does not. A thick coat just gums up, wastes product, and is miserable to buff off.
Put a tiny dab on your foam pad. Apply it using overlapping “C” or “figure-8” motions. You are aiming for a translucent, almost invisible film. If you can see a thick, white spread of product, you used way too much. Your goal is to cover the paint with the thinnest, most even layer possible. On my red Porsche, with a perfect paint correction underneath, a thin coat of a good carnuba looks like liquid glass.
The Finger Swipe Test: Your Built-In Timer
How do you know when to wipe it off? Do not guess. After applying to a whole section (like the hood), wait. The wax will start to haze from a wet look to a dull, matte finish. This usually takes 3 to 10 minutes, depending on temperature and humidity.
Now, take the tip of your finger and lightly swipe it across the hazed wax. If the swipe comes away clean, revealing clear, shiny paint underneath, it is ready. If your finger just smears the wet wax, it needs more time to dry. In the next step, we’ll cover how to apply and remove car wax to protect the finish. Those tips will help you get a lasting shine.
Buffing to a Brilliant Shine
This is the satisfying part. Take your clean, dry microfiber towel. Fold it into quarters to create multiple clean surfaces. Using light pressure, wipe off the hazed wax in straight, front-to-back strokes.
Flip your towel to a fresh side after every few wipes. Once the bulk of the residue is gone, make a final, zero-pressure pass with a completely clean part of the towel. This is the “finishing” wipe that leaves the deep, flawless gloss. On my black BMW, I might use three or four towels for the whole car to ensure I am always working with a clean surface.
Wax Aftercare and Common Mistakes to Avoid
You put in the work. Now you need to protect your protection. The first 24 hours are critical for the wax to fully set and bond to your clear coat.
Let It Cure, Keep It Dry
Check your specific product’s label. Most traditional waxes need 12 to 24 hours to fully polymerize and shed water effectively. This means no rain, no dew, and definitely no trip through the car wash for at least half a day. I always try to wax in the late afternoon so it can cure overnight in the garage. Understanding the car wax dry cure time helps you plan around weather and avoid moisture exposure during that window.
Washing a Waxed Car
When you do wash, use a pH-neutral car shampoo. Harsh soaps or dish detergent will strip the wax right off. The soap should feel slick on the paint. Your goal is to clean the dirt off the wax, not the wax off the car. The water should still bead beautifully when you are done.
Mistake 1: Waxing in the Sun or on Hot Paint
This is a classic error. I did it on my Ford F-150 hood once and vowed never again. Heat makes the solvents in the wax evaporate instantly. The product dries as you are putting it on, becoming a sticky, cement-like film that is nearly impossible to buff off without specialized cleaner. Always work in the shade on cool to the touch panels. Early morning or evening is best.
Mistake 2: Waxing Over Contamination
Wax is not a cleaner. It is a sealant. If you wax over dirt, old oxidized wax, or tree sap, you are just locking those contaminants onto your paint. Always start with a perfectly clean surface. This often means a proper wash, followed by a clay bar treatment to remove embedded grit, and using pre-wax cleansers or paint cleaners to ensure no residues are left. My Miata’s single-stage paint taught me that lesson the hard way.
Mistake 3: One Towel for the Whole Job
That single microfiber towel starts clean. After one panel, it is loaded with wax residue. By the third panel, it is saturated. It will stop absorbing and start smearing a greasy film everywhere. Have a stack of fresh towels ready and switch them out often. It makes the buffing easier and gives you a perfect result.
Mistake 4: Waxing Plastic and Rubber Trim
Most waxes contain dyes or solvents that can stain porous black plastic and rubber trim, leaving ugly white blotches. On my Honda Odyssey, the textured trim around the windows is a prime target. Apply wax carefully to painted surfaces only, and use a dedicated trim protectant on any plastic or rubber. If you do get wax on trim, a bit of isopropyl alcohol on a towel can usually clean it off before it stains.
When to Re-Wax and How to Know Your Protection is Fading
You don’t need a lab coat to figure this out. The paint tells you everything. The most honest test happens in your driveway with a garden hose.
I call it the sheeting test. Take your hose, turn off the nozzle, and let a gentle flow of water run over your hood or roof.
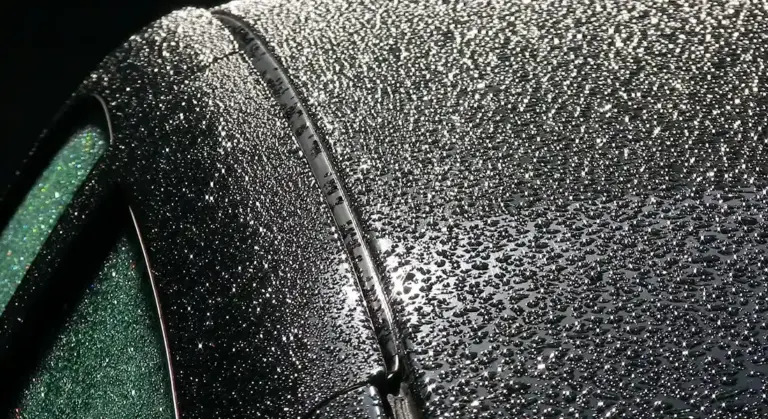
On a surface with strong, fresh protection, the water won’t bead up into tight little droplets. Instead, it will flatten out and sheet off the panel in wide, fast-moving rivers. The surface is so slick and hydrophobic that water can’t cling to it.
When your wax or sealant is wearing thin, the water behavior changes dramatically. You’ll see small, tight beads that stick in place. The sheeting action slows down or stops completely, leaving behind a spotted, wet mess. If you see this, your shield is down.
How Long Should Your Protection Last?
Think of protection in layers, from a light jacket to a winter parka. Each has its season.
- Spray Wax (2-4 weeks): This is your quick refresh. I use it on my F-150 after a rinse to fight road film. It’s fantastic for boosting gloss between major treatments, but don’t expect it to stand alone through a harsh winter.
- Paste Wax (1-3 months): The classic. A good carnauba paste, like the one I use on my Miata for that warm, deep glow, has a shorter but beautiful life. Sun and rain eat at it faster than modern synthetics.
- Liquid Sealant (3-6 months): The workhorse of durability. This is what goes on my daily drivers. It’s a synthetic polymer that bonds to the clear coat, offering longer-lasting protection against UV rays and contaminants.
These timelines are for a garage-kept car. Your reality is different.
Your Environment is the Real Timer
The calendar is a suggestion. Your car’s life is the schedule. You must factor in the assault it faces every day.
My dark blue F-150 sees road salt from November to April. That brine is a paint killer. It chemically degrades waxes and sealants at an accelerated rate. If you drive on salted roads, cut any longevity estimate in half. Frequent rinses, especially underneath, are non-negotiable.
For my classic red Miata, the enemy is the sun. Ultraviolet radiation is what ultimately breaks down the polymers in your protection, turning them brittle and ineffective. A car that lives outside in Arizona needs waxing far more often than one in Seattle.
And let’s be blunt about automatic car washes. Those spinning brushes are coated in every bit of dirt and grit from the last hundred cars. They are sandpaper machines. A single trip through one can strip a significant amount of your carefully applied protection. Touchless washes are safer for your wax, but their harsh detergents can also shorten its life.
The Smart Strategy: Using a “Topper”
Here is a professional secret for maintaining that just-waxed look with less work. It’s called topping.
You start with a solid, durable base layer. This is your liquid sealant or synthetic paste wax applied with full prep. This is your six-month foundation.
Then, every third or fourth wash, you add a topper. After you rinse the car, you mist a spray wax onto the wet panels and dry it off as normal. Products like a spray ceramic detailer or a quick wax are perfect for this.
This spray topper does not replace your base layer. It revitalizes it. It fills in micro-worn areas, adds fresh slickness, and boosts the hydrophobic effect. It’s like adding a fresh coat of polish to your shoes without stripping and redoing the entire leather. This simple habit can extend the effective life of your base protection by months, keeping your paint beading and sheeting like new with minimal effort.
On my black BMW, this is the only way I manage. A strong sealant base fights the swirls, and a spray topper after every wash keeps it slick and easy to clean, preventing new scratches.
Waxing Right for a Lasting Finish
The core of a great wax job is using a product designed for your car’s clear coat and applying it with slow, deliberate strokes in thin layers. Nail those two things, and you’re not just adding shine-you’re building a resilient shield against the elements.
Choose or apply your wax poorly, and you invite swirls, poor durability, and a dull finish that’s hard to fix.
Further Reading & Sources
- Car Waxes & Sealants for Auto Detailing | Chemical Guys
- Wax & Protect
- Correct & Protect | Best Car Wax Products – Autogeek.net
Max Gunther
Max is an automotive enthusiast having worked as a car mechanical and in interior detailing service for over 25 years. He is very experienced in giving your old car, a new fresh vibe. He has detailed many cars and removed very tough smells and stains from all kinds of cars and models, always ensuring that his work and advice helps his customers. He brings his first hand experience to his blog AutoDetailPedia, to help readers breath new life into their car interiors.