How Do You Wash, Dry, and Maintain a Vinyl Wrap Without Causing Damage?
That new vinyl wrap on your car represents a real investment, and washing it with the wrong technique can quickly lead to scratches and fading. I felt that same worry washing my wrapped Porsche 911 for the first time.
This article breaks down the safe, hands-on process I use every time. We will cover the correct two-bucket wash method, how to dry without leaving micro-scratches, and the ongoing maintenance that keeps the color vibrant.
Wash it like standard paint, and you will slowly grind dirt into the film, causing permanent scratches and a dull, faded finish.
Key Takeaways for Vinyl Wrap Longevity
Think of a vinyl wrap like a delicate, expensive temporary tattoo for your car. You want to keep it looking sharp for its full five to seven year promise, not have it crack and peel after two.
The single goal of every wash is to clean the surface without harming the vinyl material or the adhesive underneath it. Abrasion and harsh chemicals are your enemies.
- Use only gentle, pH-neutral car wash soap. Dish soap, all-purpose cleaners, and most spray waxes will damage the wrap over time.
- Dry the wrap completely after every wash. Water left to sit, especially in seams, can work its way under the material and weaken the adhesive.
- Never use traditional carnauba paste wax, ceramic spray coatings, or polishing compounds on a vinyl wrap. They can cause discoloration and degrade the plasticizer in the vinyl.
- Avoid automatic car washes with spinning brushes at all costs. The friction will scratch and lift edges immediately.
- Touchless automatic washes are a risky shortcut. The harsh acidic soaps and spot-free rinses they use can be just as damaging as brushes.
From my time caring for wraps, like the full PPF and vinyl accents on my red Porsche, I see a clear difference. A wrap washed with harsh chemicals and dried poorly might look faded and start to lift in three years. The same wrap, cared for gently and dried thoroughly, can easily look fresh for five years or more. That’s a huge return for a simple change in habit. Understanding the vinyl car wrap lifespan helps set expectations for maintenance and budgeting.
The Vinyl Wrap Care Order of Operations (Your Checklist)
Washing a wrapped car is a ceremony of prevention. You cannot skip steps or change the order. This sequence is designed to remove contamination without ever grinding it into the soft vinyl surface.
- Park in the Shade on a Cool Surface
Never wash a hot wrap. Heat makes the vinyl softer and more susceptible to scratching. It also causes soap and water to dry too fast, leaving spots. I wait until the evening or find a fully shaded spot. If the garage floor is cool, that’s your best bet. - Pressure Rinse with Low Pressure and a Wide Fan
This is your pre-wash. Use a pressure washer under 2000 PSI with a 40-degree white tip or wider. Start at the top and work down, blasting loose dirt and grit off the surface. The goal is to turn dry, abrasive dirt into harmless mud that slides off, not to scour the wrap clean. Hold the tip at least a foot away from the surface, especially near seams and edges. - Two-Bucket Hand Wash with a Soft Mitt
Use one bucket for clean, soapy water (pH-neutral wash) and one with just water for rinsing your mitt. Use a soft microfiber or lambswool wash mitt. Work in straight lines, not circles, with very light pressure. Start with the roof and windows, then move to panels. Rinse your mitt in the clean water bucket after every pass to trap dirt there. This is the same technique I use on my black BMW to avoid swirls, and it’s non-negotiable for wraps. - Rinse Thoroughly with a Gentle Flow
Use a hose without a nozzle or a pressure washer on its lowest “rinse” setting. Remove all soap residue. Soap left to dry is a chemical sitting on the vinyl. Pay special attention to body lines, spoilers, and door handles where soap hides. - Blow Dry First, Then Pat Dry with a Plush Microfiber
This is the most critical step for lifespan. Use a master blower, a leaf blower on low/cool, or a dedicated car dryer to force water out of seams, badges, and trim. Then, use a clean, premium plush drying towel to gently pat the remaining beads dry. Do not drag or wipe aggressively. Leaving water to evaporate is what leads to edge lift and adhesive failure. - Apply a Vinyl-Specific Protectant (Optional but Recommended)
After the wrap is completely dry and cool, you can use a spray protectant made specifically for vinyl wraps and PPF. These products contain UV inhibitors and are formulated not to harm the material. They add a layer of stain resistance and make the next wash easier. Never use a wax or sealant meant for clear coat.
Follow this list every time. It prevents you from dragging dirt across the vinyl during the wash and from letting chemicals or water sit and cause long-term damage. It turns a potentially damaging chore into a preserving ritual.
Gathering Your Gear: What You Need (and Don’t Need) for Vinyl Wrap Care
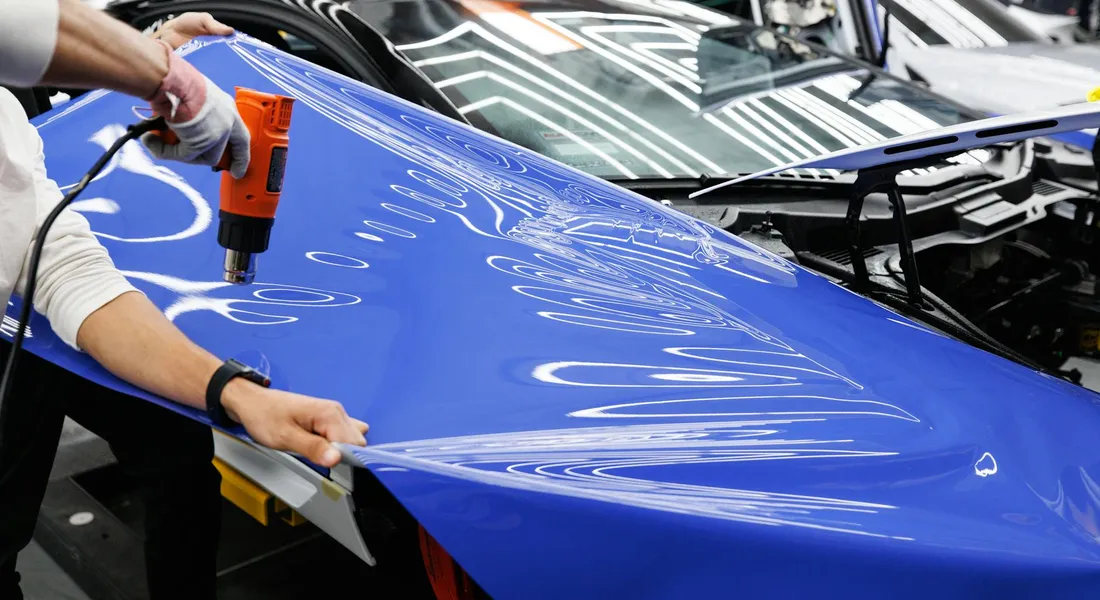
You do not need a garage full of fancy products to care for a vinyl wrap. You need the right few things. Think of it like caring for a vinyl car wrap or a high-end pair of sunglasses. You use a soft cloth, not your t-shirt, and you avoid harsh chemicals. The same logic applies here.
The Necessary Tools
This list is short and purposeful. Every item has a job.
- pH-Neutral Car Shampoo: This is non-negotiable. A gentle, pH-balanced shampoo cleans without stripping or damaging the vinyl’s top coating. I use the same one on my wrapped Porsche as I do on my other cars, but I am extra careful with dilution.
- Two Buckets with Grit Guards: One bucket holds your clean shampoo solution. The other is your rinse bucket, equipped with a grit guard at the bottom to trap dirt you wash off your mitt. This system is your best defense against inflicting swirls and scratches during the wash.
- Clean Microfiber Wash Mitts: Use a soft, plush microfiber mitt. I prefer a long-nap style because it holds soapy water well and glides over the surface. Have a couple on hand so you can swap to a clean one for the lower, dirtier sections of the car.
- A Dedicated Drying Towel: A large, clean, waffle-weave or soft plush microfiber drying towel is a must. Designate one towel for this job only. Never use it for wiping down interiors, wheels, or engines.
- A Cordless Blower (Optional but Ideal): This is the single best tool for drying a wrap. It pushes water out of seams, from behind emblems, and off the surface without any physical contact. I use my blower on every car, but it is especially valuable for the complex lines of a wrapped vehicle.
The Products to Absolutely Avoid
Vinyl has a protective laminate layer, but it is not as robust as clear coat. Certain common car care products will ruin its finish and shorten its life.
- Carnuba Wax, Paint Sealants, Ceramic Coatings: These are designed for permanent paint. Applying them to a temporary vinyl surface can cause staining, discoloration, and make the vinyl incredibly difficult to remove later.
- Degreasers and All-Purpose Cleaners (APCs): These are too harsh and will degrade the vinyl’s top coat over time, making it look dull and faded.
- Bug & Tar Removers (Not Labeled for Vinyl): Many contain strong solvents that can permanently stain or even melt the vinyl. If you need a remover, you must find one specifically formulated for vinyl wraps.
- Abrasive Polishes and Compounds: Never try to “polish” a vinyl wrap. You will instantly scratch it and remove the protective laminate.
Stick to gentle, pH-neutral cleaners and you will never have a problem. The right vinyl wrap care products are defined more by what they don’t contain than by magic ingredients.
Understanding Vinyl Wrap Care Kits
You will see pre-packaged vinyl wrap care kits for sale. A good one is simply a convenient bundle of the right stuff. It should contain a vinyl-safe wash shampoo, a detailer spray for quick touch-ups, and sometimes a vinyl-specific spray sealant. A spray sealant is different from a permanent coating. It is a light, water-based protectant that wears off in a few weeks and is safe for the material. If a kit contains wax, compound, or “glaze,” avoid it—especially when used for washing vinyl-wrapped surfaces.
The Wash & Dry Protocol: Hands-On, Step-by-Step
This is where your care pays off. The goal is to clean the wrap without introducing scratches or stressing the material. Patience is your best tool. That care also extends to car wrap repair maintenance—regular, gentle cleaning and prompt touch-ups keep the wrap looking good. In the next steps, we’ll guide you through simple maintenance checks that support a long-lasting finish.
Pre-Rinse: The Gentle Flood
You want to remove as much loose grit as possible before your mitt touches the surface. Start with the car in the shade, when the surface is cool to the touch.
You can use a pressure washer, but you must be cautious. Always use a wide 40-degree fan tip and keep the nozzle at least 12 inches away from the surface. Never use a pinpoint zero-degree tip. Do not blast directly at the edges of the wrap or seams. The goal is to use the wide fan of water to push dirt off, not to peel the vinyl back.
For most people, a regular garden hose with a nozzle set to “shower” or “flat” is perfect and safer. Thoroughly flood the entire car, starting at the roof and working down. You want to see the dirt sheet off the panels. This step loosens everything and makes the hand wash safe.
The Two-Bucket Hand Wash: Gliding, Not Scrubbing
This is the core of how to care for a wrapped car. Fill one bucket with cool water and your pH-neutral shampoo. Fill the second bucket with cool, clean water for rinsing your mitt.
Start washing at the roof, then windows, then upper body panels, saving the lower rocker panels and bumpers for last. Dunk your clean mitt in the soap bucket, wring it slightly, and glide it over the surface in straight, overlapping lines. Use even less pressure than you would on paint. You are not scrubbing. You are letting the lubricity of the soap and the softness of the mitt do the work.
Always wash in straight lines, not circles. Circular motions, especially with any grit present, can create visible swirl marks in the vinyl’s finish.
After you pass over a section, rinse your mitt thoroughly in the rinse bucket. Rub it against the grit guard to release the dirt it picked up. Then, go back to the soap bucket. This two-bucket method keeps your wash mitt clean.
Pay special attention to vinyl wrap car emblems and complex body lines. Dirt loves to hide in these crevices. Use the very edge of your mitt or a soft, clean detailing brush dedicated to this purpose to gently agitate the soap in these areas. Rinse the brush frequently.
Drying: The Most Critical Step to Prevent Stains
Water left to air-dry on a wrap will leave mineral spots. How do you dry a car wrap? With a plan.
If you have a cordless blower, use it first. Start at the roof and blow the water off, following the body lines down. Force water out from behind door handles, badges, and trim pieces. This gets the bulk of the water off without touching the car.
Follow immediately with your dedicated drying towel. Do not wipe. Instead, lay the towel flat on a panel and pat or gently pull it across the surface to soak up the remaining water. Flip the towel to a dry section often. Wiping a semi-dry surface with a towel that has picked up a microscopic piece of grit is how fine scratches happen. The pat-dry technique prevents this.
Drying is not an afterthought. It is the final, critical act of the wash that protects your investment from water stains and surface marring.
Ongoing Maintenance and Protection Between Washes
The Right Way to Add Shine and Protection
Protecting a vinyl wrap is different from protecting your car’s paint. You cannot use traditional carnauba paste waxes or ceramic coatings made for clear coat. These products are designed to bond and harden on paint, and they can seal the vinyl’s surface too tightly. This can trap gases and moisture, leading to bubbling or adhesive failure over time, even if you wax or polish your vinyl-wrapped car.
For vinyl, you need products that allow the material to breathe while still offering protection. Your best tools are spray-on vinyl detailers and water-based “wrap sealants.” These are formulated to enhance gloss and provide a slick, sacrificial layer against dirt, UV rays, and minor contaminants without sealing it shut.
Applying a protectant is simple. I keep a bottle of water-based wrap sealant in my detailing cart for my wrapped cars. Here is how I do it:
- Ensure the surface is completely clean and cool, parked in the shade.
- Spray the product directly onto a clean, soft microfiber towel. Do not spray it onto the hot wrap surface.
- Wipe the product onto one panel at a time using straight, even strokes.
- Immediately buff the panel to a high shine with a second, dry microfiber towel. There is typically no need to let it “haze.”
This process adds a noticeable depth to the color and makes the next wash much easier. It is a core part of knowing how to care for vinyl wrap properly. For my matte black wrapped Porsche, I use a specific matte finish detailer that boosts the flat look without adding gloss. Using the wrong product can create shiny, permanent streaks on a matte finish, especially when compared to glossy vinyl wraps.
How Often Should You Wash a Vinyl-Wrapped Car?
There is no single perfect schedule. Frequency depends entirely on how you use the car and where it lives. The goal is to never let harmful contaminants sit and bake into the vinyl film.
For a daily driver like my F-150, a thorough hand wash every two weeks is a good baseline. This keeps road film, pollen, and brake dust from building up and potentially staining the wrap over many months. If I take a long highway trip and get a bumper full of bug splatter, I wash the front end as soon as I get home. Bugs are acidic and can etch the wrap’s top coat if left for weeks.
Certain situations demand immediate action. Road salt, heavy bird droppings, and tree sap require a rinse-off within a day or two. Bird droppings, in particular, act like a small oven, concentrating sun heat on the vinyl and accelerating damage.
For a garage-kept show car like my Porsche 911, the schedule is different. It might only need a full wash once a month, but I will use a quick detailer spray to remove dust before every drive. This light maintenance prevents any micro-scratches from dust particles during the drying process.
Preventing Damage and Fixing Common Issues
Paint Damage Prevention for Wraps
Most wrap damage comes from well-intentioned but incorrect care. Avoiding these mistakes will save you money and headaches.
- Washing in Direct Sun: This is a top offender. Sunlight heats the vinyl, making it soft and gummy. Washing it in this state can stretch the material and make it more susceptible to scratches from dirt. Always wash in the shade on a cool surface.
- Using Harsh Chemicals: Dish soap, household cleaners, or aggressive wheel acids will degrade the plasticizers in the vinyl. This leads to premature fading, cracking, and dullness. Stick to pH-neutral automotive shampoos.
- Aggressive Scrubbing: Never attack a stain with a stiff brush or by rubbing hard with a towel. You will scuff the wrap. The correct method is gentle agitation with a soft microfiber and the proper cleaner.
- Automatic Car Washes: Those spinning brushes are wrap killers. They are filled with grit from other cars and will leave deep scratches, or worse, catch and peel an edge. Touchless automatic washes are a better, but not perfect, alternative for emergencies.
Parking matters, too. Be mindful of tight spaces where you might brush against bushes, fences, or rough walls. A vinyl wrap is durable, but it is not armor plating. A sharp branch can puncture or tear it.
Two common questions I get are: “Can I use a pressure washer?” and “Is it alright to wash in the sun?” For pressure washers, yes, but with caution. Keep the nozzle at least 12 inches away, use a wide 40-degree fan tip, and never blast directly at seam edges where water could be forced underneath. And as for the sun, the answer is a firm no. Patience for a cloudy day or a cool garage is a key part of vinyl wrap care.
Troubleshooting Stains, Lifting Edges, and Minor Scuffs
Even with perfect care, issues pop up. Here is how to handle them without making things worse.
For bug splatter, tree sap, or bird droppings, the rule is soak first. Saturate the spot with a vinyl-safe quick detailer or a dedicated bug remover. Let it dwell for a few minutes to soften and dissolve the contaminant. Then, gently wipe it away with a folded microfiber towel. You may need to repeat the process. Never pick or scrape at a dried-on stain.
If you notice a wrap edge starting to lift or curl, do not panic. More importantly, do not try to glue it down yourself with super glue or any household adhesive. You will ruin the wrap and possibly the paint. The best move is to gently press the edge down with your finger and then immediately contact your installer. They have the correct vinyl adhesive and tools to repair it properly.
Minor scuffs and light scratches happen. Unlike clear coat, you generally cannot polish them out. Polishing compound is abrasive and can quickly cut through the thin colored vinyl layer, making the damage worse. For very fine marks, a dedicated vinyl cleaner might lessen their appearance. For anything deeper, it is often best to live with it or plan for a panel replacement when the wrap is due for a change. This is the reality of how do you maintain a car wrap; you manage and protect it, knowing it is a wearable surface.
Keeping Your Wrap Looking New For Years
The best thing you can do for a vinyl wrap is to keep it clean with gentle methods. A regular two-bucket wash with a pH-neutral shampoo and a soft microfiber mitt is your first and best defense against the elements. Just make sure your vinyl wrap is properly applied to withstand these washes.
Ignore this routine, and you will watch that vibrant color fade and that smooth surface degrade years before its time.
Sources and Additional Information
- Complete Car Wrap Care Kit ( Full Bundle) | Wrap Fresh
- How To Care For YOur Vinyl Wrap FAQ’s | Wrap Works
- r/CarWraps on Reddit: Is it easier to maintain a car wrap or Paint?
- product-care-guide-for-3m-wrap-film. …
- Cleaning and Maintenance of Vehicle Wraps
- Amazon.com: Rev Auto Vinyl Wrap Cleaner Kit – 3-Item Set Includes Wrap Detailer, Shampoo & Light Stain Remover | Made for Gloss, Satin, Matte, Chrome & More : Automotive
Max Gunther
Max is an automotive enthusiast having worked as a car mechanical and in interior detailing service for over 25 years. He is very experienced in giving your old car, a new fresh vibe. He has detailed many cars and removed very tough smells and stains from all kinds of cars and models, always ensuring that his work and advice helps his customers. He brings his first hand experience to his blog AutoDetailPedia, to help readers breath new life into their car interiors.