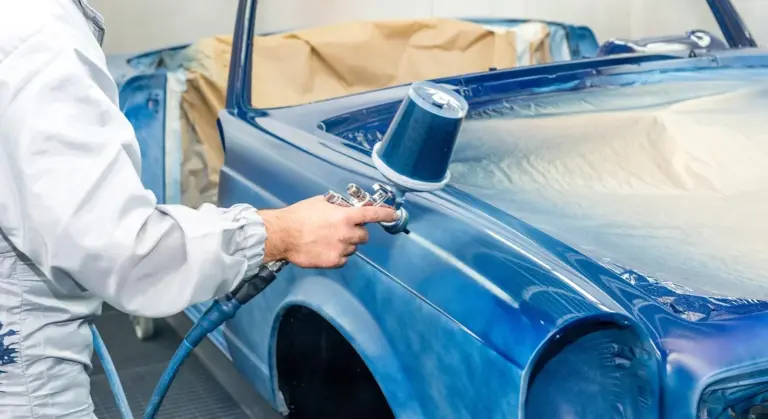
How to Remove Tape and Adhesive from Car Paint Without Damaging the Clear Coat?
That gummy tape residue stares back at you, a sticky problem on your perfect paint. You are right to panic about scratching the clear coat with a rough scrape.
I will show you the right way, from my garage to yours. We will cover identifying the adhesive type, choosing safe solvents, using lift-and-dissolve techniques, and restoring the paint’s protection.
Use the wrong method, and you will swirl or haze the finish with scratches that need a polisher to fix.
Key Takeaways: Your 60-Second Game Plan
I know you want to get that sticky mess off your car right now. Follow this plan. It works.
Always start with the gentlest method first: warm soapy water and a plush microfiber towel. You would be surprised how often this is all you need, especially on fresh residue.
This is your most important rule. Never, ever pick or scratch at the residue with your fingernail or a blade. Your clear coat is softer than you think. You will dig in and leave a scratch or a dig mark that requires a full polish to fix. I learned this the hard way on my black BMW.
The entire process boils down to four words: Soften, Dissolve, Wipe, Clean. Always work in a shaded, cool area. Direct sun heats the paint and makes solvents evaporate too fast. This can leave a stain.
Before you pour anything from a bottle, test any chemical remover in an inconspicuous spot first. The edge of a door jamb or inside the fuel door is perfect. Wait a minute, wipe it off, and check for cloudiness or dullness.
Your job is not done when the glue is gone. Finish by cleaning the area with car shampoo to remove any chemical film, then immediately apply a protectant like a spray wax. This restores the layer you just cleaned.
What Tape Adhesive Actually Is (and Why It’s Such a Pain)
Think of the stickiest thing in your kitchen. Maple syrup. Now imagine spilling some on the counter, letting it dry in the sun for a week, and then trying to wipe it off. That is tape adhesive on your paint.
It is not just “glue.” It is a designed sticky polymer that cures and bonds. Its job is to stick and stay stuck. Your job is to break that bond without breaking down the clear coat, which is also a polymer. It is a careful chemical dance.
You will usually find a few common culprits:
- Painter’s tape left on for weeks after a DIY project.
- Duct tape or gorilla tape used for a “temporary” bumper or mirror fix.
- The stubborn foam from old double-sided tape after debadging.
- 3M VHB tape, the super-strong stuff used for body side moldings.
- That brittle, faded dealership sticker from the previous owner.
Heat, age, and ultraviolet light from the sun are your enemies here. They bake the adhesive. They turn it from a slightly gummy paste into a rock-hard, cross-linked plastic. The longer it has been cooking on your paint, the more of a fight it will put up. The adhesive on my Miata’s old pinstripe was practically fossilized.
Some tapes, like many used for automotive trim and badges, use an acrylic adhesive. This is a specific, tough type. Acrylic adhesive tape removal often requires a dedicated adhesive remover or more patience with a dedicated tar and glue solvent. It does not usually yield to simple household oils.
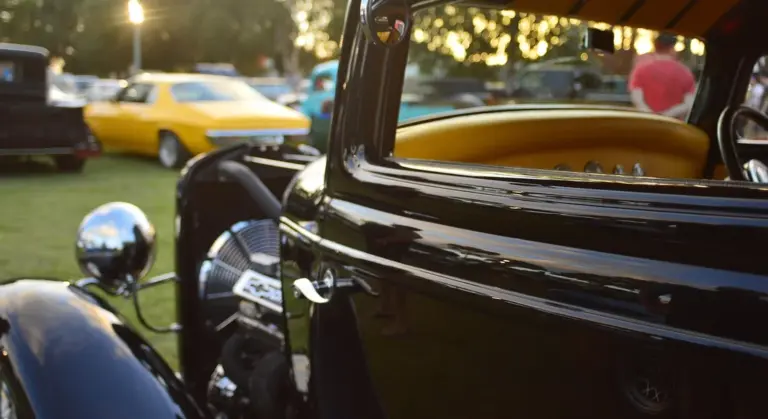
Why Your Clear Coat is More Fragile Than You Think
Think of your car’s clear coat like the thin plastic screen protector on a phone. It’s there to take the hits. It’s not the paint. It’s a hard, transparent layer sprayed over the color. And it is surprisingly easy to mess up, especially when unusual substances come into contact with it.
Solvents and harsh cleaners do not clean clear coat. They can attack it. They can permanently soften it, leaving a cloudy stain called chemical etching. Abrasives, even from a rough towel, will scratch it. Once scratched, you need a machine polisher to fix it.
Your windshield is glass. Glass is incredibly hard. You can use a razor blade and strong solvents on glass all day. Your paint’s clear coat is not glass. It is a sophisticated plastic. Treat it like one. Sometimes paint ends up on car glass and you’ll want a gentler approach. To remove paint stains from car glass, there are safer methods that won’t scratch the windshield.
My black BMW, the “Swirl Magnet,” taught me this. I once used the wrong product on a sticker. It left a faint, milky ring in the clear coat that only a full paint correction could remove. The lesson was expensive. Clear coat damage is almost always permanent until you sand or polish it away, especially when trying to remove swirl marks from the car paint.
The Safe, Step-by-Step Removal Process
Step 1: The Gentle Pre-Soak
Start simple. Wash the entire area with car shampoo and warm water. Use a soft wash mitt. The goal is to remove any loose dirt sitting on or around the tape. For very fresh residue, this gentle wash might be all you need.
For older, stubborn adhesive, you need to soften it. Take a clean microfiber towel. Soak it in warm, not hot, water. Wring it out so it’s just damp. Lay it directly over the tape or adhesive spot. Let it sit for five to ten minutes. This heat and moisture will plasticize the glue, making it gummy and easier to lift.
Step 2: Choosing and Applying Your Remover
Do not grab the strongest chemical first. Use an escalation ladder. Start mild and move up only if you must.
- Isopropyl Alcohol (IPA): Mix it 1:1 with distilled water. This is your first line of defense for most modern adhesive residues. It’s excellent for cleaning off the final oily film.
- Citrus-Based Cleaner: Products like Goo Gone are stronger. They are good for thick, tar-like glue. You must wash these off completely, as they can leave an oily film that repels wax.
- Dedicated Automotive Adhesive Remover: This is your heavy artillery. Brands like 3M make specific formulas. They are powerful. Respect them.
Your method matters more than your product. Never spray a remover directly on the paint. Spray it onto a clean, folded microfiber towel. Gently massage the residue with the soaked towel. Use light pressure. Let the chemical do the work. Don’t scrub too hard to avoid damaging the paint.
This is the rule, every single time, no exceptions. Test your chosen remover on a small, hidden spot first, like the edge of a door jamb, and wait a minute to check for any reaction.
For specific problems like how to clean 3M tape from a car or how to clean double sided tape from a car, the process is the same. The adhesive is often thicker. The warm towel soak is critical. After soaking, you can sometimes gently lift an edge of the tape with your fingernail and slowly peel, rolling the tape back on itself while applying your remover to the glue line underneath with a towel.
Step 3: The Final Wipe-Down and Inspection
The moment the sticky stuff is gone, stop. Do not admire your work yet. Any remover left on the paint is a risk.
Immediately re-wash that entire panel with your car shampoo. Use fresh soap and water to strip away every trace of the chemical. Dry the area thoroughly with a clean drying towel.
Now, inspect. Take the car into direct sunlight or use a bright LED work light. Look at the angle. You are checking for two things: micro-scratches from your wiping and any leftover haze or staining from the adhesive itself. If you see haze, you may need to use a mild polish.
Finish by applying a spray wax or sealant to the spot to restore the protective layer you likely removed during the cleaning process. This keeps the paint safe until your next full detail.
Paint Damage Prevention: What Not to Do
I see people try to save time and end up costing themselves hundreds in paint correction. The clear coat on your car is only about as thick as a sheet of printer paper. Treat it with respect.
Here are the common shortcuts that will ruin your finish.
- Using a Razor Blade or Knife: The metal is harder than your clear coat. Even a gentle scrape will leave a deep scratch you can feel with your fingernail. My black BMW is covered in tiny scars from the previous owner trying this on stickers.
- Scraping with a Credit Card or Plastic Razor: This is less risky, but plastic can still scratch if you drag grit across the paint. If you must use plastic, the area needs to be perfectly clean first.
- Applying Excessive Heat with a Heat Gun or Hair Dryer: A little warmth helps. Too much heat will distort the clear coat, creating a hazy, milky patch that cannot be fixed without a repaint. I watched a friend ruin a door handle surround this way.
- Using Gasoline, Acetone, or Nail Polish Remover: These are aggressive solvents. They can permanently stain or dissolve the clear coat and any underlying paint. The damage is immediate.
Many folks ask, “Does Goo Gone hurt car paint?” The standard citrus formula won’t chemically etch it, but it leaves a stubborn oily film. If you don’t thoroughly clean that residue with soap and water, it will repel wax and sealant, creating a ugly patch. It’s a two-step job, not a one-step solution.
The goal is to soften the adhesive for gentle removal, not to attack the paint.
Product Tier List: From Hardware Store to Pro Shop
Not every glue blob needs a pro product. Match the solution to the problem. Always test any product in a small, inconspicuous area first, like the edge of a door jamb.
Budget/Drive-Through Tier
For fresh, light residue from price stickers or painter’s tape.
- Isopropyl Alcohol (70% or less): This is my first try for light sticky film. It evaporates fast, so it’s low risk. Pour some on a clean microfiber towel and gently rub. It works great on the glass-like paint of my Tesla.
- WD-40: It’s a light lubricant and petroleum distillate. Spray a little on a towel, not directly on the car. Let it sit on the adhesive for 60 seconds to break it down, then wipe. You must wash the area with car soap afterward to remove all the oil.
Enthusiast Tier
For baked-on tape residue, bumper stickers, or glue from vinyl trim.
- Dedicated Automotive Adhesive Removers: Products like Sticky Stuff Remover or 3M Adhesive Cleaner are formulated for this. They are usually citrus-based and safe for clear coats. Spray on, let it dwell to penetrate, and the glue wipes away. They smell better than other options, too.
- Lighter Fluid (Naphtha): This is a detailer’s open secret for tar and pine sap. It works on many adhesives. It evaporates extremely quickly, which minimizes the time it sits on your paint. Use it the same way as WD-40, followed by an immediate wash. It is highly flammable, so use it outdoors with no ignition sources.
Show Car / Last Resort Tier
For the worst-case scenarios, like decades-old duct tape residue or heavy overspray.
- Professional-Grade Solvent Wipes: These are used in body shops for final pre-paint cleaning. They are powerful. I keep some for my restoration Miata project. You wipe once, very lightly, to dissolve the contaminant. You must immediately follow with a wash and likely a clay bar treatment to remove any lingering solvent. They demand respect.
This tier is only for experienced users facing the toughest jobs. If you are asking “how do you remove duct tape residue from car paint” that’s been on there since the 90s, this is your answer. For 99% of jobs, the Enthusiast Tier products are perfect and safe.
Removing Tape from Windows and Other Surfaces
Glass is your friend here. It’s hard. You can use tools and methods on a windshield or side window that would make you cringe on paint. A razor blade, used correctly, is not just acceptable-it’s often the best tool for the job.
The process is straightforward. You want to soften the gunk first, then lift it away.
- Spray a generous amount of a dedicated automotive glass cleaner or isopropyl alcohol (IPA) onto the tape or adhesive spot. Let it soak for 30 seconds to a minute. This breaks the bond.
- Take a brand new, single-edge razor blade. A dull or nicked blade can scratch. Hold it at a very shallow angle, almost flat against the glass.
- Gently push the blade under a corner of the residue. Once you get it started, you can often slide the blade along, peeling up a long ribbon of gunk. Reapply cleaner as needed to keep the area wet and lubricated.
Using a fresh blade held nearly flat turns a sticky mess into a clean, satisfying scrape. I use this method on my Tesla’s glass roof after removing stubborn road-tar spatter.
Alternative Solutions and Reader Tips
Beyond standard glass cleaner, the DIY community has some proven favorites. A simple 50/50 mix of white vinegar and water in a spray bottle works remarkably well to soften old adhesive. The mild acidity cuts through it. For the really stubborn, baked-on glue from old parking permits or decals, some detailers swear by letting a vinegar-soaked paper towel sit on the spot for five minutes before scraping.
Just remember, whatever solvent you use, clean the glass thoroughly afterwards with your normal glass cleaner. You don’t want any oily or acidic film left behind.
The Tricky Part: Trim and Plastics
This is where you must slow down. Trim, vinyl, and textured plastics are a different world from glass or paint. They are porous. Harsh solvents can seep in, causing permanent staining or a dull, bleached-out appearance. Be especially careful when cleaning and restoring plastic trim.
Your first step on any plastic or rubber surface is always a test spot in an inconspicuous area. The inner door jamb or the very bottom edge of a bumper trim is perfect.
Start with the least aggressive method. Often, rubbing the warm, softened adhesive with your thumb (wear a nitrile glove) can ball it up and roll it off. For what remains, a dedicated adhesive remover like Goo Gone can work, but apply it sparingly to a microfiber towel first, not directly onto the plastic. Wipe gently and immediately wipe the area clean with a damp towel.
On the textured black plastic of my F-150’s trim, I avoid liquid solvents entirely. I’ll use a plastic razor blade or a dedicated rubber eraser wheel attached to a drill at low speed. The friction heats and lifts the adhesive without the risk of staining. It’s the safest bet for preserving that matte finish.
Final Thoughts on Safe Adhesive Removal
The most important lesson from my garage, especially after working on my jet-black BMW, is that patience with a dedicated adhesive remover is non-negotiable for keeping your clear coat intact. Treat the adhesive, not the paint, and let the chemical do the work so your finish stays perfect. When you need to remove glue adhesive from car paint, use a remover designed for automotive finishes and test it on a hidden spot. It helps lift residue safely without risking the clear coat.
Ignore this, and you will swap a simple cleanup for a swirled, scratched mess that needs a professional polish to fix.
Relevant Resources for Further Exploration
- r/cars on Reddit: How to get adhesive off car paint?
- How to Remove Adhesive from Car Paint: 3 Easy Methods – AutoManiacs
- How to Remove Adhesive From Car Paint – M&J’s Mobile Car Detailing
- What is the best way to remove adhesive from car paint? – Quora
- How to safely remove adhesive from car paint?
Max is an automotive enthusiast having worked as a car mechanical and in interior detailing service for over 25 years. He is very experienced in giving your old car, a new fresh vibe. He has detailed many cars and removed very tough smells and stains from all kinds of cars and models, always ensuring that his work and advice helps his customers. He brings his first hand experience to his blog AutoDetailPedia, to help readers breath new life into their car interiors.