How Do You Remove Paint Overspray Without Damaging Your Car’s Paint, Glass, or Trim?
Those gritty specks on your hood are not just dirt. They are paint overspray, and if you rub them wrong, you will make a bad situation worse.
I will show you the professional method I use, covering clay barring for paint, solvent wipes for glass, and protectant based cleaning for trim.
Use the wrong technique, and you could scratch your clear coat or cloud your glass permanently.
Key Takeaways: Your Roadmap to a Clean Finish
Removing overspray is a straightforward process if you follow a few bedrock rules. I learned these through trial and error, often on my own cars.
- Clay is your primary tool for paint and glass. A detailing clay bar or clay mitt physically grabs and lifts those bonded particles. It is the most reliable method I use.
- Test spots are non-negotiable for safety. Always try your chosen product and technique on a small, hidden area first. This simple check prevents costly damage to paint or delicate trim.
- The order of operations is critical: clean before you decontaminate. You must wash the vehicle thoroughly to remove all loose dirt and grime. Claying over grit is a sure way to inflict deep scratches.
When done correctly, you will achieve a perfectly smooth, contaminant-free surface. Your paint should feel like glass under your palm, with no new scratches or haze. This is the core of surface preparation for automotive paint. Proper prep ensures optimal adhesion and a flawless finish.
For severe, baked-on overspray, seeking professional help is a smart choice, not a failure. I made that call with my black BMW when the contamination was beyond a simple clay job. It saved the paint and my sanity.
What Is Paint Overspray and How Do You Spot It?
Paint overspray is not wet paint. It is a mist of dry paint particles that has floated through the air and landed on your car. Imagine very fine sand or tiny sprinkles that have glued themselves to every surface, behaving like an adhesive that can be tricky to remove.
The best way to identify it is the “bag test.” Put your hand inside a clean, thin plastic bag, like a sandwich bag. Lightly run your fingertips over the paint. If you feel a consistent gritty texture, you have overspray. On glossy paint, overspray often creates a dull, hazy appearance. On windows and plastic trim, it looks and feels speckled and rough.
Overspray commonly comes from nearby body shop work, house painting, or industrial spray operations. I found a perfect example on my grey Honda Odyssey after a neighbor painted their fence on a breezy day. The entire side of the van was dusted with a fine white powder that felt like sandpaper to the touch.
The Non-Negotiable Order of Operations: Your Safety Protocol
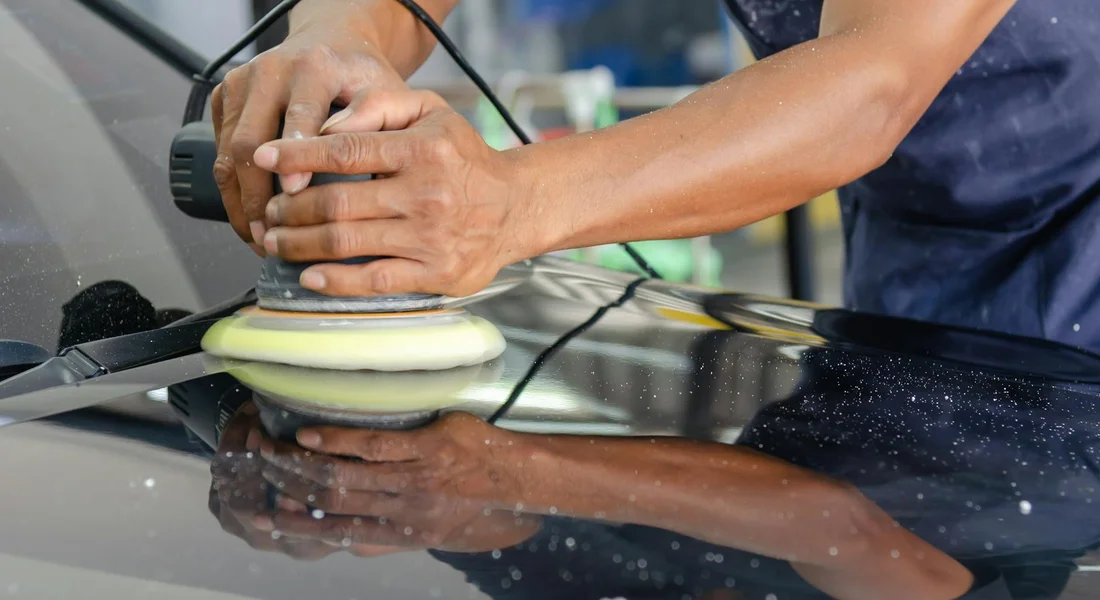
Think of this as a surgeon scrubbing in. You cannot skip steps. If you rub a clay bar over a dirty panel, you are grinding every speck of grit into your clear coat. You will create hundreds of scratches in seconds. I learned this the hard way on my black BMW. Follow this checklist in order, every single time.
- 1. Complete Wash and Dry: This is non-negotiable. You must remove all loose dirt and grime first. Use a proper two-bucket method with grit guards. Dry the vehicle completely with a clean, plush drying towel. Every surface you plan to treat gets this wash first.
- 2. Chemical Decontamination (If Needed): After washing, spray an iron remover over the paint. It will turn purple as it dissolves embedded metal particles from brake dust. This step can often loosen overspray too. Rinse it off thoroughly. If your car has heavy brake dust or you drive near industrial sites, do this.
- 3. Mechanical Decontamination (Clay): This is the step that physically removes the bonded contaminants, including the paint overspray. The clay bar slides over the clean surface and plucks the particles off.
- 4. Polish (If Clay Marring Occurs): Claying can leave very fine scratches, called marring. This is almost invisible on white paint but looks like a faint haze on dark colors. A light polish removes this haze and restores perfect clarity.
- 5. Protect: After claying and polishing, your paint is completely bare. You must apply a wax, sealant, or ceramic coating immediately to protect it.
Skipping the wash is the single biggest mistake you can make, and it will ruin your paint.
How to Get Paint Overspray Off Your Car’s Paint
This is where you focus. For the vehicle’s glossy finish, the clay bar is your primary tool. My 2016 BMW 3 Series, the jet black one, is the perfect example of why technique matters here. On black paint, every mistake shows. The process for how to remove paint overspray from car paint is straightforward, but the details make all the difference.
You take a specialized detailing clay bar. It feels like stiff putty. You use it with a generous amount of lubricant to glide it over the surface. The clay grabs the tiny bumps of overspray and pulls them free. It is a physical, mechanical process.
Let me be very clear on one point. You must use a dedicated clay lubricant. Do not use your leftover soapy wash water. Lubricant is slicker and designed to keep the clay sliding without grabbing the paint. Soapy water can dry too fast and cause the clay to stick, which can mar the finish.
Claying will leave your paint feeling smoother than glass, but it can also leave microscopic scratches, especially on soft or dark paint like my BMW’s. This is normal. It is called “clay marring.” For a daily driver, it might be fine. For a show car or a dark-colored garage queen, you will need to follow up with a polish to erase those micro-scratches and bring back a flawless reflection.
Step-by-Step: The Paint Clay Bar Treatment
Here is exactly what you do. Work on one panel at a time, like the hood or a door.
- Knead your clay bar in your hands until it is soft and pliable. Flatten it into a pancake about the size of your palm.
- Spray a 2 foot by 2 foot section of paint with your clay lubricant. Spray until the surface looks wet and slick.
- Glide the flat clay bar back and forth across the wet area. Use light pressure, just the weight of your hand. Do not press down.
- Listen. You will hear a very light squeaking sound as the clay works. That is normal. If the clay starts to drag or stick, spray more lubricant immediately.
- After a few passes, wipe the area dry with a clean microfiber towel to check your work. Run your hand over the paint. It should feel perfectly smooth. If you still feel tiny bumps, spray more lubricant and make a few more passes with the clay.
- Frequently knead your clay bar. Fold it over itself to expose a fresh, clean surface. If you drop the clay on the ground, throw it away. Do not risk picking up a piece of gravel and scratching your car.
- Move to the next 2×2 foot section, overlapping slightly with the last one, and repeat.
After Claying: To Polish or Not to Polish?
Once the whole car is clayed, you need to inspect. Take the car into bright, direct sunlight or use a strong LED detailing light. Look at the reflection on the paint, especially on horizontal panels like the hood and trunk. These prep checks are a key part of any DIY car painting techniques workflow. They ensure the surface is ready for primers and the painting steps to come.
Do you see a uniform, deep, clear reflection? Or do you see a faint, hazy, cobweb-like pattern over the gloss? That haze is clay marring. On my white Tesla, I can often skip polishing. On my black BMW, polishing is never optional after claying.
The difference between a clayed panel and a clayed-and-polished panel on dark paint is night and day. Polishing restores optical clarity and removes that fine haze.
If you see marring and do not have a machine polisher, you can still fix it by hand. Use a very gentle, finishing polish and a soft foam hand applicator pad. Apply a small amount to the pad and work it in a circular motion over a small area with moderate pressure. Buff it off with a clean microfiber before it fully dries. It is hard work by hand, but it is effective for light marring on a single vehicle.
How to Clean Overspray Off Car Windows and Glass
Glass is the easiest surface to clean when you have overspray. It is hard and non porous. My white Tesla Model 3 has a huge glass roof. It picks up overspray like a magnet. I always start here because it builds confidence.
First, wash the glass thoroughly with car shampoo and water. This removes loose dirt so you do not grind it in. Next, use a dedicated clay bar. I keep one just for glass. Lubricate the surface well with a spray made for glass or a quick detailer. Gently glide the clay bar over the contaminated area. You will feel the tiny bumps smooth out. Note: if there’s any wax on the glass, you may want to address removing wax from car windows and windshields before continuing. Once that’s done, proceed with the wash and clay to get a crystal-clear finish.
This method answers how to remove paint overspray from windshield and all auto glass. Professionals sometimes use a razor blade in a proper holder on glass. I do not recommend this for most people. If you slip, you can cut the rubber seal or yourself. Stick with a clay bar for a safe, effective clean every time, especially when removing paint overspray from car glass.
The Glass-Specific Clay Technique
Glass can handle more pressure than paint without scratching. Do not be afraid to press a little firmer with your clay. Work in small sections. Use vertical strokes, then horizontal strokes. This crosshatch pattern ensures you grab all the contamination.
After claying, you must finish the job. Use a high quality glass cleaner and a fresh, clean microfiber towel. I keep a towel just for glass to avoid streaks. Spray, wipe, and buff until the surface is crystal clear. A pristine glass surface will show you the technique is working before you move to more delicate areas.
How to Remove Overspray from Plastic Trim, Rubber, and Other Sensitive Surfaces
This is where you must be careful. The black plastic trim on my Ford F 150 is a key example. It looks tough, but it is soft. Aggressive claying or polishing will leave permanent scratches. It can also make the trim look faded and chalky. I have seen it happen, and even restoring faded black plastic trim can be challenging.
Trim and rubber are softer than your car’s paint. You cannot treat them the same way. The safe method is to use a product made for this job. A dedicated plastic trim clay bar is often milder than a paint clay bar. You can also use a specialized chemical for plastics to remove wax from plastic trim molding. Always test any chemical in a hidden spot first.
To remove paint overspray from plastic trim, apply your chosen product with a soft microfiber pad. Use very light pressure. Wipe gently and check your progress often. Patience and the right product prevent irreversible damage to your trim and rubber seals, unlike harsh methods used for paint on plastic trim.
Spot Cleaning for Leather, Vinyl Wraps, and Other Materials
Different materials need different approaches. For leather seats or steering wheels, start gentle. Use a pH balanced leather cleaner and a soft bristle brush. Agitate lightly. If overspray remains, you can try a very mild clay bar with extra lubricant. Always follow up with a leather conditioner. This restores protection and feel. That routine helps keep clean, conditioned leather car seats looking fresh. The next steps will expand on these basics.
Vinyl wraps require special care. On my Porsche 911, I use a wrap safe detail spray as my clay lubricant. I use the lightest pressure possible. The goal is to clean without lifting the edges of the wrap. Heavy handed claying can ruin a wrap, so treat it like delicate paint and follow proper maintenance routines.
People sometimes ask about removing overspray from shingles or wood floors. My auto focus is on your vehicle. For those surfaces, test a dedicated exterior paint overspray remover on a small, hidden area first. Results vary based on the material.
Paint Damage Prevention: The Common Mistakes Everyone Makes
You want that overspray gone. I get it. The urge to attack it with the first thing you grab is strong. Resist it. Rushing this job is how you turn a simple cleaning task into a costly correction. I learned these lessons on my own cars, so you don’t have to.
Mistake 1: Using a Dry or Dirty Clay Bar
Think of a clay bar as a gentle, rolling adhesive. Its job is to grab contaminants and roll them into itself. A dry clay bar has no lubricant. It grabs the overspray, yes, but it also grabs the paint itself. It drags those hard particles across your clear coat like sandpaper.
My black BMW taught me this. I got lazy on a small section, not keeping the surface wet enough. The result was a handful of fine, straight-line scratches I had to polish out later. A clay bar must glide over the surface, and that only happens with constant, generous lubrication.
- Actionable Step: Use a dedicated clay lubricant or a very slick, waterless wash product. Spray a heavy mist over a 2×2 foot area. Fold and knead the clay bar the moment you feel any grit or drag.
- Product Note: Synthetic clay towels or mitts can be more forgiving for beginners, as they’re easier to keep clean.
Mistake 2: Using Abrasive Household Cleaners or Solvents
That bottle of kitchen degreaser or paint thinner in your garage is not your friend here. Household cleaners are often alkaline and filled with salts or abrasives that etch clear coat. Harsh solvents can permanently cloud plastic trim and dissolve the oils in rubber, making it brittle and gray.
I once saw a friend try to clean overspray from his minivan’s trim with a generic all-purpose cleaner. It didn’t touch the overspray, but it permanently faded and streaked the plastic. Automotive surfaces are engineered for specific pH-balanced chemicals; household products are a destructive gamble.
- Safety Reminder: Always wear nitrile gloves. Use products in a well-ventilated space, even outdoors.
- Use-Case Note: For stubborn trim overspray, a dedicated automotive tar and adhesive remover is safer and more effective than any kitchen product.
Mistake 3: Skipping the Test Spot on a Hidden Area
You don’t know how the overspray, your chosen product, and your car’s surface will react. The only way to know is to test. The inside of a door jamb, under the trunk lid, or behind a wheel well is your laboratory.
On my Porsche’s Paint Protection Film, I test every chemical. Some spray waxes can haze PPF. A test spot revealed that. On my Tesla’s glass, I test to ensure a product won’t affect the hydrophobic coating. Finding out something causes damage on a visible panel is a sickening feeling you can avoid with two minutes of testing.
- Actionable Step: Apply your clay lube and clay, or your chosen cleaner, to a hidden spot. Wait a minute, wipe it off, and inspect under good light. Look for discoloration, hazing, or texture changes.
Mistake 4: Applying Excessive Pressure with the Clay Bar
This is the most common error. People press down, thinking more force means faster cleaning. You are not sanding a deck. You are guiding a lubricated bar to make molecular contact with contaminants.
When I restored the single-stage paint on my old Miata, heavy pressure would have cut right through the delicate pigment layer. Let the clay do the work. Your hand should provide only the weight needed to keep it flat. If you’re muscling it, you’re either using a dirty bar, need more lubricant, or the contamination needs a different approach first.
- Practical Tip: Use the flats of your fingers, not your fingertips. A gentle, palm-wide, back-and-forth motion is all you need. You should hear a faint, slick sound, not a gritty scraping.
Final Thoughts on Paint Overspray Removal
The single most important rule is to let the surface guide your method, starting with the gentlest option like a clay bar. I trust this approach because it physically lifts the contamination without risking the clear coat or glass.
Choosing a harsh chemical or abrasive tool first can instantly scratch your paint or cloud your windows.
References & External Links
- r/cars on Reddit: How to remove spray-paint residue from car
- Overspray Remover – Goof Off
- How to remove heavy overspray on paint ? | Detailing World Forum
- How to Remove Spray Paint From Your Car | Chemical Guys
- Whats best to remove paint overspray on plastic trim when …
- How do I best clean paint overspray off my car windows and paint? Someone painting with white paint misted my car.
Max Gunther
Max is an automotive enthusiast having worked as a car mechanical and in interior detailing service for over 25 years. He is very experienced in giving your old car, a new fresh vibe. He has detailed many cars and removed very tough smells and stains from all kinds of cars and models, always ensuring that his work and advice helps his customers. He brings his first hand experience to his blog AutoDetailPedia, to help readers breath new life into their car interiors.