What Does Getting a Car Detailed Mean? Your Complete Guide to Services from Cleaning to Ceramic Coating
You might think detailing is just a fancy car wash, but it goes much deeper than that. I see owners confused about what they’re actually paying for every single week.
I will explain the entire process, breaking down interior deep cleaning, exterior washing and decontamination, paint correction, vinyl wrap care, stubborn odor removal, scratch repair, polishing, waxing, and ceramic coating protection.
Misunderstand these services, and you could let minor stains set or swirl marks deepen into permanent damage.
Key Takeaways: The TL;DR on Car Detailing
Car detailing is a process of thorough cleaning, restoration, and protection. It goes far beyond a standard car wash.
Think of it this way. A car wash is like quickly dusting the surfaces in your living room. Detailing is moving every piece of furniture, cleaning under the couch, polishing the wood, shampooing the rug, and making every inch look new again.
A proper detail makes three core promises. You get a deep interior cleaning that removes ground in dirt and stains. It offers paint defect correction to eliminate swirls and scratches. Finally, it provides a layer of long term protection to keep it all looking good.
This guide is your comprehensive car detailing manual, pulled directly from the bays and garages where this work happens every day.
The Detailing Protocol: Your Non-Negotiable Order of Operations
The sequence of your work is everything. A wrong move can mean re cleaning a surface you just finished or, worse, putting fine scratches into your paint. You must follow a strict checklist.
I learned this the hard way on my black BMW 3 Series, the ultimate swirl magnet. If you clean the wheels after you wash the body, the dirty spray lands on your clean paint. If you vacuum the interior after polishing the exterior, the dust you kick up settles on your fresh wax. Order prevents frustration and protects your finish.
The Full Detail Checklist: From Grimy to Gleaming
This is the road map I use on every vehicle, from the kid hauler Odyssey to the garage queen Porsche.
- Interior Pre Clean
Start inside. Remove all trash, loose papers, and large debris. Take out the floor mats. This gives you a clean slate to work with and prevents you from tracking dirt back into a finished cabin.
- Wheels and Tires
Tackle the dirtiest part first. Wheels collect brake dust, road tar, and grime. Clean them now so any overspray or splatter gets washed off in the next steps. Use a dedicated wheel brush and a pH balanced cleaner.
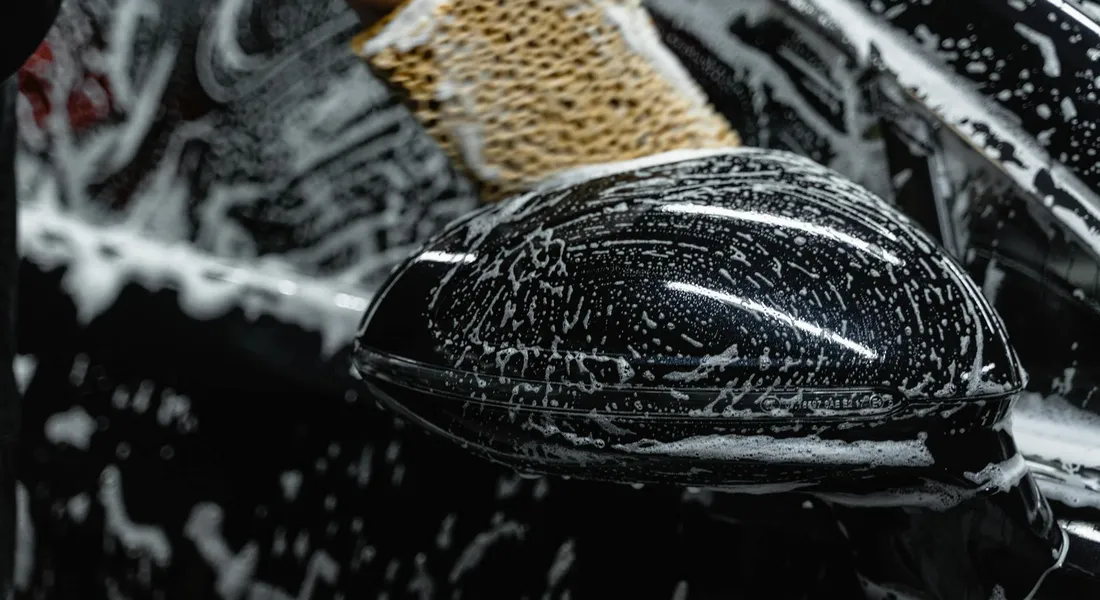
- Pre Wash and Foam
Spray the entire exterior with a snow foam or pre wash solution. Let it soak and drip for several minutes. This loosens and lifts away surface grit so your wash mitt doesn’t grind it into the paint later.
- Contact Wash
This is the main wash. Use the two bucket method. One bucket holds your soapy wash solution. The other is a rinse bucket with a grit guard at the bottom. After each panel, rinse your mitt in the clean water bucket to trap dirt. Work from the roof down.
- Decontamination
After washing, your paint may feel rough. That’s bonded contaminants. First, spray an iron remover over the paint and wheels. It will turn purple as it reacts with metallic particles. Rinse. Then, using a detailing clay bar and lubricant, gently glide over the paint to pull out any remaining grit.
- Paint Correction
This step is for removing swirls and scratches. It is not always needed. Assess your paint under good light. For light swirls, a finishing polish with a dual action polisher will do. For deeper defects, you may need a cutting compound first. Always start with the least aggressive method, test in a small area, and work up slowly.
- Protection
Once the paint is clean and corrected, you must protect it. Apply a wax, synthetic sealant, or ceramic coating. A spray wax is great for quick maintenance on my F 150. A ceramic coating, like I have on the Porsche, offers years of chemical resistance and gloss.
- Interior Deep Clean
Now return to the interior. Vacuum thoroughly, including seats, crevices, and the trunk. Use an interior cleaner on all plastic, vinyl, and leather surfaces. For cloth seats or carpets with stains, like in the Odyssey, a carpet extractor or upholstery shampooer is a game changer.
- Glass and Final Wipe
Finish with the glass, inside and out, using a streak free cleaner and a clean microfiber. Give the exterior a final inspection wipe with a clean, damp towel to catch any water spots or residue. This is the last touch.
How Long Does This All Take? Setting Realistic Expectations
People often ask how long car detailing takes. The answer depends entirely on the vehicle’s condition and the services you perform.
A basic interior and exterior clean, following steps 1 through 4 and 8 through 9, might take 2 to 3 hours on a moderately clean sedan. This is a great weekend maintenance wash.
A full detail with decontamination, a one step polish, and sealant application can easily take 5 to 8 hours. My black BMW took me a full Saturday the first time I corrected it.
A multi stage paint correction or a full interior extraction job, like removing a milk spill from a minivan, can take a professional a full day or more. Set your expectations based on the job. Rushing leads to missed spots and overlooked defects.
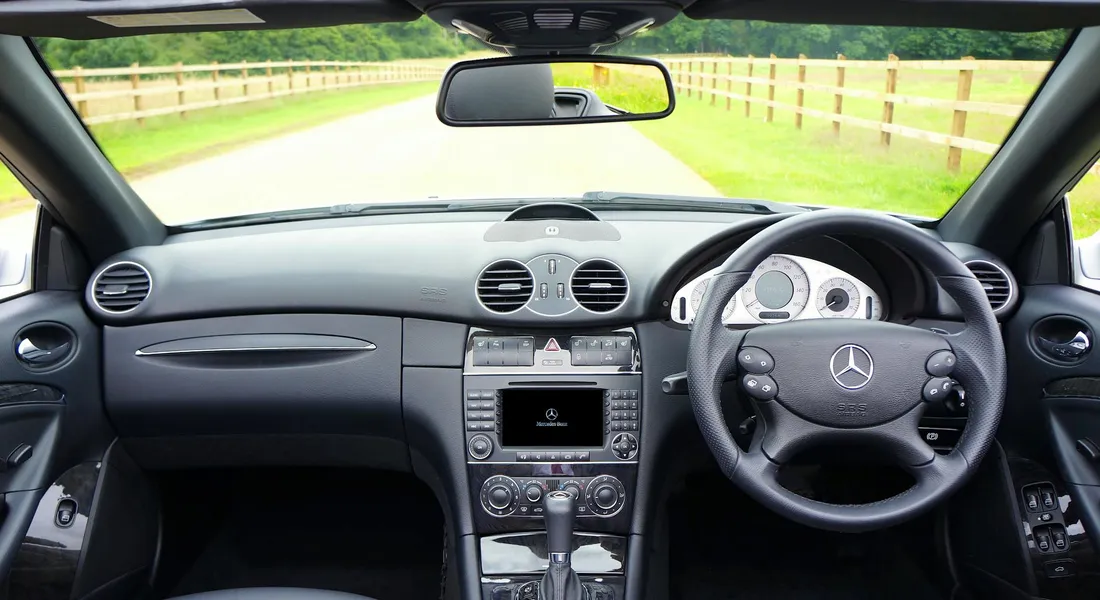
Interior Detailing: What Does It Really Include?
Yes, a proper car detailing service absolutely includes the interior. It is a core part of the job. When you pay for a detail, you are paying for someone to clean what you vacuum weekly and deep clean what you have been avoiding for years. This means shampooing seats, extracting carpets, and scrubbing the trunk back to a usable state.
Beyond removing dirt, a true interior detail is about health. You are removing allergens trapped in the fibers, bacteria from spills you forgot, and odors that have become part of the car’s personality. It transforms a lived-in space back into a clean, neutral environment.
Vacuuming is Just the Start
Any quick clean starts with a vacuum. A detailer’s vacuuming is a surgical procedure. First, we remove everything. I take out all floor mats, empty the trunk and glove box, and check under every seat. I use a powerful shop vacuum with a long crevice tool to get into the tracks of the seats, deep into the seams of the center console, and along the edges of the door panels.
You know your carpets need more than vacuuming if you press a white microfiber towel into them and it comes up gray or yellow. That is ground-in soil that a vacuum cannot pull out. This “stain test” is how I knew the carpets in my kid’s Odyssey needed a full extraction, not just a pass with the hose.
Deep Cleaning Fabrics and “Vegan Leather”
Different materials need different attacks. For a spilled-milk stain in fabric, like in my Odyssey, I use an enzyme-based cleaner. I spray it, let it dwell for ten minutes to break down the proteins, then extract it with hot water. The key is to pull the moisture and residue back out. Leaving the seat soaked just trades a milk stain for a mold problem.
Cleaning modern interiors means knowing your materials. My Tesla’s “vegan leather” is a durable synthetic. I clean it with a mild, pH-balanced interior cleaner and a soft brush. I never use conditioners on it. They just sit on top and attract dust. My Porsche’s real leather is different. After a gentle clean, I use a light leather conditioner to keep it supple and prevent cracking.
Here is my basic process for shampooing seats or carpets:
- Agitate the area with a soft-bristled brush and a dedicated fabric cleaner.
- Let the cleaner dwell for 5-10 minutes to loosen the grime.
- Use an extractor or a wet/dry vacuum with a detailing attachment to pull the dirty water back out.
- Run the air conditioner or use fans to speed up drying. A damp interior grows mildew fast.
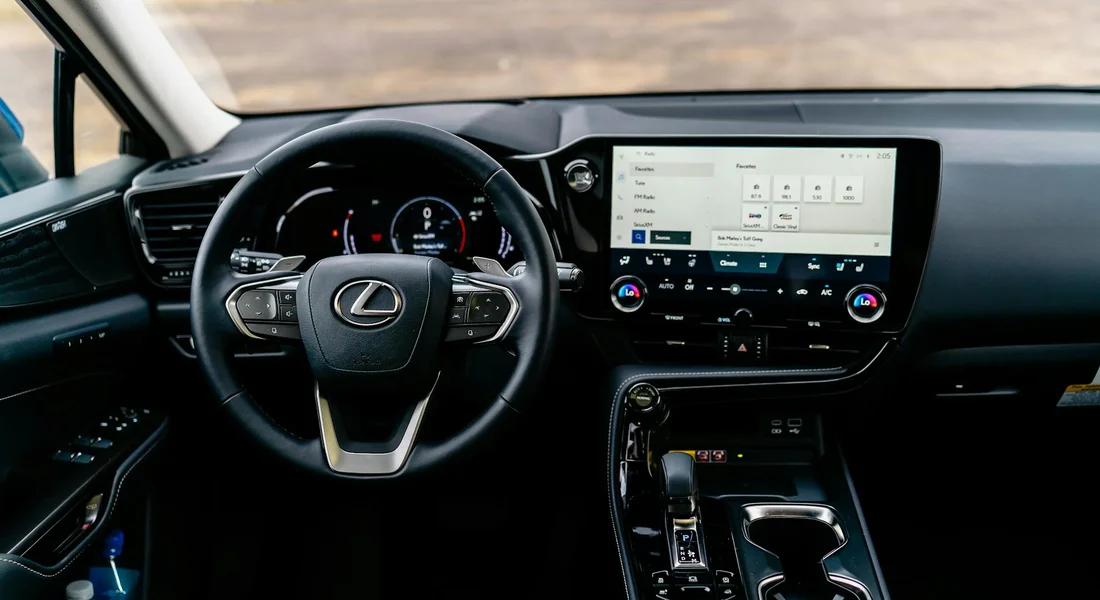
Surfaces, Tech, and the Dreaded Cupholders
Plastics, vinyl, and touchscreens require a gentle touch. For the dash and door panels, I use a water-based interior detail spray. I spray it onto my microfiber towel, not directly onto the surface, to avoid overspray into vents. For any screen or glossy plastic, I use a product specifically labeled as safe for electronics to prevent streaking or damage.
Sticky cupholders and crayon on plastic are rites of passage in a family vehicle. For the sticky gum, I use a plastic trim tool wrapped in a microfiber to scrape it out without scratching. For the residue, a little isopropyl alcohol on a towel breaks it down instantly. For crayon wax on hard plastic, a blast of heat from a hair dryer softens it, then I can wipe it away with a dry towel. It is simple, but you have to know the trick.
Exterior Detailing: More Than Just a Wash and Wax
Every proper exterior detail starts with a wash. That part is true. But a detailer’s wash is nothing like the quick spray at a gas station. Think of it as a surgeon scrubbing in versus someone just rinsing their hands. The goal is not just to remove dirt, but to do so without creating any new damage. Waxes and coatings are the final, rewarding step. You can’t apply protection to a dirty surface, so everything that follows builds on a perfectly clean foundation.
Exterior detailing always includes a wash, but the technique separates a basic clean from true paint preservation. A wax or sealant is the traditional finish, but modern details often use longer-lasting ceramic sprays or professional-grade coatings for protection measured in years, not months.
The Safe Wash: Avoiding the Swirl Magnet
My black BMW taught me this lesson the hard way. When I first got it, the paint looked good in the shade. In direct sunlight, it was a spiderweb of fine scratches, or swirl marks. Every improper wash, using one bucket and a gritty sponge, had left its mark. Black paint doesn’t hide anything.
The two-bucket method is the single biggest thing you can do to keep your paint scratch-free. You need two identical buckets. Fill one with your shampoo solution. Fill the other with clean water. This is your rinse bucket. After you wash a section of the car with your wash mitt, you rinse the mitt in the clean water bucket before reloading it with fresh shampoo. This traps the dirt you just washed off in the rinse bucket, keeping it out of your shampoo and off your paint. It’s simple, but it works.
Drying is just as critical. Letting water air-dry leaves mineral spots, especially on glass and dark paint. I use a large, plush microfiber drying towel. I gently glide it over the surface to soak up the water. I never scrub or wipe hard. For my truck or the van, I’ll often follow up with a simple spray wax as I dry for extra protection. It takes one extra minute and makes the paint slick.
Decontamination: Getting the Paint Truly Clean
Washing removes loose dirt. Decontamination removes the bonded gunk you can’t see or feel until it’s gone. My Porsche’s wheels are the perfect example. After a drive, the alloy wheels have a gritty, rust-colored dust embedded in them. That’s brake dust, and it’s full of tiny metal particles. This “fallout” lands on your paint, too.
An iron remover is a liquid you spray on. It turns purple as it reacts with and dissolves the metallic particles. You see it working. It’s satisfying. After rinsing, you move to the clay bar. Put your hand inside a thin plastic sandwich bag and gently run your fingers over the clean paint. It should feel like glass. If it feels gritty, like sandpaper, your paint needs claying.
A detailing clay bar gently glides over lubricated paint, lifting out embedded contaminants like tree sap, tar, and industrial fallout that a wash misses. You use a quick detailer spray as lubricant. The difference in smoothness is immediate and dramatic. Your paint is now truly clean, and ready for polishing or protection.
Glass, Trim, and Tires: The Finishing Touches
These areas frame your paint. Streaky glass or faded trim makes the whole car look tired. For windows, I avoid all-purpose cleaners. They leave residue. I use a dedicated glass cleaner and two microfiber towels. One for applying and scrubbing, and a second, clean and dry, for a final buff. This eliminates streaks, especially when cleaning car windows.
Tires and plastic trim need specific care. A glossy, wet-look tire dressing is a style choice. I prefer a matte, satin finish that looks new, not greasy. For the faded black plastic trim on my old Miata’s mirrors and bumpers, a trim restorer brings back the deep black color. The key is to apply it to clean, dry trim and wipe off any excess. You want it to look restored, not slick or oily to the touch.
Properly cleaned glass and restored trim provide the crisp, finished look that makes a detailed car stand out. It’s the difference between looking clean and looking cared for.
Paint Correction: Fixing Scratches, Swirls, and Oxidation
Let’s clear up a major point of confusion. Paint correction is not painting. You are not adding new paint. Instead, think of it as carefully removing a thin, damaged layer from the top of your existing paint to reveal a fresh, perfect surface underneath.
It is the most transformative service in professional detailing.
You might ask, “does detailing a car remove scratches?” The honest answer is: it depends on the scratch’s depth. Paint correction can completely remove shallow defects like swirl marks, light scratches, and oxidation, but it can only minimize the appearance of deep scratches that reach the color layer or primer. If you can catch your fingernail in the scratch, it’s too deep to be fully removed safely. The goal then becomes to polish the edges to make it less visible. For truly deep scratches, repair options in car paint—such as color-matching touch-ups or a repaint—may be necessary. These steps aim to restore a seamless finish.
Understanding Your Paint’s Layers and Defects
Modern car paint is a sandwich. The metal panel gets a primer coat, then the colored base coat, and finally a clear coat. That clear coat is a transparent, hard plastic layer. It is the gloss you see and the layer we work on during correction.
A good analogy is a glossy photograph. The picture is your color. The shiny laminate on top is your clear coat. If you get fine scratches in that laminate, the picture looks hazy. We carefully buff those scratches out of the laminate, not the picture.
Defects live in the clear coat. Here is what they look like on my own cars.
- Swirl Marks (The BMW): My black BMW is a swirl magnet. These are fine, circular scratches that look like a spiderweb in the sun. They come from improper washing with dirty towels or automatic car washes. They only exist in the very top microns of the clear coat and are the easiest to fix.
- Oxidation (The Miata): On my classic red Miata, the single-stage paint had turned pink and chalky. Oxidation is when the clear coat (or the colored paint itself on older cars) breaks down from UV exposure. The surface looks flat and lifeless. Correction restores the color and depth.
- Heavy Scratches (The F-150): My truck’s dark blue flank had a long, nasty scratch from a branch. It was white, meaning it cut deep into the clear coat, maybe even into the color. I could feel it with my nail. Correction wouldn’t erase it, but polishing the area made it far less obvious from a few feet away.
The Correction Process: Polishing and Compounding
This is your hands-on, step-by-step car detailing guide for paint correction. Think of it as the core chapter you’d find in a detailed PDF manual. The right tools make it safe and effective, especially when following the car paint correction process.
You will need a dual-action (DA) polisher. It oscillates and rotates, making it very forgiving for beginners. You need a set of foam polishing pads-a cutting pad, a polishing pad, and a fine finishing pad. For chemicals, you need a cutting compound and a finer polish. Always start with the least aggressive method.
Here is the exact process I use on every car, including my own.
- Create a Perfectly Clean Canvas. The car must be washed and decontaminated with a clay bar. Any dirt on the paint will be ground into the surface by the polisher, creating deeper scratches. This step is non-negotiable.
- Tape Off Trim. Use painter’s tape to cover any rubber, plastic, or vinyl trim. Polish will stain these materials and is very difficult to remove.
- The Test Spot is Everything. Pick an inconspicuous area with the defects you want to fix. Start with your least aggressive combo (polishing pad and fine polish). Work a 2×2 foot section. Wipe it clean and inspect under good light. Did it improve? If not, move to a more aggressive combo (cutting pad and compound). The test spot tells you the exact recipe your car’s paint needs, saving you hours of wasted effort.
- Work in Small Sections. Apply product to the pad, spread it on the paint at low speed, then make 3-4 slow, overlapping passes at the recommended speed. Let the machine and product do the work. Do not press down hard.
- Wipe and Inspect Frequently. After each section, wipe off the residue with a clean microfiber. Check your work. You are looking for the defects to disappear, replaced by a clear, deep reflection.
- Two-Step Correction. For severe swirls or oxidation, you will often need a two-step process. Step one: use the compound and cutting pad to remove the defects. This will leave microscopic hazing. Step two: use the polish and a soft pad to refine the finish to a high-gloss, haze-free state.
- Final Clean-Up. After the entire car is corrected, do a final wipedown with a surface prep spray or diluted isopropyl alcohol. This removes any last oils or residues so your wax or sealant can bond perfectly.
It requires patience. The first time I corrected my BMW’s hood, it took me an entire afternoon. But seeing those swirls vanish and the true, liquid black emerge was worth every minute. Your paint tells its story. Correction lets you rewrite the bad chapters.
Protective Services: Wax, Sealants, Ceramic Coatings, and Wraps

Think of your car’s paint like skin. Washing it is just cleaning. The real magic, the part that keeps it healthy and looking new, is the protection you put on top. This is where detailing separates from a simple car wash. You have several choices, from a quick spray to a semi-permanent shell.
The right protection balances how much effort you want to spend, how long you want it to last, and what you need to guard against.
| Service | Durability | Gloss & Feel | Cost & Effort | Best For |
|---|---|---|---|---|
| Spray Wax/Sealant | 1-3 months | Good shine, slick | Low cost, DIY in minutes | Easy upkeep on daily drivers |
| Paste/Liquid Wax | 2-6 months | Warm, deep gloss | Moderate cost, DIY in 1-2 hours | Show cars, classic paint |
| Ceramic Coating | 2-5 years | Extreme gloss, glass-like | High cost, pro install recommended | Long-term protection, easy cleaning |
| Paint Protection Film (PPF) | 5-10 years | Varies (matte/gloss), self-healing | Very high cost, pro install only | Physical chip protection (front end) |
| Vinyl Wrap | 3-7 years | Any color/finish, textured | High cost, pro install only | Color change, full-body protection |
Remember, a wrap is a thick vinyl film applied over your paint. It is not a repaint. It protects the original paint and can be removed later.
Traditional Protection: Waxes and Spray Sealants
This is car care the way many of us learned it. There is a real pleasure in applying a traditional wax by hand, watching the hazy film buff away to reveal a deep shine. For my 2022 Porsche 911, the garage queen, I use a high-quality carnauba paste wax. The warmth and depth it adds to that red paint is unmatched. It feels like tradition.
For my 2018 Ford F-150, the workhorse, I reach for a spray sealant every time after I wash it. I am done in five minutes. It beads water fiercely and sheds light dirt. It is the most practical choice for a vehicle that sees mud, salt, and real weather.
Application is straightforward but demands a clean surface. Any dirt left underneath gets sealed in, or worse, rubbed into the paint.
- Paste/Liquid Wax: Apply a thin, even coat to one panel at a time with a foam applicator. Let it dry to a haze (check the product label), then buff off with a clean, soft microfiber towel. Work in the shade on cool paint.
- Spray Sealant: After your final rinse, while the car is still wet, spray the product onto a panel. Use a wet microfiber towel to spread it evenly, then dry the panel completely with a separate dry towel. It seals as you dry.
Do not expect a paste wax to survive a harsh winter. Do not expect a spray sealant to give you the deep, liquid glow of carnauba. Each has its perfect job.
Semi-Permanent Protection: Ceramic Coatings
A ceramic coating is a liquid polymer that chemically bonds to your vehicle’s paint, creating a hard, slick, transparent layer. Think of it as a second, tougher clear coat. On my black BMW, the swirl magnet, a coating was a game-changer. It made the surface so slick that dirt had a harder time sticking, and washing became safer and faster.
The main benefits are dramatic hydrophobicity (water beads and rolls right off), strong resistance to UV fading and chemical stains, and that signature high-gloss, reflective wet look. A proper coating turns your maintenance washes from a chore into a quick rinse-and-dry affair.
Applying a true professional-grade coating is not a casual weekend project. The paint must be flawlessly clean and perfectly polished first, as any swirls or defects will be locked in for years. The application environment must be controlled-clean, cool, and dust-free. For most people, having a reputable professional apply it is the best path.
Maintaining a coated car is easier, but not hands-off. You must use pH-neutral shampoos and avoid harsh chemicals or abrasive washes. The coating itself needs no “renewing,” but topping it with a ceramic-infused spray detailer every few months will boost its beading and slickness.
Paint Protection Film (PPF) and Vehicle Wraps
These are physical barriers you apply over the paint. Paint Protection Film is a clear, urethane film that acts like a sacrificial skin. I had the front bumper and hood of my Tesla Model 3 wrapped in PPF. On that flat, bug-catching front end, it has saved the paint from countless rock chips and sandblasting. Modern PPF even has “self-healing” properties that make light swirls disappear with heat.
A vinyl wrap is a thicker PVC film used primarily to change the vehicle’s color or finish (matte, satin, gloss, chrome). It offers protection too, but its main purpose is aesthetics. Wrapping my old Miata’s faded rear bumper was cheaper than a repaint and looked fantastic.
Caring for both PPF and vinyl wraps is specific. You must avoid petroleum-based dressings on the edges and certain harsh solvents. Use only wrap-safe cleaners and sealants, as the wrong product can stain the film or cause it to lift. Pressure washers should be used cautiously, angled away from film edges.
Many people ask if they need paint correction before a new wrap or PPF. The answer is always yes. The film will conform perfectly to the surface beneath it. If that surface is scratched or swirled, those imperfections will show through the clear PPF or be magnified under a glossy wrap. A smooth, corrected paint surface is the only proper foundation for any film.
Tackling the Tough Stuff: Smell and Stain Removal
A basic clean makes a car look fresh. Real detailing makes it feel new again, deep down where the stains and smells live. This is where a service proves its worth. My grey Honda Odyssey, the official “Kid Hauler,” has seen things. Spilled milk that curdled under a seat in July. Grape juice sprayed across the third-row headliner. A crayon that melted into the rear door plastic on a hot day. Beating these problems is what separates a detail from a wash.
Complete detailing always includes targeted attack plans for set-in stains and persistent odors, because a clean car shouldn’t come with a reminder of last week’s lunch.
Identifying and Treating Stains
You cannot treat a stain correctly if you do not know what it is. The first rule is to identify it as either organic or inorganic. Organic stains are from living things: coffee, soda, milk, blood, vomit, food, urine. Inorganic stains are everything else: ink, dye, grease, mud, tar. The treatment is different.
For organic stains on fabric or carpet, you need an enzyme cleaner. I keep one in my detailing kit specifically for the Odyssey. These cleaners use bacteria to literally digest the organic matter. You spray it on, let it dwell, and then extract it. The smell often leaves with the stain. For a set-in milk stain, I would flood the area with enzyme cleaner, let it work for 15 minutes, then use my hot water extractor to pull the mess out. It usually takes two passes.
Inorganic stains like crayon wax or grease require a different solvent. A citrus-based apc or a dedicated tar and adhesive remover works. For that melted crayon on plastic, I gently scraped the bulk off with a plastic razor, then used a tiny amount of adhesive remover on a microfiber to wipe the residue. You must follow this with an interior cleaner to remove any chemical film.
When people ask if detailing includes carpet cleaning, the answer is yes, but it is stain-specific therapy, not just a surface shampoo. You attack each spot with the right chemical and tool, from a soft brush for ground-in dirt to an extractor for a soaked spill.
Odor Elimination: From Baking Soda to Ozone
Odors are ghosts of spills past. They cling to fabrics, foam, and the hvac system. You tackle them in order of escalation.
Start simple. Ventilate the car thoroughly. Sun and fresh air work wonders on mild smells. Next, try baking soda. Sprinkle it liberally on dry fabric and carpet, let it sit overnight, then vacuum it all out. It absorbs simple odors well.
When that is not enough, move to an enzyme-based odor eliminator. This is for smells with a known organic source, like that old milk. You spray it into the hvac intake (with the fan on), on all fabrics, and especially under seats. It breaks down the source at a molecular level.
For the worst cases, you use an ozone generator. This is the final boss of odor removal. My ozone machine saved the Odyssey after a container of seafood got lost under a seat for a week. Ozone is a powerful oxidant that destroys odor molecules. It is also dangerous to breathe. In cars, ozone generators are commonly used for odor removal as a final step, with proper ventilation. When used properly, they can tackle stubborn smells that linger under seats or in upholstery.
Using an ozone machine requires strict safety protocol: never be in the car while it runs, seal the interior shut, run it for no more than 30-45 minutes, and let the car air out completely for at least an hour before you even open the door. I set a timer on my phone, run the machine inside the sealed car, and leave the garage. After treatment, I open all the doors and let it ventilate before checking the results. It is the only thing that truly resets the air in a vehicle.
Recommended Products: A Detailer’s Tier List
You do not need to spend a fortune to get good results. I keep products from all three tiers in my shop. Each one has its place depending on the car and the goal. I will mention where my favorites from my own fleet fit in.
Think of a Meguiar’s car detailing guide as your map to the Tier 1 and 2 landscape. A Mothers car detailing guide will show you their excellent polishes and interior cleaners. These brands build a great foundation.
Tier 1: Budget-Friendly Basics
This tier is for keeping a daily driver clean and protected without breaking the bank. You can find these at any auto parts store or big-box retailer. They work.
- Car Wash Soap: Meguiar’s Gold Class or Turtle Wax Hybrid Solutions Ceramic Wash. Both are safe, sudsy, and will not strip wax.
- Spray Wax/Sealant: Turtle Wax Hybrid Solutions Ceramic Spray Coating. This is a game-changer for the price. I use it on my F-150’s hood and fenders for quick protection after a wash.
- Interior Cleaner: Simple Green diluted 10:1 for plastics and vinyl. For carpets, any foaming carpet cleaner from the grocery store. This is what I used for years on the Honda Odyssey before upgrading.
- Glass Cleaner: Invisible Glass. It just works better than blue stuff.
These products let you maintain a clean, presentable vehicle that can survive drive-through washes and daily grime.
Tier 2: Enthusiast-Grade Performers
Here is where you see a real jump in performance, gloss, and protection longevity. The formulas are often gentler and more specialized. This is my most-used tier for personal projects.
- Car Wash Soap: P&S Pearl Auto Shampoo or Chemical Guys Mr. Pink. Excellent lubrication, great smell, and they are pH neutral to protect your existing sealants.
- Paint Sealant: Jescar Power Lock Polymer Sealant. This gives months of slick, deep protection. It is a staple for my BMW’s corrected paint.
- All-Purpose Cleaner (APC): P&S Xpress Interior Cleaner. It cleans nearly every interior surface safely and smells like green apples. My go-to for the Tesla’s vegan leather.
- Compound/Polish: Sonax Perfect Finish. This one product can often correct and finish in a single step, perfect for beginners learning on a DA polisher.
Stepping up to this tier makes your weekend detailing work more effective and your results last noticeably longer.
Tier 3: Professional and Show Car Specialties
These are the tools for perfection. They demand more skill and understanding but deliver the absolute best results. This is what I use for paint correction on the black BMW or applying a coating to the Porsche.
- Compound/Polish System: Scholl Concepts S20 Black or Koch-Chemie Heavy Cut Compound & Fine Cut Polish. These are ultra-refined abrasives that finish down with almost no haze, critical for dark paint.
- Ceramic Coating: Gyeon MOHS or CarPro Cquartz UK 3.0. Professional-grade durability and hydrophobics. Applying one to the Porsche was a weekend-long ritual of correction and precise application.
- Interior Coating: CarPro InnerQD or Gyeon LeatherShield. For protecting new or deeply cleaned interiors. I used this on the Odyssey’s seats after a major extraction to guard against future spills.
- Specialty Cleaners: CarPro Reset for coated cars, Koch-Chemie GSF for wheel cleaner. They are hyper-concentrated and formulated for specific, demanding tasks.
Mastering these products unlocks show-car finishes and protection measured in years, not months.
How Much Does All This Cost? Breaking Down the Investment
The question of how much does car detailing cost has two answers: your time, or your money.
For a DIY detail, your startup cost is the biggest hit. A basic Tier 1 kit with wash mitts, buckets, and chemicals might run you $150. A Tier 2 setup with a dual-action polisher and pads can reach $500. Tier 3 products and tools easily cross into the thousands. After that, you are just buying consumables like soap and microfiber towels, which are cheap per detail.
Hiring a professional scales with the service. A basic exterior wash and interior vacuum might cost $75-$150. A full interior and exterior detail with sealant is often $200-$400. For paint correction and a ceramic coating, you are looking at $1,000 to $3,000 or more, depending on the vehicle size and condition.
So is it worth it? For my black BMW, correction was worth every penny to erase the swirls I hated. For the Odyssey, a deep interior clean restored sanity and removed smells that vacuuming never touched. For the Miata, bringing the single-stage paint back from pink to red was a matter of pride.
Detailing is an investment in preserving your vehicle’s value and your enjoyment of it. A clean, protected car simply lasts longer and feels better to drive.
Final Thoughts on Car Detailing
After detailing thousands of cars, from my kid-hauler Odyssey to the swirl-prone black BMW, I know the single most important rule: detailing is a form of preventative maintenance that protects your investment. It’s the conscious choice to wash, correct, and shield every surface, which directly preserves your car’s value and your pride in it.
Without this disciplined approach, you risk accelerated wear, from etched water spots on the paint to set-in odors in the upholstery, that simple washing can never fix.
Research and Related Sources
- THE BEST 10 AUTO DETAILING near EASTVALE, CA 92880 – Updated 2025 – Hours – Yelp
- TOP 10 BEST Car Detailing Service in Los Angeles, CA – Updated 2025 – Yelp
- Expert Car Detailing Services – Interior & Exterior Auto Detailing – Delta Sonic Car Wash
- Touchstone Detailing – Car Detailing Nashville You Can Trust
- Cheap Auto Detailing Deals Near You – Save with Coupons Today
- La Stress free Luxury Mobile Detail
Max is an automotive enthusiast having worked as a car mechanical and in interior detailing service for over 25 years. He is very experienced in giving your old car, a new fresh vibe. He has detailed many cars and removed very tough smells and stains from all kinds of cars and models, always ensuring that his work and advice helps his customers. He brings his first hand experience to his blog AutoDetailPedia, to help readers breath new life into their car interiors.