How Do You Remove Mildew, Damp, and Stale Odors from a Car Interior?
That musty smell when you get in your car is telling you something. It means moisture is trapped somewhere, and mildew is likely growing.
I have dealt with this in my own cars, like the kid hauler Odyssey after a spilled drink was forgotten. This article will show you my proven steps. We will cover finding where the dampness hides, cleaning and disinfecting the right way, killing odors at their source, and stopping them from coming back.
If you do not address it correctly, the mildew will spread, the smell will sink in deeper, and you could be breathing in spores.
Key Takeaways: Your Quick Path to a Fresh-Smelling Car
Think of this as a half-day project. It is a moderate job, but you must put in real effort. Success is simple. Find where the smell comes from, clean every inch, let it dry, and hit it with the right odor killer.
- Your first job is to find the moisture. Look for wet carpet, a damp trunk, or mold on the seats.
- Clean everything you can touch. I mean every surface, nook, and cranny.
- Dry the interior completely. Moisture left behind is an invitation for the smell to return.
- Treat the air with a true eliminator. An enzyme cleaner for organic smells or an ozone generator for stubborn cases works.
Hanging a pine tree air freshener is like putting a bandage on a broken arm. It only covers the smell for a day and can trap more moisture, making the real problem worse.
The Odor Removal Protocol: A Detailer’s Order of Operations
Follow this list in order. Do not skip a step. This is the same sequence I use on every car, from my kid’s Odyssey to a customer’s 911. It works.
- Empty the Car
Take out all trash, toys, papers, and personal items. Pull out the floor mats, seat covers, and any cargo liners. You cannot clean around clutter. I once found a spoiled sippy cup under the seat of my Honda Odyssey that was the source of a week-long mystery smell.
- Diagnose the Source
Get on your hands and knees. Use your nose and eyes. Check under the seats, in the trunk spare tire well, and along door seals. Feel the carpet for damp spots. Look for fuzzy white or green patches on fabric. A small flashlight helps. Finding the source is not optional; it is the only way to win.
- Dry Out the Interior
If the interior is damp, do not clean it yet. Park in the sun with all doors open for a few hours. Use a fan to move air through the cabin. For serious wetness, a wet/dry vacuum can suck moisture from the carpet. A car is a small, enclosed space. It needs to breathe before you start scrubbing. Alternatively, clean the interior without vacuuming by blotting damp spots with towels and wiping surfaces with a microfiber cloth. This keeps the process gentle while you refresh the cabin without a vacuum.
- Deep Vacuum
Use a good vacuum with a crevice tool. Go over every fabric surface twice. Hit the seats, the carpet, the headliner, and the door panels. Vacuum the vents. This removes the dry spores and dirt that hold odors. The sound of dirt hitting the canister is a good sound. It means progress when you’re trying to remove odors from your car interior.
- Clean Removable Parts
Wash rubber floor mats with soap and water. Scrub fabric mats with an all-purpose cleaner and a brush. Hose them down and let them dry in the sun. Clean them away from the car. This prevents cross-contamination. My Ford F-150’s mud-caked mats get this treatment every spring.
- Scrub All Interior Surfaces
Use the right cleaner for each material. For plastics and vinyl, I use a diluted all-purpose cleaner. For cloth seats and headliners, a gentle upholstery cleaner is key. Scrub with a soft brush, then wipe with a microfiber towel. Work from the top (headliner) down to the floor. This prevents drips on clean surfaces.
- Apply an Odor Neutralizer
Do not just spray perfume. Use a targeted product. For mildew or food smells, an enzyme cleaner breaks down the source. Spray it on affected areas and let it sit. For a deep, stale odor that remains, a small ozone generator run in the closed car for 30 minutes can wipe the slate clean. Choose your weapon based on what you found in Step 2.
- Final Dry and Ventilate
After cleaning and treating, let the interior air out again. Leave windows down in a dry, safe place. Run the fan on high with the air conditioning on to dry the vents. Touch the carpets. If they feel cool or damp, wait longer. Only put your mats and belongings back when you are sure everything is bone dry.
Sniffing Out the Source: What’s Really Causing That Smell?

You cannot spray your way out of a bad smell. I have tried. Odor removal always starts with finding the origin. Masking it with an air freshener is like putting a bandage on a rusty nail. The problem festers. You need to find the source.
First, use your nose. Close your eyes and take a slow breath. Is it a damp, earthy smell, like wet socks left in a gym bag? That’s classic mildew. Is it a sour, tangy odor that hits the back of your throat? That could be old milk or spilled soda. A sharp, ammonia-like punch often points to a past pet accident. Pinpointing the character of the smell is your first real clue.
Next, think about water. Hidden moisture is the enemy. Check the usual suspects. Are your floor mats damp underneath? In my Honda Odyssey, a spilled juice box once soaked through the mat and into the carpet foam, creating a perfect home for mildew. Feel along the edges of the carpet, especially in the footwells. A leaky windshield seal or a clogged sunroof drain tube can funnel water right into your car’s floor, silently soaking the padding. This hidden wetness is why a simple surface clean often fails.
Now, turn on your air conditioner. Blast it on max cool for a minute. If a wave of musty, locker-room air blasts from the vents, you have found another major culprit. Your car’s A/C evaporator core gets cold and wet during operation. When you turn the car off, that moisture sits in a dark box. Mold and mildew love it. Turning on the A/C just circulates the smell throughout the cabin.
Finally, consider the history. Old spills you thought you cleaned can haunt you. A coffee splash on the seat fabric, a milkshake drip in the center console crevice, forgotten french fries under the seat. Organic matter breaks down. It feeds bacteria, which creates odors. If you want to know how to get mildew smell out of car carpet, you first must accept the carpet is likely just the top layer of the problem; the foam padding underneath is the real sponge. To remove stubborn odors from car seats, you may need a deeper clean that reaches the padding. These steps address odors that hide in layers your nose can’t reach.
The Usual Suspects: A Quick Guide
Here is a quick checklist of where to hunt. Get a flashlight and be thorough.
- Wet Carpets & Mats: The prime suspect. Pull the mats out. Press a clean paper towel firmly into the carpet. If it comes back damp, you have moisture. The smell often comes from the thick foam pad glued beneath the carpet, which can hold water for weeks.
- Mold in Air Vents: That musty blast from the A/C is a dead giveaway. You might see a light dusting of black or green specks around the vent slats. The mold colony itself is inside, on the evaporator core.
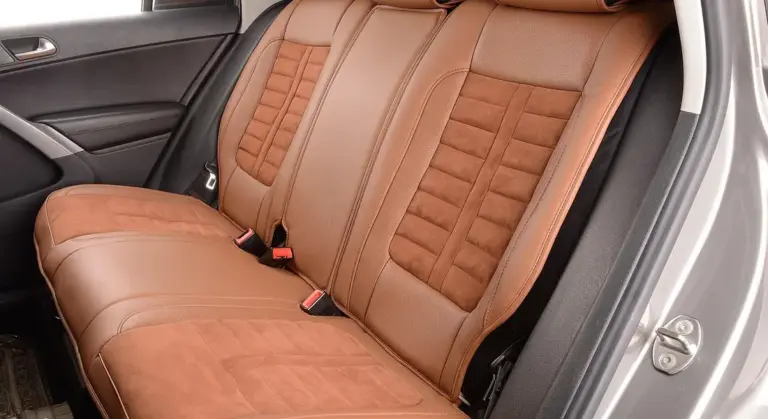
- Old Spills in Seats: Fabric seats absorb liquids like a sponge. Leather and “vegan leather” seats have seams that can trap spills. Even a small amount of liquid sugar can sour over time. Sniff closely along seams and stitching.
- Forgotten Wet Items: Check under seats, in door pockets, and in the cargo area. A damp gym towel, a pair of wet boots, or a soaked beach toy left in a corner can single-handedly ruin the air in your car.
- Trunk Moisture: Do not forget the trunk. A leaky taillight gasket or a poorly sealed spare tire well can let in water. The carpeted trunk liner holds moisture against the metal, leading to a distinct, enclosed damp smell.
Gear Up: The Tools and Prep Work You Need
You cannot win a fight against mold and deep smells if you show up empty-handed. My 2019 Honda Odyssey, the “Kid Hauler,” has taught me this lesson more than once. The right tools make the job possible. The right prep work makes it effective.
Start by gathering your essentials. You need a baseline kit to attack the problem.
- A strong vacuum with attachments. A shop-vac is ideal. You need the crevice tool to dig into seat tracks and the upholstery brush for fabrics. This is your first line of defense to remove the dry, loose spores and debris.
- Plenty of clean, dry microfiber towels. Use a soft, plush towel for wiping surfaces and a more textured one for gentle scrubbing. Have a stack ready. You will go through them.
- A soft-bristle detailing brush. This is for agitating cleaner into fabrics and vinyl without scratching. A firm toothbrush works for tiny vents and seams.
- A pH-neutral interior cleaner. Avoid harsh degreasers or all-purpose cleaners on modern interiors. A gentle, dedicated interior cleaner is safe for dash plastics, vinyl, and most fabrics.
- An odor-neutralizing product. This is your specialist. You have three main types: enzymatic (eats organic matter), oxygen-based (like hydrogen peroxide cleaners that fizz and lift stains), or an ozone generator for severe cases. I keep an enzymatic spray on hand for my Odyssey’s frequent spills.
Your workspace matters as much as your tools. Always park in a shaded, ventilated area and open all doors and windows completely before you start. You need maximum airflow. Sunlight heats the interior and bakes smells in. It also makes cleaners evaporate too fast, which can cause streaks. If you are using a strong cleaner or an ozone generator, wear nitrile gloves and consider a mask. Your safety is not optional.
Some tools are not essential, but they are game-changers if you can access them.
- A carpet extractor is the ultimate weapon for soaked carpets. It injects cleaning solution and sucks the dirty water back out.
- A steamer uses heat to kill mold spores and loosen grime from crevices without harsh chemicals. It is fantastic for cleaning air vents.
- A moisture meter takes the guesswork out. You can press it against the carpet or seat foam to find hidden dampness you cannot feel with your hand.
Lay everything out before you begin. Open the doors. Take a deep breath and locate the source of the smell. That is your target.
The Strip-Down: Removing and Washing What You Can
You need to get everything out of the car that you can. I always do this first. It opens up the space and lets you tackle the big, removable sources of smell on their own. Think of it like cleaning a room by taking out the rugs and curtains before you scrub the floors. This groundwork also sets you up to tackle remove new car smell interior odors later. With the space cleared, odor-removal steps can work more effectively.
Pull every single item out. Do not skip anything.
- Remove all floor mats. Front, rear, and if you have one, the cargo area liner.
- Take off any removable seat covers. Grab loose fabric items too, like pet blankets or that sweatshirt you threw in the back.
- Unbolt and take out child safety seats. This is critical. You will find a world of crumbs and dampness hiding underneath a child seat, and that is ground zero for bad odors.
Now wash these items properly. Do this outside. I use the driveway. For my Honda Odyssey, the kid hauler, this step happens every few months after a juice box incident or a muddy soccer game.
Hose down rubber or all-weather mats first. Spray them hard to blast off dried mud and salt. Use a stiff brush and a squirt of car wash soap for the grime. Rinse until the water runs clear. Prop them against a fence or wall so water drains off and air circulates all around them.
For fabric seat covers and liners, be gentler. I fill a bucket with warm water and add a capful of a gentle, odor-neutralizing fabric cleaner. Submerge the cover, agitate it by hand, and then rinse it with a hose on a gentle shower setting. Do not wring it out tightly, as that can damage the fibers.
Dry everything in direct sunlight. Lay fabric items flat on a clean patio or hang them over a railing. The sun’s heat and UV light are powerful. They help kill mold spores and bake out stale smells. Do not put a single item back in the car until it is bone-dry to the touch, even in the seams. Returning a damp mat is asking for mildew to come back stronger.
Your fabric seats are still in the car. You need to clean them now to prepare for the deeper odor fight. This is not the full extraction yet, but a crucial surface clean. For clean cloth fabric car seats, this quick surface prep helps lift grime and odors before the deeper treatment. A gentle wipe now keeps the fabric ready for the next steps.
Vacuum the seats completely. Use a soft brush attachment and get deep into the crevices. You want all loose dirt and debris gone.
Mix a small batch of cleaner. I use a dedicated upholstery cleaner diluted with warm water in a spray bottle. Always test any cleaner on a hidden spot, like under the seat, to check for color fading.
Spray the fabric lightly. Do not soak it. Using a soft-bristled interior brush, gently scrub the solution into the material. You will see the dirt lifting to the surface. Take your time and work in small sections.
Blot the area immediately with a clean, dry microfiber towel. Press down to absorb the dirty moisture. Your goal is to leave the seat just slightly damp, not wet. A damp seat will dry quickly inside your ventilated car, but a wet seat will become a new source of that damp odor you are trying to eliminate. This step removes the surface layer of odor-causing residue and sets you up for success in the next phase. If the odor is from urine, these steps also help reduce urine-related staining and odors in car seats, paving the way for urine-specific cleaning in the next steps.
The Deep Scrub: Cleaning Every Surface Inside the Cabin

Think of the interior like a waterfall. You always start at the top and work your way down. This way, any drips or loosened grime falls onto a dirty surface you haven’t cleaned yet, not onto a spotless seat.
First, tackle the headliner and the air vents. Use a light mist of a dedicated interior cleaner or a diluted all-purpose cleaner on a soft microfiber towel. Never soak the headliner, as the adhesive can fail. Just dampen the towel and gently wipe. For vents, a soft detailing brush helps flick dust out of the slats before you wipe.
For hard plastics, vinyl, and leather, your choice of cleaner matters. You want a pH-balanced interior cleaner that lifts dirt without leaving a shiny, greasy film behind. That greasy residue is a magnet for dust and makes surfaces feel slippery. On my BMW’s dash or the Honda’s seats, I spray the cleaner onto my microfiber towel first, not directly onto the surface, to control overspray. Wipe with purpose, flipping to a clean side of the towel often.
Fabric upholstery and carpets are the ground zero for a mildew smell. You must lift the moisture and the organic matter feeding the odor. Pre-treat any visible stains with your cleaner. Then, agitate the entire area with a soft-bristled brush to work the cleaner deep into the fibers. This breaks the bond between the contaminant and the fabric. To remove mold, mildew, and musty smells more effectively, finish with an odor-neutralizing rinse. This helps ensure the odor is eliminated, not just masked.
Now, you remove it. Whether you’re using a carpet extractor, a wet/dry vac with a sprayer, or the classic “bucket and towel” method, the next step is non-negotiable.
Detailer’s Pro-Tip: The Extraction Technique
This is where most people fail. They scrub and then quickly suck up the foam, leaving the deeper moisture and dirt behind. You have to be slow and deliberate.
If using an extractor, place the nozzle firmly on the carpet. Press the trigger and pull back at a speed of about one inch per second. Make overlapping passes, like mowing a lawn. You will see dirty water flowing into the nozzle. Keep going over the same area with clean, hot water until the water being sucked back looks clear.
With the towel method, the principle is the same. Use a thick, absorbent microfiber towel. Press it down hard into the damp carpet with the palm of your hand, then lift. You are blotting, not wiping. Move to a clean section of the towel and repeat. Do this until the towel comes up mostly dry and no more discoloration transfers.
To check your work, use a flashlight held at a low angle, almost parallel to the carpet. This raking light will reveal any leftover staining or damp patches you missed with overhead light. On my Odyssey, this trick found a dried juice spill I thought was gone.
Don’t Forget the Climate Control System
You can clean every surface and still have a musty smell blast from the vents when you turn on the air. The system’s evaporator core is a cold, damp place perfect for mildew.
Start with the easy part: replace the cabin air filter. It’s often behind the glove box and is a cheap, effective first step.
For a deeper clean, you need an HVAC system cleaner. These are typically foaming sprays. With the vehicle running and the A/C on full blast (recirculation mode OFF), find the exterior air intake usually at the base of the windshield. Spray the foaming cleaner into the intake as directed. The fan will pull the foam through the evaporator core, cleaning it. Let the system run for the time specified on the can to dry everything out. You will likely smell the cleaner inside the cabin, which is how you know it’s working. Always follow the product’s safety instructions for ventilation.
The Final Assault: Choosing and Using Odor Neutralizers
You have cleaned everything you can see and touch. The smell is still there. This is where you fight the odor on a molecular level. You need a neutralizer, not a cover-up. Air fresheners just add a new scent on top of the old one, like putting cologne on a dirty shirt. A true neutralizer attacks the odor source itself.
Think of these as your specialized troops. Each one has a different job.
- Enzymatic Cleaners are your bacteria. They are alive. They eat the organic gunk causing the smell, like spilled milk, old food, or pet accidents. They work slowly, breaking down the source over hours, but they permanently remove the food that smells feed on. I keep a bottle for the Odyssey’s back seats.
- Oxygen-Based Cleaners are your safe oxidizers. They release active oxygen to break down odor molecules. They are fantastic for fabrics and carpets because they are usually color-safe and don’t leave a chemical residue. They work on a wider range of odors than enzymes.
- Ozone Generators are your tactical nuke. Ozone (O3) is a powerful oxidizing gas that seeks out and destroys odor molecules. It is the only thing I trust for truly pervasive smells like heavy smoke, deep mildew, or unknown biological odors. It is serious equipment and requires respect.
How to Deploy Your Odor Troops
Using the right tool wrong will waste your time. Here is how to apply each one.
For enzymatic cleaners, you must find the source area. Soak the spot thoroughly. Let it dwell. Do not let it dry. I sometimes cover a soaked area with plastic wrap for a few hours to keep it wet. The enzymes need time and moisture to work. Rinse lightly if the product calls for it.
Oxygen-based cleaners often come as sprays or little pods. For a whole-car treatment, I place a pod under each front seat. For a targeted attack, I spray it on the carpet, mats, and fabric seats until damp, not soaked. Let it air dry completely with the windows cracked. The oxidizing action happens as it dries.
An ozone generator is a process. You run the car’s fan on recirculate, place the machine’s hose in a window seal, and set a timer. For my detailing jobs, 30-45 minutes is typical for a moderate smell. You then must air the car out completely for at least as long as you ran the machine before you can breathe the air inside. These steps are designed to remove ozone detailing odors from the interior. Proper airing ensures you are left with fresh air after treatment.
The Truth About DIY Methods
People ask me about vinegar and baking soda all the time. Let me be straight with you.
White vinegar is a mild acid. It can kill some surface mildew and bacteria. It works, sort of. But you are trading a mildew smell for a strong pickle smell that can linger for days. You still need to extract the vinegar solution. It is a lot of work for a partial result.
Baking soda is a great odor absorber. An open box in the footwell will soak up smells from the air. But absorption is not elimination. It does not kill mold spores or break down organic matter. It is a good temporary holdover, not a cure.
Handle all chemicals, even DIY ones, with care. Wear gloves. Test any cleaner on a hidden patch of fabric or plastic first. Ventilate your workspace.
When to Call the Professionals
You might search “car odor removal service” or “car odor removal machine.” Here is what you are buying.
A professional detailer has industrial-grade ozone generators and often another tool called a thermal fogger. The fogger heats a deodorizer into a fine mist that penetrates every nook, following the same paths the odor did. It is incredibly effective for complex smells, like a heater core leak or a rodent nest in the vents.
Call a pro when the smell has won. If you have done a full deep clean and used a consumer ozone unit with no luck, the cost of a professional treatment is worth it. They have the experience and stronger tools to solve problems a home kit cannot. For context, saving a car from a total loss due to odor is often cheaper than trading it in at a massive loss.
Ozone Generator Safety & Use
This is not a suggestion. It is a rule. Ozone is harmful to lungs. It can damage certain materials like rubber and certain plastics with prolonged exposure.
- Never, ever sit in the car while the ozone generator is running. Do not let pets near it.
- Set up the machine outside the car, feeding the hose through a barely closed window. Use duct tape to seal the gap.
- Follow the manufacturer’s time guidelines. More is not better. For a standard car, start with 30 minutes.
- When the timer stops, turn the machine off. Open all doors and let the car air out for at least 30-60 minutes. The ozone needs to revert back to breathable oxygen.
- Smell the air inside before you get in. It should smell clean and slightly electric, like after a thunderstorm. If it smells harsh, air it out longer.
This is exactly what a professional car odor removal service does. They just have commercial machines and the experience to do it safely every time. If any of these steps make you nervous, hiring them is a smart move.
Locking in the Win: How to Keep Your Car Smelling Fresh
You just won a battle against a nasty smell. Let’s make sure it doesn’t come back. Good habits are your new best defense. They are simple, cheap, and save you from future deep cleanings.
Build Smart Daily Habits
Think of your car’s interior like your kitchen. You wouldn’t leave spilled milk on the counter for a week. Treat your car with the same respect. My Honda Odyssey, the kid hauler, taught me this the hard way after one forgotten sippy cup of milk.
- Use heavy-duty, all-weather floor mats. They contain the mess. You can pull them out, hose them off, and let them dry in the sun. The factory carpet underneath stays bone dry and safe.
- Remove trash every single time you get gas. Empty coffee cups, food wrappers, and receipts are odor starters. A small bag in a door pocket makes this easy.
- Avoid leaving wet items in the car. This includes gym bags, wet towels, muddy shoes, or a rain-soaked jacket. Moisture is the enemy. If you must leave something damp, place it on top of a towel on your all-weather mat, never directly on carpet.
These three habits alone will stop most odor problems before they have a chance to begin.
Control Hidden Moisture
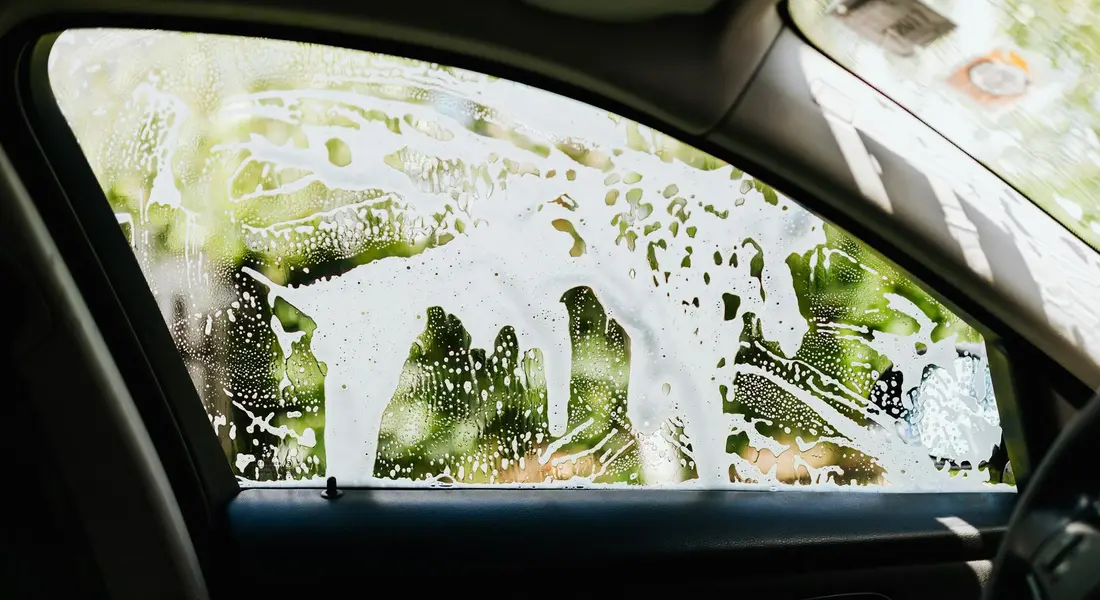
Sometimes the air itself is the problem. In damp climates or during rainy seasons, moisture gets trapped inside. You can feel it on the windows. That dampness soaks into your carpets and seats, creating a perfect home for mildew.
The solution is simple and silent: silica gel desiccant bags. You see these little “Do Not Eat” packets in new shoe boxes. They absorb moisture from the air.
- Buy a few reusable silica gel canisters or bags meant for closets or safes.
- Place one under each front seat, out of sight. The air flowing through the cabin will pass over them.
- Every month or so, when the silica beads change color, “recharge” them by baking in the oven on low heat as the package directs. They will last for years.
This trick is a game-changer for convertibles, cars stored in humid garages, or anyone who lives near the water.
Stop A/C Mold at the Source
That sour, musty smell that blasts from your vents when you first turn on the air conditioning is mold growing on your evaporator core. It’s a cold, wet metal box inside your dashboard. You can prevent it.
About two minutes before you reach your destination, turn off the A/C compressor but leave the fan blowing. On most cars, you just press the “A/C” button so the light goes off. Leave the fan on its normal speed.
This forces dry, ambient air through the evaporator, blowing off the condensation and drying it out before you park. A dry evaporator cannot grow mold. Do this religiously during humid months, and you may never need an expensive A/C disinfectant spray again.
Make Cleanup a Routine, Not a Chore
Regular maintenance is less work than a major correction. This is true for paint, and it’s absolutely true for interiors.
Vacuum your carpets and seats every two weeks. Use a crevice tool to get into the seams where crumbs hide. A quick wipe-down of vinyl, plastic, and leather surfaces with a damp microfiber towel takes five minutes and removes the oils and dust that start to smell over time. For lingering odors in cloth seats and carpets, targeted removal tips can refresh the interior. The next steps will cover how to remove odors from cloth car seats and carpets.
When a spill happens, address it immediately. Blot, do not rub, a liquid spill with a dry towel. For a solid mess, scoop up the big pieces and give the area a quick clean with an interior detailer spray. Putting in two minutes of work now saves you from a two-hour extraction session later.
Your nose will thank you. Your car will feel cleaner, longer. And you will have won the war against bad smells for good.
Keeping Your Car’s Interior Fresh and Healthy
Beating those smells comes down to one rule: you must eliminate the moisture and treat the source, not just cover it up with a spray. Success means starting with a deep clean, drying everything completely, and using the right tool, like an ozone generator for stubborn biological odors.
Ignore the source of the dampness, and the mildew and its smell will always come back, risking your health and the car’s materials.
Research and Related Sources
- Eliminate Musty Smell in Car Interiors | Chemical Guys
- How To Remove Musty Or Moldy Smells From Your Car – Apex Auto Pros
- How to Remove Mold and Mildew Smell from Your Car Interior Effectively
- How To Remove Musty Car Smells | Turtle Wax
- Mildew smell in car: How do you get rid of it? | Toyota of North Charlotte
- That Musty Smell – What Mold Odors Mean for Your Car’s Interior
- mildew smell | Auto Geek Online Auto Detailing Forum
Max is an automotive enthusiast having worked as a car mechanical and in interior detailing service for over 25 years. He is very experienced in giving your old car, a new fresh vibe. He has detailed many cars and removed very tough smells and stains from all kinds of cars and models, always ensuring that his work and advice helps his customers. He brings his first hand experience to his blog AutoDetailPedia, to help readers breath new life into their car interiors.