Is Windex or Vinegar Safe for Your Car Windows? Here Are the Best Cleaning Methods
You see a dirty windshield and grab a bottle from under the kitchen sink, but you worry it might do more harm than good.
I’ve cleaned windows on hundreds of cars, from my kid-hauler Odyssey to my black BMW swirl magnet. We will cover the truth about ammonia and acidity on auto glass, the step-by-step technique for a streak-free finish, and the detailer-approved products I actually use.
Get this wrong, and you could permanently haze your glass or damage the delicate trim around it.
Key Takeaways: Your Quick Safety & Method Guide
Let’s cut to the chase. Grabbing whatever’s under the kitchen sink is a common reflex. Here’s what you need to know before you spray.
Windex is a calculated risk, while a diluted vinegar solution is a better homemade option, but both are compromises compared to products made for cars.
The safest, most effective method isn’t complicated. Do these three things every time:
- Use a dedicated auto glass cleaner, preferably one labeled ammonia-free.
- Wash the glass first with soap and water to remove grit, just like you would the paint.
- Wipe with a clean, low-lint microfiber towel, flipping to a dry side for the final pass.
The AutoDetailPedia Product Tier List
Not all glass cleaners are equal. Your choice depends on your goals.
| Tier | Best For | Product Example & Notes |
| Budget / Drive-Through Clean | Quick exterior wipes, removing light film. The “better than Windex” option. | Store-brand auto glass cleaner (like from an auto parts store). They’re typically ammonia-free and safer for tint. |
| Enthusiast / Weekly Washer | Someone who details their own cars and wants value and performance. | Ammonia-free concentrates (like Griot’s Garage or Chemical Guys). You mix with water in a spray bottle. A gallon makes gallons. Cost-effective and powerful. |
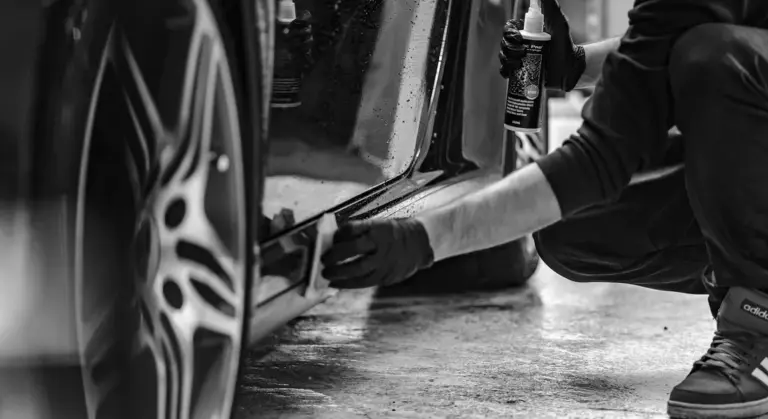
| Show Car / Coating-Safe | Cars with ceramic coatings, rain repellents, or old window tint you need to preserve. | Professional-grade cleaners (like Stoner Invisible Glass or CarPro Clarify). Formulated to not leave residues that interfere with water beading. My go-to for the Porsche and the Tesla. |
Detailer’s Pro-Tip: The Streak-Free Wipe
The product matters, but your technique matters more. Streaks come from product residue, not a dirty window.
After you spray, use a clean, folded microfiber towel. Wipe in one straight, firm pass. Don’t go back over it while it’s wet. Flip the towel to a fresh, dry side and make a final pass with light pressure to pick up any leftover moisture. Slow, overlapping circles just smears the cleaner around. A confident, straight pull leaves it crystal clear.
The Windex Question: Is That Blue Bottle Really Safe?
We’ve all done it. The bottle is right there. It works on the house windows, so why not the car? The short answer is your house windows don’t have tint film or sensitive rubber seals. Your car does.
The core problem with Windex is ammonia, a harsh chemical that excels at cutting grease but acts as a slow poison for many automotive materials.
So, can you clean your car windshield with Windex? You can, but you shouldn’t make a habit of it. It’s a gamble. On brand-new, non-tinted exterior glass, if you’re incredibly careful to avoid spraying any plastic trim or rubber seals, you might get away with it once. I’ve done it in a pinch on my F-150’s windshield. But it’s never the best or safest choice. There’s always a better product in my garage. Sometimes you’re fighting a stubborn film, and that’s where products designed to remove film and clean car windows really shine. They restore clarity without risking seals, coatings, or trim.
The real danger is on tinted windows. A friend of mine used Windex on his new sedan’s tint for months. He called me wondering why the rear window tint was turning a purplish color and starting to bubble at the edges. That was ammonia damage. The repair cost was more than a lifetime supply of proper glass cleaner. Ammonia breaks down the adhesive and dyes in the tint film, causing fading, discoloration, and those ugly, permanent bubbles.
Overspray is your interior’s enemy. Can you use glass cleaner on dash plastics or vinyl? No. Ammonia-based cleaners can leave a hazy, streaky residue on vinyl and plastics. On my old Honda Odyssey’s dashboard, that residue would attract more dust, making it look dirty again faster. On modern screens and glossy black trim, it’s a smudgy disaster. That’s why many drivers opt for dashboard cleaning protection that both cleans and shields the surface. A protective layer helps repel dust and fingerprints, keeping the dash looking newer longer.
The Ammonia Problem for Tint and Trim
Think of window tint as a thin, delicate sandwich. The adhesive layer is the glue. Ammonia doesn’t just clean the surface, it seeps into the edges and attacks that glue. It breaks it down chemically. The tint film detaches in spots, trapping air-that’s the bubble. The sun bakes it, and the damage is done. The fading is from the ammonia degrading the film’s dyes.
Rubber seals and plastic trim around your windows need to stay flexible. Ammonia dries them out, making them brittle over time. A brittle seal cracks. A cracked seal leaks. I see it on older cars all the time-crusty, shrunken trim that no longer seals properly. Harsh cleaners accelerate that aging process dramatically.
When You *Might* Get Away With It
The only scenario where I’d even consider it is on the exterior glass of a brand-new car with no window tint whatsoever. Even then, you must use a towel to apply it, not spray it directly. This prevents overspray onto the paint or trim. Rinse the area thoroughly with water afterwards.
But let’s be honest. If you’re reading this, you care about doing it right. A bottle of safe auto glass cleaner costs a few dollars. It’s not worth the risk. For the sake of your tint, your trim, and your interior’s finish, leave the blue bottle in the kitchen.
The Vinegar Solution: A Natural Alternative with a Catch
Can you clean car windows with vinegar? Yes, you absolutely can. For dissolving the greasy film, bug splatter, and hard water spots Windex struggles with, a simple vinegar solution works very well. It is a much safer alternative for your car’s interior and exterior trim. The acetic acid cuts through grime without the harsh chemicals. Vinegar is an effective, detailer-approved cleaner for glass, but it comes with one very noticeable problem you must plan for when it comes to removing hard water stains from car windows.
The major drawback is the smell. That sharp, pickled aroma does not just vanish. It lingers inside your cabin, clinging to fabrics and vents. You are left driving around in something that smells like a salad for days. It is a real trade-off for a clean windshield.
To use it correctly, you must dilute it. A mix of distilled white vinegar and distilled water is the key. Using straight vinegar is overkill and makes the odor problem far worse. The right ratio balances cleaning power with a chance the smell will eventually fade.
Getting the Mix Right (And Avoiding the Diner Smell)
Precision matters here. You want enough vinegar to clean, but not so much you regret it. My go-to recipe is straightforward.
- 1 part distilled white vinegar
- 3 parts distilled water
Use a clean spray bottle. The distilled water is important. Tap water has minerals that can leave spots on your perfectly cleaned glass, defeating the whole purpose. Shake the bottle to mix it.
If the thought of the vinegar smell bothers you, add a single drop of an orange or lemon based all purpose cleaner to the bottle. Do not add more. This tiny addition can help mask the initial scent without affecting the solution’s clarity or creating streaks.
Spray the solution onto the glass, not your towels. Work in sections. Wipe with a clean, damp microfiber towel first to lift the dirt, then follow immediately with a second clean, dry microfiber to polish the surface to a streak free finish. Full strength vinegar is unnecessary, increases the odor risk, and offers no real cleaning benefit on auto glass.
Vinegar on Car Interiors: Beyond the Glass
People often ask if they can clean a car interior with vinegar. The answer is careful, and limited. For hard, non porous plastics like a cup holder or a dusty dashboard, a light spray of the same diluted solution on your towel can work. I have used it on the hard plastics in my Honda Odyssey to tackle sticky residues. You must be aware it can dry out some plastics over time, and that familiar smell will soak into any fabric it touches.
You must never use it on sensitive surfaces. Do not use vinegar on leather or vinyl seats. It will degrade the protective coatings and dry out the material. Do not use it on Alcantara or suede; it will stain and ruin the texture. Never spray it near or on your infotainment screen or gauge cluster lens. The acidic solution can damage anti glare and oleophobic coatings permanently.
For those surfaces, use cleaners designed for them. A dedicated interior cleaner for plastics and a separate, pH balanced leather cleaner are worth the investment. They work better and keep your car smelling like a car, not a condiment.
How to Clean Interior Windshields and Windows Without Streaks
We all know that hazy film. It’s not quite dirt, not quite fog. It’s a greasy, fingerprint-smeared veil that catches the low sun and makes you squint. This film is a mix of plastic outgassing from your dashboard, skin oils, and just general cabin grime. Your goal is to cut through it completely, leaving nothing behind.
You need two specific microfiber towels to win this fight. First, a soft, plush towel for applying your cleaner. Second, a dedicated glass towel with a tight, flat weave designed for final polishing. Trying to do both jobs with one fluffy towel is the main reason people get streaks.
Step 1: Setting the Stage for Success
Park your car in the shade and let the interior cool down. Heat is your enemy here. It causes your glass cleaner to evaporate almost instantly, leaving the dissolved grime to dry into new, stubborn streaks before you can wipe it away.
Before you touch the glass, wipe down your entire dashboard, steering wheel, and center console with a dry microfiber. This simple step removes the layer of dust that would otherwise float onto your freshly cleaned windshield the moment you drive away. In my Honda Odyssey, the “Kid Hauler,” skipping this means a dust-sprinkled window five minutes after a perfect clean.
Step 2: The Two-Towel Technique in Action
Fold your plush application towel into quarters. Lightly mist one quarter with your chosen glass cleaner-do not soak it. You want it damp, not dripping.
Wipe the interior glass in a loose, overlapping “S” pattern. Cover the entire surface. Do not use circular motions. The goal is to apply the cleaner and dissolve the film, not to dry the glass with this towel.
Immediately grab your dry, clean glass polishing towel. Fold it into quarters as well. Starting at the top, wipe the glass with firm, straight up-and-down strokes. Overlap each pass. The vertical motion on the interior glass makes any remaining streak pattern virtually invisible to your eye while driving.
Flip both towels to a fresh, clean side after every panel. A towel loaded with grime just re-smears it. If you’re cleaning the windshield of my Tesla, the “Modern EV,” you’ll see how quickly the towel picks up that clear interior film.
Detailer’s Technique Tweak: The Lighting Angle Check
You think you’re done. The glass looks clear looking straight through it. Do not trust that view. Here’s the trick every pro uses.
Turn on your phone’s flashlight. Hold it flat against the glass, shining across the surface, not through it. Get low and look across the beam’s path. This raking light will reveal every hidden streak, smear, and patch of residual film you missed. It’s how I find the flaws on my black BMW’s windows, the ultimate test. Address any streaks with a clean corner of your glass towel. Only when it passes the flashlight test are you truly finished.
How to Clean Exterior Windshields and Windows Like a Pro
Cleaning your car’s windows is not a standalone job. It is the final act of your car wash. If you try to clean them first or alone, you just spread dirt from the body onto the glass. I always wash the entire car, then focus on the glass. My black BMW taught me that. Its windows would smear if I didn’t follow the proper order. This routine gives you clean car windows streak-free. A streak-free finish also improves visibility.
Your windshield collects bonded contaminants like industrial fallout and brake dust, so it needs decontamination with a clay bar just like your paint does. That smooth, silent wipe you want starts with a truly clean surface.
Step 1: The Pre-Clean (Getting Rid of the Grit)
Start with a proper two-bucket wash. As you wash the car, use your wash mitt to gently clean the glass with the soapy water. I sometimes add a capful of pH-neutral glass cleaner to my wash bucket for this step. It helps break down light film.
After washing, use a dedicated clay bar on the glass to safely pull out every speck of embedded grit. Use a fine-grade clay bar and keep it well-lubricated with detail spray. Glide it in straight lines across the windshield. You will feel the drag turn smooth. On my Tesla’s large, flat windshield, this removed the tiny bumps that made the wipers shudder.
Step 2: The Final Glass-Specific Pass
Now, make one dedicated pass with your chosen glass cleaner. Use the same two-towel method you use inside: one towel to apply, one to buff dry. Spray the cleaner onto your application towel, not directly onto the glass. This controls the product and prevents overspray on paint.
You must use separate, dedicated towels for exterior glass. Towels used on paint have micro-contaminants that will scratch glass. I have a set of green glass towels. My blue paint towels never touch my windows. On my Porsche, mixing them once left fine hazing on the windshield.
Tackling Exterior Nuisances: Bugs, Sap, and Water Spots
Specific problems need specific solutions. Here is how I handle the tough stuff without damaging the glass.
- For Bug Splatter: Use a dedicated bug remover spray. Soak the area for a full minute. Let the product dissolve the bugs. Gently wipe with a wet microfiber. Do not scrub. On my F-150 after a country drive, this method prevents etching.
- For Tree Sap: Use isopropyl alcohol (90% works best). Pour a little on a microfiber cloth and dab the sap. It will dissolve instantly. Wipe the area clean with a damp towel afterwards. Always test on a small spot first.
- For Hard Water Spots: Use a solution of 50% distilled white vinegar and 50% water. Spray it on the spots. Let it sit for three to five minutes. The mild acid loosens the minerals. Rinse thoroughly with clean water. Be careful to keep this solution off your car’s paint and trim.
Never attack these nuisances with a razor blade or abrasive pad. Soaking time is your safest tool. I scratched a windshield on my old Miata by being impatient. A few minutes of soaking makes the wipe away easy.
Better Than Both: Safer, Smarter Product Alternatives
Here is the easy win. Why gamble with household chemicals when you can use tools made for the job? The detailing world has already solved this problem with products that are safe, effective, and often cheaper in the long run. We can break them down by what you need and what you want to spend.
Think of it like this. You wouldn’t use dish soap to wash your hair every day. It might clean, but it strips everything away. Your car’s glass, especially the interior side with tint film, deserves that same careful thought.
The All-Rounder: Ammonia-Free Concentrates
This is the secret weapon of many professional detailers and smart DIY owners. You buy a gallon of concentrate and mix it with water in your own spray bottle. The value is incredible.
A gallon of quality ammonia-free glass cleaner concentrate can make over twenty spray bottles for about the same price as four pre-mixed bottles from the store.
It is completely safe for window tint, interior plastics, and vinyl. You control the strength. For light dust, I use a weaker mix. For greasy fingerprints and heavy grime on my kid-hauler Odyssey, I mix it stronger. Look for a product generically described as a “streak-free glass cleaner concentrate.” It is a foolproof foundation for any car.
For Coated Cars: Ceramic Glass Cleaners
This is the next level. If you have applied a windshield sealant or a full-vehicle ceramic coating that includes the glass, you need a specific cleaner. Standard cleaners, even ammonia-free ones, can slowly degrade that expensive hydrophobic protection.
Ceramic glass cleaners are formulated to lift dirt without attacking the silicone dioxide or other compounds in your coating. I use one on my Tesla Model 3, which has a ceramic coating on the windshield. It cleans off the bug splatter without dulling the water-beading effect. A great bonus is that many of these cleaners leave behind a slight anti-fog or water-repellent boost of their own, extending your protection between major sealant applications.
The Invisible Upgrade: Glass Sealants
Cleaning is one thing. Making future cleaning easier is the real pro move. A glass sealant is a durable, slick coating you apply to the exterior glass. It chemically bonds to the surface, creating an invisible barrier.
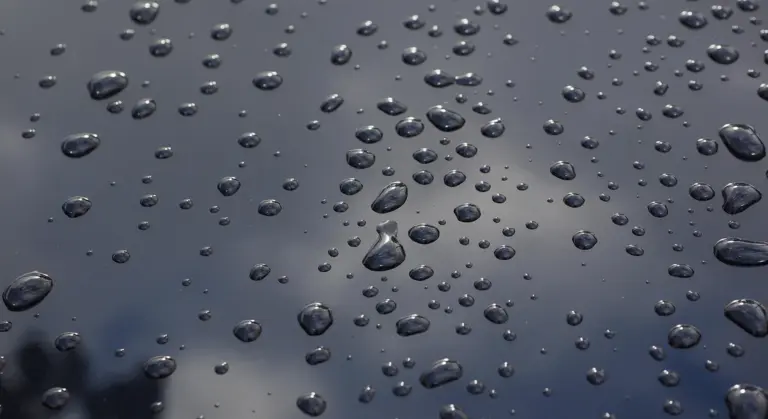
Applying a glass sealant is the ultimate step for reducing effort and massively improving visibility during rain.
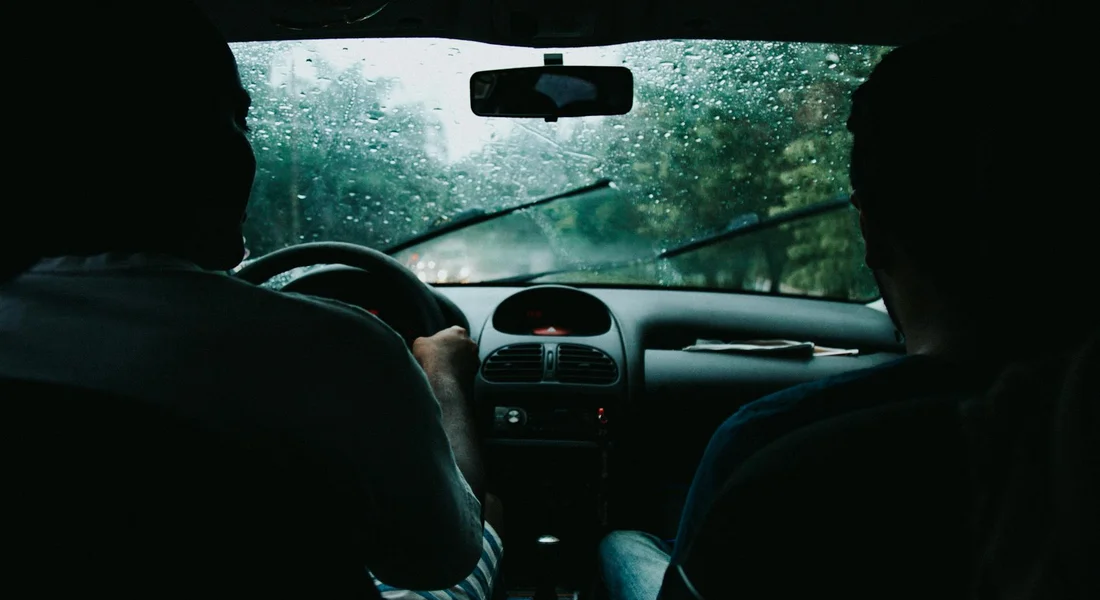
At highway speeds, water simply beads up and rolls off the windshield. Your wipers work less, and you see more. The surface becomes so slick that dirt and bug residues have a harder time sticking. Applying one takes about 15 minutes twice a year. I put it on my F-150 every spring and fall. It turns a torrential downpour from a white-knuckle event into just a rainy drive. It is the best investment for anyone who drives in weather.
Fixing Common Car Window Problems
You wash the outside. You wipe the inside. But the glass still looks foggy or streaked. I know that feeling. You are not doing anything wrong. You are just fighting different types of contamination that need different treatments.
Removing Haze, Film, and “Smoker’s Residue”
That greasy haze on the inside of your windshield is not imaginary. On a sunny morning, it glows and makes everything blurry. In my kid hauler, the Honda Odyssey, it builds up fast. This film is not usually dirt. It is plastic off gassing. The dashboard, the seats, the trim, they all release oily vapors that stick to the cool glass.
A standard glass cleaner often just smears this film around. You need a product designed to cut grease.
- Use a dedicated interior glass cleaner. These formulas contain stronger surfactants to emulsify the plasticizer film. Spray it on a clean, low pile microfiber cloth first, not directly on the glass, to avoid overspray on the dash.
- For a stronger DIY option, mix isopropyl alcohol (IPA) with distilled water. A 1:1 ratio works. Test it on a small spot first. The alcohol dissolves the grease quickly.
- Ventilation is not a suggestion. Open all doors. Wear gloves if you have sensitive skin. Breathe in those fumes and you will get a headache. After cleaning, leave the windows cracked to let any remaining residue air out.
Work in small sections. Wipe with one side of the towel, then flip to a dry side to buff it clear. If you see streaks, your towel is saturated. Grab a fresh one. That interior film requires a solvent action, not just a cleaner, and a relentless supply of clean towels.
Dealing with Stubborn Water Spots and Etching
Water spots on the outside are a different battle. You must know what you are facing. Fresh water spots are just mineral deposits sitting on top. They feel rough. You can often scrape them off with a fingernail, but hard water spots on windows require a more thorough approach.
Etched glass is permanent damage. The minerals have eaten into the surface. Your fingernail will glide right over it. The spot is now part of the glass. My black BMW faces this every summer from sprinklers.
- For fresh mineral deposits, use a dedicated water spot remover. These are acidic products that dissolve the calcium and magnesium. Follow the instructions. They work fast. Rinse the area thoroughly afterward.
- For etching, you cannot dissolve it away. You must polish it away. This removes a tiny layer of glass. It is a job for a professional with the right tools.
Act fast on water spots. The longer they bake in the sun, the deeper they etch, turning a simple clean up into a major correction.
When to Call a Pro: Glass Polishing
Deep etching, wiper blade scratches, or widespread haze from acid rain require glass polishing. This is not like polishing paint.
Glass is harder. It requires specialized, very abrasive compounds and a machine that runs at the correct speed with a dedicated glass polishing pad. Doing it yourself with a standard polisher is a huge risk. You can create heat fractures, make the scratches worse, or leave the glass optically distorted. If you need to remove scratches from car glass, a professional service with calibrated equipment is usually the safer route.
I called a pro for the deep wiper scratches on my Ford F 150. They used a precise, slow speed rotary polisher and a cerium oxide compound. Glass polishing is a subtractive process that leaves zero room for error, making it the definitive case for hiring a specialist.
Keeping Your Glass Crystal Clear for Longer
A perfect glass clean feels great. The real skill is keeping it that way for more than a day. A little regular care stops that greasy, streaky film from ever building up to a point where you need the heavy chemicals and elbow grease.
Your Microfiber Towel Hygiene Routine
Here is the absolute truth of detailing. A dirty towel will ruin a perfect clean every single time. For glass, this is the most important rule. The number one cause of streaks on a freshly cleaned window is a contaminated microfiber towel.
You would not dry a freshly polished plate with a towel you just used to clean the stove. The same logic applies to your car. Oils, silicones, and dirt from paint or interior plastics get baked into the towel fibers. When you rub that towel on glass, you are not cleaning. You are smearing.
I have a dedicated set of blue towels that only touch glass. They live in their own bin. My black BMW, the swirl magnet, taught me this lesson. I once used a towel that had touched a spray wax on its paint. The haze it left on the windshield took me twenty minutes to re-clean.
Wash them right. Do it like this:
- Wash glass towels separately from any other detailing towels.
- Use a free and clear detergent. No fragrances, no dyes.
- Absolutely no fabric softener or dryer sheets. They coat the fibers and destroy absorbency.
- Tumble dry on low heat or air dry. High heat can melt the microfiber edges.
This routine keeps the towels thirsty and soft. They will glide over the glass and soak up cleaner without leaving a trace.
A Simple Weekly Touch-Up Habit
Life happens. Your hand touches the window. Pollen settles overnight. A light rain leaves spots. You do not need a full detail kit to fix it.
I keep a simple system in every car. In my Ford F-150 workhorse, it is in the center console. In the family Honda Odyssey, it is in the driver’s door pocket. A small spray bottle of a quality glass cleaner and one of my dedicated, clean glass towels, folded up.
Once a week, usually when I am fueling up, I give the windshield and front side windows a quick pass. It takes sixty seconds.
- Spray the cleaner directly onto the dry towel, not the glass. This prevents overspray on the dash or wipers.
- Wipe the interior glass in a cross-hatch pattern.
- Flip the towel to a dry section and buff once lightly to erase any haze.
This habit is powerful. A quick weekly touch-up prevents the stubborn build-up that forces you to break out the heavy-duty cleaners and scrub. Your visibility stays perfect, and your deep cleans become much farther apart. It is the easiest win in car care.
Your Path to Perfectly Clear Windows
The clearest view starts with the right method. Use a dedicated auto glass cleaner and a pristine, high-quality microfiber towel to achieve a finish without streaks or risk.
Ignore this, and you will trade temporary clarity for persistent streaks, greasy residue, or the slow chemical damage ammonia can inflict on tint and interior plastics.
Further Reading & Sources
- Can You Use Windex On Car Windows? – Jalopnik
- Vinegar Glass Cleaner | Windex® Glass Cleaner| SC Johnson
- Ammonia-Free Glass Cleaner | Windex® Glass Cleaner | SC Johnson
- Can You Use Windex on Car Windows? (Quick Answer + Pro Fixes) – Simi Valley Chrysler Dodge Jeep Ram Blog
- https://www.windex.com/en-us/inspiration/more-abou…
Max is an automotive enthusiast having worked as a car mechanical and in interior detailing service for over 25 years. He is very experienced in giving your old car, a new fresh vibe. He has detailed many cars and removed very tough smells and stains from all kinds of cars and models, always ensuring that his work and advice helps his customers. He brings his first hand experience to his blog AutoDetailPedia, to help readers breath new life into their car interiors.