How Do You Clean and Extract Water from Car Carpet After a Spill or Flood?
That cold, damp spot under your feet is more than an annoyance. It is a race against clock to stop mold before it starts.
Using methods proven on everything from spilled milk in the Odyssey to a forgotten sunroof on the 3 Series, I will show you the right way to pull water out, how to clean the stained carpet underneath, and the steps to make sure it is completely dry.
Leave water trapped down there, and you are giving mildew a permanent home in your car.
The Detailer’s Order of Operations: Your Roadmap to Dry Carpet
Follow this list in order. Treat it like a recipe where skipping a step ruins the dish. Mold and permanent odors start when moisture gets trapped where you can’t see it.
- Safety and Assessment: Put on gloves first. Check if the spill is near any wiring, especially in modern cars with electronics under seats. Identify the liquid. Water is one thing, but milk or soda needs different care.
- Remove Bulk Liquid: Use a wet-dry vacuum or a stack of old towels. Do not scrub. Press and blot to soak up the free-standing liquid. This prevents it from seeping deeper.
- Pull Up Carpet and Remove Trim: This step is critical. You must get to the padding underneath. Carefully pop off the plastic door sill trim with a trim tool. Lift the carpet from its clips or Velcro. Go slow. I’ve broken clips on my BMW by rushing.
- Extract and Clean: With the carpet lifted, use a carpet extractor or a steam cleaner with strong suction. Pull moisture from both the carpet fibers and the foam backing. For stains, spray a diluted all-purpose cleaner, gently brush, then extract again.
- The Dry-Out: This is where most DIY jobs fail. Place fans to blow air under the lifted carpet. Use a dehumidifier inside the car if you have one. Crack the windows if the air outside is dry. Proper drying takes patience, often a full 48 hours.
- Odor Treatment (if needed): Only after everything is dry. For spills like milk in the Odyssey, use an enzyme cleaner. For flood water, an ozone generator might be necessary. Never use a spray air freshener to cover a damp smell.
- Reassembly and Protection: Once the carpet and padding are completely dry to the touch-no cool, damp spots-reattach everything. Consider applying a fabric protectant spray for future spills.
If you only remember one thing, remember to lift the carpet and dry underneath. I’ve fixed too many cars where the owner did everything right except that.
First, Assess the Situation: Is This a DIY Job or a Pro Emergency?
You need to gauge the mess before you grab tools. A spilled coffee cup on the passenger side is a quick cleanup. A footwell full of floodwater from a heavy rain is a different story. The depth of the liquid and what it is changes everything.
Think about my Honda Odyssey, the “Kid Hauler.” When a full juice box exploded in the back, it wasn’t just the surface. It soaked through the carpet into the thick padding below. That was a full DIY day with my extractor and fans. It was on the borderline. If you don’t have the tools or the time for that, it’s okay to call a pro.
Let’s talk about professional car carpet drying services. What do they do? They use industrial-grade extractors and high-speed air movers. They often remove seats and the entire carpet assembly to dry the metal floor pan. When is it worth the cost? When the water is contaminated, the spill is massive, or you simply can’t dedicate a weekend to drying. For finding reputable ones near you, ask at a local detail shop you trust. Check online reviews, but look for specifics about interior water damage, not just regular washes or how they cleaned spilled drinks on car carpet and upholstery.
Detailer’s Pro-Tip: The real damage happens in the hidden layers. The jute backing or that foam insulation under your carpet holds water like a sponge. If it’s wet, you must get airflow under there. A lot of advice you read on forums or Reddit focuses on the surface carpet. That misses the point. Lift it. Dry it. Or you’ll be dealing with a musty smell that never leaves.
Gather Your Arsenal: Tools for the Wet Work
You need the right tools. Fighting water is different than fighting dust. I break this into three categories: what pulls the water out, what dries the air, and what cleans the mess.
Extraction: The Main Event
The goal here is to remove liquid, not just move it around. You have options, but they are not all equal.
- Wet/Dry Vac (Shop Vac): This is your most accessible weapon. It’s a strong vacuum that can handle liquids. It’s great for pulling up pooled water. It won’t deep clean like a pro tool, but for extraction, it’s a workhorse. My garage one gets used on the F-150’s mud-covered mats monthly.
- Dedicated Carpet Extractor: This is what pros use. It has two hoses. One sprays hot water and cleaning solution deep into the carpet fibers. The other has a powerful vacuum to suck it all back out, pulling dirt and moisture from the padding below. This spray-and-suck action is the gold standard for both cleaning and serious water removal.
- The “Rug Doctor” Rental: Can you use a Rug Doctor on car carpet? You can, but it’s tricky. The pros are raw power and availability. The cons are bulk. These machines are big. They can over-wet a car’s thin carpet and padding fast. If you use one, go slow. Use minimal cleaning solution. You must extract, extract, extract to get all that moisture back out.
Drying: The Silent Partner
Pulling water is only half the battle. Moisture left in the air or padding will cause mildew. That smell is hard to kill even with proper cleaning.
- Fans (Air Movers): This is your MVP. A simple box fan or a purpose-built air mover does one job perfectly. It moves air across the wet surface. This evaporation is how you dry the carpet from the top down. Point it at the wet area, open the opposite door or window, and let it run. I use one overnight after cleaning the Odyssey’s carpets.
- Dehumidifiers: These pull moisture from the air itself. In a closed garage on a humid day, they help a lot. But for most car jobs, moving air with a fan is more effective and cheaper.
- Sun and Time: Sunlight and a breeze can help. But relying on them alone is a gamble. It might dry the surface while leaving the padding underneath damp. That’s how you get mold.
Cleaning: Solving the Stain
Once the bulk water is gone, you often have a stain or odor to deal with.
- All-Purpose Cleaner (APC): Diluted APC is my first reach for most spills. A light mist, a gentle scrub with a soft brush, then extraction works on many stains. Test it in a hidden spot first.
- Dedicated Carpet Shampoo: For set-in stains or odors, a shampoo made for automotive carpets is better. They are designed to foam and release dirt without leaving a sticky residue that attracts more dirt.
- The Steam Cleaner: Can you steam clean car carpet? Yes, but understand its role. A steamer sanitizes and helps release dirt with heat and vapor. It does not extract. You still need a vacuum to pull the released moisture and dirt out. Used before an extractor, it’s a powerful one-two punch, especially for old, sticky spills.
The Core Extraction: Pulling Water from the Depths
Here is the hands on work. This is where you save your carpet.
First Response: The Shop Vac Method
For a spill or the first pull after a flood, grab your wet/dry vac.
- Remove the filter if your vac requires it for liquids.
- Use the bare hose or a wide floor nozzle without a brush attachment.
- Press the nozzle down firmly onto the carpet. You want to seal it.
- Make slow, overlapping passes. Listen. You will hear a loud slurping sound when it’s pulling water. As the carpet gets drier, the sound changes to a higher-pitched whistle of air. That’s your cue.
- Go over the area multiple times from different angles. You are pulling from the foam backing, not just the surface.
This method gets about 70-80% of the moisture out. The rest needs evaporation with a fan.
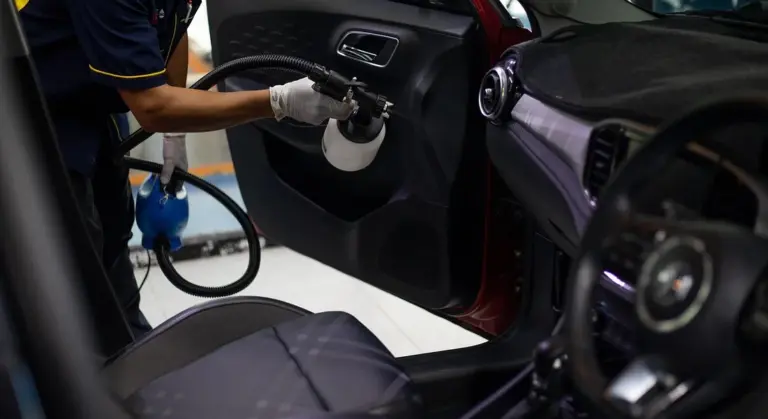
The Professional Method: The Carpet Extractor
This answers “how do car detailers clean carpet.” It’s a process.
- Spray: Apply your cleaning solution with the tool’s spray trigger. You want the carpet damp, not flooded.
- Scrub: Use a soft-bristled detail brush to agitate the solution. Work it into the fibers. This loosens the dirt and any stain.
- Suck: Engage the powerful vacuum. Make slow, deliberate passes with the extraction wand, holding it down to seal. You’ll see dirty water rushing up the clear tube into the recovery tank. Make passes until the tube runs clear.
This cycle cleans and extracts in one move. It’s why the results are so thorough. The heat in some machines also helps break down stains and speeds drying.
What About a Car Wash Vacuum or Pressure Washer?
Let’s be direct about two common ideas.
Can you clean a rug at a car wash with the pressure washer? Do not do this. The high-pressure water will blast surface dirt deeper into the carpet padding. It will also force so much water in that you will never dry it properly. You are giving yourself a much bigger problem.
The coin-op vacuum is great for loose chips and sand. It is not designed for water extraction. It lacks the sealed suction power. It might pull a little from the surface, but it will leave the padding soaked. For a small spill, it’s a last resort. For a flood, it’s useless. Use your own wet/dry vac instead.
The Non-Negotiable Dry-Out: Beating Mold at Its Own Game
Getting the surface of the carpet to look dry is the easy part. The real enemy, mold, grows in the dark, damp places you cannot see. If you skip this step, you will lose. A musty smell will become a permanent passenger in your car. Even if you can remove mold and mildew from carpet, it may not be possible to completely get rid of the odor.
You must get air under the carpet. On most vehicles, the carpet is not glued down completely. You can peel it back from the door sills. Lift the carpet and prop it up. I use a clean, rolled-up bath towel or a short piece of PVC pipe. This creates an air tunnel. Aim a fan to blow directly into that space.
I learned this the hard way with my black BMW, the “Swirl Magnet.” I once left a damp floor mat on the carpet for a week. The surface felt fine. Underneath, the foam backing was still wet. A sour, mildewy smell took root. I had to pull the entire interior out to fix it. Airflow underneath the carpet is the only way to dry the thick foam backing that soaks up most of the moisture.
Your Drying Arsenal
Use every tool you have. One fan is good. Two fans are better. Point one at the propped-up carpet tunnel and another across the interior cabin. If you have a dehumidifier, place it inside the car and close the doors and windows. It will pull moisture right from the air. For a secondary aid, open a container of DampRid or a similar moisture absorber and leave it on a dry section of the floor.
This is not a quick fix. Patience is your most important tool here. This is not a two hour job. You must plan for twenty four to forty eight hours of active, continuous drying. Check the progress every few hours. If you are using a dehumidifier, empty its water tank regularly.
How to Know It’s Truly Dry
Your eyes will lie to you. Use your sense of touch and a simple test. First, feel the carpet with the back of your hand. It should feel cool, but not cold and damp. Then, reach under the propped-up section and feel the actual metal floor pan and the bottom of the carpet foam. It must feel completely dry and room temperature.
If you want to be absolutely sure, try the plastic bag trick. Tape a small, clear plastic bag tightly over a section of the carpet you think is dry. Seal it flat. Leave it overnight. If you see condensation or fog on the inside of the bag in the morning, your carpet is still releasing moisture. Keep drying.
This leads to a common question. Will a wet car carpet cause rust? Yes, absolutely. Your car’s floor pan is painted metal. Prolonged moisture trapped against it will degrade that paint and start corrosion from the inside out. Drying your carpet completely is not just about smell, it is a direct act of vehicle preservation that prevents costly body rot.
Cleaning and Odor Elimination: After the Moisture is Gone
You have the floor mats out. The bulk water is gone. Now you can clean. Do this step before you close the doors for final drying. A wet carpet is easier to agitate and extract from than a damp one. This is your chance to lift the grime the floodwater left behind.
Cleaning is not just about looks. It is about removing the food source for mold and bacteria, which are the root of all bad smells. If you skip this, you are just drying dirt into the fabric.
How to Clean Your Car Carpet: A Two-Path Process
Your approach depends on what was spilled. For general dirt, mud, or unclear flood water, an All-Purpose Cleaner (APC) is your best first step. For set-in stains, old spills, or a deep refresh, a dedicated carpet shampoo is the tool. For the best car cleaning methods, tools, and products, the next steps will guide you to top options.
I keep both in my kit. For my grey Odyssey, the “Kid Hauler,” an APC handles most of the mystery spills from the back seats. It is a versatile starting point.
Path 1: The All-Purpose Cleaner (APC) Method
An APC cuts through general soils and grime. It is a great first strike.
- Dilute your APC according to the bottle’s instructions for carpets or upholstery. Stronger is not better here.
- Lightly mist the solution onto the damp carpet. Do not soak it. You want to dampen the fibers, not refill the foam pad below.
- Agitate with a firm-bristled brush, like a carpet or drill brush. Use a circular motion to work the cleaner down to the base of the fibers. You will see the dirt loosen.
- Let it dwell for 5-10 minutes, but do not let it dry.
- Extract thoroughly with your wet/dry vac or carpet extractor. Pull out all the dirty solution you just worked in.
An APC clean is often all you need to reset a carpet after a plain water flood or general soiling.
Path 2: The Dedicated Carpet Shampoo Method
Carpet shampoos are different. They are designed to encapsulate dirt and are often foamier. Use them for older stains, noticeable discoloration, or a thorough annual clean.
- Foam is your friend. Apply the shampoo as a foam directly to the carpet or use a sprayer and agitate it into a foam. The foam lifts the dirt to the surface.
- The process is the same: agitate, dwell, extract. But you must extract every bit of shampoo residue. Any leftover residue becomes a sticky magnet for new dirt.
- Shampoos often leave a light scent and can have built-in stain guards. They are a more complete treatment for a tired carpet.
Tackling Stains and the Smells They Cause
Floodwater is one thing. A spilled milkshake is another. Organic stains need special care.
For spills like milk, soda, juice, or vomit, you need an enzymatic cleaner. These cleaners use bacteria or enzymes to literally digest the organic matter. You cannot scrub that away with regular soap.
Follow the product’s instructions closely. Usually, you apply it, let it dwell for a long time (sometimes hours), and then extract. It may take more than one application.
Enzymatic cleaners are the only reliable way to remove the source of biological odors from a spill. I used one on a old milk stain in the Odyssey. The sour smell was gone because the bacteria eating the milk sugar were gone. That same approach can help remove unusual car odors trapped in a vehicle. Enzymatic cleaners target the odor source, not just mask it, so the car interior can smell fresher.
How Do You Get Odors Out of Car Carpet?
This is the most common question. The answer is simple, but the work is hard. Odor is a symptom. The cause is moisture, bacteria, or both.
Spraying an odor neutralizer on a wet carpet is a waste of money. You are just perfuming a problem. The process is non-negotiable: removing odors from cloth car seats and carpets is essential.
- Remove all bulk water.
- Clean the carpet (with APC, shampoo, or enzyme cleaner) to remove the odor source.
- Extract all cleaning solution.
- Dry the carpet perfectly with airflow, heat, and dehumidification.
- Now, if a slight smell persists, use an odor neutralizer. These break down odor molecules rather than masking them.
For smells that will not quit, like severe mold or long-term pet odors, professionals use an ozone generator. This is a powerful tool. Ozone gas oxidizes and destroys odor particles in the air and on surfaces. This is especially effective for mildew and damp stale odors.
Ozone generators are not for beginners. You must vacate the vehicle and follow strict safety protocols, as ozone is harmful to breathe. I use one in my sealed garage for extreme cases, but for 99% of spills, perfect drying and a good enzymatic clean will solve the odor problem for good.
Putting It All Back Together & Preventing a Repeat
Your carpet is dry and clean. The hard part is over. Now you need to put everything back without breaking it. This is where patience pays off. Rushing can snap a plastic clip or tear a fabric edge, leaving you with a rattle or a gap you can’t fix.
Reinstalling Trim and Carpet the Right Way
Start with the carpet itself. Do not force it. Gently maneuver it back into position, tucking the edges under the door sill plates and center console. Make sure it lies flat over any wiring harnesses or humps. If it resists, stop. Lift it back out and check for an obstruction you missed. A seat bolt, a wiring loom, or a forgotten trim screw can snag it.
The trim pieces and sill plates are next. This is a clip game. Line up each plastic piece carefully with its mounting holes. Use the palm of your hand to press straight down until you hear a firm, solid click. Do not hammer them with a fist or a tool. If it won’t go, double-check the alignment. Forcing it turns a $5 clip into a headache.
Reconnect any electrical connectors for seat sensors or seat heaters. They usually only fit one way. Push until they click and lock. Give the wire a gentle tug to confirm it’s secure.
Finally, bolt the seats back in. Thread each bolt by hand first to avoid cross-threading. Snug them down evenly with a ratchet in a crisscross pattern, just like lug nuts on a wheel. Do not over-torque them. You just need them tight enough to not move.
Your First Line of Defense: Quality Floor Mats
Now, let’s make sure you never have to do this again. The single best investment for your interior is a set of premium floor liners. I am not talking about the thin, floppy mats that came with the car. I mean thick, rubberized mats with tall, contoured walls.
In my kid-hauler Honda Odyssey, I use TuxMat liners. They have coverage that goes halfway up the footwells. When a juice box explodes or snow melts off boots, the liquid is contained in the liner. I simply pull it out, wipe it down, and pour the liquid down the drain. The factory carpet underneath stays bone dry.
Brands like WeatherTech, TuxMat, and 3D MAXpider are popular for a reason. They are designed using 3D scans of your specific vehicle. They fit perfectly. This containment is priceless. It turns a potential carpet-extraction job into a 30-second wipe-up.
Adding a Water-Repellent Layer
After an extraction, some people ask if they should “rewaterproof” their carpet. Factory car carpet isn’t really waterproof. You can, however, apply a fabric protector like Scotchgard or Chemical Guys Fabric Guard. This creates an invisible barrier that causes liquids to bead up on the surface rather than immediately soaking in. If you do get water inside, remove it promptly to prevent staining and mildew. Quick blotting with towels or a dry/wet vacuum can help keep the interior dry and protect the carpet fibers.
This is not a force field, it’s a time buffer. It gives you those critical extra seconds to grab a towel and blot a spill before it sinks down to the foam backing. It works great for coffee, soda, or rainwater from a wet shoe.
For it to work, the carpet must be absolutely clean and completely dry first. Spray a light, even coat over the entire footwell from about 6 inches away. Let it dry fully. It won’t stop a major flood, but for daily life, it’s excellent insurance.
The Golden Rule
All this talk of mats and protectors leads to one simple truth. The best tool for keeping your carpets dry is you. The most effective technique is immediate action, especially when it comes to maintaining clean car carpet and floor mats.
If you spill your latte, pull over and blot it now. If your kid tracks in slush, pull the mats out that evening. Moisture is the enemy. Let it sit, and you invite smells, stains, and mold. Deal with it fast, and your car’s interior stays fresh for years.
My Odyssey has seen gallons of spilled milk, apple juice, and melted snow. Because of good mats and quick clean-ups, the carpet still looks and smells like new. That’s the real goal.
Final Thoughts on Carpet Water Extraction
I have pulled gallons of water from my own Honda Odyssey after spills, and the rule is always the same: act fast with extraction to stop moisture from sinking in. Complete the job with directed airflow until every layer feels dry to the touch, and you will protect your interior from long term damage.
Leave any dampness behind, and you are inviting mold to take root in the carpet padding.
References & External Links
- How to Remove Excess Water from Car Carpet | Zerorez Carpet Cleaning
- How to Dry Car Carpet Quickly: Simple Step-by-Step Guide
- r/Cartalk on Reddit: How to dry car carpet without pulling them out
- What is the fastest way to dry a wet car carpet? – Quora
- How to Dry Car Carpet Safely & Effectively – AutoManiacs
Max is an automotive enthusiast having worked as a car mechanical and in interior detailing service for over 25 years. He is very experienced in giving your old car, a new fresh vibe. He has detailed many cars and removed very tough smells and stains from all kinds of cars and models, always ensuring that his work and advice helps his customers. He brings his first hand experience to his blog AutoDetailPedia, to help readers breath new life into their car interiors.