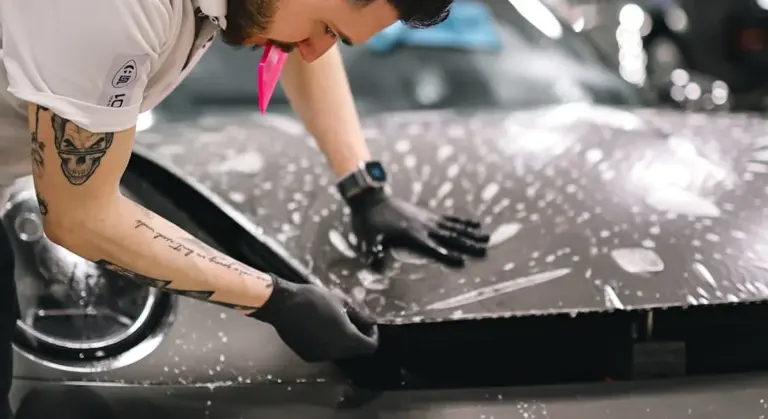
How Do You Safely Wash a Vinyl Wrapped Car Without Damaging the Wrap?
You invested in that sleek vinyl wrap for a flawless look, but now you’re afraid a simple wash might scratch or dull it. I understand that worry completely.
Here, I will share the exact methods I use on wrapped vehicles like my Porsche 911, focusing on gentle hand-washing techniques, selecting pH-neutral soaps, using soft microfiber tools, and properly drying to prevent edge lifting.
Use traditional car wash habits on a wrap, and you will introduce fine scratches, cause colors to fade, and risk the adhesive failing.
Key Takeaways: Your Vinyl Wrap Survival Guide
- Always use a pH-neutral, automotive-specific shampoo made for wraps or paint protection film. This is not a suggestion; it is the law for your wrap’s longevity.
- Never, under any circumstances, take a vinyl-wrapped car through a brush or touch automatic car wash. Those spinning brushes will shred the edges and scratch the film.
- Dry the surface gently with a soft, clean microfiber towel using a patting or dragging motion. Aggressive wiping can catch and lift the delicate edges of the vinyl.
- Traditional carnauba wax or ceramic coatings for paint do not belong on vinyl. Use only sealants and sprays specifically formulated for vinyl wraps to maintain color and prevent drying.
- Clean bug splatter, bird droppings, and tree sap immediately. These contaminants stain and etch the vinyl surface faster than you think, especially in the sun.
The Golden Rules of Washing a Vinyl Wrap
Think of your vinyl wrap like a high-performance athletic jersey. It looks fantastic and does its job, but it needs a specific kind of care. Forget everything you know about washing plain paint. These rules are your new foundation. Get this right, and your wrap will stay vibrant for years — definitely more reliable than painting over vinyl car wrap.
How Often Should You Wash a Vinyl-Wrapped Car?
It is not about a strict calendar. It is about what the car goes through. My grey Honda Odyssey, the kid hauler, might need a wash every week if it’s collecting fast-food grease and rain spots. My red Porsche 911, the garage queen, might only need one every month.
For a typical daily driver, a wash every two weeks is a solid baseline to prevent damage. But you must adjust. If you drive through a bug storm, wash it that evening. If you park under a pine tree, check for sap daily. Salt from winter roads demands a rinse as soon as the temperature is above freezing. Let dirt bake onto the vinyl in the hot sun, and you are asking for a stained, dull finish that is harder to clean later.
What is the Best Type of Soap to Use for a Vinyl Wrap?
This is where most people make their first big mistake. They grab dish soap from the kitchen sink. Do not do that. Dish soap is a degreaser. It will strip away the protective top layer of the vinyl over time, leaving it looking hazy and faded.
You must use a pH-neutral, automotive shampoo labeled for wraps, vinyl, or PPF. These soaps are designed to lift dirt without harming the film’s chemistry or its adhesive. I keep a gallon of wrap-safe shampoo in my detailing cart. It feels slick between your fingers and rinses completely clean, leaving no residue behind. For my cars, from the Tesla to the Miata, this is the only soap that touches any wrapped or filmed surface.
Should You Use a Pressure Washer on a Vinyl Wrap?
Yes, you can. In fact, I use one on all my cars for the initial rinse. A pressure washer is excellent for safely blasting loose grit off the surface before your wash mitt ever touches it. But you have to use it like a surgeon, not a firefighter.
Always start with a wide-angle, 40-degree nozzle. This gives you a gentle fan of water. Keep the tip at least 12 inches away from the vinyl surface. Never, ever aim the stream directly at a seam, edge, or any place where the vinyl is tucked or trimmed. The force can get underneath and start peeling it back.
Contrast this with a zero-degree nozzle, which is like a laser beam of water pressure that can instantly cut into or tear the vinyl film. That tool stays in the box. A safe pre-rinse with the right nozzle removes the abrasive dirt that causes scratches during the hand wash.
What Water Temperature is Safe for Washing a Wrap?
Keep it cool. I use water that feels comfortable on my wrist. Think of washing your hands. You want comfortable warmth, not scalding hot. Very hot water can soften the vinyl’s adhesive layer. A softened adhesive is a weak adhesive, and that can lead to edges lifting or the entire panel becoming less stable.
In summer, I use straight cold water from the hose. In winter, I might mix in a little warm water from the house just to take the chill off. The goal is to clean the car, not cook the wrap. Lukewarm water is perfectly effective at loosening grime when paired with a good shampoo.
Handling Stubborn Contaminants Without Harm
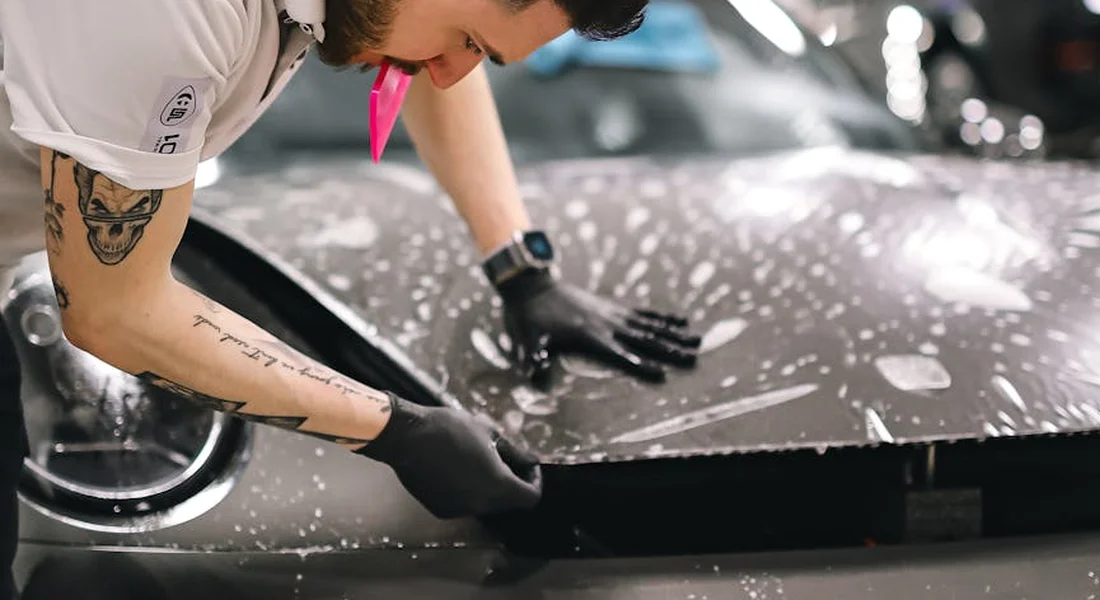
The basic wash gets you 90% of the way. This part is for the other 10%. Tree sap, baked-on bugs, road tar. You need a plan for these.
Always start with the gentlest method. Move to stronger solutions only if the first try fails. Rinse the area completely after any chemical use.
How Do You Remove Bugs, Tar, or Sap from a Wrap?
For bug splatter, patience is your best tool. I use a dedicated bug remover spray. I soak a microfiber towel with it and lay the wet towel over the bug-covered area for a minute or two. This softens the mess without harsh scrubbing, which is especially important when trying to remove bug stains from car paint.
Let the product do the work, then gently wipe the residue away with a fresh side of the towel.
Tar and sap are tougher. A specialized tar remover is best. In a pinch, I use isopropyl alcohol diluted with water, about 10-15% strength. I put a few drops on a clean microfiber and gently rub the spot.
You must rinse the area with water immediately after. Do not let the solvent sit on the wrap. For sap, sometimes a second application is needed. The rule is simple: soak and wipe, never scrub.
Is It Safe to Use a Clay Bar on a Vinyl Wrap?
The short answer is no, not traditional detailing clay. Real clay is abrasive. It can mar the soft surface of a vinyl wrap, leaving behind faint scratches or “clay marring” that you then have to polish out.
You still need to remove embedded grit. Here is a test. After washing and rinsing a panel, run your hand inside a thin plastic sandwich bag over the wet surface. If it feels gritty, like sandpaper, you need decontamination.
A Safer Alternative: Synthetic Decontamination Towels
I use synthetic clay towels or mitts. They look like blue or gray microfiber towels. You spray a generous amount of your wrap-safe detail spray or lubricant on the surface, then glide the towel over it with light pressure.
The synthetic material grabs the embedded particles and pulls them free without cutting into the vinyl like traditional clay can.
The feel is different. With traditional clay, you feel it grabbing and dragging. The synthetic towel glides smoothly. After each pass, you fold the towel to a clean section. When the towel is full, you rinse it in a bucket of clean water and keep going.
Common Vinyl Wrap Washing Mistakes (Paint Damage Prevention)
I have seen these errors in my own shop. They happen fast. A single mistake can mean a repair or a re-wrap. Here is what to avoid.
Can You Take a Vinyl-Wrapped Car Through an Automatic Car Wash?
No. Never. The question “can a wrapped car go through a car wash” has one answer. It is a recipe for damage.
Those spinning brushes are abrasive. They trap dirt and grind it into the wrap, causing scratches. The high-pressure sprays can force water under the edges of the wrap, causing it to lift and peel. The harsh soaps can dry out and discolor the vinyl over time.
Automatic car washes, especially touch-style ones, are the fastest way to ruin an expensive vinyl job compared to touchless car washes.
Using the Wrong Protection: Wax and Paint Sealants
Vinyl is not paint. Products made for your car’s clear coat can hurt a wrap. Carnauba wax can leave a white, hazy stain in the seams and on matte finishes. Ceramic coatings formulated for paint often will not bond correctly and can create a blotchy, uneven appearance. Look for safe chemicals formulated for car paint and clear coats. These products help protect both the wrap and the underlying finish.
You must use products labeled specifically for vinyl wraps or Paint Protection Film (PPF). These are designed to protect without staining. On my Porsche’s wrap, I only use a spray-on vinyl sealant. It adds shine and protection without any risk. Regular wash and careful maintenance help preserve the wrap’s look and durability. A simple, wrap-friendly wash routine will keep it looking fresh for years.
Drying Dangers: Streaks, Spots, and Lifted Edges
Letting the car air dry guarantees water spots. These are mineral deposits baked onto the surface by the sun. They can be very difficult to remove from matte wraps.
Using a dirty or old towel is just as bad. It will scratch. I use a large, clean, plush microfiber drying towel. I lay it flat on the panel and pat the water up. For large flat areas, I gently glide the towel.
This “pat and glide” method pulls water off the surface without dragging dirt across it. Pay special attention to wrap edges and seams. Do not aggressively pull or rub against them with the towel corner.
Other Critical Avoidances
- Washing in direct sun. The soap and water dry too fast, causing streaks and spots.
- Using abrasive scrub pads, stiff brushes, or even rough side of a sponge. They will scratch.
- Letting solvents like gasoline, brake fluid, or bug remover sit and dry on the surface. Rinse immediately.
- Be careful with tire dressings. Some are solvent-based. If they splash on a wrapped rocker panel, they can stain. Apply tire dressing carefully and wipe any overspray off the wrap right away.
The Vinyl Wrap Safe Wash Protocol: A Step-by-Step Checklist
Follow this order exactly. It is the same method I use on my own wrapped vehicles, like the vinyl graphics on my Miata. Stray from this list and you risk lifting edges or scratching the film.
Step 1: The Pre-Rinse
Do not touch the car yet. Your first job is to blast away loose abrasive grit. Use a pressure washer with a wide 40-degree nozzle or a strong hose stream. Start at the roof and work down.
Pay special attention to the lower third of the car and crevices around trim. This is where road salt and brake dust like to hide. You want to see the dirt running off in sheets before you even think about soap. A powerful pre-rinse removes up to 90% of the dirt without you ever touching the surface.
Step 2: The Contact Wash
Now you can make contact, but with a strict system. Fill two buckets with water. One gets your dedicated car wash soap. The other stays clean for rinsing your mitt. Grit guards in the bottom of both buckets are non-negotiable.
- Soak a soft, plush microfiber wash mitt in the soap bucket.
- Wash one section at a time, starting with the roof and windows.
- Use straight-line motions, not circles.
- After you wipe that section, rinse the mitt completely in the clean water bucket. Swirl it on the grit guard to trap any dirt it picked up.
- Reload with fresh soap from the other bucket and move to the next panel.
This method keeps your wash mitt clean at all times. It prevents you from grinding dirt into the vinyl. Wash from the top down, finishing with the dirtiest lower panels and wheels last.
Step 3: Targeted Decontamination (If Needed)
After the wash, run your clean hand inside a plastic baggie over a panel. If it feels bumpy like sandpaper, you have bonded contaminants. For vinyl, you must be gentle.
Use a dedicated synthetic clay towel or mitt, not traditional clay. Lubricate the surface heavily with a quick detailer spray made for wraps or a diluted rinseless wash solution. Gently glide the clay towel over the lubricated surface. A synthetic clay towel is far less aggressive than traditional clay and is the only safe choice for vinyl film.
For bugs, tar, or sap, refer back to the targeted cleaning methods. Always start with the mildest option, like a dedicated bug remover, and apply it to a microfiber towel first, not directly onto the wrap.
Step 4: The Final Rinse
Remove all cleaning residues. Use your hose without a nozzle to create a broad, flowing stream. Start at the roof and let the water cascade down the panels in sheets.
This sheeting action pulls most of the water off the car naturally. It leaves fewer droplets behind, which means less drying and fewer potential water spots. Ensure you flush out all door jambs, seams, and around trim where soap can hide.
Step 5: Drying the Right Way
Do not let a vinyl wrapped car air dry. Water spots are a real threat. Grab a large, clean, premium microfiber drying towel. I prefer a waffle weave style for this.
Lay the towel flat on a panel and gently blot or pull the water away. Do not scrub back and forth. For the critical areas, open all doors, the trunk, and the fuel flap.
- Use a separate, smaller plush towel to carefully dab water away from vinyl seams and edges.
- Never pull or drag a towel across a loose edge, as you can catch it and cause a lift.
Diligent drying at the seams is what prevents water from seeping underneath and causing adhesive failure.
Step 6: Adding Protection
This final step is about preservation, not fixing problems. Once the wrap is completely clean and dry, you can apply a protectant. It’s important to remember that regular maintenance is key to keeping it in top shape.
Use a spray sealant or detailer formulated specifically for vinyl wraps. These products contain UV inhibitors to fight fading and often provide a nice satin or gloss finish. This care is especially important when you apply vinyl wrap car parts, helping the wrap resist sun exposure from the start. Spray the product onto a microfiber applicator pad, not directly onto the vinyl. These steps also help protect newly wrapped panels during installation. Apply a thin, even coat following the product’s instructions.
Remember, a sealant adds a sacrificial layer. It will make future cleaning easier and help your wrap last. It will not remove scratches or stains. That is a job for the cleaning steps you just completed.
Final Thoughts on Vinyl Wrap Care
Always wash your wrap with a pH-neutral shampoo and the gentle pressure of your hand, not a harsh brush or strong spray. This simple habit preserves the wrap’s adhesive strength and keeps its color looking deep and rich for years.
Use the wrong chemicals or tools, and you will accelerate fading, cause peeling at the edges, and introduce permanent scratches.
Related Guides and Information
- r/cars on Reddit: Can I wash my wrapped car at a normal car wash?
- How Long To Wait To Wash Your Vinyl Wrapped Car? – vinylfrog
- Can a Wrapped Car Go Through a Carwash? | Wrap Guys
- Car Wrap Washing and Drying Kits (Try It Today!) | Wrap Fresh
- Proper Care & Feeding of Your Vehicle Vinyl Wrap – The Wrap Agency
- Can You Wash Your Car Wrap? | Metro Restyling Blog
Max Gunther
Max is an automotive enthusiast having worked as a car mechanical and in interior detailing service for over 25 years. He is very experienced in giving your old car, a new fresh vibe. He has detailed many cars and removed very tough smells and stains from all kinds of cars and models, always ensuring that his work and advice helps his customers. He brings his first hand experience to his blog AutoDetailPedia, to help readers breath new life into their car interiors.