How Do You Sand a Car for Paint Prep? A Detailer’s Guide to Smooth Surfaces
Staring at that scratch or dull patch on your paint and wondering where to start with sanding? I get it, the thought of putting sandpaper to your car’s finish is downright scary.
I will show you the exact methods I use, from correcting my jet black BMW to prepping my classic Miata for new color. We will cover selecting sandpaper grits, the critical wet sanding process, tool choices for detailers, and achieving a flawlessly smooth surface for paint, wrap, or clear coat.
Rush this job without the right technique, and you will permanently scar your paint, making it worse than when you began.
Why Sanding is the Non-Negotiable First Step for Paint
Think about the last time you washed your car and your hand slid over a slick, glossy panel. That shine feels great, but it is a problem for new paint. Fresh paint needs texture to hold on. Sanding creates that texture. It is like giving the surface a firm handshake instead of a slippery high five. Without it, paint will peel. I have seen it happen on hoods and roofs where someone skipped this step.
I worked on my 1995 Mazda Miata, the Classic Red restoration project. The single stage paint had oxidized to a chalky pink. Before I could even think about bringing back the red, I had to sand. Sanding does three things: it makes paint stick, it removes old flaws, and it creates a perfectly even canvas for new color. You are not just cleaning. You are rebuilding the foundation.
People always ask me if they need to sand all the way down to bare, shiny metal. The answer is usually no. For a detailer or someone prepping for a wrap or a respray, that is overkill. You sand to bare metal for major body repairs, like fixing deep rust or a crumpled fender. For most paint prep, you only need to sand the clear coat or the top layer of existing paint. You are just scratching it up enough for the new material to grab onto.
Compare it to painting a room in your house. You would not slap new paint over old, glossy wallpaper or a wall full of holes and bumps. You would prime it. You would smooth it out. A car is no different. The metal and plastic panels are your walls. The paint is your final color coat. Sanding is your primer and your patching.
Skip this, and you will see the results fast. The paint will not bond. It will lift and peel at the edges after a few months. Or, you will get a texture called orange peel, where the finish looks lumpy and uneven, like the skin of the fruit. It is a sure sign of a rushed job.
Your Sanding Toolkit: Everything You Need to Start
You do not need a shop full of equipment, but you need the right tools. Using the wrong one can ruin your paint. I keep a specific kit for this, refined after years of fixing my own cars, like the swirl marks on my Jet Black BMW. It’s one of my favorite kits for car detailing.
Here is what you must have on hand.
- Sandpaper in various grits: This is your bread and butter. Start with coarser grits like 400 or 600 for cutting down big imperfections. Move to medium grits like 800 or 1000. Finish with fine grits like 1500 or 2000 to create a smooth, hazy surface ready for paint.
- Sanding blocks, both hard and soft: A hard block keeps pressure even on flat hoods and doors. A soft, flexible block conforms to curves on fenders and bumpers. Never sand with just your fingers. You will create grooves and dips.
- A dual-action polisher/sander: For large areas, this saves your arms and time. Look for a machine with an 8mm throw. It is a common spec for sanding because it is less aggressive than a 15mm polisher, giving you more control to avoid burning through the clear coat.
- A spray bottle filled with water: For wet sanding. The water acts as a lubricant, carries away debris, and keeps the paper from clogging. It also keeps the surface cool.
- Microfiber towels (350+ GSM for the final wipe): After sanding, you need to remove all the slurry and dust. A thick, plush towel grabs every particle without scratching the delicate sanded surface.
- A grit guard for your wet sanding water bucket: This sits in the bottom of your bucket. It traps the sanded-off material so you are not dipping your sandpaper back into muddy, abrasive water.
- Tack cloths: These are sticky cheesecloth rags. After a final wipe, run a tack cloth over the panel. It picks up the invisible dust that a towel can miss. It is the last line of defense before paint.
- Masking tape and paper: Protect everything you are not sanding. Tape off trim, windows, and lights. Cover adjacent panels with paper. Overspray and accidental scratches are a nightmare to fix later.
For chemicals, start with a pH-neutral car wash soap for a pre wash. You need to strip all wax, sealants, and road film from the paint before any sandpaper touches it. A strong alkaline or acidic cleaner can damage the paint, so neutral is safe and effective. Always handle car paint chemicals safely by following the label directions and wearing gloves.
Now, manual or power sanding. I use both. On my Porsche 911’s complex curves, I sand by hand. It is slow, but I have total control over every inch. On the big, flat hood of my F 150, I use the dual action sander. It is faster and gives a more uniform finish. Hand sanding is for precision, power sanding is for productivity. Choose based on the panel and your comfort level. Start by hand if you are new. You can feel the surface change under your fingers.
Pre-Sanding Prep: Making the Car Ready for Abrasion
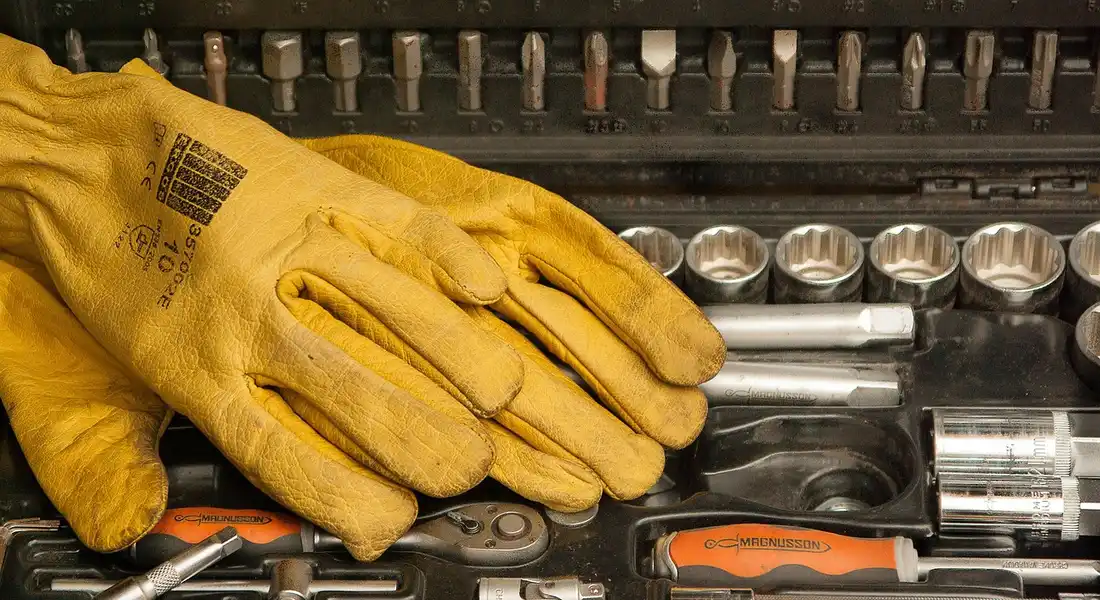
This step is everything. Rushing through prep work is the single biggest mistake I see. Sanding over dirt or silicone guarantees a failed paint job. The goal is to create a perfectly clean, bare, and predictable surface. Follow this order religiously.
The Protocol: Your Five-Step Checklist
Think of this as a surgeon scrubbing in. You cannot skip a step.
- Thorough Wash and Dry
Start with a standard two-bucket wash. I use my BMW, the ‘Swirl Magnet,’ as a reminder. Any dirt left behind will become permanent scratches once you start sanding. Dry completely with a clean, plush microfiber towel. Water spots left to dry can hide minor surface defects you need to see.
- Decontaminate (Iron Remover and Clay Bar)
Washing removes loose dirt. It does not remove bonded contaminants. Spray an iron remover over the entire panel. You will see it turn purple as it dissolves embedded brake dust and rail dust. Rinse it off. Next, use a detailing clay bar or clay towel with plenty of lubricant. This process pulls out the tiny, gritty particles that feel like sandpaper under your hand. If you sand over these, you are grinding them into your paint.
- Mask Off Trim, Windows, and Protected Areas
Use a high-quality automotive masking tape and painter’s plastic or paper. Cover every piece of trim, rubber seals, windows, headlights, and areas you are not working on. On my F-150, I spend extra time masking the textured plastic fender flares. Sanding dust is a fine powder that gets everywhere and is brutal to clean out of crevices and off glass.
- Inspect Under Bright Light
Grab a bright LED work light. Hold it at a low angle to the paint and move it slowly. You are looking for dents, deep scratches, and the tell-tale ‘ring’ or texture of old bodywork repairs. Mark these areas with a piece of low-tack painter’s tape. Old repairs may have different hardness. You need to know where they are before your sandpaper hits them.
- Degrease the Entire Area
Mix isopropyl alcohol and distilled water in a spray bottle. A 1:1 ratio works well. Spray it on and wipe the panel down with a clean, lint-free microfiber towel. Then, immediately wipe it again with a second, dry side of a fresh towel. This final wipe removes any oils from your skin, silicone from previous products, or residue from the clay lube. It leaves a truly sterile surface.
The Workspace: Your Battle Against Contamination
Your prep extends beyond the car. The environment matters. Work in a clean, well-ventilated garage if possible. Sweep the floor first. If you are working outside, understand that wind will blow dust onto your wet sandpaper. There is no perfect fix for that. Wear a proper N95 dust mask or respirator. Your lungs cannot filter out this fine dust. A clean car in a dirty space is still a dirty job. Control what you can.
Understanding Sandpaper Grits: From Cutting to Polishing
Think of sandpaper as your toolbox for shaping a surface. Each grit has a job. Using the wrong one is like trying to carve a turkey with a butter knife. It makes a mess and ruins the meal. I learned this the hard way on the hood of my old Miata, leaving deep scratches that took hours to fix, even when I used rubbing compound trying to repair them.
Grit numbers tell you how many abrasive particles are packed into one square inch. A lower number means bigger, more aggressive particles. A higher number means smaller, finer particles. You move from low to high, never the other way around.
The Four Grit Families for Auto Work
We group grits by their purpose. This isn’t just theory. It’s the road map for every sanding job you’ll do.
Coarse Grit (80-180): The Stripper
This is your heavy artillery. Run your fingers over 80-grit paper. It feels jagged and mean. It doesn’t just scratch the surface. It digs trenches. You use this to strip old, failing paint down to bare metal or to aggressively shape body filler. Never use coarse grit on factory paint you plan to keep, as the scratches will be too deep to easily remove. I keep a roll of 180-grit for stripping clear coat failures on older panels, but I treat it with respect.
Medium Grit (220-400): The Shaper
This is the transition zone. After using coarse grit, you’re left with deep, uneven scratches. Medium grits level those out. I use 220 or 320 to smooth primer-surfacer or to further refine body filler before the first primer coat. Your goal here is to create a uniform, scratchy surface that the primer can grip onto, not to make it smooth to the touch. It will still feel rough, like medium-grade sandpaper.
Fine Grit (500-800): The Primer Smoother
Now we prepare for paint. After spraying primer, you sand it with these fine grits. 500-grit is for initial leveling of the primer. 800-grit is the final step before your base coat goes on. This is a critical stage. The surface should feel completely smooth and flat, like a sheet of quality writing paper, with no detectable bumps or grooves. Any scratch left in the primer will telegraph through your fresh paint. On my BMW’s bumper repair, I spent an entire afternoon sanding the primer with 800-grit until it was flawlessly smooth before I proceeded with touching up the bumper paint.
Ultra-Fine Grit (1000-3000+): The Polisher’s Partner
You don’t use these before painting. You use them after. This is “color sanding” or “wet sanding.” Once the new clear coat has fully cured, you might sand it with 1500, 2000, or 3000-grit to remove tiny dust nibs or orange peel texture. This process creates a hazy, perfectly flat surface that you then polish back to a high-gloss shine. The paper feels silky. This is the secret behind that liquid-deep show car finish on my Porsche’s rear quarter panel.
How Much Sanding Before Painting a Car?
There is no single answer. It depends completely on the job. The rule is simple: you must sand out the scratches from the previous, more aggressive grit. If you skip steps, you will see those scratches in your final paint.
Here is the grit progression for two common jobs:
For a Spot Repair (Like a Door Ding):
- Feather Sand the Edge: Use 320-grit to gently taper the edge of the existing paint so the repair blends.
- Apply Primer: Spray primer over the bare metal or filler.
- Sand Primer: Start with 500-grit to level, then finish with 800-grit until perfectly smooth.
- Paint: Apply base coat and clear coat.
The key is feathering the existing paint so there’s no hard ridge for your eye to catch.
For a Full Panel Prep (Like a Hood):
- Strip or Scuff: If the old paint is bad, strip with 180-grit. If it’s sound, scuff the entire surface with a maroon Scotch-Brite pad (about 320-grit equivalent) so the new paint can stick.
- Apply Primer-Surfacer: This builds up a thick, sandable layer.
- Sand Primer: Start with 320-grit to shape, move to 400-grit, then finish with 500-grit. For a show-quality job, take it to 800-grit.
- Paint: Apply base coat and clear coat.
For a full panel, uniformity is everything. Every square inch must be sanded with the same pressure and the same final grit. Low spots hide until paint hits them, then they scream for attention.
Close your eyes and feel the surface. Coarse grit rasps and catches your skin. Fine grit whispers. Your fingertips will tell you when you’re done. When you can run your hand across the primer and feel nothing but a consistent, smooth drag, you are ready for paint. It is that simple, and that demanding.
Dry Sanding vs. Wet Sanding: When to Use Each Method
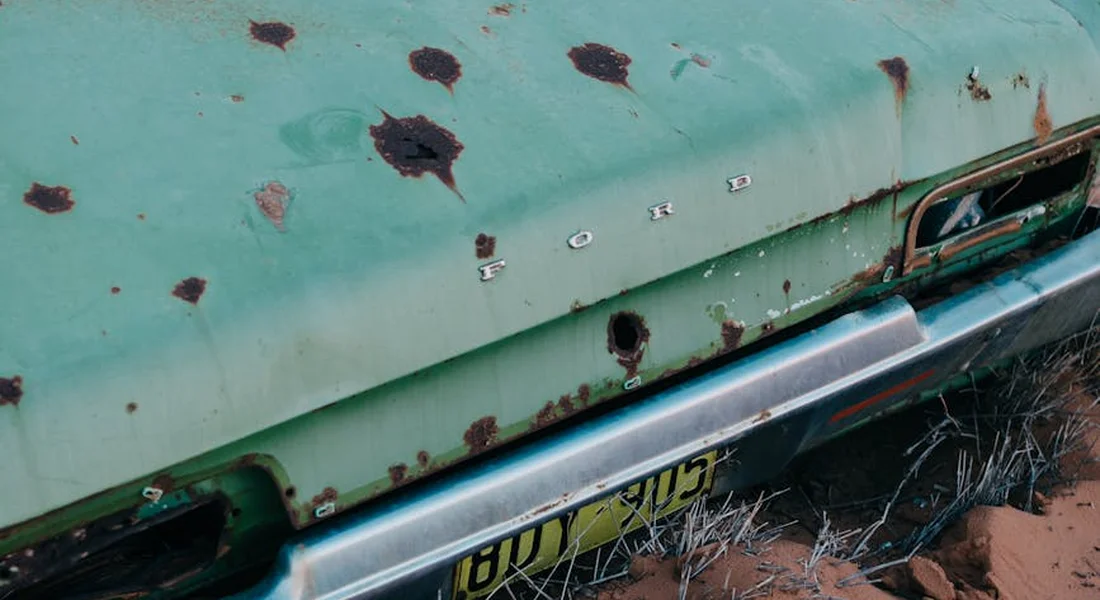
The main difference is right there in the name. Dry sanding is just you, a sanding block, and abrasive paper. Wet sanding adds a steady stream of water or a lubricant like soapy water to the process.
Think of it like sanding a piece of wood. Dry sanding creates a fine powder. Wet sanding creates a milky paste. That paste is the key to everything.
Dry sanding is your workhorse for fast, aggressive removal, but you must control its biggest byproduct: dust.
I use dry sanding for the heavy lifting. Stripping old, failing clear coat. Feathering the edges of a deep scratch. Leveling down a primer surface before paint. It cuts quickly.
The dust is a nightmare, though. It gets everywhere, clogs your sandpaper faster, and can scratch other panels if it settles. I never dry sand without my shop vacuum hooked right up to the sanding block. For my black BMW, a single speck of that dust dragged across the paint would mean another swirl to correct later.
- Best for: Initial material removal, shaping body filler, roughing up a surface for adhesion.
- Tool Tip: Always use a sanding block (never just your fingers) and a vacuum attachment to capture dust at the source.
- Grit Range: Typically starts coarse, from 80 grit up to about 400 grit for this stage.
Wet sanding is your finisher. It uses water to lubricate the surface, carry away debris, and give you a perfectly smooth result.
The water does three critical jobs. It keeps the sandpaper from loading up with material (clogging). It drastically reduces heat buildup, which can warp thin metal or plastic. Most importantly, it creates that slurry which acts as a finer secondary abrasive, helping to polish the surface as you work.
I switch to wet sanding when the shape is right and I need a glass-like finish. This is the step before applying paint or after applying clear coat. The feel is different. Your hand moves smoother, with less resistance.
- Best for: Final surface smoothing, removing tiny imperfections (like dirt nibs), and preparing for a flawless paint application.
- Tool Tip: Use a spray bottle or a bucket with a sponge to keep the surface flooded. Change your water often as it gets dirty.
- Grit Range: Starts around 400 grit for smoothing primer, then goes up to 1000, 1500, 3000 for polishing stages.
Do you wet sand a car after painting? Absolutely. This is called color sanding or cut and buff, and it’s the secret to a show-car finish.
Even the best paint job has a texture called “orange peel.” It looks like the skin of an orange. To get a mirror, liquid finish, you carefully wet sand the fresh clear coat with very fine grits (like 2000 or 3000) to level that texture. Then you follow with a heavy compound and polish to restore the gloss. I did this on my Porsche’s rear bumper after a repair. The difference between the factory orange peel and the hand-sanded section was night and day. In car painting process techniques finish, the final look is shaped by every step—from meticulous prep to controlled clearcoat application and final buffing. The hand-sanded section shows how those steps come together to yield a showroom gloss.
A quick but vital safety note: that wet sanding slurry is slippery. It will make your floor a hazard and can stain concrete or asphalt. Contain your work area with drop cloths and always clean up the slurry immediately. Letting it dry creates a concrete-like mess that’s a pain to remove.
The Step-by-Step Sanding Process: A Detailer’s Protocol

I think of sanding a car like sculpting. You start with the rough shape and refine it down to a surface so smooth you can’t feel the transition with your eyes closed. This is my method, honed from fixing chips on my black BMW to prepping panels on my old Ford truck. It works.
1. The Coarse Cut: Leveling and Stripping
You begin with the aggressive grits. This stage is about removal, not finesse. For sanding off clear coat or leveling significant imperfections like a deep scratch, you might start with 400 or 500-grit sandpaper. If you’re working with body filler, this is where you start shaping it. The goal is to knock down the high spots and get the area generally level with the surrounding paint.
Body filler needs to be completely hard before you touch it with sandpaper, or you will ruin your work and clog the paper instantly. I use a firm sanding block and work in crosshatch patterns. You go in one direction, then sand over it perpendicularly. This prevents creating deep grooves. Your only job here is to make the filler contour perfectly to the panel. Do not move on until it does.
2. The Medium Blend: Removing Your Scratches
Now you erase the evidence of the coarse work. Jump up to your medium grits, like 800 or 1000. This step removes the deep scratches left by the 400-grit and creates a more uniform surface. You are not sanding the original paint yet, just the area you’ve been working on and a good margin around it.
The key here is to sand until every single scratch from the previous grit is gone. Use good light and look from different angles. My “Swirl Magnet” BMW taught me that any scratch you leave will eventually haunt you. When you think you’re done, wipe the area clean and look again.
3. Primer and the Fine Foundation
If you’ve exposed bare metal or used filler, you must apply primer. Primer seals the surface and provides a consistent foundation for your new paint. After the primer has fully cured according to the can’s instructions, you sand it.
This is where you ask, “how do you sand primer?” Start with a fine grit, like 1000 or 1200, to knock down any texture or “orange peel” in the primer. Then, move to an even finer grit, like 1500. You are sanding the primer until it is perfectly smooth and flat. In the broader context of sand primer car paint prep, this step ensures the surface is ready for the final coats. Proper sanding helps the paint adhere and finish evenly. A common mistake is to stop sanding primer while it still looks cloudy or sandy; it must feel like glass to the touch for the paint to lay down correctly.
4. The Final Polish: Ultra-Fine for a Seamless Finish
The last step before paint is the ultra-fine sand. This is for the entire panel, including the factory paint you’re blending into. Use 2000 or 3000-grit sandpaper, preferably with a soft block. You are not trying to remove material now. You are creating microscopic abrasions over the entire surface. This gives the new paint something to grip, called “mechanical adhesion.”
Run your bare hand over the area. If you feel any bump, ridge, or texture difference, you are not ready. It should feel like one continuous, feather-smooth surface. This step is what separates a visible repair from an invisible one.
The Non-Negotiable Step: Cleaning Between Grits
After every single sanding stage, you must clean the panel. I mean perfectly, surgically clean. Any grit left behind from the previous sandpaper will act like gravel under your new, finer paper and create deep scratches.
I use a dedicated microfiber towel and a spray detailer or isopropyl alcohol mixture. Wipe thoroughly. Then, go over the area with a tack cloth. This sticky cheesecloth-like material picks up the finest dust you cannot see. Do not skip the tack cloth before primer or paint.
Detailer’s Pro-Tip: It’s in Your Hands, Not Your Muscles
The technique is everything. For machine sanding with a dual-action polisher and a sanding pad, use slow, overlapping passes. Let the tool and the abrasives do the work. If you lean on it, you will create low spots and waves. For hand sanding, keep the block perfectly flat. Use the weight of your arm, not the force from your shoulder. I learned this the hard way on the flat hood of my F-150, putting uneven pressure on the edges of the block and creating a dish I then had to fix.
Speed and pressure are your enemies. Consistency and patience are your best tools.
Mastering Curves, Edges, and Block Sanding

Flat panels are the easy part. The real test is the door handle recess, the sharp ridge along the fender, the curve of a quarter panel. These areas are where good prep turns great, or where a project gets ruined. I learned this the hard way on my black BMW. A single moment of inattention on a body line can cut right through the clear coat, creating a shiny, expensive-to-fix scratch.
You need a different touch here. Forget the power tools and rigid blocks.
How to Sand Edges and Contours Without Cutting Through
Think of edges as the thinnest, most vulnerable part of your paint. The clear coat and color layer are literally feathered out to nothing. A hard block focuses all your pressure onto that tiny, sharp apex. It will cut through in seconds.
Your tools change completely for this job.
- Use a flexible, foam-backed sanding pad. These conform gently to curves.
- For tighter spots, fold a small piece of sandpaper into thirds, using just your fingertips on the back.
- Sand with light, swirling motions. Let the paper do the work. You are not trying to remove material here, you are just scratching the surface evenly to promote adhesion.
Never let a hard sanding block touch a true edge or a sharp body line. Your hand is the best tool here, giving you direct feedback. If the paper feels like it’s catching or digging, stop immediately.
The Right Way to Block Sand: Creating a Perfectly Flat Surface
Block sanding is the opposite game. Here, you want to eliminate any waves, orange peel, or slight imperfections to create a perfectly flat foundation. This is critical for a mirror-like wrap install or a flawless paint finish. I use this technique on every panel of my Porsche and Miata before any major work.
The goal is simple. You use a long, rigid block to span high spots and knock them down evenly, without creating new low spots (valleys).
- Wrap your sandpaper tightly around a long sanding block. A 6-inch or longer block is ideal for panels.
- Apply even, moderate pressure with both hands. Do not press down with your fingers.
- Use long, straight, overlapping strokes along the length of the panel. Follow the natural lines of the car. On a door, sand from front to back. On a hood, sand from windshield to grill.
- Keep the block flat. Do not rock it. A rocking motion is what creates dips and valleys.
Long strokes with a rigid block will flatten the high areas while preserving the panel’s original contour. Short, choppy strokes with a small block will make the surface wavy, like an old dirt road.
Checking Your Work: The Raking Light Test
Your eyes will lie to you under garage lights. You need to see the truth of your sanding job. This is where the raking light comes in.
After sanding a section, take a bright handheld flashlight or a work light. Hold it at a very low angle, almost parallel to the panel. Shine it across the surface you just sanded. Move around the car and look from different angles – the front, the back, the side.
This shallow light will reveal everything.
- Deep, isolated scratches mean you have a piece of grit stuck in your paper. You need to clean your paper or replace it.
- A wavy, reflective pattern shows your block sanding was uneven. You see hills and valleys.
- Dull, uniform haze is your goal. It means you have an even, consistent scratch pattern across the entire area.
Do not move to the next finer grit of sandpaper until the entire area looks uniformly dull under the raking light from every angle. Any high spots or scratches you see now will only be magnified by shiny paint or a vinyl wrap. This step separates a rushed job from a professional one. It requires patience, but it is non-negotiable.
How to Know When the Sanding is Truly Done

You sand an area. It feels smooth. You move on. Then you spray primer or paint, and every single scratch you missed seems to glow under the sun. I have been there. Knowing when to stop sanding is the difference between a professional finish and a weekend regret.
It is not about time. It is about passing three simple tests. You need your eyes, your hands, and a good light.
The Visual Test: Uniform Dullness
Look at the panel from multiple angles under bright, clean light. I use a simple LED work light. Your goal is a completely uniform, flat, dull appearance.
Any remaining shiny spot is a low area you have not touched or an old scratch that is not yet level with the surrounding surface. Shiny spots are your enemy; they tell you the sanding is not complete and the surface is not level. This is critical for areas like the hood of my black BMW, where every flaw shouts at you.
The Tactile Test: The Bare Hand Check
Wash your hands to remove any grit. Then, gently drag your fingertips across the sanded surface. Do not press hard. You are feeling for ridges, dips, or the subtle catch of a remaining scratch.
The surface should feel like perfectly smooth, flat glass. If you feel any texture, a slight catch under your nail, or a wavy inconsistency, you have more work to do. Your bare hand is one of the most sensitive tools you own for detecting surface imperfections before paint.
The Amplifier Test: The Plastic Baggie Trick
This is the professional’s secret for the final check. Take a thin, disposable plastic sandwich bag and put it over your hand. Now feel the surface again.
The plastic film removes the cushioning effect of your skin and amplifies every single tiny pit, nib, or scratch. Imperfections you could not feel with your bare hand will become obvious. The baggie test reveals the microscopic landscape of your paint, confirming it is truly ready for primer or sealant. I use this without fail on my Porsche’s panels before applying a ceramic coating.
The Final Light Check
After you pass the feel tests, do one last visual inspection with your LED light held at a low, glancing angle across the panel. Look for any fine, straight scratches that might remain from a previous grit. These will show up as faint lines in the uniform dull finish.
If you see them, a final pass with your finest grit sandpaper (used correctly with a lubricant) will erase them. This step catches what your hands might miss.
The Patient Warning
This is the step where everyone wants to hurry. You are tired. The panel looks good enough. Do not give in. Rushing the sanding inspection guarantees that your paint or wrap will highlight every mistake you chose to ignore. The extra twenty minutes you spend here will save you hours of color sanding and compounding later, or the heartbreak of a flawed finish.
Think of it like prepping the wall before you paint a room. No amount of expensive paint will hide a lumpy, unsanded wall. Your car’s final coat is only as perfect as the surface you create for it right now. That same logic applies to your car. If you’re wondering whether you should paint your car, the prep you invest now will determine the finish.
After the Sanding Dust Settles: Final Paint Prep Steps
You’ve sanded the panel to a perfect, uniform matte finish. Your arm is tired. The hard part is over, right? Not quite. The work you do now, in these final moments, is what separates a professional-grade job from one plagued by dirt nibs and fisheyes. This is where you transition from sculptor to surgeon.
Your sanded surface is a dust magnet. That dust hides in body seams, trim cracks, and even the pores of the bare metal or primer. If you paint over it, you will see every single speck. The goal here is absolute, clinical cleanliness.
The Final Cleaning Sequence
Follow these steps in order. Do not skip one. I do this exact routine on every project, from the 1995 Miata’s fender to a fresh bumper for the F-150.
- Complete Blow-Down with Compressed Air
Put on your safety goggles first. Dust in the eye is no joke. Use your air compressor with a dedicated blow-out gun. Start at the top of the panel and work down. Force air into every crease, emblem, door handle cavity, and body gap. You are evacuating the dry, loose sanding residue that a cloth will never reach. Angle the gun to blow the dust out and away from your clean panel.
- The Chemical Wipe
Next, you need to remove any oils or silicones. Your fingers left prints. Your sanding block might have transfer. For this, I use isopropyl alcohol (IPA) diluted with distilled water to a 15-20% solution or a dedicated, grease-cutting pre-paint cleaner. Do not use a general-purpose detail spray or window cleaner.
Flood a clean, soft microfiber towel with your cleaner. Wipe the entire sanded area and a generous margin around it using straight, overlapping passes. Before the cleaner evaporates, immediately follow with a second, dry microfiber towel to buff the surface completely dry. This “wet wipe, dry buff” technique lifts and traps the contamination instead of smearing it.
- The Tack Cloth Pass
Now for the final particle lift. A tack cloth is a loosely woven cheesecloth impregnated with a mild, sticky resin. Unfold it gently and lightly drag it across the surface in one direction only. Do not scrub or go back and forth. You will feel it grabbing the tiniest bits of lint and dust. Discard it after use. A used tack cloth just redeposits dirt.
- The Immediate Pre-Paint Check
Just before you load your spray gun, give the area one more pass with a fresh tack cloth. If you’ve waited more than 20 minutes, repeat the IPA wipe and tack step. Contamination finds a way. This last check is your safety net.
Beyond Prep: What is Color Sanding?
You’ve prepped the surface for paint. But what about after the paint is on? That’s where color sanding comes in. Think of it as the finishing touch for a fresh paint job or a correction method for older, orange-peeled clear coat.
Color sanding is the process of wet sanding a cured paint surface-typically the clear coat-with extremely fine grits (like P1500 to P3000) to level microscopic texture, remove dust nibs, or eliminate orange peel. It’s followed by heavy compounding and polishing to restore a flawless, glassy shine. It’s a high-risk, high-reward procedure I’ve used on the black BMW to remove factory orange peel. You must know your paint’s thickness and have a skilled polishing technique to follow.
Whether you’re laying down fresh paint on a restoration or applying a vinyl wrap, the principle is the same. If you’re painting over a vinyl car wrap, surface prep and primer compatibility matter a lot to ensure the new coating adheres properly. Every step of sanding and cleaning has one aim: to create a surgically clean, perfectly smooth canvas. Your paint or wrap will only be as good as the surface it touches. Take your time here. The results speak for themselves.
Final Thoughts on Paint Prep Sanding
The single most important step is the one you cannot see. A perfectly sanded, flat, and flawlessly clean surface is the only foundation that will hold a beautiful, durable finish. Rushing here guarantees failure later.
Ignore this disciplined process of sanding, cleaning, and inspecting, and you will see every skipped step and piece of grit permanently trapped under your new paint.
Relevant Resources for Further Exploration
- r/Autobody on Reddit: Never prepped a car in my life. How could I go about sanding this very rough paint for a wrap? What tools, procedures etc?
- Sandpaper Grit Guide for Auto Body Work | National Abrasives
- How to Wet Sand and Polish Paint : 9 Steps – Instructables
Max Gunther
Max is an automotive enthusiast having worked as a car mechanical and in interior detailing service for over 25 years. He is very experienced in giving your old car, a new fresh vibe. He has detailed many cars and removed very tough smells and stains from all kinds of cars and models, always ensuring that his work and advice helps his customers. He brings his first hand experience to his blog AutoDetailPedia, to help readers breath new life into their car interiors.