Do You Know Which Primer Your Car’s Paint Really Needs?
Using the wrong primer can ruin a paint correction or wrap project before you even start. I’ve seen it make fresh paint gummy or peel away in sheets.
This guide will show you how to choose and use primer correctly. We will cover the two main types of primer for detailing work, how to properly prepare the surface, the right tools for the job, a step-by-step application method, and the critical curing process.
Skip these steps, and your new paint or film will fail.
Key Takeaways: The Primer on Primer
Primer is the essential foundation for a lasting paint job. It is not a step you skip to save time.
- Proper paint adhesion to metal, plastic, or old paint.
- Active corrosion resistance to stop rust in its tracks.
- A perfectly smooth, uniform base that makes your color coat look deep and even.
Applying primer is a moderate to advanced skill. It requires a clean environment and the right safety gear.
You must use a proper respirator with organic vapor cartridges and work in a well ventilated space. The fumes are not something to ignore.
If you skip primer on bare metal or body filler, your new paint will peel. It is not a matter of if, but when.
Why Primer Isn’t Optional: What It Really Does to Your Paint
Automotive primer is a specially formulated, sticky paint that grips surfaces your color coat cannot. Think of it like the primer you put on a drywall patch before painting. You would not paint directly over the rough spackle. Your car’s surface needs the same preparation before painting.
So, do you need primer? For any real paintwork, the answer is yes. It has three non-negotiable jobs.
First, it sticks. Primer is designed to bond tenaciously to sanded metal, plastic, or existing paint. Your glossy top coat is designed to look beautiful, not to cling to bare steel.
Second, it seals. Primer creates a barrier that locks out moisture and stops corrosion. It also seals in contaminants and stains that could bleed through your new paint later.
Third, it builds a uniform surface. Primer fills the microscopic scratches from sanding. This gives your color coat a consistent texture to lay down on. Without it, your finish can look wavy or dull.
Can you paint a car without primer? Not if you value the results. For bare metal or bodywork, it is a firm no. The paint will fail. To avoid repeating that failure, you’ll want to know the paint needed for the car. That knowledge guides proper prep and primer choices.
For a small touch-up on intact factory clear coat, you might get away without it. But for anything that breaks through to the primer or metal, you must use it.
Primer also prevents a frustrating issue called print through, where sand scratches or the edge of a body repair slowly becomes visible weeks after you finish painting. A proper primer layer blocks those shadows from ever showing up.
The Cost of Skipping Primer: A Story from the Shop
I learned this lesson on my 1995 Mazda Miata. The classic red single stage paint was oxidized and thin. I sanded a small section on the rear quarter panel to bare metal, got excited, and sprayed color directly onto it. It looked great for about three months.
Then a bubble appeared. Then a chip. Soon, a whole patch was peeling off like a sunburn. The surface under the peeling paint felt rough and chalky, not the smooth, sealed surface primer provides. I had to re sand the entire area and start over, this time with primer. The difference in how the new color laid down was night and day. It looked professional.
This is about long term durability. On my Ford F 150, a chip down to metal on the wheel arch is an invitation for rust, especially with road salt. A dab of touch up primer in that chip before the color is the only way to stop the corrosion for good. Without it, you are just covering up the problem.
Do I Need Primer for Touch Up Paint on My Car?
It depends on how deep the damage goes. Look closely at the scratch or chip.
If it is a superficial scratch that only affects the clear coat, you do not need primer. Your touch up paint will bond to the existing base coat.
If the chip is deep and you can see bare, gray metal or black plastic, you need primer. The color paint alone will not adhere properly and will not prevent rust on metal.
For these small, isolated spots, a primer pen is your best friend. It is like a marker filled with primer. Clean the spot thoroughly, sand it lightly with a fine grit sanding pen, then apply the primer pen layer. Let it dry completely before applying your color coat. This simple step makes a tiny repair last for years instead of months.
Choosing Your Weapon: Types of Automotive Primer

When folks search for car paint primer types, it can sound like a foreign language. Let’s simplify. Think of primers like the different brushes in my detailing kit. You don’t use a wheel brush on leather seats. In the same way, each primer is a tool for a specific job. Your goal is to match the primer to the task: sealing bare metal, filling scratches, or just getting a good grip. Picking the right one is the difference between a repair that lasts and one that fails in a year.
Epoxy Primer: The Ultimate Seal and Barrier
This is your foundation. On my 1995 Mazda Miata restoration, the first coat over the fresh, sanded metal was always epoxy primer. It’s the gold standard. Its job is to lock out moisture and stick to bare steel or aluminum like nothing else. I’ve seen cars where this layer prevented rust for decades. Epoxy primer creates an impermeable shell, stopping corrosion before it can even start.
You need to know this: nearly all professional-grade epoxy primers are 2K, meaning two-component. You mix the primer base with a separate hardener to activate it. It cures chemically into a tough, waterproof barrier. It’s not meant for filling scratches. It’s your first and best defense.
Urethane Primer-Surfacer: The Filler and Smoother
After the epoxy seals my Miata’s panels, I switch tools. Urethane primer-surfacer is the filler. Its job is to fill in those tiny sanding scratches and create a perfectly level, smooth canvas for your color coat. Imagine spackling a wall before painting it. That’s what this does. This primer builds up thickness where you need it, hiding minor imperfections under a sandable layer.
You typically spray this over your sealed epoxy primer. Like epoxy, the good stuff is usually a 2K product. It sands beautifully to a fine powder. On my black BMW, getting this surface perfectly flat is the only way to avoid seeing every flaw under the final paint.
Self-Etching Primer: For Bare Metal Grab
This primer is a specialist. Use it only on clean, bare metal-think a new patch panel on the Ford F-150 or a sanded-down bolt hole. It contains acids that microscopically etch the metal surface. This etching gives the primer a mechanical grip, like thousands of tiny anchors. Self-etching primer bonds to bare metal through a chemical reaction, not just adhesion.
Here’s the big caution from my shop days. This is not a topcoat or a sealer. It’s a bonding agent. You must cover it with a primer-surfacer or epoxy primer. If you paint directly over it, you might trap moisture and cause bubbling later.
What About Lacquer Primer and Rattle Can Sprays?
I get the question about car paint primer spray all the time. Yes, aerosol cans from the parts store exist. I’ve used them for a quick touch-up on a stone chip on the Porsche’s bumper. They’re lacquer or synthetic enamel based. They work for very small, isolated repairs. A rattle can is fine for a spot fix, but it lacks the durability and build of a mixed 2K product.
They dry fast and are easy to sand, but they don’t seal or protect like epoxy. They can shrink over time. If you’re looking for car paint primer near me, skip the big-box aisle. Drive to a dedicated auto paint supply store. They sell the professional products and can give you real advice.
Primer Color Choices: Why Pink, Grey, or White?
Why is some primer pink? Or grey? It matters. Primer color affects how your final paint color looks. A white or light grey primer will make a bright red or yellow topcoat pop with less paint. A dark primer can make a light color look muddy and require more coats to cover. The primer’s color is a backdrop that influences the final hue and coverage of your paint.
Here’s a simple rule from painting my own cars. Use a light primer under light or vibrant paint. Grey primer is a universal, neutral base for most colors. That pink primer you see? It’s often a “guide coat” primer-surfacer. The pink color helps you see when you’ve sanded through it evenly, revealing the layer below.
The Primer Arsenal: Tools & Chemicals You’ll Need
Priming is not a casual weekend wipe-down. It is a dedicated process. Getting the right result depends on having the right tools ready before you start. This list covers everything. Do not skip items.
Safety Gear (Non-Negotiable)
This is not a suggestion. It is a requirement. Primer aerosols and sanding dust are serious health hazards. I learned this the hard way years ago in a poorly ventilated garage. The headache lasted two days.
- Organic Vapor Respirator with P100 Filters: A basic dust mask is useless. You need a respirator like a 3M 6000 or 7000 series that seals to your face, with combo filters that stop both chemical vapors and fine particulates.
- Nitrile Gloves: Primer and prep chemicals will soak through your skin. Use heavy-duty, non-powdered nitrile gloves. Change them if they tear.
- Safety Glasses: Not sunglasses. Wraparound glasses that seal. Sanding debris or overspray in the eye will ruin your day instantly.
- Ventilated Workspace: A professional spray booth is ideal. For a DIYer, you need massive airflow. Use a fan to push air out of a fully open garage door, never recirculate it. I only prime outdoors on still, low-humidity days, wearing my respirator the entire time.
Your lungs and eyes do not get a second chance. Treat this step with absolute respect.
Surface Preparation Tools
Primer fails because the surface was not ready. This step is 80% of the job. My black BMW taught me that any leftover wax or polish will cause fisheyes and poor adhesion.
- DA Polisher for Sanding: A dual-action polisher with a 5-8mm throw, like a Griot’s G9 or Rupes LHR15, makes sanding large areas manageable. Fit it with a backing pad designed for sanding discs. For small spots, you will sand by hand.
- Sandpaper Grits (180, 320, 400, 600): You need a range. Use 180-320 grit for stripping old paint or smoothing heavy body filler. Use 400-600 grit for featheredging scratches and final smoothing before primer. Always use wet/dry paper with a spray bottle of water for lubrication when sanding paint; this keeps the paper from clogging and creates a finer scratch pattern.
- Grit Guard & Wash Bucket: If you are cleaning an entire panel or car before sanding, use the two-bucket method. The Grit Guard at the bottom traps sanding dust so you are not rubbing it back into the paint.
- High-GSM Microfiber Towels: For the final wipe-down, use thick, clean, 350-500 GSM towels. I reserve a specific set of black towels from The Rag Company just for paint prep to avoid any chance of contamination.
- Prep Spray or Wax & Grease Remover: This is critical. After sanding, you must remove all oils. Use a dedicated, pH-neutral product like CarPro Eraser or Gtechniq W4. Spray it on one clean microfiber and wipe the panel. Immediately follow with a second, dry towel to buff it off. Do not let it air dry.
- Tack Cloths: Right before spraying, gently drag a tack cloth over the surface. It picks up the invisible dust that settled after your final wipe. Do not scrub with it, or you may leave adhesive residue.
Application Equipment
This is where your preparation meets the paint. Using the wrong gun or air supply creates a texture like orange peel that you will have to sand for hours.
- HVLP Spray Gun (1.3-1.6mm Tip): HVLP (High Volume, Low Pressure) is the standard for primer. A gun like an Astro EVO or Fuji Mini-Mite 4 is a good example. The 1.3-1.6mm fluid tip is designed for thicker materials like primer and basecoat. Do not use a small detail gun meant for clear coat.
- Air Compressor: Check your gun’s manual for its CFM (Cubic Feet per Minute) requirement at a specific PSI. Your compressor must meet or exceed it. An undersized compressor will cause the gun to sputter and lay down an uneven, bumpy coat of primer.
- Mixing Cups and Sticks: Use graduated cups for accuracy. Mix your primer and hardener in the exact ratio the product data sheet specifies. Stir thoroughly with a clean stick for a full minute. Do not shake the gun cup to mix.
- Car Paint Primer Pen: For a tiny stone chip on your hood, a full spray gun is overkill. A primer pen, like the ones from Dr. ColorChip, is perfect. It has a fine tip to dab primer into just the chip. Let it dry, then sand it flush with 600-grit before applying touch-up paint.
Your spray gun is an extension of your hand. Practice its trigger, fan pattern, and distance on a piece of cardboard before it ever touches your car. If you’re tackling a DIY car painting project, it’s time to choose the right spray gun for that job. The right tool shapes your finish and your workflow.
The Make-or-Break Step: Prepping the Surface for Primer
You can buy the most expensive primer on the shelf. It will not matter. Ninety percent of a good paint job happens before the primer can ever leave the gun. This step is the foundation. Skip it, and your entire project will fail, no matter how carefully you spray. This section answers the real questions, like do i need to primer over old car paint and can you primer over paint car. The answer starts right here, with your hands and some sandpaper.
Step 1: Deep Clean and Decontaminate
Think of your car’s surface like your skin before applying a bandage. If it’s dirty or oily, the bandage falls off. Primer acts the same way. Start with a proper wash using a dedicated car shampoo. Dry the panel completely with a clean microfiber towel.
Run your hand inside a plastic sandwich bag over the area. If it feels gritty, you need to clay bar it. The clay grabs embedded contaminants that washing misses. After claying, you must degrease. I use a dedicated wax and grease remover on a fresh, white microfiber. Wipe the entire panel down, then immediately wipe it again with a second, dry side of the towel to remove the residue. This step kills any hidden silicones or oils.
Step 2: Sanding to Create “Tooth”
Adhesion is mechanical. Primer needs a rough surface, called “tooth,” to lock onto. Glossy paint is too smooth. This is the heart of car paint primer sanding. You are not trying to remove all the paint. You are trying to uniformly scratch it.
For old, solid paint that you are priming over, use 400-grit sandpaper. You can use a dual-action sander or do it by hand with a sanding block. Your goal is to erase every bit of shine. The entire area should look evenly dull and matte. No glossy spots.
For bare metal, you need a more aggressive grip. Start with 180-grit to remove any light surface rust and really profile the metal. Then, follow up with 220-grit to smooth out the deep scratches from the 180. You must clean bare metal immediately after sanding to prevent flash rust from forming. It can start in minutes.
Step 3: The Final Wipe-Down
You have just created a mountain of fine dust. It is everywhere. If you paint over it, you will have a bumpy, rough finish. First, blow off the panel and the surrounding area with compressed air. Then, take a clean, high-quality microfiber towel and a prep spray or isopropyl alcohol mixture. Wipe the entire sanded area down thoroughly.
Just before you are ready to spray, go over the area once more with a tack cloth. This sticky cheesecloth-type rag picks up the final, invisible dust particles that want to ruin your work. Do not skip this. It is the last line of defense.
Can You Primer Over Paint Without Sanding?
No. I need to be very clear here. You cannot successfully primer over paint without sanding it first, especially when wet sanding car paint. Primer is not magic glue. It needs a physically rough surface to mechanically bond to. A glossy, smooth coat of paint provides no grip.
If you spray primer onto an unsanded surface, it will sit on top like a sheet of plastic. It may look okay for a week. Then it will crack, peel, or lift off in one big piece when you sand it for paint. The failure is guaranteed, it is just a matter of when. Sanding is non-negotiable. Do the work now, or do twice the work later—especially if you’re using aerosol spray paint.
How to Apply Primer Like a Pro: Spray Gun and Pen Techniques
Applying primer is about control. For a large panel on my F-150, I use a spray gun. For a tiny rock chip on the 911’s bumper, I use a pen. The goal is the same. You want a uniform, smooth foundation that grips the bare metal and welcomes the paint on top.
I will break it into two parts. First, we handle the big job with a spray gun. Then, we tackle the small touch-up with a pen or rattle can.
Mixing Your Primer
If you are using a 2K primer, which has a separate hardener, this step is non-negotiable. Your primer will not cure properly if you guess.
Find the technical data sheet for your specific primer. It is usually online. This sheet tells you the exact mix ratio, like 4:1 primer to hardener. Use precise measuring cups. Do not pour by eye.
Mix thoroughly for a full two minutes, scraping the sides and bottom of your mixing cup to blend everything completely. A poorly mixed primer will have soft, gummy spots that never fully harden.
Once the hardener is activated, you are on the clock. This is the “pot life.” The data sheet will say something like “45 minute pot life.” That means the mixture will begin to thicken and become unusable in your gun after that time. Mix only what you can use within that window.
Spray Gun Technique: Patterns and Overlap
Before you point the gun at your car, test on a piece of cardboard or a dedicated spray-out card. You need to dial in three things.
- Air Pressure: Start with your compressor regulator set to what the gun manual suggests, usually between 25-35 PSI at the gun.
- Fluid Flow: Turn the fluid knob to get a medium wetness.
- Fan Pattern: Adjust the pattern so it is a wide, even oval, not a narrow stream.
Spray a pass on your test card. You want a wet, glossy stripe without any dry, sandy texture or heavy, runny drips.
Now, approach the panel. Stand so your arm can move comfortably across it.
Keep the gun perpendicular to the surface, about 6 to 8 inches away. Start moving your arm sideways before you pull the trigger. Begin spraying just off the edge of the panel. Move across with a steady, even speed. Release the trigger after you have passed the other edge.
The secret is the overlap. Each new pass should cover 50% of the previous wet pass. This builds an even coat without stripes or thin spots. Imagine the stripes on a zebra, each one half covering the last.
Do not arc your wrist. Keep the gun the same distance all the way across. On a big hood, I move my whole body, not just my arm.
Using a Primer Pen or Rattle Can for Spots
For a small chip you have sanded clean, a primer pen is perfect. The goal here is to fill the chip, not coat the whole panel.
Shake the pen or can for at least two full minutes. You hear the mixing ball rattling. Shake it more than you think you need to.
Hold it about 3 to 5 inches from the surface. Give it a very short, light burst right into the chip. Apply a tiny dot, just enough to wet the bottom of the chip, and let it dry completely. This might take 15 minutes.
Come back and apply another tiny dot. You might need three or four of these micro-layers to build the primer up level with the surrounding paint. One big glob will sag, shrink as it dries, and leave a ugly bump.
How Many Coats of Primer Should I Use?
I get this question all the time. With a spray gun, I almost always apply two to three medium coats.
The first coat is a light “tack coat.” It just kisses the surface. Let it flash off for 5-10 minutes until it is just slightly tacky to the touch.
Then, apply your next full, wet coat using the 50% overlap technique. Let that flash off. If you need a third for perfect, even coverage, apply it then.
You are looking for complete, consistent color coverage without any low spots, not for a thick, milky layer you can see depth in. Too much primer is a problem. It can crack or prevent proper paint adhesion. Two or three smart coats is the sweet spot.
After the Spray: Drying, Sanding, and Sealing
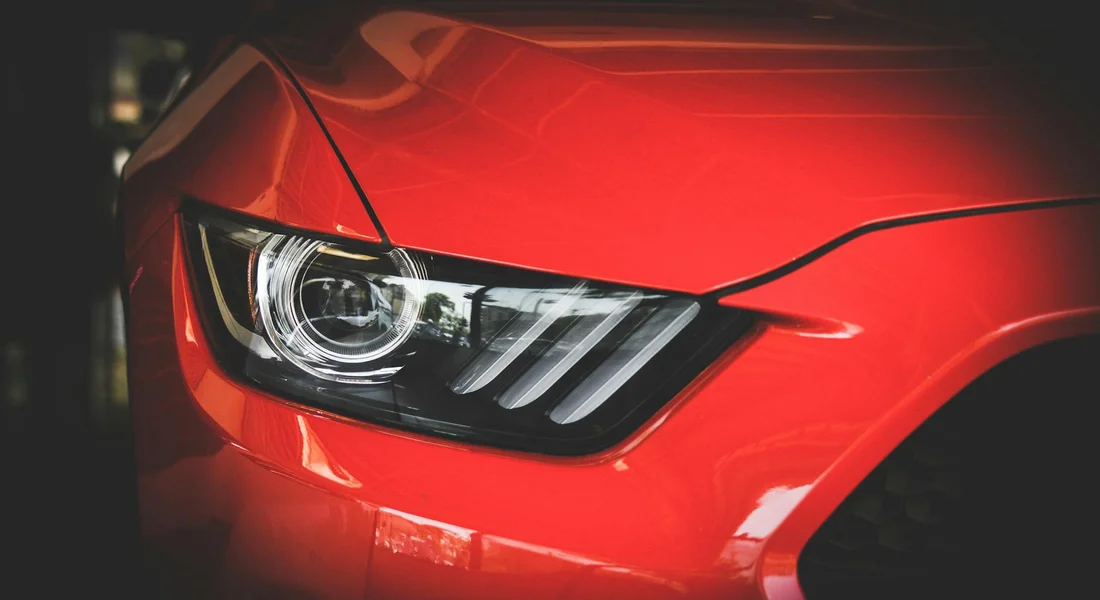
You just laid down a coat of primer. It looks good, but you are not done. The primer must be prepared correctly before paint touches it. This stage is where a repair turns professional or stays amateur. I have seen it on my 1995 Mazda Miata. That car taught me that rushing here ruins everything. We will cover drying, sanding, and the role of sealers. This also answers common questions like “car paint primer sealer” and the relationship between “car paint primer and clearcoat.” It’s especially crucial when covering scratches on a fender or any other part of the car.
The Waiting Game: Dry vs. Cure Times
Primer can feel dry in minutes. That is dry to the touch. Do not be fooled. Fully cured means all solvents have evaporated and the film has hardened. This can take hours or even overnight. Painting over primer that is only dry to the touch will trap solvents and cause lifting or poor adhesion later. Always check the product sheet for the full recoat window.
You might ask, does primer dry faster than paint? Usually, yes. Primer is designed to flash off quickly. But curing is what matters for a stable base. On a humid day with my Ford F-150, I once sprayed primer that was dry in thirty minutes. I waited four hours before sanding, just to be safe. The cure time is your friend. Use it.
Sanding the Primer for a Glass-Smooth Base
This step cannot be skipped. You need to level the primer. Use a sanding block with 400 to 600 grit wet/dry sandpaper. Keep the surface and paper wet with clean water. This lubricates the cut and prevents clogging. Sand in straight, overlapping passes. Do not use just your fingers. A block keeps the surface flat.
The goal is a uniform, dull finish. Run your hand over it. It should feel like fine suede. If you see any shiny spots or orange peel texture, keep sanding. Those are high points. A perfectly sanded primer surface is the single biggest factor for a smooth, flawless paint job.
Can you paint over primer without sanding a car? Technically, yes. But I advise against it. Every time I skipped sanding on my BMW 3 Series, the final paint showed every tiny imperfection. Sanding ensures the topcoat bonds evenly and looks deep. Do the work.
To Seal or Not to Seal? Primer Sealers Explained
A primer sealer is a special final coat. It goes over your sanded primer but is not meant to be sanded itself. Its job is to lock everything in and provide a uniform surface for the basecoat. Think of it as a translator between the primer and the color.
It is useful in specific cases. On a delicate edge where you risk sanding through to bare metal, a sealer protects that thin primer. If you are switching between different primer and paint types, a universal sealer creates a compatible base. For my Porsche 911’s PPF edges, a sealer ensured perfect color match on a small touch-up.
Not every job needs a separate sealer bottle. Many modern primer-surfacers are formulated to be top-coated directly after sanding. Read the technical data. If your primer and paint are from the same system, you can often proceed without this extra step.
Will Primer Rust If Left Exposed?
Yes. Primer will rust if left exposed, especially epoxy primer on bare metal. Primer is porous. It absorbs moisture from the air like a sponge. I learned this the hard way on a project fender I left primed in a garage for two weeks. A faint blush of surface rust appeared.
Primer is a foundation, not a finish. It has zero long-term protective qualities. You must apply your topcoat or a non-porous sealer within the timeframe the product recommends. Do not let a primed panel sit for days. Plan your work so the color or clearcoat goes on as soon as the primer is ready.
The Primer Protocol: Your Step-by-Step Checklist
Getting primer right isn’t about fancy tricks. It’s about following a strict order. Skip a step or change the sequence, and you risk failure. This is the non-negotiable sequence I use on every project, from my Swirl Magnet BMW to the Miata restoration.
The Complete Primer Application Checklist
Treat this list as law. Each step builds on the last.
-
Safety First: Don respirator, gloves, and eye protection. Ensure ventilation.
This is non-negotiable. A simple dust mask won’t cut it. You need a proper respirator with organic vapor cartridges (OV). Isocyanates in many primers are dangerous. I wear nitrile gloves and safety glasses every single time. Open the garage door, use a fan to move air out, and never work in an enclosed space. Your health is the first coat.
-
Clean: Wash and decontaminate the repair area. Wipe with wax & grease remover.
Primer needs a perfectly clean canvas. Wash the entire panel, not just the spot. After washing, I use a dedicated iron remover and a clay bar to pull out any embedded contaminants you can’t see. The final step is a wax and grease remover. Soak a clean, lint-free towel and wipe the area. Let it flash off. Any silicone, wax, or road film left behind will cause fisheyes or adhesion failure later.
-
Sand: Scuff the surface to the correct grit for adhesion. Remove all dust.
This is where adhesion is born. For bare metal, you might start with 180-grit. For sanded existing paint, 320 or 400 is typical. You must create a uniform, dull scratch pattern over the entire area. I use a dual-action sander for large areas and my hand for edges. After sanding, dust is your enemy. Use an air gun to blow out crevices. Then, wipe the area with a tack cloth. Do this twice.
-
Mask: Protect surrounding areas with tape and paper.
Overspray travels farther than you think. Use a high-quality automotive masking tape. The cheap stuff can leave residue or fail. I mask off a generous area around the repair. For my black BMW, I’ll often mask the whole adjacent panel to be safe. Use plastic sheeting or masking paper to cover everything you don’t want dust or primer on. Take your time here.
-
Mix: Prepare primer according to manufacturer instructions.
This is a chemistry experiment, not guesswork. Read the technical data sheet. If it’s a 4:1:1 mix (primer:hardener:reducer), you must measure precisely. I use graduated mixing cups. Stir thoroughly with a stir stick. Don’t shake the mixed primer in the cup it creates micro-bubbles. Mix only what you can use within the pot life. Once it starts to kick, it’s trash.
-
Apply: Spray 2-3 even coats with proper flash time between.
Start with a light tack coat. This first misty layer grabs onto the sanded surface. Wait for it to become dull and tacky to the touch (flash off). Then apply your first full, wet coat. Move the spray gun in steady, overlapping passes. Let it flash again. Your second coat should achieve full, even coverage without runs. Applying too heavy, too fast is the number one cause of sags and solvent pop.
-
Cure: Allow primer to fully harden as per data sheet.
This is the patience test. “Dry to the touch” is not cured. Sanding too early gums up paper and ruins the surface. The data sheet tells you the true cure time for sanding. It can be 30 minutes or several hours, depending on temperature and product. I let primers cure overnight in my garage whenever possible. Ambient temperature matters more than you think.
-
Sand: Block sand with fine grit for smoothness. Clean thoroughly.
Once fully cured, you level the primer. I wet-sand using a sanding block and 400 or 600-grit sandpaper for a smooth, uniform surface. The goal is to remove any orange peel or dust nibs. Keep the surface wet. After sanding, rinse the panel completely and wipe it down with a clean, wet sponge. Let it dry, then go over it again with your wax and grease remover to eliminate any sanding residue.
-
Seal: Apply primer sealer if required, or proceed directly to topcoat.
This step is conditional. If you’re priming over old paint that might “bleed” through (like a red tint), or if you’ve let the primer sit for more than a few days, you need a sealer. It’s a non-sanding, tight coat that locks everything down and provides a uniform base. If you’re painting directly over fresh primer within the recoat window, you can often skip to the basecoat.
-
Paint: Apply basecoat within the recommended recoat window.
Your perfect primer job is a ticket to the finish line. Now, follow the paint manufacturer’s instructions for applying the color coat over your specific primer. There’s a critical window for adhesion. Miss it, and you might have to sand the primer again. Stick to the system, and your paint will lay down smooth and hold fast for years.
Your Primer is Only as Good as Your Prep
The single most important lesson I’ve learned, whether priming a fender on the F-150 or a panel on the old Miata, is that the primer is not a magic fix. Your final result relies entirely on the clean, bare, and properly sanded surface you create before the primer can ever touches it. Everything else follows from that foundation.
Skip these steps, and your beautiful new paint job will fail, peeling or bubbling away from the surface it could never properly bond to.
Citations and Authoritative Sources
- Automotive Primer (Car Paint Primer) | Auto Body Toolmart
- Automotive Primer Paint
- Amazon.com: Primers – Paints & Primers: Automotive
- Quality Primer Gallon Kits | Auto Paint HQ
- r/Autobody on Reddit: Which primer to purchase?
- Automotive Paint Primers | Eagle National Supply
- Automotive Primers Auto Body Primer Product Page
Max Gunther
Max is an automotive enthusiast having worked as a car mechanical and in interior detailing service for over 25 years. He is very experienced in giving your old car, a new fresh vibe. He has detailed many cars and removed very tough smells and stains from all kinds of cars and models, always ensuring that his work and advice helps his customers. He brings his first hand experience to his blog AutoDetailPedia, to help readers breath new life into their car interiors.