How Do You Spray Paint a Car at Home? A Detailer’s Guide to Doing It Right
You look at your car’s dull paint and wonder if you can bring back the shine yourself without a professional shop’s bill. I get it, I’ve weighed that same risk on my own projects, like bringing the red back to my ’95 Miata.
This article will teach you the detailing-focused approach to a cosmetic respray, covering critical surface prep, choosing paint that lasts, professional spraying technique, and sealing your work with clear coat.
Get any of this wrong, and you’ll be staring at a fragile, orange-peel finish that traps dirt and fails within months.
The Reality Check: Is a DIY Spray Paint Job Right for You?
How do you spray paint a car? The first question is simpler. Should you? I have painted panels in my garage. I have also paid professionals for a full respray. The results are not the same. Some DIY routes involve the use of spray cans for car painting. It’s a tempting option for small projects, but results can vary from a professional finish.
A professional booth delivers a factory glass-like finish. The paint flows like liquid silk. A DIY job in a garage, even a careful one, often has the faint texture of an orange peel. You can feel it if you run your hand over it. Dust nibs are almost guaranteed. The color might not match perfectly.
Spraying paint is the easy part that comes at the very end. The real work, which determines 90% of the finish, happens in the days of prep before you ever touch a spray gun.
DIY painting makes sense in a few specific cases:
- A single-panel repair, like a fender or door, on an older car.
- A budget restoration of a project car, like my ’95 Miata, where perfection isn’t the goal.
- Practicing on a “beater” car or an old hood from a junkyard to learn the craft.
You should avoid a DIY spray if:
- You want to respray your entire daily driver and expect a showroom result.
- There is major rust or structural damage. Paint is not a fix. It is a final layer.
- You are in a hurry or lack a controlled, clean, and ventilated space to work.
For beginners asking about diy car painting, the skill floor is real. It is not like washing or waxing. You are handling toxic chemicals and operating a tool that must move in perfect, overlapping strokes. Your first project will not be perfect. Start small.
Your Required Arsenal: Tools, Paints, and Safety Gear
If you decide to proceed, you cannot skip the essentials. Trying to paint without the right tools is a guarantee of frustration and a bad finish.
Your body is not disposable. A proper respirator with organic vapor cartridges is non-negotiable. A dust mask is useless against paint fumes.
Here is your core tools and chemicals list:
- Sanding & Prep: DA polisher/sander, 180 to 3000 grit sandpaper assortment, sanding blocks, masking tape and professional masking film, tack cloths, grease and wax remover (like isopropyl alcohol).
- Application: Either a quality HVLP spray gun with a compressor that can keep up, or a large volume of professional-grade rattle cans designed for automotive use.
- Finishing: 500+ GSM plush microfiber towels for a final wipe down before paint, more towels for cleanup.
- Safety: Respirator with OV cartridges, nitrile gloves, safety glasses, and a full coverall or dedicated painting clothes.
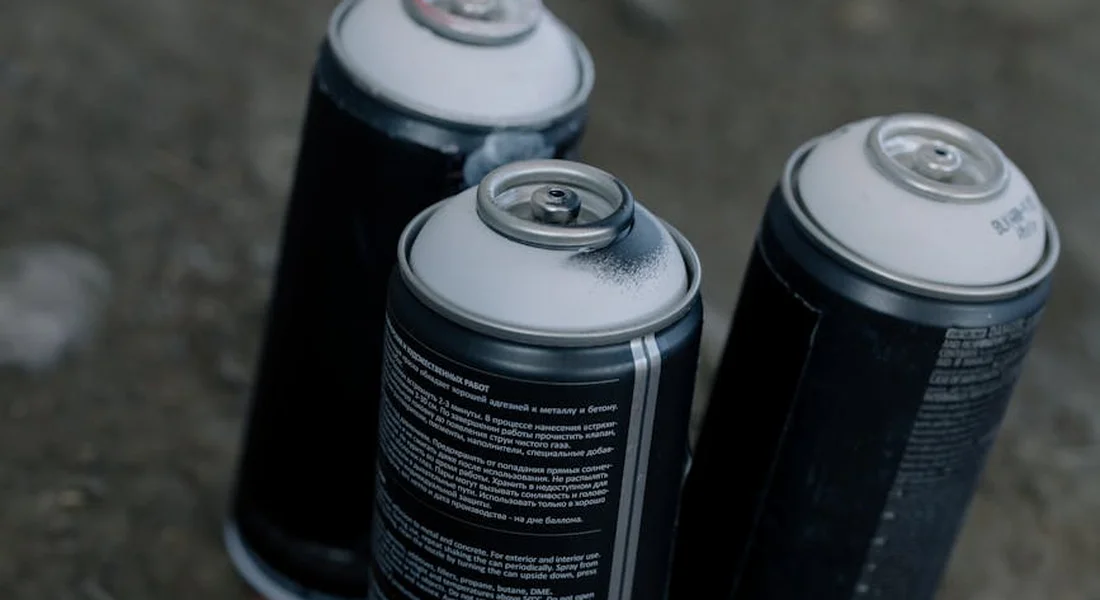
The diy car painting spray decision comes down to rattle cans versus an HVLP gun. Rattle cans are accessible. They work for very small areas. For anything larger than a bumper, the limited control, uneven pressure, and tiny amount of material will lead to a dry, textured finish that is difficult to make smooth. An HVLP gun, fed by a compressor, gives you control over fluid flow, air pressure, and fan pattern. It is the only way to approach a professional-looking result on a panel. If you’re considering DIY painting, make sure you choose the right spray gun for the job.
Understand your paint system. Modern paint is a sandwich:
- Primer: Fills small sanding scratches and provides a uniform surface for the color to stick to. It is often sanded smooth before the next step.
- Basecoat: This is the color layer. It goes on thin and looks flat and dull by itself.
- Clear Coat: This is the thick, glossy protective layer. All the depth and shine comes from here. You will sand and polish this layer to remove imperfections.
Buy your primer, basecoat, and clear from the same product line. Mixing brands or systems is asking for a chemical reaction called “lifting,” where the new paint wrinkles the layer underneath.
Those diy car painting kits you see online? They are often missing the critical items. They give you a cheap gun, some paper, and maybe a mask. They never include the powerful compressor you need to run the gun, the ventilation, the lighting, or the gallons of practice it takes to learn trigger control. A proper kit is one you assemble yourself, piece by piece, based on the job in front of you. It’s one of those DIY projects that’s harder than it looks.
Creating a Paint Booth: Your Environment is Everything
You cannot do this outside. I tried painting a fender for my ’95 Miata on a calm day once. A single gust of wind deposited a fine layer of pollen across the wet clear coat. It looked like it had a skin condition. Dust, bugs, and leaves are your sworn enemies. Your garage is your fortress.
Building Your Temporary Garage Booth
Think of this as creating a clean room. You are sealing off the world. Start by giving the floor a thorough sweep and a damp mop. You want to eliminate any dust you can kick up later.
Get heavy-duty plastic sheeting, at least 4-mil poly. Drape it from the ceiling to create walls, sealing the top to the ceiling joists with painter’s tape. Extend the plastic walls so they touch the floor on all sides. Use more tape to seal every seam and overlap. Any gap is a highway for contamination.
Your lighting setup is just as vital as your plastic walls. A single overhead light casts shadows that hide drips and thin spots. You need to see the paint from all angles. I use two portable LED work lights on tripods. Position one on each side of the car, pointing at the panel you’re painting. The bright, shadow-free light reveals everything.
Ventilation: This is a Matter of Health
Spray paint and clear coat release volatile organic compounds (VOCs). Breathing this stuff is dangerous. A simple dust mask is worthless here. You need organic vapor cartridges on a proper half-face respirator. I will not start a spray session without mine fitted and sealed.
Ventilation means moving air, not just opening a door. You need an exhaust fan. A standard box fan in a window works if you seal the gaps around it with cardboard and tape. The goal is to create a gentle, consistent airflow that pulls fumes away from you and out of the space. Have a second intake window or door cracked open on the opposite side of the garage to allow fresh air in. This flow is non-negotiable for your safety.
Controlling Temperature and Humidity
Paint is a chemical soup that needs specific conditions to cure properly. If it’s too cold, the material will not flow or adhere correctly. If it’s too humid, moisture gets trapped under the finish, leading to a milky haze called “blushing.”
Check the technical data sheet for your specific paint and clear coat. Most modern automotive paints need a minimum of 65°F (18°C) and ideally around 70-75°F (21-24°C). Humidity should be below 65%. I keep a simple digital thermometer/hygrometer on my workbench. If your garage is chilly, a portable electric heater can help, but keep it away from any flammable vapors.
Paint the entire car in one session if you can, so it all cures under the same conditions. A temperature swing between painting the hood and the trunk can lead to a visible difference in gloss and texture. Your environment controls your finish.
The Protocol: Your Step-by-Step Order of Operations
This is the map. If you skip a step, you will get lost. I have painted panels on my old Miata and my F-150 using this exact process. It works if you follow it.
-
Step 1: Deep Clean & Decontaminate
You are not washing your car. You are performing surgery on the surface. Any speck of dirt, sap, or metal fallout that you paint over will become a permanent, ugly blemish under the new paint. No amount of cleaning will remove those stains afterwards.
Start with a standard two-bucket wash. Dry it completely. Then, spray an iron remover over the entire panel. You will watch it turn purple as it dissolves invisible brake dust and rail dust particles embedded in the paint. Rinse it off.
Now, use a detailing clay bar with plenty of lubricant. Glide it over the clean, wet surface. You will feel it grab and pull out contaminants your wash missed. The goal is a surface so smooth it feels like glass, with zero grit under your fingertips.
-
Step 2: Disassembly & Masking
A sharp paint line looks professional. A fuzzy one looks like a backyard job. Whenever possible, remove the part. Take off the door handles, trim pieces, and side mirrors. It is easier to paint a simple shape than to dance a spray can around complex edges.
For areas you cannot remove, use professional painter’s tape and masking paper. Do not use newspaper, the ink can bleed. Do not use cheap plastic sheeting that can blow onto your wet paint. Run the tape along the edge, then seal it by rubbing it down firmly. Then, apply your paper, overlapping the sheets so no gap exists. Masking is boring, but a rushed job here guarantees hours of frustration later, cutting overspray off windows and trim.
-
Step 3: Sanding & Surface Prep
I hear the question all the time: “How can I paint my car without sanding?” You cannot. Adhesion is everything. New paint will not stick to a slick, glossy surface. It will chip and peel the first time you drive. That’s why sand car paint prep matters. It roughens the surface and removes contaminants so the new coat can adhere properly.
Sanding gives the new material something to grip. It also flattens small scratches and imperfections. For a full repaint, you sand the entire panel. For a touch-up, you feather the damaged area out into the good paint.
Use a dual-action sander with 400-600 grit sandpaper for old paint. For bare metal, start with 320 grit. Always use a sanding block on edges by hand, as a power sander will cut right through. The goal is not to remove all the color, but to turn the entire surface a uniform, dull matte finish. When you are done, there should be no shiny spots left at all. Wipe the area down with a wax and grease remover on a clean, lint-free cloth to eliminate any sanding dust or oils from your hands.
-
Step 4: Primer Application
Primer is the foundation. It seals the sanded surface and provides a uniform base for your color. Shake your spray can for a full two minutes. The mixing ball should rattle freely.
Apply the primer in multiple light coats. Do not try to cover everything in one pass. Hold the can about 8 inches away and use smooth, side-to-side strokes with a 50% overlap on each pass. Let the first “tack coat” dry for about 10 minutes. Then apply a second, slightly heavier coat. Two to three coats is usually enough.
Once the primer is fully dry (check the can, usually 1 hour), you must sand it lightly with 600-800 grit sandpaper or a grey scuff pad. This smooths out any texture or “orange peel” from the spray can. Wipe it clean with wax and grease remover again. The primed surface should feel perfectly smooth and uniform before a single drop of color touches it.
-
Step 5: Basecoat Application
This is where the color appears. The technique is everything. Warm your spray cans in a bucket of warm water for five minutes. This improves the paint flow and pressure. Shake them vigorously.
Start with a light “tack coat.” This is a dusting of color that barely covers the primer. It helps the next coat adhere better. Wait five minutes.
Now apply your “wet coats.” These are full, slow passes where you see a wet, glossy layer develop immediately. Hold the can 6-8 inches away. Start your motion before the panel, and stop after it. Maintain a steady speed and distance. Overlap each pass by 50%. Applying the paint in several thin, wet coats prevents runs and sags, which are impossible to fix without starting over. Apply coats until you achieve complete, even coverage with no primer showing through. This may take 3-5 coats.
-
Step 6: Clear Coat Application
The clear coat is the shield. It provides the gloss, the depth, and the protection against the sun and weather. Do not rush this. Wait for the basecoat to become dry to the touch, usually 15-30 minutes. Wait between paint coats to ensure the next layer bonds and cures. Getting the paint coats wait time right is key to a durable, glossy finish.
Clear coat must be applied thick and wet. Use the same steady, overlapping pass technique. Your goal is a perfectly even, high-gloss wet layer. Apply two to three coats, waiting 5-10 minutes between them. A rich, properly applied clear coat is the single biggest factor between a DIY job that looks good and one that looks factory. For lasting protection, use clear coat protective coatings suited to your surface. Follow the product’s cure times and recoat guidelines for best results. It is also your last chance to get it right.
-
Step 7: The Long Wait
The paint is dry to the touch in hours. It is not cured for weeks. This is the hardest part. Drying is when the solvents evaporate and the surface is no longer sticky. Curing is when the paint molecules fully cross-link and harden into a durable finish.
Do not polish, wax, or reassemble trim for at least 30 days. Park the car in a clean, dry garage. If you must drive it, be prepared for the finish to be very soft. A tiny piece of gravel will dig right in. Rushing the cure time will ruin all your hard work, leaving you with a soft, easily scratched finish. Patience is not a suggestion here, it is a requirement.
Technique: How to Adjust and Use Your Spray Gun (or Can)
This is where the magic happens, or where the disaster begins. Your technique is everything. A perfect paint job and a terrible one start with the same materials. The difference is in your hands and your settings.
Adjusting a Spray Gun for Car Painting
Think of your spray gun as a musical instrument. You need to tune it before you play. Most guns have three basic controls, and you must test them on a piece of cardboard before the car.
- Fluid Knob (Material Flow): This controls how much paint comes out. Start with it closed, then open it 1.5 to 2 full turns as a baseline. You want enough paint to flow for a wet coat, but not so much that it runs. If you see runs on your test card, turn the fluid down.
- Air Cap (Air Pressure): This is the force that atomizes the paint into a fine mist. Your gun’s manual will suggest a PSI range, often 25-35 PSI at the gun. Too high, and you get dry, sandy texture. Too low, and the paint comes out blobby and orange-peely.
- Fan Pattern Knob: This shapes the spray from a round dot to a wide, flat oval. For painting large panels like a hood or door, you want the widest, flattest fan pattern you can get. For tight spots, narrow it down.
Adjust these three settings together on scrap until you see a smooth, even, wet coat. It takes patience. Do not skip this step.
The Rattle Can Ritual
For smaller jobs with aerosol cans, the rules are different. Your gun adjustments are replaced by two critical actions.
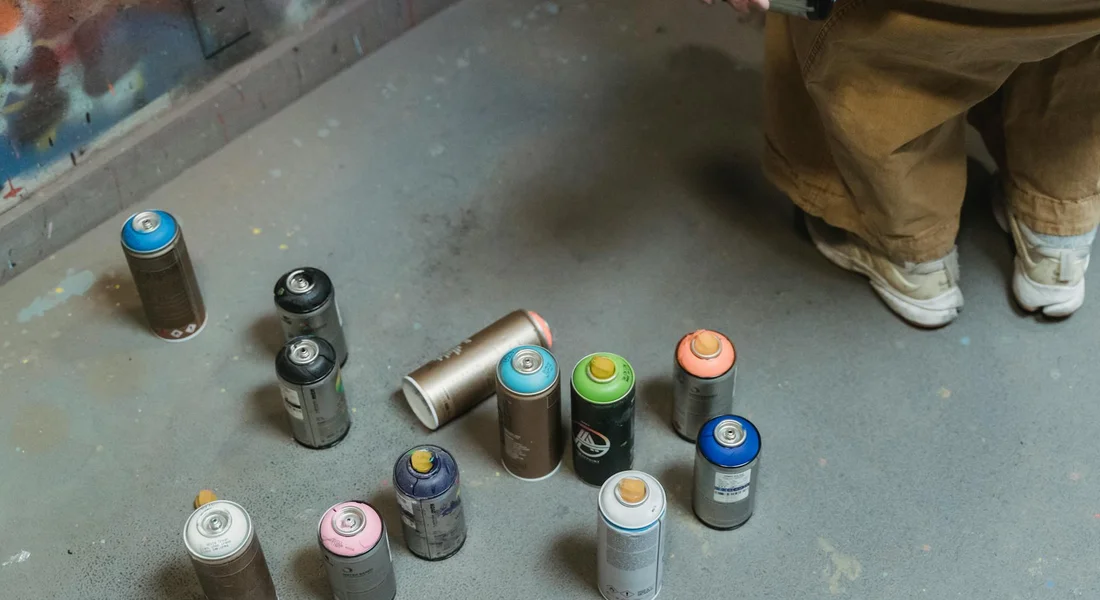
First, warm the can. I put it in a bucket of warm (not hot) water for five minutes. This thins the paint slightly and increases the pressure inside, giving you a finer mist and more consistent spray. A cold can sputters and spits, leaving a gritty, uneven finish—especially when you’re using aerosol spray paint for detailed auto work.
Second, shake it constantly. And I don’t mean a few wrist flicks. Shake it for a full two minutes before you start, and for 30 seconds between every pass. The balls inside must mix the paint and propellant completely. If you hear the balls stop rattling, shake more.
A Cautionary Tale: The “Swirl Magnet” and Texture
Let me tell you about my black BMW. Its factory paint was soft. A previous owner tried a touch-up with a rattle can on the rear bumper. Their technique was poor. They held the can too close, moved too slowly, and didn’t keep it warm.
The result wasn’t just a color mismatch. It was a textured, orange-peel mess that felt like sandpaper. Years later, when I tried to correct and polish the bumper, that spot was impossible. The compound just skated over the peaks of the texture. Poor spray technique creates physical texture that no amount of polishing can ever fix. You are stuck with it until you sand it all off and start over. Remember that with every trigger pull.
The Sound and Look of a Proper Pass
How do you know you’re doing it right? Use your senses.
The sound should be a consistent, hissing whisper. No sputtering or popping. Your movement should be smooth, like you’re conducting an orchestra. Start moving your arm before you pull the trigger, spray across the panel in a straight line, and release the trigger after you pass the edge.
Keep the gun or can perpendicular to the surface, 6 to 8 inches away. Overlap each pass by 50%. The look you want is a “wet coat.” It should look glossy and liquid as you apply it, but it should not sag, run, or look drippy. It’s a balance. If it looks dry or dusty as it hits the panel, you’re too far away, moving too fast, or your air pressure is too high.
Practice this motion on a large piece of vertical cardboard until it becomes muscle memory. Your car’s paint depends on it.
Fixing the Inevitable: Drips, Dust, and Orange Peel
You will get a drip. A speck of dust will land in your fresh clear coat. It happens to everyone, including me. On my BMW’s hood, I once got so focused on laying down a smooth coat that I missed a tiny run forming at the edge. The key is not to panic. These are all fixable with patience and the right follow-up steps. Think of it as part of the process, not the end of the project.
How to Fix Drips and Runs
A drip or run means too much paint pooled in one spot. You cannot fix it while it’s wet. You must let it cure completely, usually for at least 24-48 hours, until it is hard like plastic. Once cured, you can fix and remove paint runs.
To fix it, you will sand the drip level with the surrounding paint and then re-apply your topcoat. If you’re dealing with repair paint drips, you may also want to learn how to remove repair paint drips for a cleaner finish.
- Start with a sanding block and 800-grit sandpaper for a base coat run, or 1000-grit for a run in the clear coat. Keep the block flat and use light pressure.
- Sand just until the high spot of the run is flush with the surface. Stop often to wipe the area with a wet towel and check your progress. You do not want to sand through the color.
- Once level, step up to 1500-grit and then 2000 or 3000-grit sandpaper to remove the scratches from the previous grit.
- Clean the area thoroughly with isopropyl alcohol and a microfiber towel.
- Re-apply your clear coat over the sanded area, feathering the edges out. You may need to blend this new clear over a larger area for a seamless look. Apply 2-3 light coats, following the flash times on the product.
Removing Dust Nibs and Contaminants
A dust nib is a tiny, hard speck of something that got embedded in your paint as it dried. You will see and feel them. This is where your detailing skills come in handy.
You remove dust nibs by leveling the clear coat around them through careful wet sanding, then polishing the area back to a gloss.
- First, let the paint cure fully. Trying to sand soft paint will make a bigger mess.
- Wrap a small piece of 3000-grit sandpaper around a firm, flexible foam pad. This conforms to the car’s curves.
- Lubricate the area with plenty of soapy water or a dedicated sanding lubricant. Gently sand the nib and the immediate area around it. Your goal is to cut the nib down until it is gone and the surface is perfectly flat.
- Wipe clean. You will now see a small dull spot where you sanded.
- Use a dual-action polisher with a cutting compound and a medium foam pad to restore gloss to that spot. Work in a small, controlled area. This is the same process as paint correction.
- Follow with a finer polish and a finishing pad to perfect the clarity and remove any haze from the compounding step.
Managing Orange Peel Texture
Orange peel is that bumpy, textured finish that looks like the skin of an orange. Some degree of it is completely normal in a DIY spray job. Factory cars have it. My F-150 has it straight from Ford. A severe case, where the texture is very pronounced, means the paint was too thick, the air pressure was wrong, or you held the spray gun too far from the surface.
Accept a mild, even orange peel as a sign of a successful DIY job; only pursue wet sanding for severe texture you truly cannot live with.
Correcting it is a major undertaking. You are essentially sanding the entire painted panel perfectly flat and then compounding and polishing it back. It requires a full paint correction setup:
- Begin with a full wash and decontamination of the cured paint.
- Using a sanding block and 1500 or 2000-grit paper with lubricant, sand the entire panel with consistent, straight-line strokes until the texture is gone and the surface is uniformly dull. This takes practice and courage.
- Progress through finer grits like 3000 to remove the sanding scratches.
- Compound the entire panel with a heavy-cut compound and a microfiber cutting pad on a polisher. This removes the sanding haze.
- Polish with a finer polish and a foam finishing pad to bring back the deep gloss.
- Apply your chosen sealant or wax for protection.
It is a lot of work. For most home projects, a uniform, glossy peel is a victory. Save the full wet sand for a small panel or a show car like the Porsche, not the daily driver Odyssey.
Aftercare: Detailing and Protecting Your New Paint
You just sprayed the last coat. The color looks deep and wet under the garage lights. I get it. You want to seal that shine immediately. Resist that urge completely, because the real work of protecting your paint starts with patience. Fresh paint is soft. It needs time to cure, which means the solvents inside need to evaporate fully so the film can harden. This isn’t a suggestion. It’s a rule.
The Critical Waiting Game: Curing
Think of curing like concrete setting. It looks solid on top, but it’s still soft underneath. For most DIY paints, especially single-stage or enamel, this period is 30 to 90 days. On my 1995 Miata restoration, I waited a full 60 days before even thinking about protection. Temperature and humidity drag this out. Cool, damp garages slow it down.
Applying a wax or sealant now is a disaster. You’ll seal those escaping solvents right under the barrier. This can cause cloudiness, poor adhesion, or even wrinkles in the paint later. The only thing your new paint should see for the first month is air and maybe a very gentle rain.
Your First Wash: Gentle is Everything
After about two weeks, if you must wash it, you can. But this wash is different. You treat the paint like fine glass. I use the same method on my black BMW, the ultimate test for gentle care.
- Use a pH-neutral car shampoo. Nothing with waxes or cleaners. Just pure, gentle soap.
- Wash in the shade with a cool surface. Use the two-bucket method with grit guards to keep dirt off your wash mitt.
- Let the soap and water do the work. No pressure. Gently glide the mitt over the surface. No scrubbing.
- Rinse thoroughly with clean water. Dry with a clean, plush microfiber towel. Pat it dry. Do not drag or rub.
This first wash is about removing dust, not grinding in shine. Any mistake here will etch swirls into the soft paint, and you’ll see them forever.
Long-Term Protection for the DIY Garage
Once the cure time is up-you can test it by pressing your fingernail gently in an inconspicuous spot; it should not leave a mark-it’s time for real protection. For a home painter, I always recommend a high-quality spray ceramic sealant. It’s the perfect bridge between a wax and a professional coating.
I use a spray sealant on my F-150 and my wife’s Odyssey. It’s foolproof. You spray it on a clean, dry panel, wipe it evenly with one towel, and buff off any haze with a second dry towel. It beads water fiercely for months. A spray ceramic sealant gives you serious chemical resistance and UV protection without the commitment or cost of a full ceramic coating. It’s the smart first step in guarding your hard work.
Paint is Just the Beginning
Spraying the paint is an achievement. Keeping it perfect is the art of detailing. This is where we live. A flawless paint job can be ruined in one bad wash. A mediocre job can be made to look brilliant with proper correction and care. The application is the sprint, but the aftercare is the marathon that defines your car’s finish for years. Everything from the clay bar process for my Porsche’s PPF to the oxidation battle on the Miata starts with understanding this simple truth: your paint is only as good as what you do after it dries.
Final Thoughts on DIY Car Spray Painting
The single most important piece of advice I can give is to treat surface preparation as the non-negotiable foundation of your project. Every minute you invest in flawless cleaning, sanding, and priming pays back tenfold in the durability and gloss of your final coat.
Cut corners here, and you will be staring at a finish plagued by peeling, orange peel texture, or rapid fading within a single season.
Deep Dive: Further Reading
- Spray Painting For Beginners DIY Series – YouTube
- Alpha Custom Color Spray Cans – Perfect OEM-Matched Automotive Paint
- Aerosol Paint – 66 Auto Color
- How to Spray Paint a Car | Lowe’s
Max is an automotive enthusiast having worked as a car mechanical and in interior detailing service for over 25 years. He is very experienced in giving your old car, a new fresh vibe. He has detailed many cars and removed very tough smells and stains from all kinds of cars and models, always ensuring that his work and advice helps his customers. He brings his first hand experience to his blog AutoDetailPedia, to help readers breath new life into their car interiors.