How Do I Remove Vinegar, Musty, and Other Bad Smells From My Car Vents and Air Conditioner System?
That sharp vinegar or damp basement smell blowing from your dashboard isn’t just annoying. It tells you mold or bacteria is growing inside the system you breathe from.
Using methods I’ve trusted on my own cars, from the kid-hauling Odyssey to the black BMW swirl magnet, I will show you how to pinpoint the odor source, safely clean the vent surfaces and evaporator core, and stop the smell from returning.
Let it go, and that stench will soak into your seats and headliner, turning every drive into a chore.
The Detailer’s Quick Guide: Key Takeaways for a Fresh Cabin
You want the smell gone. I get it. Here is the straight talk on how to do it right.
- The proven method is a three step attack: replace the filter, kill the growth at the source, then dry everything out completely. Skip a step and the smell will come back.
- Plan for about an hour of active work, plus another 10 to 15 minutes of running the fan to dry the system. The whole job, from start to finish, often takes 1 to 2 hours.
- This is a moderate job. It is not hard, but you must follow the steps carefully. Rushing can leave cleaner residue or moisture behind.
- Always start with the cabin air filter. A dirty filter is usually ground zero for the problem and will trap new smells.
- Use an EPA registered evaporator coil cleaner. These formulas are designed to kill mold and mildew on contact without harming the delicate fins of your A/C core.
- Run the fan on high for at least 10 minutes after cleaning. This is non negotiable. You must evaporate all the moisture from the core to prevent the mold from growing right back.
Diagnosing the Funk: What That Smell Really Means
Your nose is the best tool you have. That specific odor is telling you exactly what is happening inside your vents.
A sharp vinegar or sour smell is often the first warning of mildew. I notice this in my Honda Odyssey every spring after a wet winter. It is that faint, acidic tang when you first start the blower. It means moisture has been sitting in the system just long enough for microbes to wake up. It is common after a humid season or if you often run the A/C on a short trip and then park the car.
The classic musty, dirty socks smell means you have a full blown mold colony on your evaporator core. That core gets ice cold when the A/C runs, and when you shut the car off, it sweats. That dark, damp environment is a paradise for mold spores. If your car smells like a forgotten gym bag, the evaporator is the culprit.
A sweet, syrupy, or rotten egg smell is a red flag. Your detailing chemicals will not fix this. A sweet, almost maple syrup odor can signal a coolant leak from the heater core. A rotten egg or sulfur smell might point to a failing catalytic converter. If you catch these scents, especially if they come with drips on the floor or strange engine performance, stop. Consult a mechanic immediately. This is not a cleaning issue.
Smoke smell is a coating problem, not just a filter problem. Cigarette smoke or campfire particulates are like tar. They coat the evaporator fins and the plastic ductwork in a sticky film. Changing the cabin filter helps, but it is like putting a clean filter in a dirty chimney. You need to clean the surfaces the air touches before it reaches the filter.
Gathering Your Arsenal: Safe and Effective Tools for the Job
You cannot fight a smell you cannot see. I learned that after a week of driving my grey Honda Odyssey with the faint, sour ghost of spilled milk lingering in the air. Masking it with pine-scented sprays only made it worse. To win this fight, you need specific tools that target the source safely, for both you and your car’s materials. This is not about brand names. It is about product types that work. If you’re dealing with the stubborn sour milk odor in a car, practical steps exist to remove sour milk smell from a car. These methods target the odor at its source.
EPA-Registered Evaporator Coil Cleaner (Foam or Spray)
This is your main weapon. The evaporator coil is a cold, damp metal grid inside your dashboard where your AC’s cold air is made. Mold and mildew love it there. An EPA-registered cleaner is non-negotiable because it is formulated to kill the microbial growth that causes the rotten, musty smell. I use a foam type on my cars; it expands and clings to the coil, dissolving the gunk. A generic “air freshener” simply adds perfume to the already stinky air blowing past the dirty coil. It is a temporary cover-up, not a solution.
New Cabin Air Filter (Charcoal-Activated is Best)
Think of this as your car’s nose. It sits in the airflow path, usually behind the glove box, catching dust and pollen. A dirty, old filter holds odors. Swapping in a fresh, charcoal-activated filter is a critical step because the charcoal absorbs odor molecules from the air passing through it. A standard white filter just traps particles. The charcoal version in my F-150 actively grabs those vinegar or mildew smells, giving you cleaner air from the start.
Microfiber Towels and a Soft-Bristle Brush
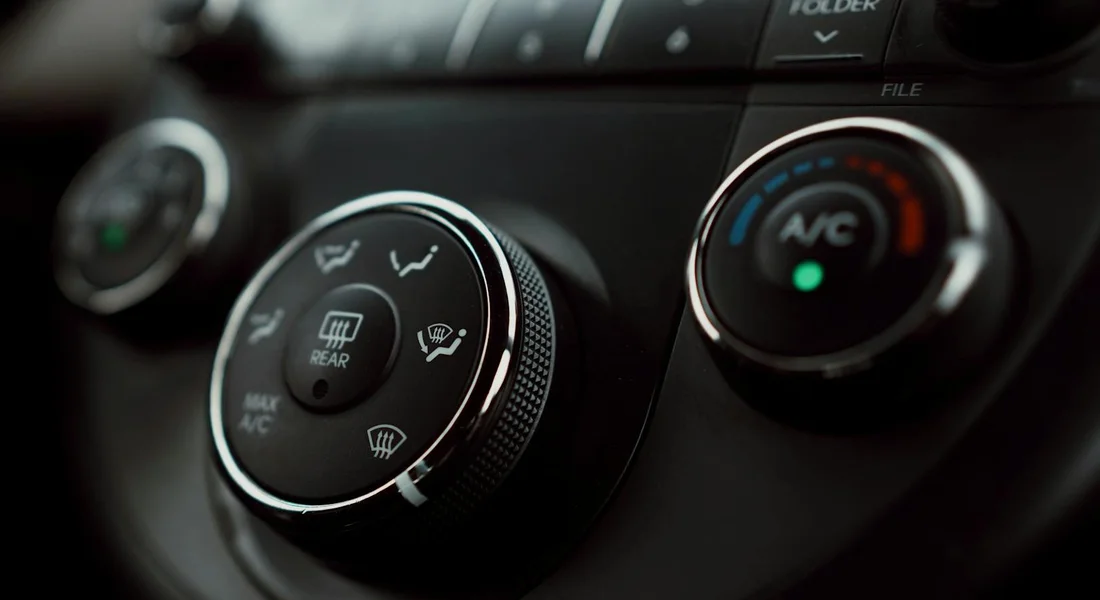
Your vents are the final gateway for air. Dust, skin cells, and crumbs collect on the vanes and deep inside. A soft detailing brush lets you agitate dust in the vents without scratching the delicate plastic slats. Follow it with a plush microfiber towel to wipe the surfaces clean. I keep a dedicated set for interiors. On my black BMW, using anything abrasive on those vents would leave fine scratches I would see every day.
Interior-Safe Disinfectant Spray
After you clean the coil and change the filter, the hard surfaces around the vents need attention. An interior-safe disinfectant spray kills bacteria on plastic and vinyl without causing discoloration or drying out the materials. Spray it on a microfiber towel first, then wipe down the vent faces, the control knobs, and the dashboard. This eliminates any lingering germs on surfaces that touch the air you breathe.
Protective Gloves and Safety Glasses
Do not skip this. The evaporator coil cleaner is a chemical. Wearing nitrile gloves and safety glasses protects your skin and eyes from irritation and keeps the job safe. I put them on every single time, even for a quick clean on my Miata. It takes two seconds and prevents a lot of potential trouble.
The Protocol: The Correct Order of Operations to Kill Odors
-
Step 1: Replace the Cabin Air Filter. Always Do This First.
Think of your cabin air filter as your car’s nose hair. It traps everything. A dirty filter holds mold, dust, and the very smells you hate. I always start here. On my grey Honda Odyssey, the kid hauler, a sour milk smell vanished the day I changed its filter.
Find the filter panel. It is usually behind the glove box. Pull the old filter out. Lay it next to the new one. You will see a dirty, damp, often discolored pad versus a crisp, clean one. Swapping this filter removes a major source of odor and lets your cleaning work penetrate deeper. Do this step first every time.
-
Step 2: Access and Clean the Evaporator Core.
The evaporator core is the cold heart of your AC. Moisture collects here and mold grows. You must clean it directly. First, locate the external air intake. With the engine off, open the passenger door. Look for a grated panel near the base of the windshield or under the glove box area.
Use a professional, foaming HVAC system cleaner. Do not use vinegar or household products. They can damage sensitive parts. Insert the cleaner’s extension tube into the intake. Start your car. Set the AC to max cold, the fan to its highest setting, and turn on recirculation mode. Spray the foam in short bursts. The fan will suck it through the ducts and over the evaporator core.
Now, wait. Follow the cleaner’s dwell time on the label. This is usually 10 to 15 minutes with the system off. This dwell time allows the foam to expand, cling to the coils, and break down the biofilm causing the musty smell. Patience here makes all the difference.
-
Step 3: Mechanically Clean the Vents.
While the cleaner dwells, clean the vents you can see. Never spray liquid directly into the vent slats. It will drip inside your dashboard and create new problems. Instead, use a soft detailing brush to loosen dust and debris from the slats.
Spray a mild interior cleaner onto a clean microfiber towel. Wrap the towel around a plastic trim tool or your finger. Wipe each vent slat carefully. On my jet black BMW, the swirl magnet, I use a plush microfiber to avoid scratching the delicate plastic. This physical wiping removes the surface layer of grime that holds odors and gets blown into your face, unlike just spraying odor removers in the car interior.
-
Step 4: The Critical Dry-Out Cycle.
After the dwell time, you must remove all moisture. A wet system is a moldy system. Start your engine again. Roll down all windows. Set your climate control to the hottest temperature. Set the fan to the highest speed. Direct the airflow to the floor vents. Let it run for a full 10 to 15 minutes.
This heat bakes out residual moisture from the evaporator core and ducts. I do this in my Ford F-150 workhorse after every deep clean. This dry-out cycle is the step that locks in your success and prevents the odor from returning next week. You will feel the hot, dry air pushing out any last traces of dampness.
Detailer’s Pro-Tip: The Technique Tweak for Stubborn Smells
Some smells just don’t want to leave. You’ve cleaned the cabin filter and run a treatment, but a faint, funky odor still greets you on humid mornings. This is where your technique makes the difference between a good result and a permanent fix.
Mastering the Evaporator Cleaner Application
Spraying cleaner into the intake and hoping for the best is a waste of money. The evaporator core is a dense, folded aluminum fin stack. You need to coat all of it. Here is how I do it on my kid-hauling Odyssey.
First, find the evaporator drain tube under the car and verify it’s clear. Poke a zip tie up it to break through any slimy blockage. A clogged drain is often the root of the smell. If the odor persists, the next step is to identify the exact source of the car odor to guide further checks. This helps you locate whether the smell comes from the HVAC system, the exhaust area, or other spots.
When you use the foam cleaner, think “painting a wall,” not “spraying for bugs.”
- Use very short, one-second bursts.
- Pause for three seconds, then spray again.
- Rotate the can’s nozzle slightly between bursts.
This method lets the foam expand deep into the core instead of just coating the front fins. The most critical step is the dwell time; you must let that foam sit and drip for the full time listed on the can, usually 10-15 minutes. This is not just drying time. This is when the antimicrobial or enzymatic agents are actively breaking down the biofilm on the fins. Rushing this step is the number one reason a smell comes back.
Sealing the Deal with a Final Dry-Out
After the treatment, you’ve introduced moisture back into the system. Your final job is to ensure everything dries completely. Run the fan on high heat for at least 15 minutes with the AC compressor off. This bakes out residual dampness from the ducts.
Then, address the cabin air itself. Place an open, new box of plain baking soda under the passenger seat. Tear the perforated flaps open fully. For an even stronger pull, use a commercial desiccant bag meant for closets or safes.
Leave it there for three to four days with the windows closed. This silent helper absorbs the last traces of musty dampness lingering in your carpets and air. It is a simple, final touch that makes the cleanliness last.
One safety note. When using any spray cleaner inside the cabin, protect your dashboard and interior plastics with a microfiber towel. Overspray can leave a sticky residue that is a new problem to fix.
Tackling Specific Stench: Vinegar, Musty, and Smoke Smells
You have the core protocol. Now let’s use it on these specific odors. I treat each smell differently in my shop.
Vinegar and Musty Smells
That sour or damp smell means moisture is trapped in your system. The standard protocol is the cure. You clean the evaporator coil, use a disinfectant, and run the blower. For vinegar and musty smells, the dry-out cycle at the end is what seals the deal. Run the heater on full blast for ten minutes after cleaning. This bakes out the leftover dampness. Skip this step, and the smell will come back in a day or two. My Honda Odyssey, the kid hauler, taught me this after a spilled milk incident turned musty.
Smoke Smells
Smoke is a tougher opponent. The protocol is your baseline, but you must go further. You will likely need to repeat the evaporator cleaning step. Foam the coil, let it sit, and rinse it out two or three times over a week. How do you get smoke smell out of car vents? You must also clean every hard surface inside the car with an interior cleaner. Nicotine residue is like a sticky film that coats your dash, doors, and the plastic vent slats. Wipe all those surfaces down thoroughly. The smell lives in the residue, not just the air. That’s why removing cigarette and vape smoke odors means treating every surface and vent, not just the air. A thorough approach combines residue cleanup with odor-neutralizing steps.
Can You Spray Cleaner Directly into the Vents?
No. Do not spray cleaner directly into the vents. You risk damaging the blend door actuators or electrical components behind the dash. I have seen actuators gum up from liquid, causing the climate control to fail.
The correct method is safe and simple. Spray your chosen interior cleaner onto a clean microfiber cloth. Wrap that cloth around a soft detailing brush. Then gently insert the brush and clean the vent slats. This applies cleaning power right where you need it without letting liquid drip inside.
How Do You Clean the Inside of an AC Vent?
First, agitate the loose dust. Use a soft, long-bristle detailing brush. Swirl it inside the vent openings to loosen everything. Next, use a vacuum with a crevice tool attachment. Suck all the dust out. For sticky gunk or old residue, go back to the spray-on-cloth method. Spray cleaner on a cloth, wrap it on your brush, and scrub the interior surfaces you can reach. It takes patience, but it works.
When to Call for Backup: Professional Odor Removal Options
You can do a lot on your own. I do it every week in my own garage. But some jobs require a bigger gun. Knowing when to stop is a sign of a smart detailer, not a failed one.
If you’ve followed a complete DIY process-cleaning the cabin filter, treating the evaporator core, and spraying the intake-and that foul smell comes creeping back within a few weeks, the problem is deeper than your reach. It means the contamination is likely widespread in the ductwork or has a persistent source you can’t access.
Signs You Need a Pro
- The Smell Returns: This is the biggest clue. A proper DIY fix should last. If it doesn’t, the issue is systemic.
- Evidence of a Major Water Leak: You find soaked carpet padding under the floor mats, especially on the passenger side. This often points to a clogged AC drain tube or a leak in the body sealant, which has created a hidden, wet breeding ground for mold.
- Severe Biological Contamination: You see visible, widespread mold or mildew growth on interior surfaces, or the smell is overwhelmingly like rotten eggs or a dead animal. My Honda Odyssey once had a spilled milk incident that seeped under a seat. The initial clean wasn’t enough, and the sour smell came back with a vengeance. That’s a bio-hazard.
What the Pros Use
Professional detailers and odor specialists have tools that go far beyond a spray bottle. They attack the entire air volume of your vehicle. When odors are unusual or persistent, professionals tailor treatments to remove the source rather than just mask it. This comprehensive approach targets and helps remove unusual car odors at their root.
Advanced Ozone Generators: These aren’t the small, consumer-grade units. A pro machine produces a high concentration of ozone (O3), a powerful oxidizing gas. They seal the car and run the machine for a set time, often with the HVAC fan on recirculate. The ozone gas permeates every crack, vent, and fabric, breaking down odor molecules at a chemical level. Unlike lower-end ozone generators, these are specifically designed for effective car odor removal.
Thermal Fogging: This is my go-to for the toughest jobs. A specialized machine heats a deodorizing solution into a dry, penetrating fog. The fog is pumped into the cabin and the fresh air intake with the system running. Because the fog particles are so fine, they travel through the entire HVAC ductwork and coat every surface, neutralizing odors on contact. It’s like filling every inch of the system with cleaning vapor.
These services typically start at around $150 and can go up to $300 or more, depending on the severity and the vehicle size. It’s an investment, but for a permanent solution to a health-affecting problem, it’s often the only real fix.
Remember, these are not DIY tools. Ozone requires strict safety protocols, and thermal fogging uses concentrated chemicals. This is the point where calling a trusted professional is the right move for your car, and your nose. If you’re aiming to remove ozone odors, a professional can assess and apply safe odor-removal methods.
Keeping It Fresh: Simple Habits to Prevent Smell Regrowth
Think of your car’s air system like a kitchen sink. You can scrub it clean, but if you leave food in the drain, the smell comes right back. The goal here is to stop feeding the problem. These are not difficult tasks. They are small habits that make a huge difference in eliminating bad odors from your car’s interior.
Run your air conditioning for at least ten minutes once a week, even in the dead of winter. I do this every Sunday. This does two critical things. It keeps the compressor seals lubricated, which prevents leaks. More importantly, it circulates dry, cold air through the evaporator core. This chills the metal and helps knock off any new moisture or mildew trying to get a foothold. This simple weekly run is your first and easiest line of defense against that damp, musty smell returning.
Your evaporator gets wet every time the A/C runs. Letting it sit wet is asking for trouble. Make this a ritual. For the last mile or two of your drive, turn off the A/C compressor. You can usually press the “A/C” or “Snowflake” button on your climate control. Leave the fan blowing on its normal speed. This pulls warm, dry cabin air over the cold evaporator fins. It wicks away the moisture. I do this religiously in my Tesla after a long drive on a hot day. By the time I park, the system is mostly dry inside. No moisture means no place for mildew to grow.
Your cabin air filter is the lung of your car’s interior. A dirty filter is clogged with pollen, dust, and mold spores. It restricts airflow and traps odors right at the intake. Check your owner’s manual for its location-it’s often behind the glovebox. Change it every 12 months, or every 6 months if you drive on dirt roads or during heavy pollen season. A fresh filter is cheap insurance. A clean cabin air filter ensures good airflow and stops your system from recirculating old contaminants every time you turn on the fan.
Be vigilant about interior spills. This lesson was burned into me by my Honda Odyssey, the kid hauler. A spilled milk shake that seeps into a floor mat doesn’t just smell bad there. As it warms up, those organic particles get pulled into the fresh air intake near your windshield wipers. It becomes food for the microbial soup in your evaporator. Clean up messes fast. Extract liquids from carpets thoroughly. Wipe down sticky surfaces. Do not let organic material bake into your interior. You are starving out the enemy.
Final Thoughts on a Fresher Cabin Air System
The most reliable fix targets the evaporator core deep in your dash with a proper, foaming cleaner to kill the odor-causing mold, followed by installing a fresh cabin air filter. This one-two punch addresses the root cause and helps keep the air clean moving forward.
If you skip this, the microbial colony will keep growing, turning that faint vinegar note into a persistent, musty stench that fills the cabin on every startup.
Deep Dive: Further Reading
- Ultra Shield Air Conditioner Treatment – Best Odor Eliminator for AC’s
- How To Remove Car Air Conditioner Smells | Turtle Wax
- How to Get Rid of Musty Smell From a Car Air Conditioner – Consumer Reports
Max is an automotive enthusiast having worked as a car mechanical and in interior detailing service for over 25 years. He is very experienced in giving your old car, a new fresh vibe. He has detailed many cars and removed very tough smells and stains from all kinds of cars and models, always ensuring that his work and advice helps his customers. He brings his first hand experience to his blog AutoDetailPedia, to help readers breath new life into their car interiors.