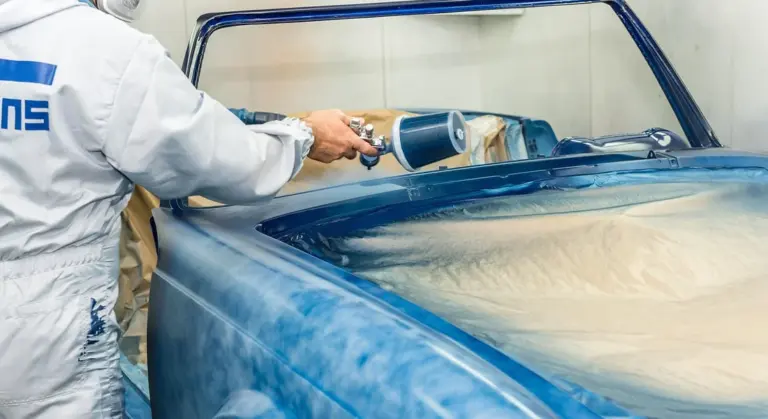
How Do You Remove Spray Paint and Splatter from Car Paint Without Damaging It?
Discovering fresh spray paint or paint splatter on your car’s surface is a sickening feeling. I understand the panic and the need for a clear, safe path to clean it.
This article will walk you through identifying the type of paint contamination, choosing the safest solvent for your clear coat, executing a meticulous removal process, and restoring your paint’s protective layer.
Use the wrong chemical or technique, and you risk etching the clear coat, leaving permanent stains, or causing scratches that demand paint correction.
Key Takeaways: Your Action Plan for Paint Removal
Before you touch a single towel, understand your plan. This is the path to success without damaging your car’s finish.
- Your golden rule is simple: always start with the gentlest possible method and only get more aggressive if you have to.
- The typical progression is: 1) A thorough wash, 2) A solvent test with isopropyl alcohol, 3) Claying the paint, 4) Using a light polish, 5) As a last resort, a cutting compound.
- The single biggest factor is the cure state of the foreign paint. Fresh, tacky paint is a much different fight than rock-hard, cured paint.
Step 1: Assess the Damage – What Kind of Paint Are You Dealing With?
Do not skip this step. Rushing in with the wrong tool makes a mess worse. Put on a pair of nitrile gloves right now. They protect your hands from harsh chemicals and keep skin oils off the paint.
First, look at the pattern. Is it a fine mist that feels like sandpaper? That’s overspray, common from a nearby painting project. Is it big droplets or splatters? That points to a closer, more direct accident.
Now, do the fingernail test. With your gloved hand, gently try to flick a spot at the edge of a splatter. Does it flake off easily, like a dried mud crust? That’s promising. Does it feel completely bonded, like it’s part of the car’s own coat? That means it’s cured and will need more work.
This initial assessment tells you if you’re in for a quick cleanup or a multi-step correction.
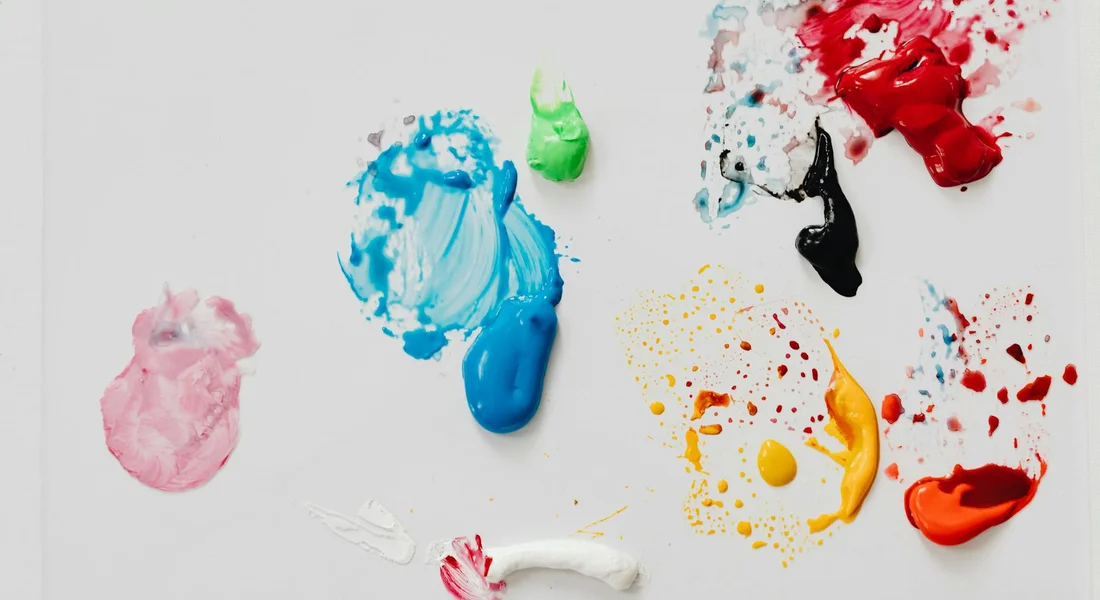
Is It Latex, Enamel, or Automotive Paint?
Different paints behave differently. Knowing which one you’re facing gives you a strategic advantage.
Latex paint, the water-based kind used on houses, often has a rubbery, plastic-like feel once dry. When it’s fresh, it can smear. When cured, it can sometimes be peeled off in a sheet. It’s usually the most forgiving to remove.
Spray enamel or automotive paint is a different beast. It’s designed to be tough and glossy. It bonds aggressively. Fresh, it will be tacky and leave residue on your glove. Cured, it feels as hard and smooth as your car’s original paint. This is your toughest opponent, especially when you try to remove spray paint from automotive surfaces.
I learned this on my grey Honda Odyssey. A latex paint splash on the bumper came off with clay and some detailer spray. But the overspray on my black BMW from a neighbor’s fence project? That was a cured enamel that required polishing.
The Fresh vs. Cured Paint Dilemma
This is the core of your entire strategy. Your approach changes completely based on the answer.
“Fresh” paint hasn’t fully hardened. We’re talking usually within a day or two. It might still be slightly soft or tacky to the touch. Your goal with fresh paint is to lift it or dissolve it before it gets a permanent grip. Solvents and claying are your best friends here.
“Cured” paint has fully cross-linked and hardened into a solid layer. It could be days, weeks, or months old. It feels hard and smooth. You cannot simply wipe it away. Cured paint must be mechanically abraded away, which is why we escalate to polish and compound. It’s a removal process, not just a cleaning one.
Identifying this state dictates every product and tool you’ll reach for next. If you’re lucky, it’s fresh. If not, you’ll need patience and the right abrasive.
Your Paint Removal Arsenal: Tools & Chemicals

Fixing paint vandalism is a process. You cannot skip steps. Having the right gear, laid out like a surgeon’s instruments, is what separates a clean repair from a ruined paint job. This is not a time for paper towels and kitchen cleaners. Here is what you need.
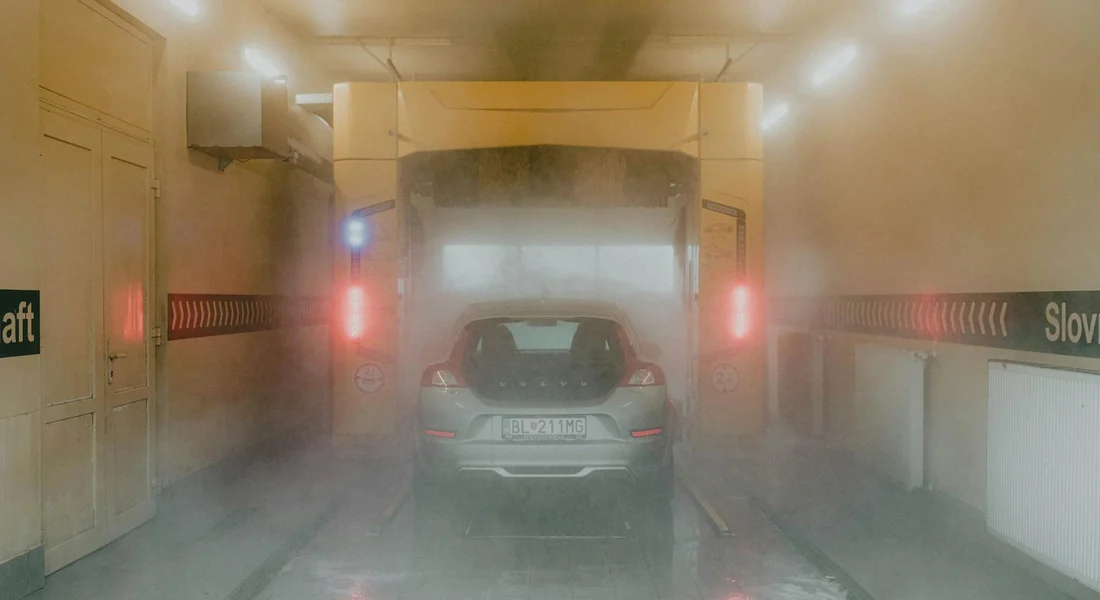
The Foundation: Wash & Decontamination
Everything starts with a perfect wash. You must remove all loose grit first. Scrubbing over dirt will grind it into your paint, creating deep scratches that are worse than the paint splatter itself.
- pH-Neutral Car Shampoo: This is your baseline cleaner. It lifts dirt without stripping existing wax or sealant. Use it in a dedicated wash bucket.
- Two Buckets with Grit Guards: One bucket holds your soapy wash water. The other holds clean rinse water for your mitt. The Grit Guard sits at the bottom, trapping dirt you rinse off so it doesn’t get back on your mitt. This single step prevents hundreds of fine scratches. I use this on my black BMW every single wash.
- Automotive Detail Clay: This is not for the spray paint yet. After washing, you clay the entire panel. It grabs embedded industrial fallout, tree sap, and other bonded contaminants that washing missed. A clean surface lets your polishing steps work perfectly. Think of it as sanding wood before you stain it.
The Removal Agents: Attacking the Paint Itself
This is your primary weaponry. These chemicals break down the foreign paint so you can lift it away, ideally without touching your car’s clear coat.
- Dedicated Tar & Adhesive Remover: This is your first and best line of attack. Modern spray paint is often acrylic or enamel based. A quality tar remover is formulated to dissolve these bonds. Spray it on, let it dwell for a minute, and gently wipe. Always test this on a hidden spot first, especially if your car has a vinyl wrap or Paint Protection Film (PPF), like on my Porsche. Some removers can damage wraps or certain plastics.
- Isopropyl Alcohol (Diluted): Mix this with distilled water at a 1:1 ratio. After using the tar remover, IPA is your final wipe-down. It removes any chemical residue and leaves a perfectly clean, streak-free surface for polishing. It also helps you see if any paint transfer remains.
- High-Pile 500 GSM Microfiber Towels: Use these for applying the tar remover and the IPA wipe. The thick, plush nap holds the chemical and lets you gently blot and lift. The deep fibers grab the dissolved paint so you’re not smearing it around. Using a rough towel here would scour the finish.
The Correction Tools: Restoring the Finish
Even with careful chemical removal, you will often have a faint stain or slight etching in the clear coat. This is where you restore the gloss.
- Light Cutting Compound: This is a mild abrasive. If a shadow of the paint remains or the clear coat is slightly dulled, a compound will level the surface. It removes a microscopic layer of clear coat. Use it by hand for small spots or with a machine for larger areas.
- Finishing Polish: After compounding, you are left with fine hazing. The polish refines the surface to a high-gloss, swirl-free finish. It is the final step before applying protection.
- 15mm Long-Throw Polisher: For larger areas, like a door panel hit by overspray, a machine is essential. A 15mm long-throw orbital polisher is my choice for jobs like this. It has a smooth, fast orbit that corrects paint quickly with less heat buildup than a short-throw machine. It made resurrecting the single-stage paint on my old Miata possible.
- Low-Pile 300 GSM Microfiber Towels: These are for product removal. Their flat, tight weave provides just enough friction to buff off compound and polish residue to a brilliant shine without leaving lint behind. I use a stack of these for every correction job.
Wear nitrile gloves. Work in the shade. And remember, patience is not just a virtue here, it is the technique. Rushing with the wrong tool makes a small problem a permanent one.
How to Remove Fresh Paint Splatter and Overspray
If you catch it fast, you have a real chance. Fresh spray paint or accidental overspray hasn’t fully cured or chemically bonded to your car’s clear coat. That makes it much easier to deal with. You want to start simple. Building confidence early saves you from panicking and making the problem worse.
The biggest mistake you can make with fresh paint is wiping it aggressively with a dry towel; you’ll just smear the contaminant into a thin, greasy film that’s harder to remove. Your goal is to dissolve and lift, not grind it in. Solvents and lubrication are your best friends here.
- Perform a standard two-bucket wash. This is your baseline. You need to remove all loose dirt and road film first. Any grit under your mitt will act like sandpaper. I do this on my black BMW every single time, no exceptions. You might get lucky and find the paint splatter is so fresh it just slides off with the soap.
- After washing, keep the panel wet. Grab a dedicated clay bar and lubricant. We’ll dive into this next, but for now, know that if the wash didn’t work, clay is your logical next step.
- If clay struggles, move to a solvent wipe. This is for the more stubborn, tacky bits that are starting to set. We’ll cover the safe way to do this.
The Clay Bar Treatment: Your First Big Weapon
Detailing clay is a gentle abrasive. It doesn’t sand the paint. Instead, it shears off microscopic contaminants that are stuck on top of your clear coat. Think of overspray as tiny, hard bumps glued to a smooth ice rink. The clay slides over, grabs those bumps, and pulls them off.
In your hand, a good detailing clay feels like rubbing a smooth, cold piece of gum over the surface. You will hear and feel a light scratching sound when it’s grabbing contamination. On my white Tesla, which seems to magnetize everything, the sound of clay picking up industrial overspray is unmistakable.
Here is how you use it correctly:
- Knead your clay bar until it’s soft and pliable. Flatten it into a patty that fits comfortably in your fingers.
- Flood the work area with clay lubricant. You cannot use too much. A dry clay bar will stick and mar your paint.
- Using light pressure, glide the clay bar back and forth in straight lines. Do not use circular motions. Cover an area about two feet by two feet.
- Frequently knead the clay to expose a fresh, clean surface. Once all sides are contaminated, discard it. Do not try to reuse dirty clay.
- After claying a section, wipe it dry with a clean, plush microfiber towel to inspect. The surface should feel perfectly smooth, like glass.
A critical safety rule: if you drop the clay bar on the ground, throw it away immediately. It will pick up abrasive grit that will scratch your paint beyond belief. I learned this the hard way years ago on a dark blue truck, and the scratches took hours to polish out.
Using Rubbing Alcohol or Prep Solvent
When clay isn’t enough, you need a solvent. Isopropyl alcohol (IPA) is a common, effective choice. It breaks down the paint splatter’s binders without harming a healthy clear coat. But you must use it wisely.
Never use straight 99% IPA from the bottle on your paint. Always dilute it with distilled water. A safe starting ratio is one part IPA to three parts distilled water. This creates a mixture strong enough to cut fresh paint but gentle enough for most clear coats.
Before you touch any visible panel, you must spot test. Find an inconspicuous area, like the edge of a door jamb or behind a wheel arch. Spray a little of your diluted solution on a clean microfiber towel and gently wipe. Wait a minute, then check for any hazing or discoloration. This is non-negotiable on plastic trim, which can be stained or dried out by solvents. The grey plastic trim on my Honda Odyssey is very sensitive this way.
If the test passes, follow this technique:
- Mist your diluted IPA solution directly onto a fresh, clean microfiber towel. Do not spray it onto the car’s surface, as it can run onto trim or dry too quickly.
- Gently wipe the paint splatter with the damp towel. Use a light, lifting motion. You should see the foreign paint transfer onto your towel.
- Immediately after wiping, rinse the area with clean water. Do not let the alcohol solution air dry on the paint.
- Dry the panel thoroughly with a separate dry towel.
This method works for small spots and splatters. For larger areas of overspray, commercial paint prep solvents or dedicated overspray removal clays are more efficient. The principle remains the same: lubricate, dissolve, lift, and rinse immediately.
Removing Cured or Dried-On Spray Paint
Can spray paint be removed from a car after it has baked on for days or weeks? Yes, it absolutely can. I have dealt with this on my own cars, like when overspray from a neighbor’s project landed on my Ford F-150. The fear is real, but the solution is methodical. Even if it’s graffiti paint on a vehicle, it can be addressed.
This is where paint correction comes into play. Your goal is to abrade the foreign paint off without cutting too deep into your clear coat. Think of it as precision sanding, but on a microscopic level. This process is more involved than cleaning fresh splatter, but it is very doable for a dedicated car owner with some patience.
Machine Polishing: Abrading the Contaminant Away
For cured paint, you will likely need a machine polisher. Your first decision is between a finishing polish and a light cutting compound. A finishing polish is like fine sandpaper for your clear coat. A light cutting compound is like coarse sandpaper. Always start with the finest option first.
Use a soft foam finishing pad on your polisher. Set the machine to a low speed, around speed 3 or 4 on a typical DA polisher. The key to success here is the “test spot” principle. Work on a small 2×2 foot area. Apply a few drops of polish to the pad, spread it on the paint at low speed, then make three or four slow, overlapping passes. Wipe the area clean with a microfiber towel and inspect it under good light. If the spray paint is gone and the finish looks glossy, you are on the right track.
When and How to Use a Light Cutting Compound
Step up to a light cutting compound only when the polish does not make a dent. On my black BMW, a stubborn overspray spot required this step. Remember the trade-off: more cutting power means more clear coat removal, so this is a last-resort DIY step.
Switch to a dedicated cutting pad. Use slow, deliberate passes with the polisher on a medium setting. Do not press down hard; let the pad and compound do the work. You must follow a cutting compound immediately with a finishing polish to restore gloss and remove any hazing. This two-step process is non-negotiable for a clean result.
Tackling Plastic Trim, Rubber, and Glass
How do you remove paint splatters from car plastic? You need a gentler approach. Plastics and rubber trim are more sensitive; harsh solvents can stain or dry them out, leaving a chalky, faded look. Make sure to use appropriate methods to remove paint from car surfaces without causing damage.
Your safest first try is a dedicated automotive tar and adhesive remover. Spray it on a microfiber cloth, not directly on the trim, and gently rub the paint spot. For glass, the rules change. When you’re dealing with paint overspray on car glass, a glass-focused approach matters. A razor blade holder with a fresh blade is your best friend. Hold the blade at a 45-degree angle to the glass and scrape the cured paint off. It is safe and highly effective when done carefully.
Paint Damage Prevention: The Common Mistakes to Avoid
In a panic, it is easy to grab the wrong tool. Here is what not to do.
- Mistake 1: Using acetone, lacquer thinner, or brake cleaner. These are paint strippers. They will melt your clear coat instantly, creating a permanent, cloudy disaster.
- Mistake 2: Scrubbing with abrasive pads like Scotch-Brite or steel wool. These will scratch your paint deeper than the spray paint itself. They are for pots and pans, not your car’s finish.
- Mistake 3: Using excessive pressure with a clay bar or polisher. Pressure does not equal cleaning. It creates heat and holograms, especially on dark paint like my BMW. Let the product and tool work.
- Mistake 4: Skipping the spot test on any new product or method. Always test in an inconspicuous area first. This simple step can prevent a huge repair bill.
When the Job Is Too Big: Calling a Professional Detailer
Know your limits. Calling a pro is not a failure; it is smart preservation. I have sent jobs out when the scale was beyond my time or tooling.
Call a professional for total vandalism coverage, paint on delicate matte or satin finishes, or if your own removal attempt made the haze and swirls worse. For extreme cases on metal trim (not painted surfaces), pros might use methods like gentle glass bead blasting. A good detailer will assess the damage, use professional-grade compounds and machines you might not own, and always finish the job with a protective sealant to lock in the correction.
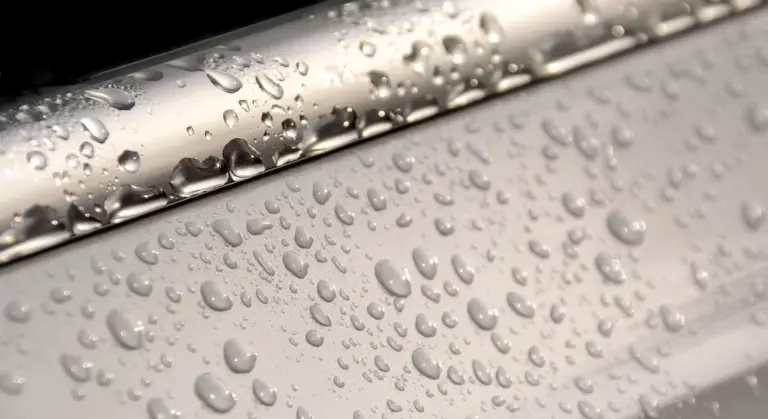
Protecting Your Car After the Clean-Up
After any abrasive step-clay bar, compound, or polish-your paint is bare and vulnerable. It has no protection. You must apply a spray wax or sealant immediately to shield the fresh, clean surface. I keep a bottle of spray sealant in my detailing cart for this exact moment. It takes five minutes and makes all the difference. You saved your car’s finish. You learned a valuable skill. That is a win.
Tackling Plastic Trim, Rubber, and Glass
How do you remove paint splatters from car plastic? You go slow. You test first. On my grey Honda Odyssey, the kid hauler, its plastic bumpers and door trim see everything. Paint overspray feels like a rough, crusty layer stuck on a soft surface. You cannot attack it like you would the car’s metal hood.
Plastics and rubber trim are more sensitive because solvents can stain them or dry them out permanently. These materials are porous. A harsh chemical can seep in, leaving a ghostly white stain or causing the plastic to crack and fade. I learned this on my old Ford F-150’s trim. A aggressive cleaner made the black plastic look ashy and brittle.
For these surfaces, your safest first try is a dedicated automotive tar and adhesive remover. It is formulated to break down paints and adhesives without damaging most trim. Sometimes masking tape leaves adhesive on car paint after a job, and you’ll want a gentle way to remove it. This method also covers removing tape residue from painted surfaces without damaging the finish. Here is my method:
- Pick a quality remover from a detailing brand you trust.
- Spray it onto a clean, folded microfiber towel, not directly on the plastic.
- Gently dab and wipe the paint splatter. Let the product do the work.
- For a stubborn spot, press the damp towel onto it for thirty seconds, then wipe again.
Always do a test spot in a hidden area, like behind a wheel well. After cleaning, I apply a light protectant to restore moisture. This keeps the trim looking dark and healthy.
Glass is a different beast. It is hard and non porous. For cured paint splatter on windows, a razor blade is often safe and highly effective. Hold a fresh blade at a 45 degree angle to the glass and use short, gentle scraping motions; the paint will flake off cleanly. On my Tesla Model 3, I use this method for bug splatter and overspray. Keep the glass wet with a spray of soapy water. This lubricates the blade and prevents any chance of scratching. It works like peeling a sticker off a smooth table.
Paint Damage Prevention: The Common Mistakes to Avoid
Seeing a mess on your paint makes you want to attack it. I get it. You grab the strongest thing in the garage and start scrubbing. Stop right there. In your rush to fix one problem, you can create a much bigger, more expensive one. Here are the actions you must avoid.
Mistake 1: Using Acetone, Lacquer Thinner, or Brake Cleaner
This is the nuclear option, and it will destroy your paint’s foundation. These are paint removers, not paint cleaners. They are designed to soften, melt, and dissolve coatings.
Your car’s shiny surface is not just color. It’s a clear coat, a thin, hard layer of transparent paint protecting the color underneath. Acetone and its cousins attack that clear coat instantly. They don’t clean it; they chemically melt it, leaving it hazy, dull, and compromised. On my black BMW, using a solvent like this would permanently etch the finish, creating a cloudy spot that no amount of polishing could fix.
These harsh chemicals strip away the clear coat’s integrity, leaving the color paint beneath defenseless and guaranteed to fail. The damage is immediate and often irreversible, unlike any other substances or methods that damage car paint.
Mistake 2: Scrubbing with Abrasive Pads or Steel Wool
If chemicals are a silent killer, this is a brute-force assault. Scotch-Brite pads, the green side of a kitchen sponge, or steel wool might seem like good tools for a tough job. They are not. They are made of hard, abrasive fibers or metal that act like thousands of tiny knives.
Think of your clear coat like the screen on your phone. Dragging steel wool across it doesn’t clean it; it carves deep, permanent scratches into it. These scratches, called “marring” or “deep swirls,” will catch the light and make your entire paint job look dull and scratched. You’ll trade a few spots of overspray for a panel full of glaring defects.
Using an abrasive pad is a guaranteed way to turn a surface contamination problem into a permanent, visually obvious paint defect.
Mistake 3: Using Excessive Pressure with a Clay Bar or Polisher
More pressure does not mean better cleaning. It means more friction, more heat, and more risk. When using a detailing clay bar, you only need enough pressure to glide it smoothly over the lubricated surface. Pressing down hard grinds the clay and any trapped contaminants directly into the paint, instilling fine scratches.
The same goes for a machine polisher. My Tesla’s clear coat is surprisingly soft. If I lean on the polisher trying to remove a stubborn spot, I can easily burn through the clear coat in a heartbeat, leaving a bald patch that requires a full repaint. The tool and the product do the work. Your job is to guide them gently and consistently.
Let the chemistry of your cleaner and the designed action of your tool do the work; forcing it only increases the risk of creating scratches or burning through the paint.
Mistake 4: Skipping the Spot Test on Any New Product or Method
This is the golden rule, and I break it at my own peril every single time. You must test. A spot test takes sixty seconds and can save you thousands of dollars. Every car is different. The clear coat on my old Miata is thick single-stage paint. The film on my Porsche is a sensitive polymer. A product that works on one could ruin the other.
Find an inconspicuous area. Inside a door jam, under the trunk lid, behind a wheel well. Apply your chosen product or method to a small section. Wait. Wipe it off. Inspect it under good light. Does the paint look the same? Is the texture unchanged? If yes, proceed with confidence. If you see hazing, discoloration, or texture change, stop immediately.
Always perform a spot test in a hidden area; it is your only insurance policy against accidentally damaging the entire visible surface of your vehicle.
When the Job Is Too Big: Calling a Professional Detailer
I love a good DIY project. But I also know when to wave the white towel. Trying to be a hero can turn a bad situation into a disaster for your paint. There is no shame in calling for backup.
If you look at the damage and your first thought is a sinking feeling, that is your gut telling you this might be a pro job.
When to Make the Call
Here are the three main times I would hand the keys to a trusted detailer.
- Total Vandalism Coverage: If the spray paint covers large panels, the entire side of the car, or the windshield, the scale alone makes it a professional restoration. The time, product, and risk of error are simply too high for a weekend warrior.
- Paint on Delicate Finishes: Modern matte, satin, or frozen paint is a different beast. You cannot use traditional polishes or compounds on them. Even a mild clay bar can leave shiny, permanent marks. If overspray lands on these surfaces, a specialist with the right non-abrasive cleaners and techniques is your only safe bet. I would not touch the matte black trim on my friend’s Porsche 911 with anything but a dedicated matte cleaner.
- You Tried and Made It Worse: This happens. You used too aggressive a pad, worked the compound too long on a hot panel, or didn’t lubricate the clay. Now, the spray paint is gone, but you are left with a hazy, swirled mess. A professional can correct these new defects and save the clear coat.
What the Pros Can Do
A good detailer starts with an assessment under bright lights. They will feel the surface with a gloved hand. They need to know what they are dealing with before a drop of chemical is sprayed.
For extreme cases on metal trim or chrome (never on paint), some shops use a method called glass bead blasting. It uses tiny glass beads at low pressure to literally blast away contaminants without harming the base metal. It is a last resort for pitted, damaged trim.
For paint, a professional will use a multi-step process with a machine polisher, professional-grade compounds, and refined technique to remove the foreign paint without removing more of your car’s clear coat than necessary. This approach also removes stains and contaminants from the paint, not just overspray. It helps ensure a uniform, pristine finish before sealing. They finish the job by applying a high-quality sealant or ceramic coating to protect the fresh, corrected surface. You get back a car that is not just clean, but protected.
Final Thoughts on Removing Paint from Your Car’s Finish
Your car’s clear coat is a finite resource. The most important lesson is to always start with the gentlest method possible and work your way up only when necessary. Test your chosen solvent or polish in an inconspicuous area first, and let the contamination guide your escalation from detail spray to polish to solvent. When choosing products, favor safe chemicals for car paint and clear coats, prioritizing low-VOC options. This helps protect the finish as you clean and revive it.
Rushing this process or skipping steps will almost certainly damage your clear coat, turning a simple cleanup job into an expensive paint correction.
Industry References
- r/Mustang on Reddit: Someone spray painted my car y’all know how to get it off?
- How do I remove spray paint from a car without damaging …
- I accidentally ran over a spray paint can and paint got on the side of my car. How can I remove it without damaging my car’s original paint? I have a white car. – Quora
Max is an automotive enthusiast having worked as a car mechanical and in interior detailing service for over 25 years. He is very experienced in giving your old car, a new fresh vibe. He has detailed many cars and removed very tough smells and stains from all kinds of cars and models, always ensuring that his work and advice helps his customers. He brings his first hand experience to his blog AutoDetailPedia, to help readers breath new life into their car interiors.